ge.com
©
Safety Instructions . ........ 9-4
Operating Instructions
Clock and Timer ............ 19
Control i,ockout ............ 19
Controls .................... 5
Convection .............. 15-17
Oven .................. 1O, 11
Probe .................. 14, 17
Sabbath Feature ............. 9
Self Cleaning Oven ....... 20, 21
Special Features ............ 6-8
Thermostat ................ 19
Timed Baking
and Roasting ............ 13, 18
Care and Cleaning
Cleaning Oven Door ......... 23
Control Panel .............. 25
Lift-Off Oven Door .......... 23
Light Bulb ................. 22
Oven Floor ................ 23
Probe ..................... 24
Removing Packaging Tape .... 22
Shelves .................... 24
Stainless Steel Surfaces ....... 25
Troubleshooting Tips ..... 96-28
Consumer Support
Consumer Support ...Back Cover
Product Registration ...... 99, 30
Warranty .................. 31
f1"912-30" Single Wall Oven
,f1"952-30" Double Wall Oven
0
Writethemodelandserial
numbershere:
Model #
Serial #
You can find them on a label
on the flont of the oven behind
the oven door on single oven
models, or the flont of the lower
oven behind the oven door on
double oven models.
49-80470 07-07 JR
IMPORTANTSAFETYINFORMATION.
READALLINSTRUCTIONSBEFOREUSING.
WARNING!
For your safety, the information in this manual must be followed tominimize the risk of fire or
explosion, electric shock, or to prevent property damage, personal injury, or loss of life.
IMPORTANTSAFETYNOtiCE
The California Safe Drinking Water and ToxicEnforcement Act requires the Governor of California
topublish a list of substances known to the state to cause cancer, birth defects or other reproductive
harm, and requires businesses to warn customers of potential exposure to such substances.
Thefiberglass insulation in self-clean ovens gives off a very small amount of carbon monoxide during
the cleaning cycle. Exposure can be minimized by venting with an open window or using a ventilation
fan or hood.
SAFETYPRECAUtiONS
When using electrical appliances, basic safety precautions should be followed, including the
following:
Use this appliance only for its intended
purpose as desoibed in this Owner's
Manual.
iiiiiiiiiiiii!!
iiiiiiiiiiiii!!
Be sure your appliance is properly
installed arid _ounded by a qualified
technician in accordance Mth the
prox,ided installation instructions.
Do riot attempt to repair or replace any
part of your oven unless it is specifically
recommended in this manual. All other
ser\,icing should be referred to a qualified
technician.
Have the installer show you the location
of the circuit breaker or fuse. Mark it fi)r
easy reference.
Before perfiwming any ser\,ice, disconnect
the oven power supply at the household
distribution panel by removing the fuse or
switching off the circuit breaker-
Do riot leave children alone---children
should riot be left alone or unattended in
an area where an appliance is in use. They
should never be allowed to sit or stand on
any part of the appliance.
Do riot allow anyone to climb, stand or
hang on the door- They could damage the
oven, or cause severe personal in,ju U.
_ Be sure the oven is securely installed in
a cabinet that is firmly attached to the
house structure. Never allow anyone to
climb, sit, stand or hang on the oven door:
Never leave the oven door open when you
are riot watching the oven.
Always keep combustible wall coveting,
curtains or drapes a s_e distance fiom
your overI.
Always keep dish towels, dishcloths, pot
holders arid other linens a s_e distance
from your oven.
Always keep wooden arid plastic utensils
arid canned food a s_e distance m_,ay
from your" oven.
Teach children riot to play xdth the
controls or any other part of the oven.
Large scratches or impacts to glass doors
can lead to broken or shattered glass.
2

ge.com
WARNING!
SAFETYPRECAUTIONS
iiiiiiiiiiiii!
iiiiiiiiiiiii!
iiiiiiiiiiiii!
iiiiiiiiiiiii!
iiiiiiiiiiiii!
iiiiiiiiiiiii!
iiiiiiiiiiiii!
Do not store flammable materials in
all oveil.
CAUTION:,temsofi.terestto
children shouM not be stored in cabinets
above an oven; children climbing oll the
oven to reach items could be seriously
in,jured.
Never wear loose-fitting or han_ng
garments while using the appliance. Be
careful when reaching fi_r imms stored in
cabinets over the oven. Flammable material
could be i_dted if brought in contact with
hot surfaces or headng elements and may
cause severe burns.
Use only d U pot holders--moist or damp
pot holders oll hot surf`aces may result in
burns flom steam. Do not let pot holders
touch hot headng elements. Do not use a
towel or other bulky cloth.
For your safety, never use your appliance
for warming or heating the room.
Do not let cooking grease or other
flammable materials accumulate in or
ilear the oveIl.
Do not use water oll _ease fires. Never pick
up a flaming pail. Turn the controls off{.
Flame in the oven can be smothered
completely by closing the oven door and
turning the oven off or by using a multi-
purpose dU chemical or fkmm-type fire
extinguisher.
Do not touch the heating elements or the
interior surface of the oven. These surf`aces
may be hot enough to burn even though
they are dark in color During and _ter
use, do not touch, or let clothing or other
flammable materials contact any interior
area of the oven; allow sufficient time fi)r
cooling first.
Potentially hot surf`aces include oven vent
openings, surf`aces near the openings,
cre\,ices around the oven dooi, the edges
of the window and metal trim parts above
the door
REMEMBER:The inside surf`ace of the oven
may be hot when the door is opened.
Never leave,jars or cans of f`atdrippings in
or ilear your oveIl.
Do not store or use combustible materials,
gasoline or other flammable vapors and
liquids in the x,icinity of this or any other
appliance.
Stand away from the oven when opening
the oven door. Hot air or steam which
escapes can cause burns to hands, face
and/or eyes.
Do not heat unopened food containers.
Pressure could build up and the container
could burst, causing an in,juU.
Keep the oven vent unobstructed.
Keep the oven flee from grease buildup.
Place the oven sheff in the desired position
while the oven is cool. If shelves must be
handled when hot, do not let pot holder
contact the heating elements.
When using cooking or roasting bags in the
oven, follow the manuf`acturer's directions.
Pulling out the sheff to the stop-lock is a
convenience in lifting heaxT foods. It is 'also
a precaution against burns from touching
hot surf`aces of the door or oven walls.
Do not use the oven to diy newspapers.
If overheated, they can catch oll fire.
Do ilot use the ovell f()r a storage area.
Items stored in an oven can ignite.
Do not leave paper products, cooking
utensils or food in the oven when not
in use.
After broiling, always take any broiler pall
out of the oven and clean it. Leftover
grease in a broiler pan can catch fire next
time you use the pail.
Clean only parts listed in this Owner's
Manual.
Do not use aluminum foil to line
oven bottoms. Improper installation
of aluminum fifil may result in a risk
of electric shock or fire.
3
IMPORTANTSAFETYINFORMATION.
READALLINSTRUCTIONSBEFOREUSING.
COOKMEATANDPOULTRYTHOROUGHLY...
Cookmeat andpoultry thoroughly--meat to at leastan INTERNALtemperatureof 160°Fandpoultry
toat least an INTERNALtemperatureof 180°ECookingto thesetemperaturesusuallyprotectsagainst
foodbomeillness.
SELF-CLEANINGOVEN
Do not clean the door gasket. The door
gasket is essential for a good seal. Care
should be taken not to rob, damage or
move the gasket.
Do not use oven cleaners. No commercial
oven cleaner or oven liner protective
coating of any kind should be used in or
around any part of the oven. Residue from
oven cleaners will damage the inside of the
oven when the self clean cycle is used.
Before selfk:leaning the oven, remove
shiny, silvePcolored oven shelves (on some
models) and all other cookware.
Be sure to xdpe up excess spillage before
starting the self cleaning operation.
If the self cleaning mode malfunctions,
turn the oven off and disconnect the power
supply. Have it ser\@ed by a qualified
technician.
READANDFOLLOWTHISSAFETYINFORMATIONCAREFULLY.
SAVETHESEINSTRUCTIONS
4
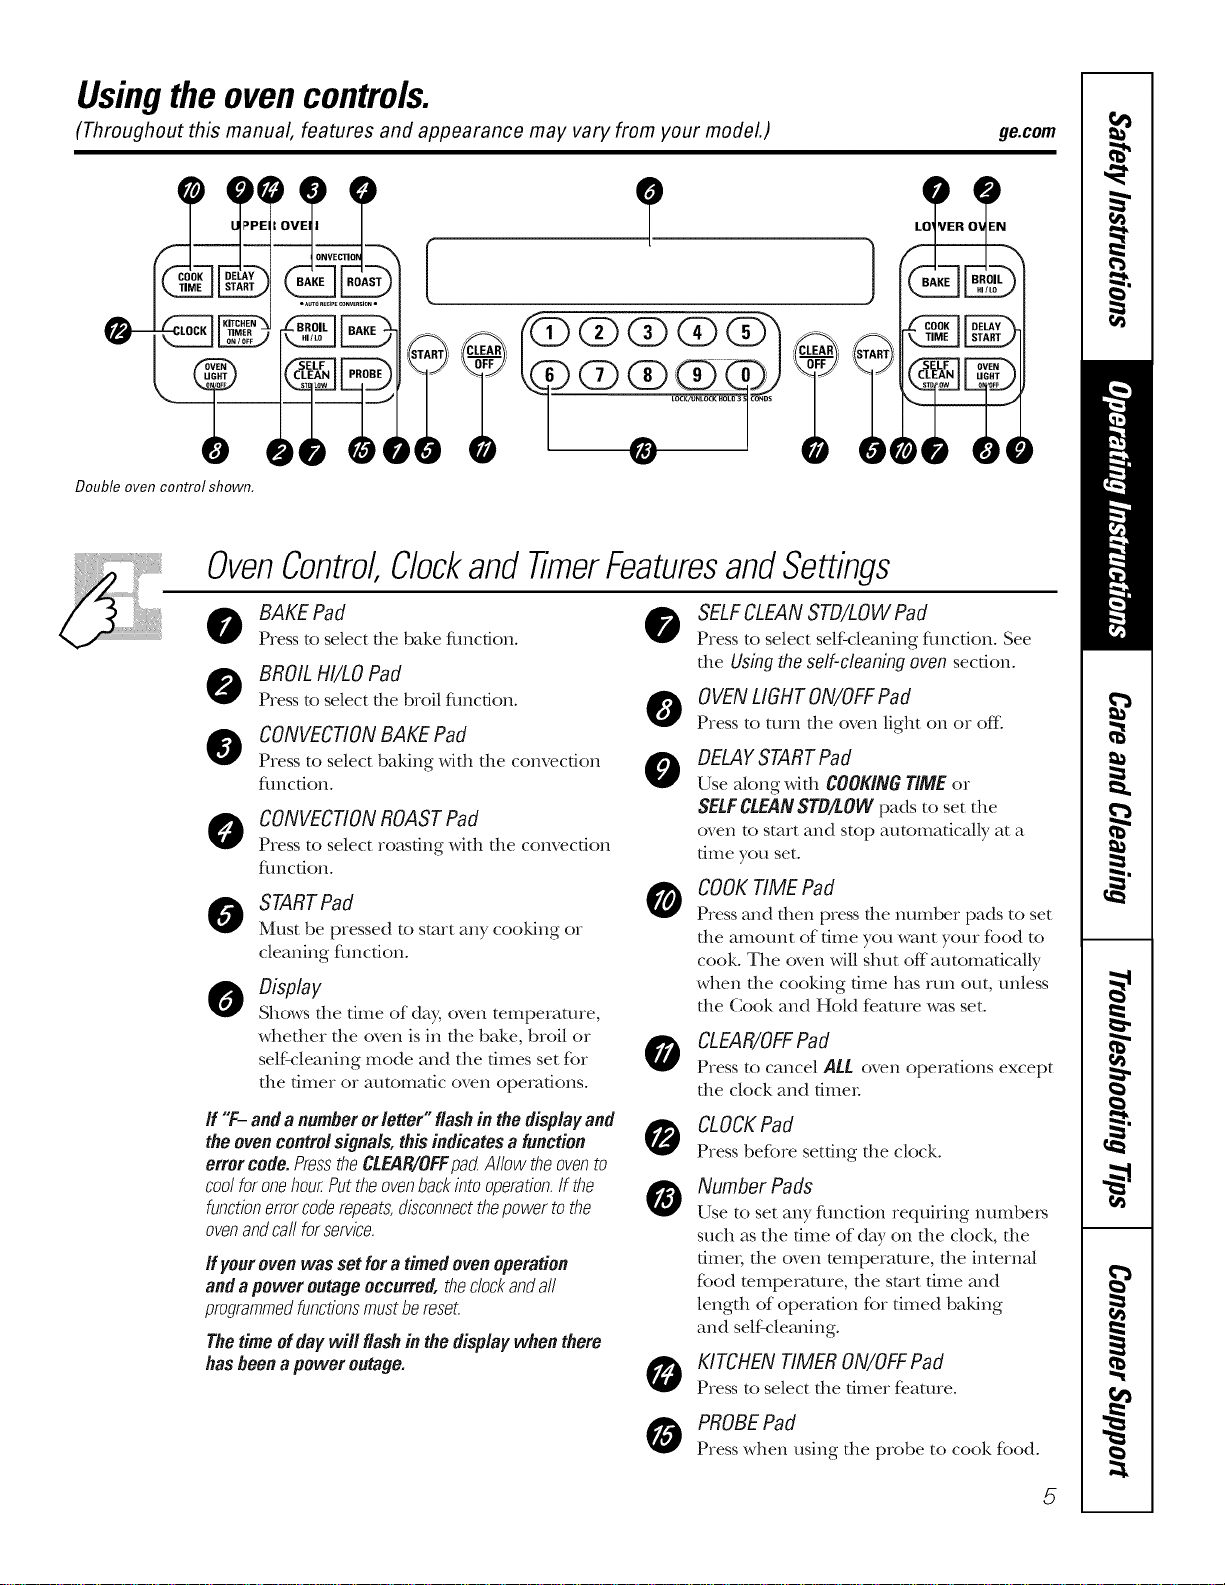
Usingthe ovencontrols.
(Throughout this manual, features and appearance may vary from your model.) ge.com
Double oven control shown.
OvenControl
0
0
@
Clockand TimerFeaturesandSettings
BAKE Pad
Press to select file bake fimcdon.
BROIL HI/LO Pad
Press to select the broil fimcdon.
CONVECTIONBAKE Pad
Press to select baking with tile convection
flmcfion.
O ONVECTIONROASTPad
Press to select roasting with the convection
flmcdono
STARTPad
Must be pressed to start any cooking or
cleaning flmcfion.
Display
Shows file time of day, oven temperature,
whefller rile oven is in file bake, broil or
self'cleaning mode and tile times set for
rile timer or automatic oven operations.
SELFCLEAN STD/LOWPad
Press to select self'cleaning fimction. See
the Usingtheself-cleaningoven section.
OVENLIGHTON/OFFPad
Press to turn tile oven light on or of_
0
0
DELAYSTARTPad
Use along widl COOKINGTiMEor
SELFCLEANSTB/LOWpads to set tile
oven to start and stop automatically at a
time you set.
COOKTIME Pad
Press and then press the mmlber pads to set
file amount of time you want your food to
cook. The oven will shut off automaticaUy
when file cooking time has run out, unless
rile Cook and HoM feature was set.
CLEAR/OFFPad
Press to cancel ALL oven operations except
tile clock and filller
If "F-anda numberorletter" flashin the displayand
theovencontrolsignals,thisindicates a function
errer code. PresstheCL,91R/OFFpactAllow theovento
coolforonehou_Puttheovenbackintooperation.If the
functionerrorcoderepeats,disconnectthepowertothe
ovenandcallforservice.
If yourovenwasset fora timedovenoperation
andapoweroutageoccurred, theclockandall
programmedfunctionsmustbereset.
Thetimeofdaywill flashin thedisplaywhenthere
hasbeena poweroutage.
CLOCKPad
Press before setting tile clock.
Number Pads
Use to set any fimcdon requMng ntm).be_
such as tile time of day on tile clock, tile
fime_; tile oven mmperamre, tile internal
food temperature, tile start dine and
length of operation for dined baking
and self cleaning.
KITCHEN TIMER ON/OFFPad
Press to select tile timer fe.ature.
PROBEPad
Press when using tile probe to cook food.
5
Special featuresofyour ovencontrol.
Yournew touch pad control has additional features that you may choose to use. Thefollowing are the features
and how you may activate them.
Thespecial feature modes can only be activated while the display is showing the time of day. They remain in
the control's memory until the steps are repeated.
When the display shows your choice, press the STARTpad. The special features will remain in memory after
a power failure, except for the Sabbath feature, which will have to be reset.
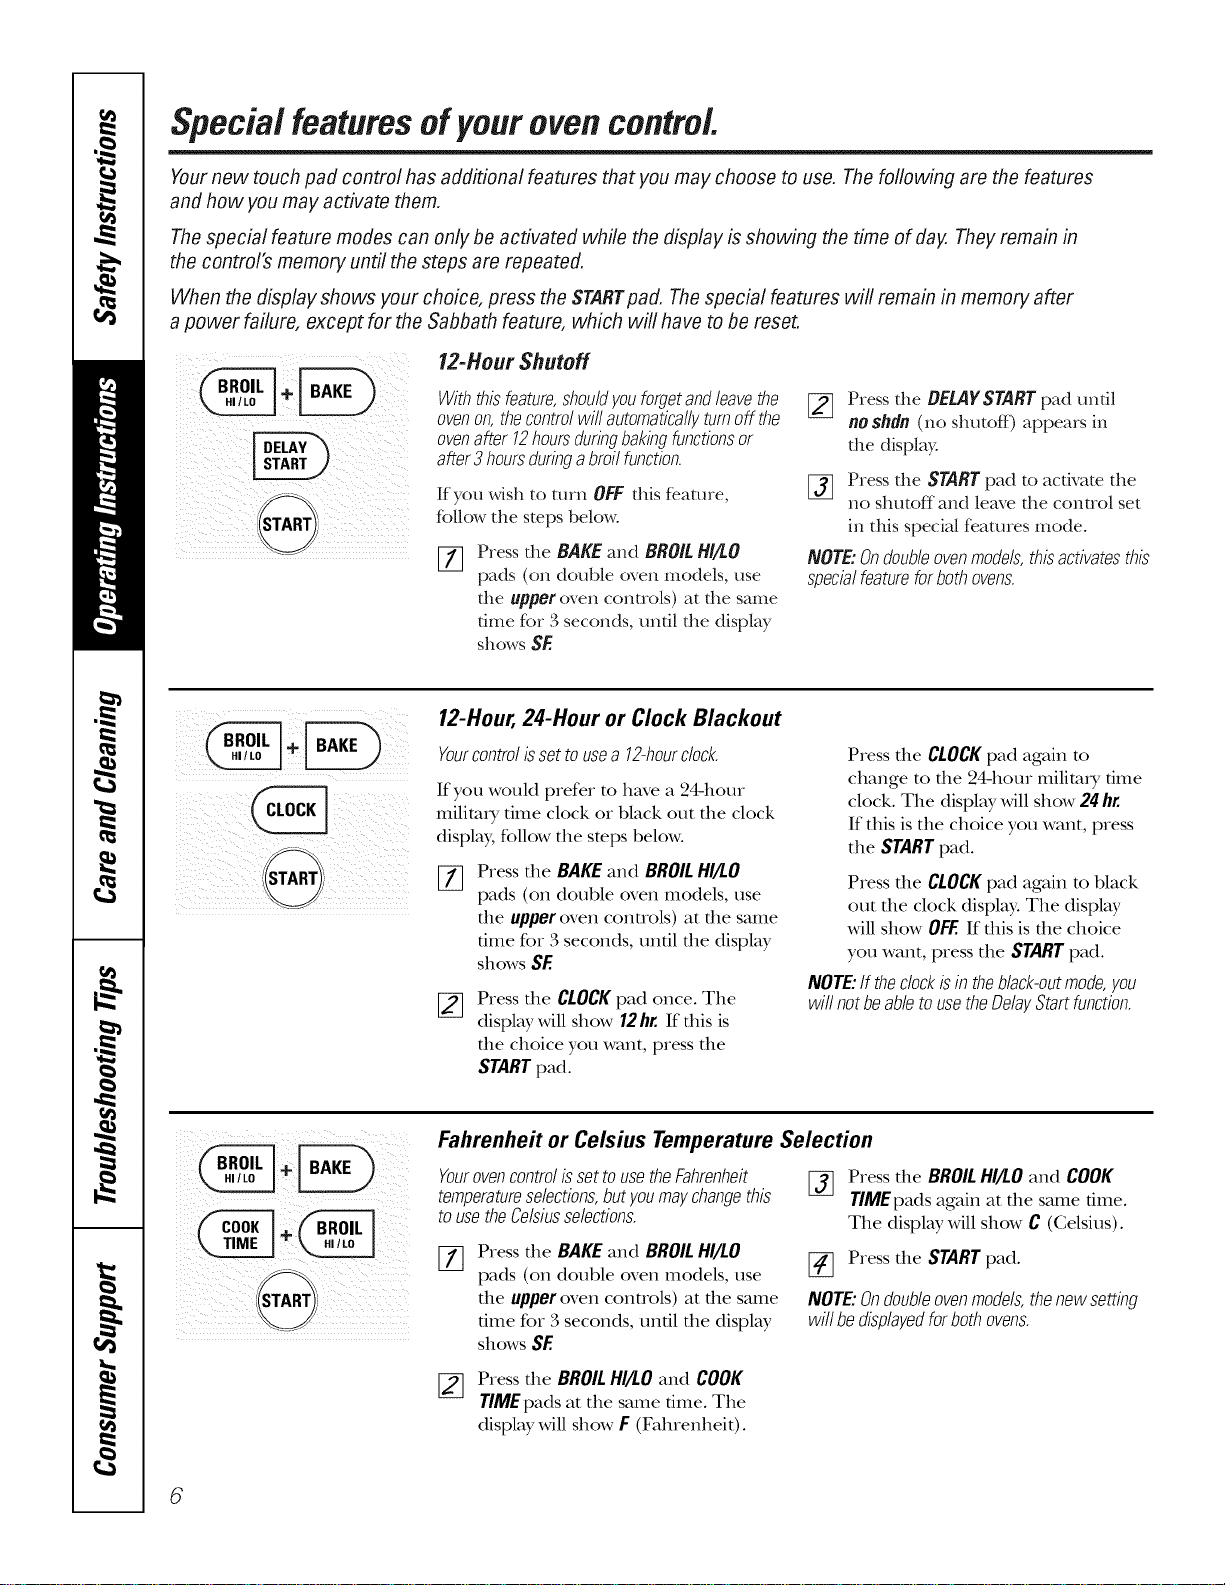
12-Hour Shutoff
Withthisfeature,shouldyouforgetandleavethe
ovenon,thecontrolwill automaticallyturnoffthe
ovenafter12hoursduringbakingfunctionsor
after3 hoursduringabroilfunction.
If you wish to turn OFFthis feature,
follow the steps below.
[77 Press the BAKEand BROILHI/LO
pads (on double oven models, use
the upperoven controls) at the same
time for 3 seconds, undl the display
showsSE
[_ Press the BEL4YSTARTpad undl
noshdn(no shutoff) appears in
the display.
[_] Press the STARTpad to activate the
no shutoff and leave the control set
in this special features mode.
NOTE:Ondoubleovenmodels,thisactivatesthis
specialfeatureforbothovens.
12-Hour, 24-Hour or Clock Blackout
Yourcontrolissettousea 12-hourdock.
If you would prefer to have a 24-hour
milimi T time clock or black out the clock
display, follow the steps below.
%
Press the BAKEand BROILHI/I.O
pads (on double oven models, use
the upper oven controls) at the same
time for 3 seconds, until the display
showsSE
Press the CLOCKpad once. The
display will show 12hr.If tiffs is
the choice you want, press the
STARTpad.
Press die CLOCKpad again m
change to file 24-hour milim_y time
clock. The display will show 24 hr.
If this is the choice you want, press
the STARTpad.
Press die CLOCKpad again m black
out the clock display. The display
will show OFF.If this is the choice
you want, press the STARTpad.
NOTE:If theclockisin theblack-outmode,you
willnotbeabletousetheDelayStartfunction.
ill _ _ _i_
Fahrenheit or Celsius Temperature Selection
YourovencontrolissettousetheFahrenheit
temperatureselections,butyoumaychangethis
tousetheCelsiusselections.
Press the BAKE and BROILHI/LO
pads (on double oven models, use
the upper oven controls) at the same
time for 3 seconds, until the display
shows SE
[_ Press the BROILHI/LO and COOK
TIME pads again at the same time.
The display will show C (Celsius).
[_ Press the STARTpad.
NOTE:Ondoubleovenmodels,thenewsetting
willbedisplayedforbothovens.
[_ Press the BROILHI/LO and COOK
TIME pads at the same time. The
display will show F (Fahrenheit).
6
ge.com
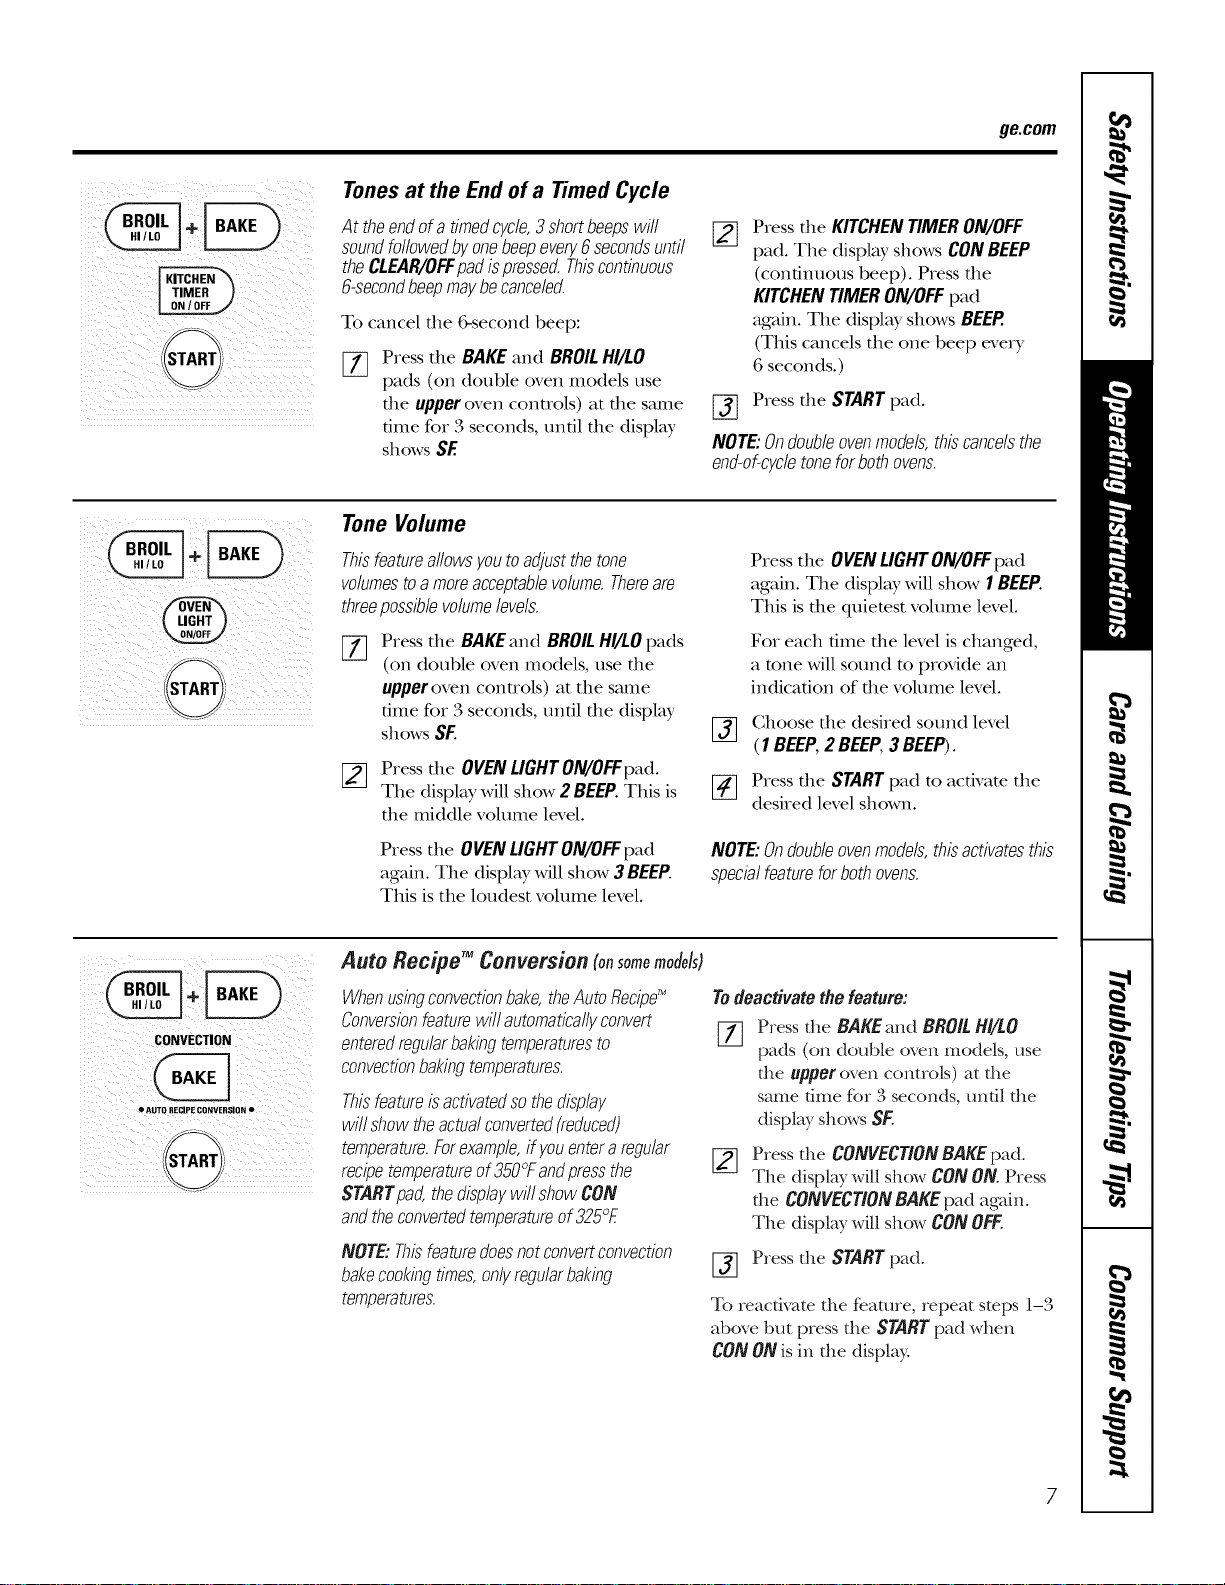
Tones at the End of a Timed Cycle
At theendofa timedcycle,3 shortbeepswill
soundfollowedbyonebeepevery6secondsuntil
theCLEAR/OFFpadispressed.Thiscontinuous
6-secondbeepmaybecanceled.
To cancel the &second beep:
%
Press the BAKE and BROIL HI/LO
pads (on double oven models use
the upper oven controls) at the same
time for B seconds, until the display
shows SE
[]
Press the KITCHENTIMERON/OFF
pad. The display shows CONBEEP
(continuous beep). Pressthe
KITCHENTIMERON/OFFpad
again. The display shows BEEP.
(This cancels the one beep every
6 seconds.)
Press the STARTpad.
NOTE:Ondoubleovenmodels,thiscancelsthe
end-of-cycletoneforbothovens.
Tone Volume
Thisfeatureallowsyoutoadjustthetone
volumestoamoreacceptablevolume.Thereare
threepossiblevolumelevels.
%
Press the BAKEand BROILHI/LOpads
(on double oven models, use the
upper oven controls) at the same
time for Bseconds, until the display
shows SF.
[_ Press the OVENLIGHTON/OFFpad.
The display will show 2 BEEP.This is
the middle volume level.
Press the OVENLIGHTON/OFFpad
again. The display will show 3 BEEP.
This is the loudest volume level.
Press the OVENLIGHTON/OFFpad
again. The display will show 1BEEP.
This is the quietest volume level.
Fox each time the level is changed,
a tone will sound to provide an
indication of the volume level.
[_] Ghoose the desired sound level
(1BEEP,2 BEEP,3BEEP).
[_ Press the STARTpad to activate the
desired level shown.
NOTE:Ondoubleovenmodels,thisactivatesthis
specialfeatureforbothovens.
! i_ i i I
CONVECTION
• AUTO RECIPE coNVERSION •
Auto Recipe TM Conversion (onsomemodels)
Whenusingconvectionbake,theAutoRecipe'_
Conversionfeaturewill automaticallyconvert
enteredregularbakingtemperaturesto
convectionbakingtemperatures.
Thisfeatureisactivatedsothedisplay
willshowtheactualconverted(reduced)
temperature.Forexample,ifyouentera regular
recipetemperatureof350°Fandpressthe
STARTpad,thedisplaywillshowCON
andtheconvertedtemperatureof325°E
NOTE:Thisfeaturedoesnotconvertconvection
bakecookingtimes,onlyregularbaking
temperatures.
Todeactivatethefeature:
[77 Press the BAKEand BROILHI/LO
pads (on double oven models, use
the upperoven controls) at the
same time for 3 seconds, until the
display shows SE
Press the CONVECTIONBAKEpad.
The display will show CONON.Press
the CONVECTIONBAKEpad again.
The display will show CONOFF.
[_ Press the STARTpad.
To reactivate the feature, repeat steps 1l-3
above but press the STARTpad when
CON ON is in the display.
Special featuresofyourovencontrol
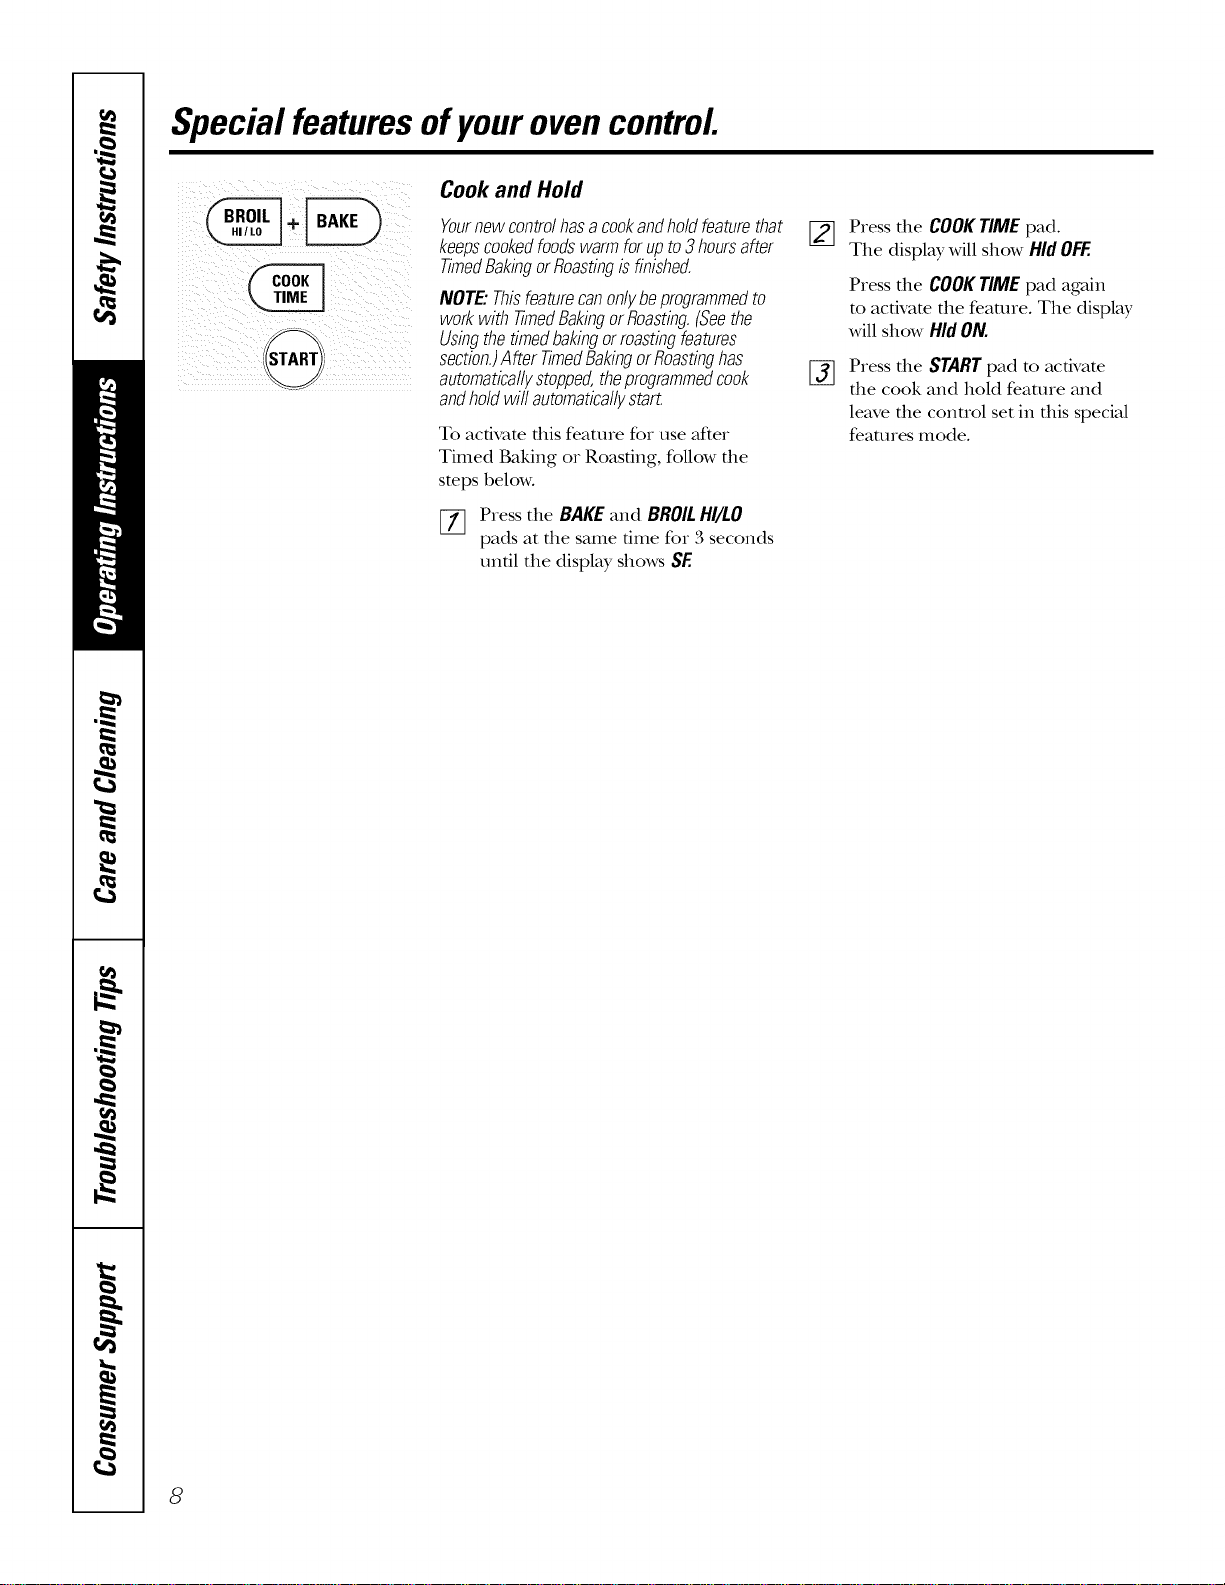
Cook and Hold
Yournewcontrolhasacookandholdfeaturethat
keepscookedfoodswarmforupto3hoursafter
TimedBakingorRoastingisfinished.
NOTE."Thisfeaturecan onlybeprogrammed to
work with timed Bakingor Roasting.(Seethe
Usingthe timedbakingormasting features
section.)After TimedBakingorRoastinghas
automaticallystopped,the programmedcook
andhold wit automaticallystart.
To activate this feature for use after
Timed Baking or Roasting, follow the
steps below.
[7] Press the BAKE and BROILHI/LO
pads at the same time for 3 seconds
until the display shows SE
[_ Press the COOKTIME pad.
The display will show Hid OFF.
%
Press the COOKTIME pad again
to activate the feature. The display
will show Hid ON.
Press the STARTpad to acdvate
the cook and hold feature and
leave the conuol set in this special
features mode.
8
Usingthe SabbathFeature.
(Designed for use on the Jewish Sabbath and Holidays.) (on some models) ge.com
TheSabbathfeaturecan beusedfor baking/roastingonly.It cannot beusedfor convection,broiling,self-cleaningor
DelayStart cooking.
NOTE:Theovenlight comesonautomatically(on somemodels)when thedooris openedandgoesoff whenthedoor is closed.
Thebulb maybe removed.SeetheOvenLightReplacementsection. Onmodelswith a lightswitch on the controlpanel,theoven
lightmaybe tumed on andleft on.
When the display shows D the
oven is set in Sabbath. When the
display shows D C the oven is
baking/roasting.
How to Set for Regular Baking/Roas_g
Make sure the clockshows the correct t/me of day and
the ovenis of[.
VT] Press and hold both the BAKE and BROIL
HI/tO pads, at the same time, until the
display sho_vs SE
NOTE" If bake or broil appears in the
displa), the BAKE:rod BROIL HI!tO pads
were not touched at the same tittle.
Touch the CLEAR/OFFpad and begin
again.
F_] Tap the DELAYSTART pad until SAb bAtH
I¢-I
appears in the display.
[_] Touch the START pad ;and D will appear
in the displa?c
[-_ Touch the BAKE pad. No signal will
be given.
%
%
Using the number pads, enter the desired
temperature between 170°F ;and 550°F.
No signal or temperature will be given.
Touch the START pad.
[_] After a 1,mdom delay period of
approximately 30 seconds to 1 minute,
D C will appear in tlae display indicating
that tlae oven is baking/r0asting. If D C
doesn't appear in the displa); start
again at Step 4.
To adjust the oven tempelature, touch the
BAKEpad, enmr the new mmperature using
the number pads, and touch the STARTpad.
NOTE"The CLEAR/OFFandcoogrlMEpadsare
active during the SabbatlJ feature.
ii /ii i i _ i
When the display shows D the
oven is set in Sabbath. When the
display shows D C the oven is
baking/roasting.
How to Set for Timed Baking/Roasting - Immediate Start and Automatic Stop
Make sure the clockshows the correct t/me of day and Touch the BAKEpad. No signal will be
the ovenISoff. [_ gixen.
%
[_q Press ;and hold both the BAKE ;and BROIL
/LLJ
HI!tO pads, at the same time, until the
displa) shows SE
NOTE" If bake or broil appears in the
displa); the BAKE;rod BROILHI!tOpads
were not touched at the same time.
Touch the CLEAR/OFFpad ;and begin
again.
I-_ Tap the DELAYSTART pad until SAb bAtH
appears in the display.
_-] Touch the STARTpad ;and D will appear
in the display.
[_ Touch the COOKTIMEpad.
[_ Toucla the number pads to set the
desired length of cooking time between
1 Imnute ;and 9 hours ;and 99 minutes.
The cooking time that you enmred will
be displayed.
Touch the START pad.
%
%
Using the number pads, enter the
desired tempelature. No signal or
tempelamre will be gixen.
Touch the START pad.
After a 1,mdom delay period of
approximately 30 seconds to 1 minute,
D C will appear in tlae display indicating
that tlae oxen is baking/r0asting. If D C
doesn't appear in the displa); start
ag'ain at Step 7.
To adjust the oxen tempelature, touch the
BAKEpad, enter the new tempecature using
the nmnber pads ;and touch tlae STARTpad.
When cooking is finished, the display will
change from D C to D ;and 0:00will appem;
indicating that tlae oxen has turned 0rEbut is
still set in SabbatlJ. Remoxe the cooked tood.
i!i i iiii! iii!@i! iii IIIII
How to Exit the Sabbath Feature
Touch the CLEAR/OFFpad.
If the oven is cooking, wait tor a candom
dela) period of approximatel)30 seconds
to 1 minute, until onl} D is in the displa}c
Press ;and hold both the BAKE ;and BROIL
HI!tO pads, at the same time, until the
displa) sho_vs SE
Tap the DELAYSTART pad until 12shdn
or no shdnappears in the displa}. 12shdn
indicates that the oxen will automaticalls
turn off after 12 hours, no shdnindicates
that the oxen will not automaticall}
turn ott:
[_ Touch the START pad.
NOTE"If a power outage occurred wlaile
the oven was in Sabbath, the oven will
automatically turn off ;and stay off even
when the power returns. The oven control
mtlst be reset.
9
Usingthe oven.
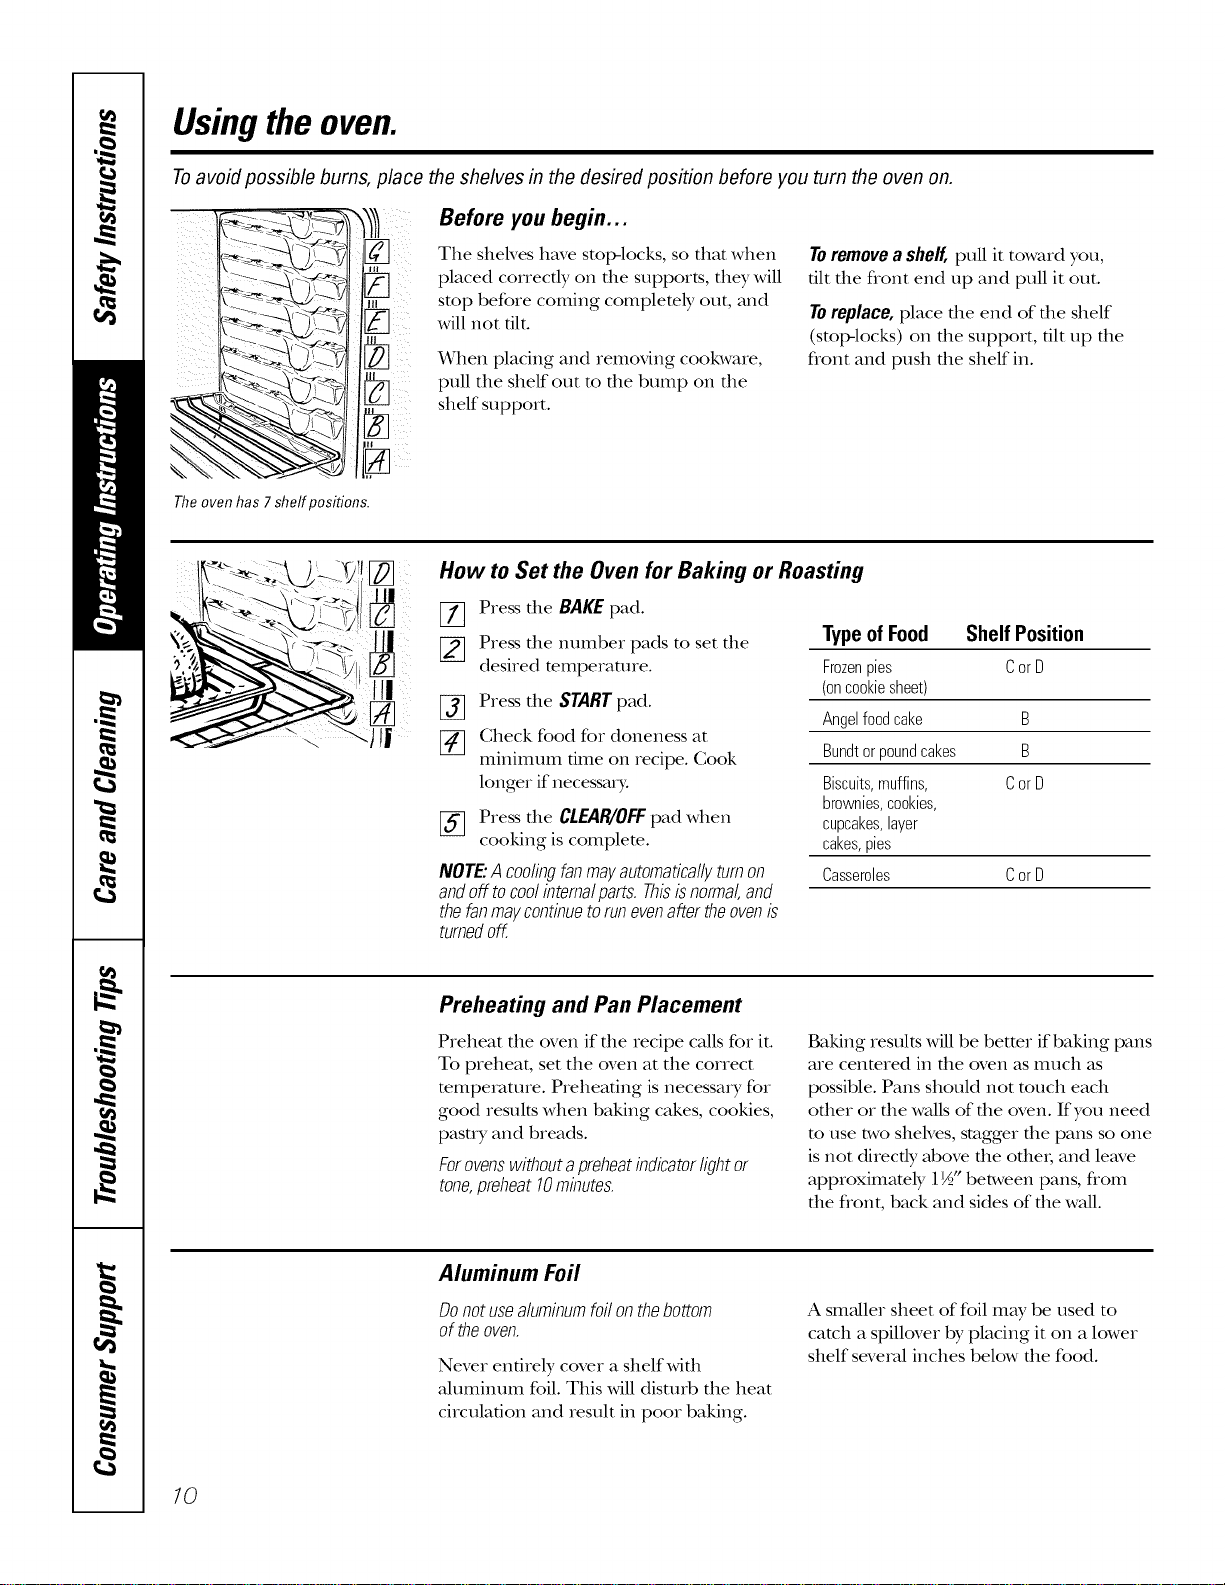
Toavoid possible bums, place the shelves in the desired position before you turn the oven on.
Before you begin...
The sheNes have stop-locks, so thin when
placed correctly on file supports, they will
stop before coming complemly out, and
will not tilt.
When placing and removing cookware,
pull the shelf out to the bump on the
shelf support.
Toremovea shelf,pull it toward you,
tilt the flont end up and pull it out.
Toreplace,place the end of the shelf
(stoI>locks) on the support, tilt up the
flont and push the shelf in.
Theoven has 7shelf positions.
C
How to Set the Oven for Baking or Roasting
[7] Press the BAKEpad.
[_ Press the number pads to set the
desired temperature.
[_ Press the START pad.
[_ Check food for doneness at
minimum time on recipe. Cook
longer if neces_uT:
[_ Press the CLEAR/'OFFpad when
cooking is complete.
NOTE"Acoolingfanmayautomaticallyturnon
andoff tocoolintemalparts.Thisisnormal,and
thefanmaycontinuetorunevenaftertheovenis
turnedoff.
Type of Food Shelf Position
Frozenpies CorD
(oncookiesheet)
Angelfoodcake B
Bundtorpoundcakes B
Biscuits,muffins, CorD
brownies,cookies,
cupcakes,layer
cakes,pies
Casseroles CorD
Preheating and Pan Placement
Preheat the oven if file recipe caUs for it.
To preheat, set the oven at the correct
mmpemture. Preheating is necessa_ Tfor
good results when baking cakes, cookies,
pasuT and breads.
Forovenswithoutapreheatindicatorlightor
tone,preheat10minutes.
Baking results will be better if baking pans
are centered in the oven as much as
possible. Pans should not much each
other or the waUsof the oven. If you need
to use two shelves, stagger the pans so one
is not directly above the otbei; and leave
approximately 1½" between pans, from
the flont, back and sides of the waU.
Aluminum Foil
Donotusealuminumfoilonthebottom
oftheoven.
Never entirely cover a shelfwifll
ahllIlintllI1 foil. This will disturb the heat
circulation and result in poor baking.
A smaller sheet of foil may be used to
catch a spillover by placing it on a lower
shelf several inches below the food.
10
ge.com
If your oven is connected to 208
volts, rare steaks maybe broiled by
preheating thebroiler and positioning
the ovensheff oneposition higher.
t The U.S. DepartmentofAgriculture says
"Rare beef is popular, but you should
know that cooking it to only 140°[: means
some food poisoning organisms may
survive. " (Source: Safe Food Book. Your
Kitchen Guide. USDA Rev. June 1985.)
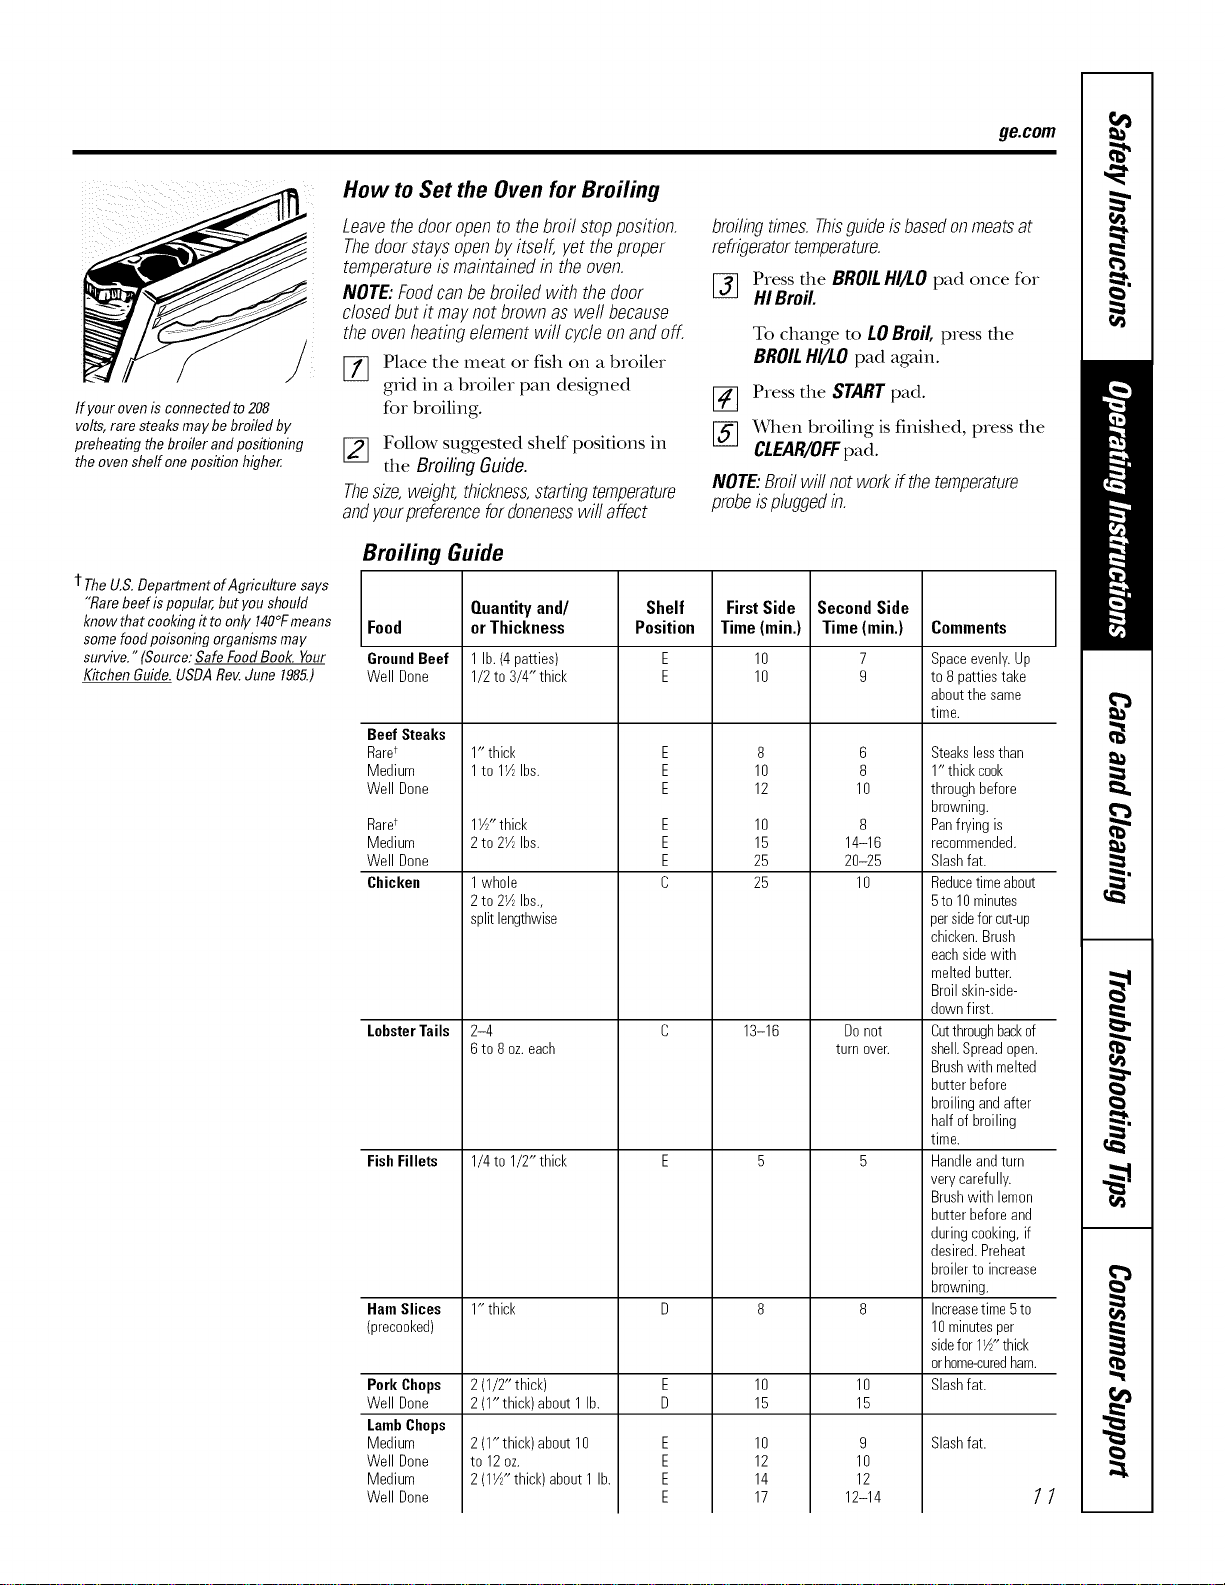
How to Set the Oven for Broiling
Leavethedooropento thebroil stopposition.
Thedoorstaysopenbyitself, yettheproper
temperatureismaintainedin theoven.
NOTE:Foodcanbe broiledwith thedoor
dosedbutit maynotbrownaswell because
theovenheatingelementwill cycleonandoff.
[] Place the meat or fish on a broiler
gdd in a broiler pan designed
for broiling.
f_ Follow suggested shelf positions in
the Broiling Guide.
Thesize,weight,thickness,startingtemperature
andyourpreferencefordonenesswill affect
Broiling Guide
broilingtimes.Thisguideisbasedonmeatsat
refrigeratortemperature.
[_ Press the BROILHI/I.Opad once for
HI Broil.
To change to LOBroil, press the
BROILHI/LOpad again.
_] Press the STARTpad.
f-if-]_qlen broiling is finished, press the
CLEAR/OFFpad.
NOTE:Broilwillnotworkif thetemperature
probeispluggedin.
Food
GroundBeef
Well Done
Beef Steaks
Rare*
Medium
Well Done
Rare*
Medium
Well Done
Chicken
LobsterTails
FishFillets
Quantityand/
orThickness
Pork Chops
Well Done
LambChops
Medium
Well Done
Medium
Well Done
1 lb.(4 patties)
1/2to 3/4" thick
1" thick
1to lY_Ibs.
1Y/"thick
2to 27_Ibs.
1whole
2to 2Y_Ibs.,
splitlengthwise
2-4
6to 8 oz.each
1/4to 1/2" thick
Shelf
Position
E
E
E
E
E
E
E
E
C
FirstSide
Time(rain.)
10
10
8
10
12
10
15
25
25
13-16
SecondSide
Time(rain.)
7
9
6
8
10
8
14-16
20-25
10
Donot
turn oveE
Comments
Ham Slices 1" thick D 8 8
(precooked)
2(1/2" thick) E 10 10
2(1"thick)about 1 lb. D 15 15
Slashfat.E
E
E
E
2(1" thick)about 10
to 12oz.
2(1W' thick)about 1lb.
9
10
12
12-14
10
12
14
17
Spaceevenly.Up
to 8pattiestake
aboutthesame
time.
Steakslessthan
1" thickcook
throughbefore
browning.
Panfrying is
recommended.
Slashfat.
Reducetimeabout
5to 10minutes
persideforcut-up
chicken.Brush
eachsidewith
meltedbutter.
Broilskin-side-
downfirst.
Cutthroughbackof
shell.Spreadopen.
Brushwith melted
butterbefore
broilingandafter
half of broiling
time.
Handleandturn
verycarefully.
Brushwith lemon
butterbeforeand
duringcooking,if
desired.Preheat
broilerto increase
browning.
Increasetime5to
10minutesper
sidefor 1½"thick
orhome-curedham.
Slashfat.
11
Usingthe clock, timerand controllockout.
: ¸¸¸¸¸¸¸7¸
iiill ;iiiii i iiiiii!iiiill
Make sure the clock is setto the
correct time of day.
To Set the Clock
The clock must be set to die correct time
of day for die automatic oven timing
tractions to work properly. The time of
day cannot be changed duling a timed
baking or self-cleaning cycle.
[77 Press die CLOCK pad.
[] Press die number pads.
[_] Press die START pad.
Thetimer is a minute timer only.
Thetimer does not control oven
operations. The maximum setting on
the timer is 9 hours and 59 minutes.
To Set the timer
[_ Press die KITCHENTIMERON/OFF
pad.
Press die number pads until die
amount of time you want shows
in die display. For example, to set
2 hot]IS and 45 minutes, press 2, 4
and 5 in that order. If you make a
mistake, press die KITCHEN TIMER
ON/OFF pad and begin again.
[-_ Press the STARTpad.
AfterpressingtheSTARTpad,SETdisappears,
thistellsyouthetimeiscountingdown,although
thedisplaydoesnotchangeuntiloneminutehas
passed.Secondswillnotbeshownin thedisplay
untilthelastminuteiscountingdown.
[_ x4qien the tinier reaches :00,
die control will beep 3 times
followed by one beep every
6 seconds until die KITCHEN TIMER
ON/OFFpad is pressed.
The 6-second rune can be canceled by
following die stops in die Specialfeatures
ofyour oven control section under Tones
at the End of a Timed Cycle.
To Reset the timer
If die display is sdll showing die dine
remaining, you may change it by pressing
the KITCHENTIMERON/OFFpad, then
press the number pads until die time
you want appears in die display.
If die remaining time is not in die display
(clock, del W start or cooking dine are in
die display), recall die remaining time by
pressing die KITCHEN TIMER ON/OFF pad
and then pressing die number pads m
enter die new time you want.
To Cancel the timer
PressKITCHENTIMERON/OFFpad twice.
LOCK.,'UNLOCK HOLD 3 SECONDS
/2
Control Lockout
Yourcontrolwillallowyoutolockoutthetouch
padssotheycannotbeactivatedwhenpressed.
NOTE:Ondoubleovenmodels,thisactivatesthis
featureforbothovens.
To lock/unlock die controls:
[77 Press die 9 and 0pads at die same
time for 3 seconds, until die display
shows LOgON.
To tmlock die control, press die 9
and 0pads at the same time for 3
seconds, until die display shows
LOCOFF
When this feature is on and die much
pads are pressed, die conuol will beep
and die display will show LOCON.
NOTES:
Thecontrollockoutmodeaffectsall touch
pads.Notouchpadswill workwhenthis
featureisactivated.
, Theadjustmentwillberetainedinmemory
afterapowerfailure.
Usingthe timedbakingand mastingfeatures, somemode/sJ ge.oom
On double oven models, you can use timed baking in one oven while using self-clean in the other; you can also use
timed baking in both ovens at the same time.
NOTE:Foods that spoil easily--such as milk, eggs, fish, stuffings, poultry and pork--should not be allowed to sit for
more than 1hour before or after cooking. Room temperature promotes the growth of harmful bacteria. Be sure that
the oven light is off because heat from the bulb will speed harmful bacteria growth.
_ _ F_ i ii
i!/i III__iiii_i_!_i!_i_i_ii! _i_!_i!_i!_i!_i!_i!_i
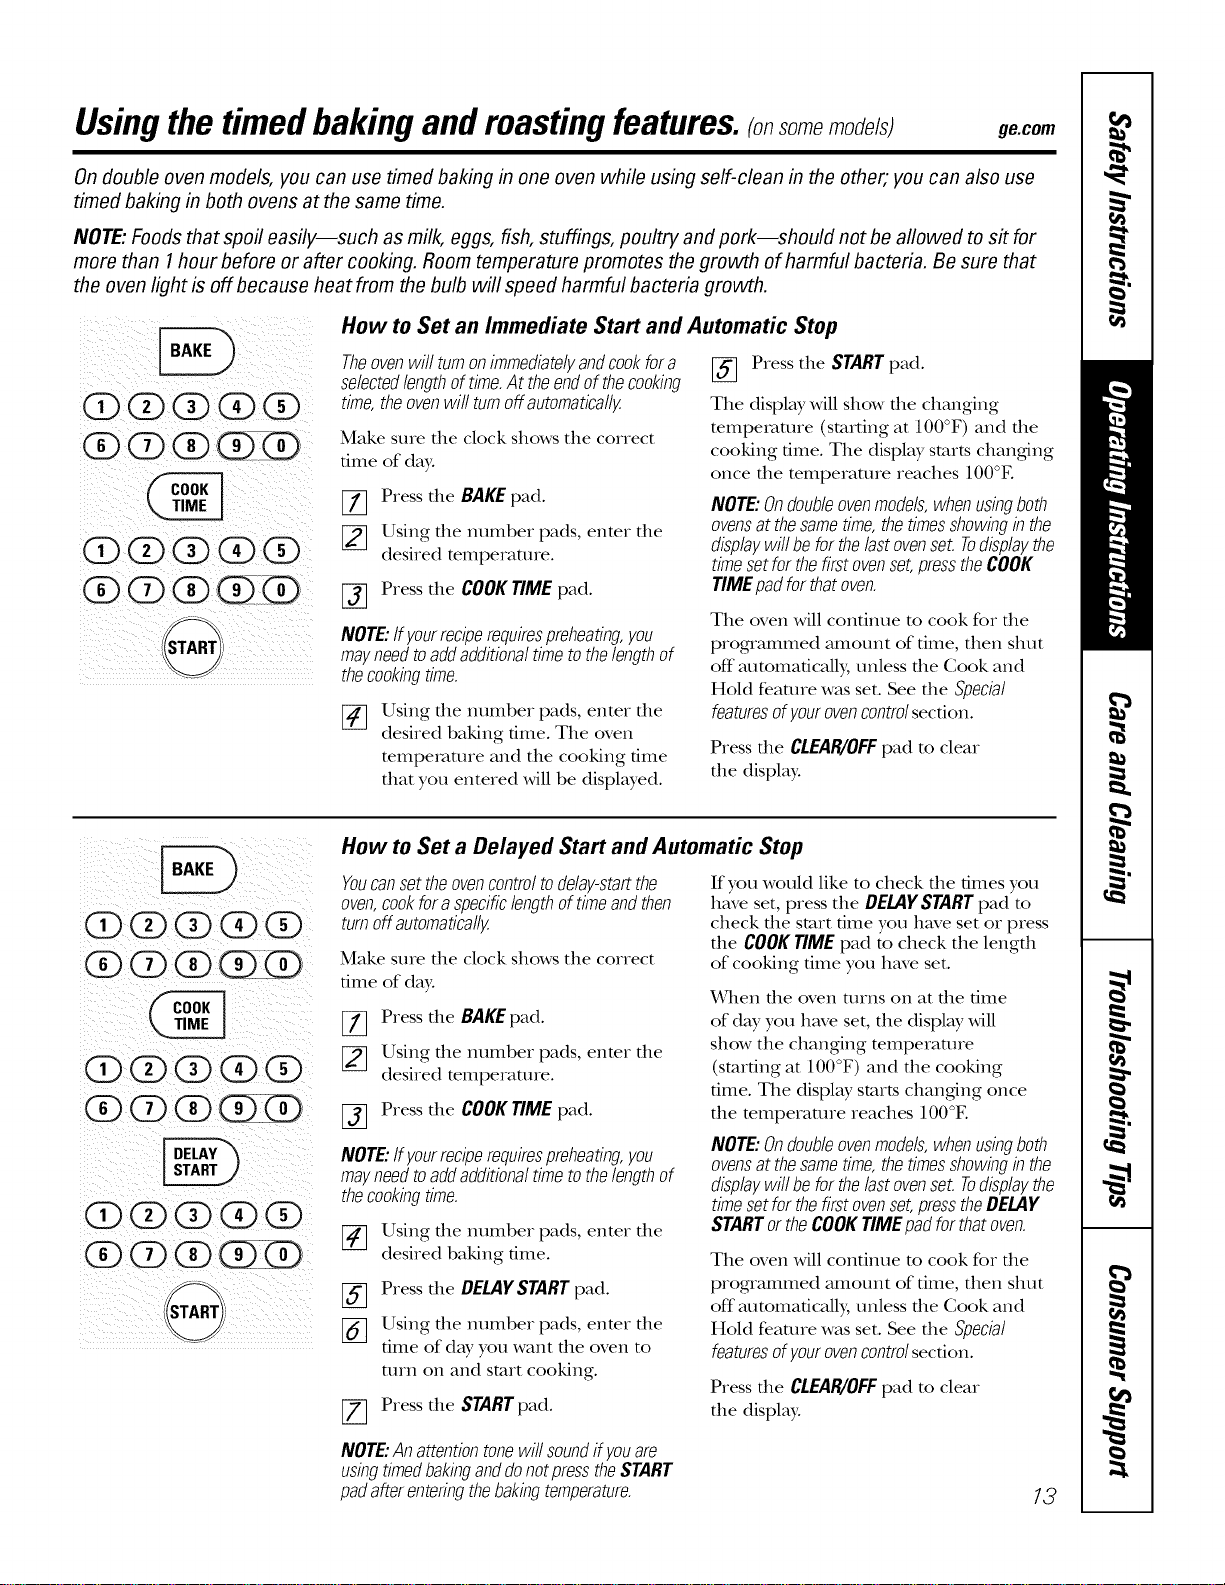
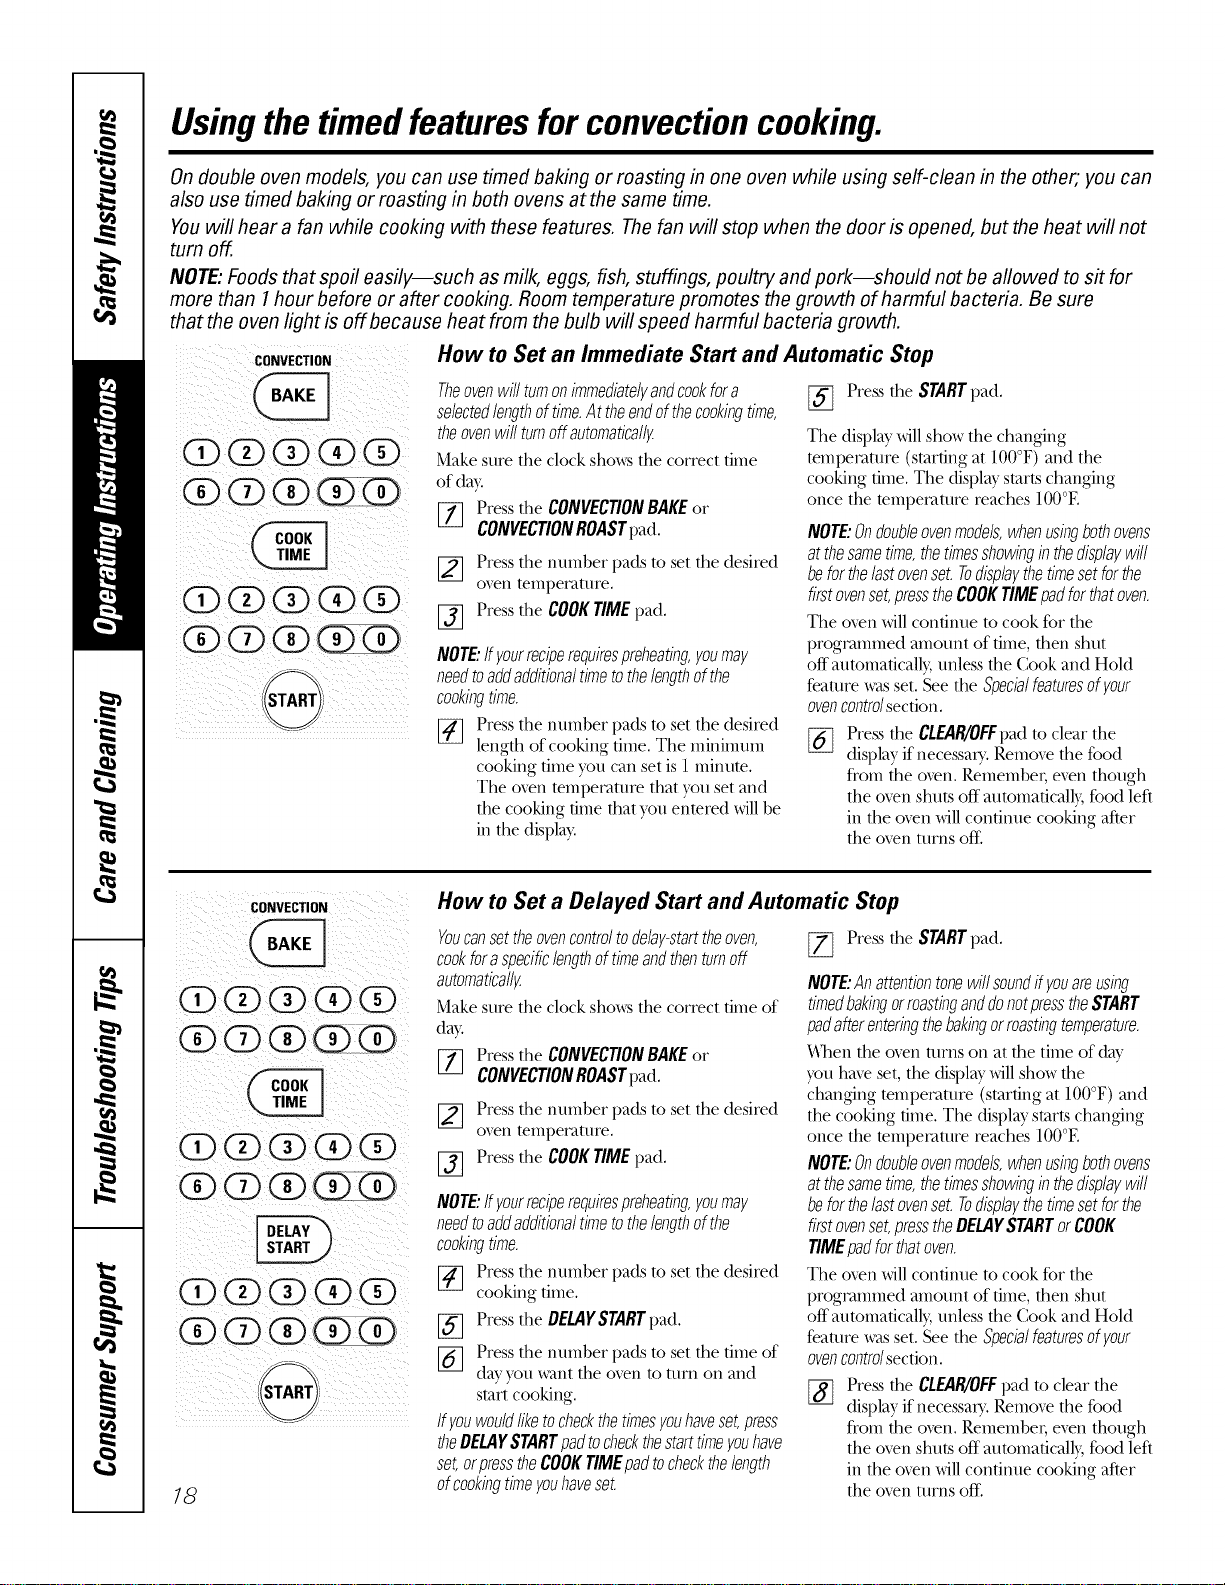
How to Set an Immediate Start and Automatic Stop
Theovenwillturnonimmediatelyandcookfora
selectedlengthoftime.At theendof thecooking
time,theovenwi//turnoffautomatica//y.
Make sure die clock shows tile correct
time of day.
[_ Press tile BAKEpad.
[] Using tile number pads, enter tile
desired temperaulre.
[-_ Press tile COOKTIMEpad.
NOTE:If yourreciperequirespreheating,you
mayneedtoaddadditionaltimetothelengthof
thecookingtime.
[_ sing tile ntllIlbeI pads, enter tile
desired baking time. Tile oven
mmpemmre and tile cooking time
that you entered will be displwed.
[_ Press tile STARTpad.
Tile display will show file changing
mmpemmre (starting at 100°F) and file
cooking time. Tile displ W starts changing
once die mmperamre reaches 100°E
NOTE:Ondoubleovenmode/s,whenusingboth
ovensat thesametime,thetimesshowingin the
displaywi//beforthelastovenset.Todisplaythe
timesetforthefirstovenset,presstheCOOK
TIMEpadforthatoven.
Tile oven will continue m cook for file
programmed amount of time, then shut
off automatically, unless tile Cook and
Hold feature was set. See tile Special
features ofyour ovencontrolsecdon.
Press tile CLEAI{/OFFpad to clear
tile display:
(1ii)0@(i3(i#
Q@Q@Q
@@@(D(Z)
@@@@Q
@@@(i)@
@@@@Q
'START
How to Set a Delayed Start and Automatic Stop
Youcansettheovencontroltodelay-startthe
oven,cookfora specificlengthoftimeandthen
turnoffautomatically.
Make sure tile clock shows tile correct
time of day:
[_ Press tile BAKEpad.
[_ Using tile number pads, enter tile
desired temperature.
[_ Press tile COOKTIMEpad.
NOTE:If yourreciperequirespreheating,you
mayneedtoaddadditionaltimetothelengthof
thecookingtime.
[-_ Using tile number pads, enter tile
desired baking time.
[_ Press tile DELAYSTARTpad.
[_] Using tile number pads, enter tile
time of day you want tile oven to
mrn on and start cooking.
[-_ Press tile STARTpad.
If you would like to check die times you
have set, press tile OELA¥STARTpad m
check tile start time you have set or press
dieCOOKTIMEpad m check tile lengdl
of cooking time you have set.
XATllen die oven turns on at die time
of day you have set, tile display will
show tile changing temperature
(stardng at 100°F) and die cooking
time. Tile display starts changing once
die temperature reaches 100°E
NOTE:Ondoubleovenmodels,whenusingboth
ovensat thesametime,thetimesshowingin the
displaywi//beforthelastovenset.Todisplaythe
timesetforthefirstovenset,presstheDELAY
STARTortheCOOKTIMEpadforthatoven.
Tile oven will continue m cook for die
programmed amount of time, then shut
off automatically, unless the Cook and
Hold feature was set. See the Special
features ofyour ovencontrolsecdon.
Press tile CLEAI{/OFFpad to clear
tile display:
NOTE:Anattentiontonewillsoundifyouare
usingtimedbakinganddonotpresstheSTART
padafterenteringthebakingtemperature.
13
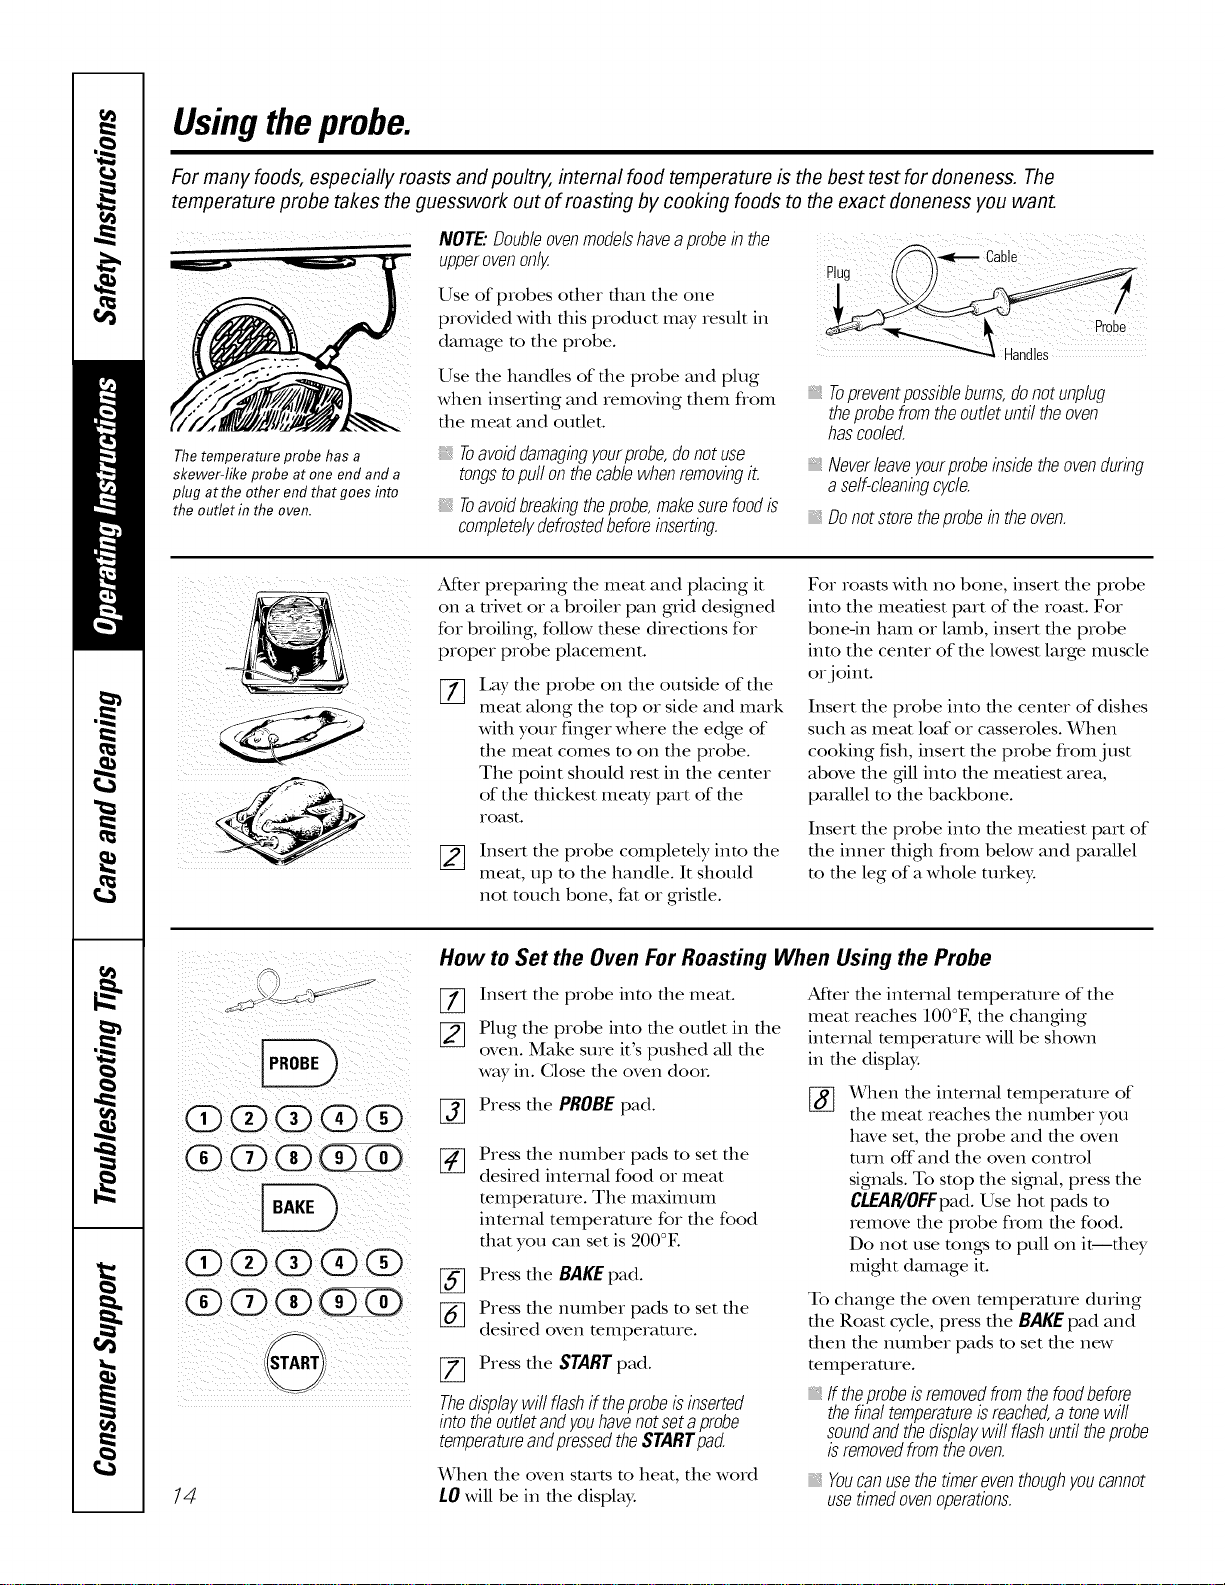
Usingtheprobe.
For many foods, especially roasts and poultry, internal food temperature is the best test for doneness. The
temperature probe takes the guesswork out of roasting by cooking foods to the exact doneness you want.
Thetemperature probe has a
skewer-like probe at one end and a
plug at the other end that goes into
the outlet in the oven.
NOTE."Double ovenmodelshaveaprobe in the
upperovenonly.
Use of probes other than the one
provided with this product may result in
damage to tile probe.
Use tile handles of tile probe and plug
when inserting and iemoving thenl flom
tile meat and outlet.
Toavoiddamagingyourprobe,donotuse
tongstopull onthecablewhenremovingit.
Toavoidbreakingtheprobe,makesurefoodis
completelydefrostedbeforeinserting.
Topreventpossiblebums,donotunplug
theprobefromtheoutletuntiltheoven
hascoded.
Neverleaveyourprobeinsidetheovenduring
a self-cleaningcycle.
_, Donotstore theprobe in the oven.
After preparing file meat and placing it
on a uivet or a broiler pan grid designed
for broiling, follow these directions for
proper probe placement.
[]
I,ay tile probe on tile outside of tile
meat along tile top or side and mark
with your finger where the edge of
the meat comes to on the probe.
The point should rest in the cenmr
of the thickest meat), part of the
Ioast.
[_ Insert tile probe completely into tile
meat, tap to the handle. It should
not touch bone, fat or gristle.
For ro_tstswith no bone, insert file probe
into the meatiest part of the roast. For
bone-in ham or lamb, insert tile probe
into tile cenmr of tile lowest large muscle
or joint.
Insert file probe into die center of dishes
such as meat loaf or casseroles. When
cooking fish, insert the probe from j ust
above tile gdllinto the meatiest area,
parallel to the backbone.
Insert tile probe into tile meatiest part of
tile inner thigh from below and parallel
to the leg of a whole turkey.
14
How to Set the Oven For Roasting When Using the Probe
%
%
Insert tile probe into tile meat.
Plug tile probe into file outlet in file
oven. Make sure it's pushed all file
way in. Close tile oven dooL
Press file PROBE pad.
%
%
Press tile mnnber pads to set tile
desired internal food or meat
mmperamre. Tile nlaxililttnl
inmrnal temperature for the food
that you can set is 200°E
Press the BAKE pad.
Press tile mnnber pads to set tile
desired oven temperaune.
Press the START pad.
Thedisplaywill flashif theprobeisinserted
intotheoutletandyouhavenotsetaprobe
temperatureandpressedtheSTARTpad.
_(¥hen file oven starts to heat, tile word
LO will be in tile display:
After file inmnlM mmperature of tile
meat reaches 100°F, tile changring
inmrnM mmperamre will be shown
in the display.
[_ _(_qlentile internal tempetv_ture of
the meat reaches the nmnber you
have set, the probe and the oven
turn off"and the oven control
signals. To stop the sigmal, press the
CLEAPffOFFpad.Use hot pads m
remove file probe from file food.
Do not use rungs m pull on it--they
might dmnage it.
To change tile oven mmpetature during
the Roast cycle, press the BAKEpad and
then the mnnber pads m set the new
temperature.
If theprobeisremovedfromthefoodbefore
thefinaltemperatureisreached,atonewill
soundandthedisplaywill flashuntiltheprobe
isremovedfromtheoven.
Youcanusethetimereventhoughyoucannot
usetimedovenoperations.
Usingthe convectionoven. ge.com
Convection Bake
NOTE'.Theconvectionfanwill cycleonandoff
whilecookingtobestdistributehotairin the
oven.
Theconvectionovenfan shutsoff when the oven
door is opened.DONOTleave the dooropen for
longperiodsof time while usingconvection
cookingoryou may.shorten the fife of the
convectionheatingelement.
Ina convectionoven,a fancirculateshot air
over,underandaroundthefood.
Thiscirculatinghot airisevenly,distributed
throughouttheovencavity.As a result,foods
areevenly,cookedandbrowned--often in less
time with convectionheat.
Idealforevenlybrownedbakedfoodscooked
onmultipleshelves.
Goodforlargequantitiesofbakedfoods.
Goodresultswithcookies,biscuits,muffins,
brownies,cupcakes,creampuffs,sweetrolls,
angelfoodcakeandbread.
The convection fan circulates die heated
air evenly over and around the food.
Multi-shelfposition
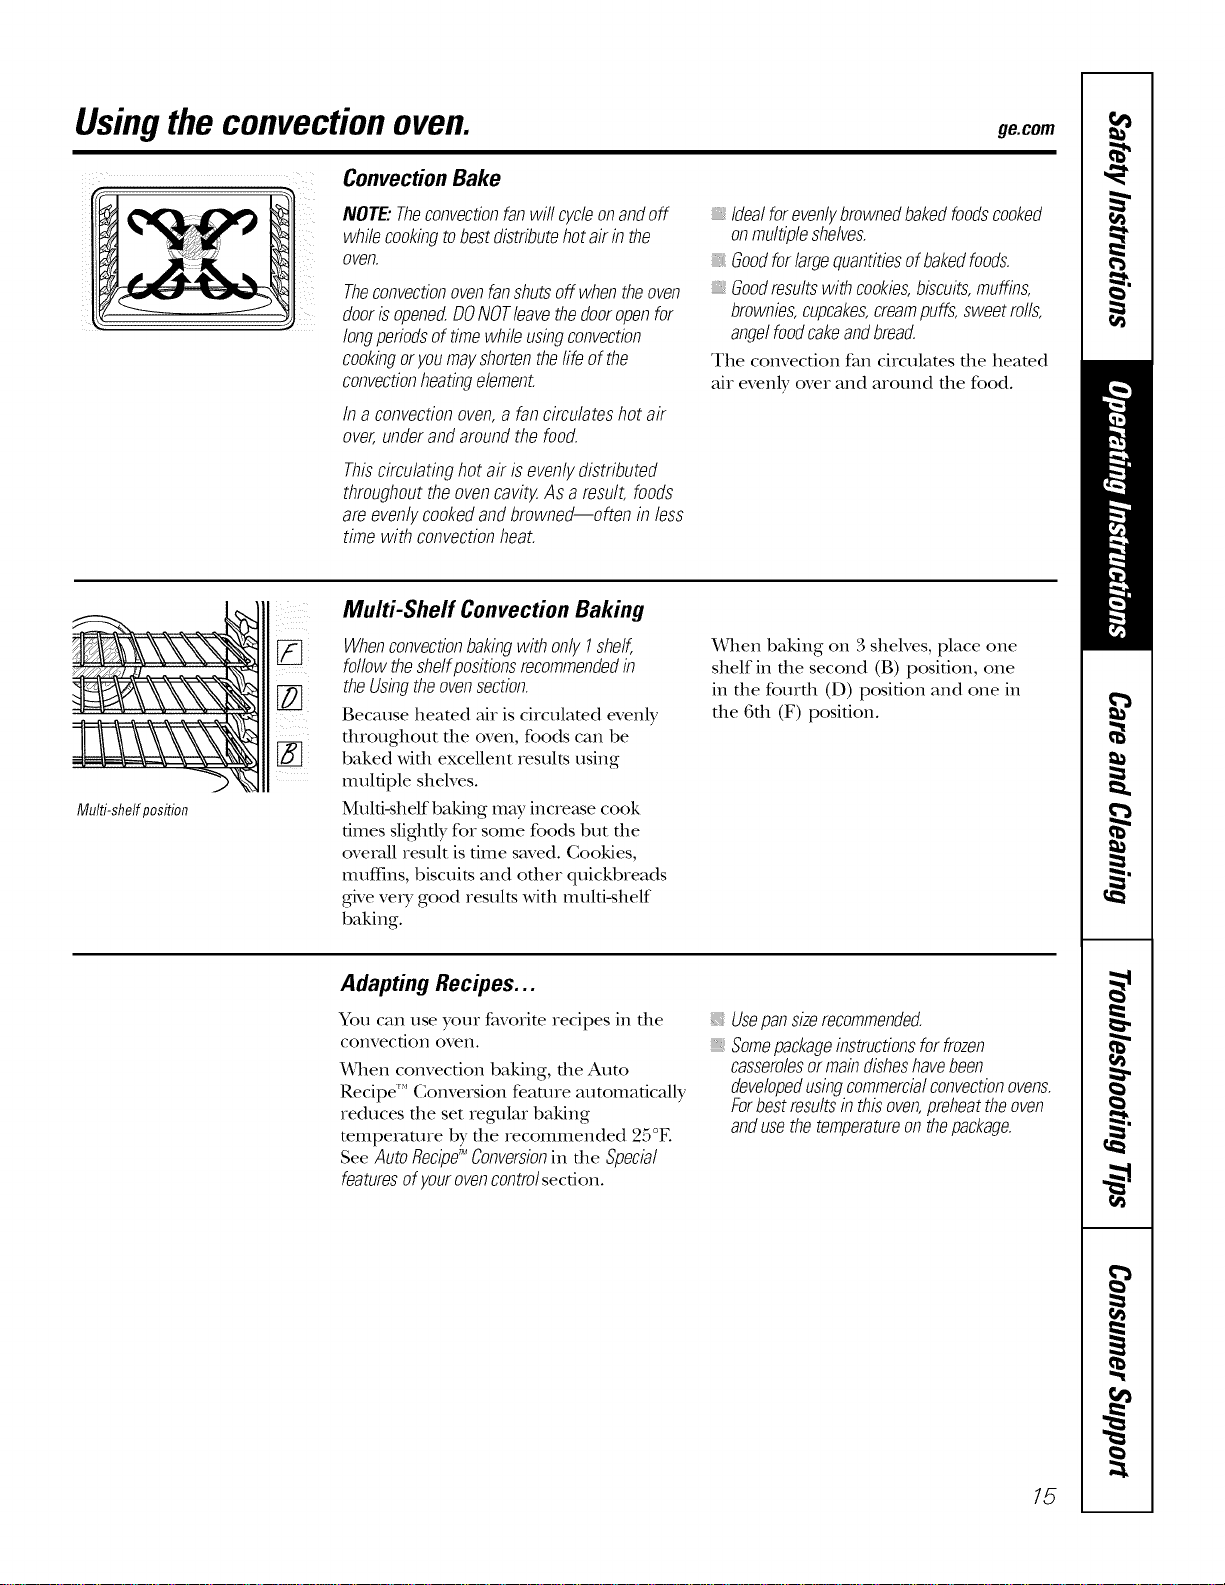
Multi-Shelf Convection Baking
zzz
[] WhenconvectionbakingwithonlyI shelf,
followtheshelfpositionsrecommendedin
theUsingtheovensection.
Because heated air is circulated evenly
dlroughout tile oven, foods can be
baked with excellent results using
multiple shelves.
Muld-shelf baking may increase cook
dines slighdy for some foods but file
overall result is dine saved. Cookies,
Illllft]ns, biscuits and other quickbreads
give ve_y good results with multi-shelf
baking.
When baking on 3 shelves, place one
shelf in die second (B) position, one
in the fourth (D) position and one in
the 6th (F) position.
Adapting Recipes...
You can use your favorite recipes in tile
convection oven.
When convection baking, die Aura
Recipe"* Conversion feature automaficMly
reduces tile set regular baking
temperaUlre by tile recommended 25°E
See AutoRecipg_Conversionin tile Special
featuresofy.ourovencontrolsecdon.
Usepansizerecommended.
Somepackageinstructionsforfrozen
casserolesormaindisheshavebeen
developedusingcommercialconvectionovens.
Forbestresultsinthisoven,preheattheoven
andusethetemperatureonthepackage.
15

Usingtheconvectionoven.
Convection Roast
Goodfor large tendercuts of meat,uncovered.
The convec6on fan circulams file heamd
air evenly over and around the food.
Meat and pouluy are browned on all
sides as if they were cooked on a
rotisserie. Heamd air will be circulamd
ovei; under and around the food being
roasmd. Tile heamd air seals in juices
quickly for a moist and tender product
while, at tile same time, creating a rich
golden brown exmfioL
When you are convection roasting, it is
important that you use a broiler pan and
grid designed for broiling for best
convection roasOng results. The pan is
used m catch grease spills and tile grid is
used m prevent grease spattels.
When baldngcooldes,you will
getthe bestresults ffyou use a
flat coolde sheet insteadof a
panwith low sides.
Cookware for Convection Cooking
Before using your convection oven,
check to see if your cookware leaves
room for air circulation in the oven.
If you are baking with several pans, leave
space between them. Also, be sure tile
pans do not touch each other or the
walls of tile oven.
Paper and Plastic
Heat-resistant paper and plastic
containets fllat are recommended for
use in regular ovens can be used in
convection ovens. Plastic cookware that
is heat-resistant to temperatures of
400°F can also be used.
Metal and Glass
Aaly type of cookware Mll work in your
convection oven. Howevei; metal pans
heat tile fastest and are recommended
for convection baking.
Darkenedor matte-finishedpans will bake
faster thanshinypans.
Glassor ceramicpans cookmoreslowly.
For recipes like oven-baked chicken,
use a pan wifll low sides. Hot mr cannot
circulate well around food in a pan Mill
high sides.
CONVECTION
(D(Z)(X)(X)(X)
@@@@@
START,
How to Set the Oven for Convection Baking or Roasting
%
%
Press tile CONVECTIONBAKEpad
or tile CONVECTIONROASTpad.
Press tile number pads to set tile
desired oven temperature.
Press tile START pad.
To change file oven mmperamre, press
file CONVECTIONBAKEor CONVECTION
ROASTpadand then the number pads
to set tile new temperature.
X4qlen tile oven starts to heat, file
changing mmperamre, starting at 100°F,
will be displwed. When the oven reaches
the temperature you set, 3 beeps will
SOtlnd.
[_ Press tile CLEAR/OIFpad when
finished.
Youwillheara fanwhilecookingwith
convection.Thefanwillstopwhenthedooris
opened,buttheheatwillnotturnoff.
_,Youmayheartheovenclickingduringbaking.
Thisisnormal.
16
ge.com
For best results when roasting large
turkeys and roasts, we recommend
using theprobe included in the
convection oven,
CONVECTION
00(i)(i)@
@@(i)@@
@(2)@@@
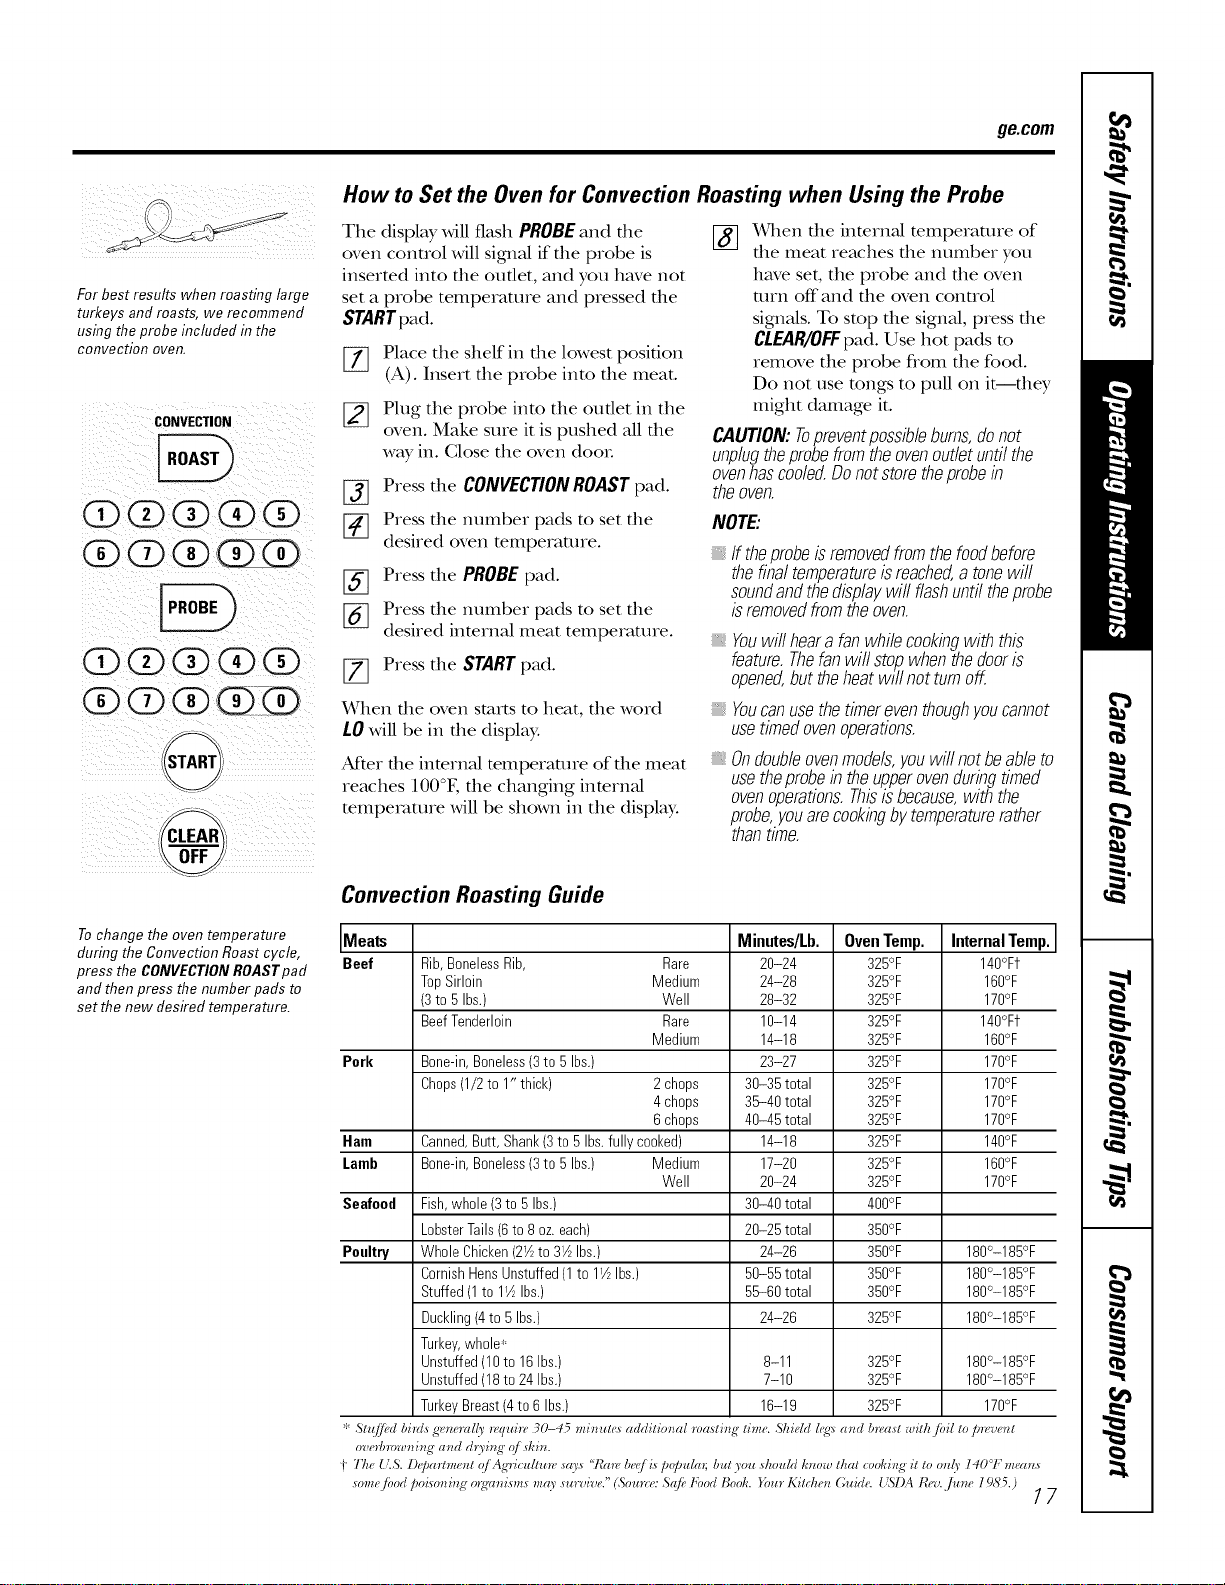
How to Set the Oven for Convection Roasting when Using the Probe
The display will flash PROBEand the [_ When the interned temperature of
oven control will sigalal if the probe is the meat reaches the number you
inserted into the outlet, and you have not
set a probe temperature and pressed the
STARTpad.
[[_] Place the shelf in the lowest position
(A). Insert the probe into the meat.
[_ Plug the probe into the outlet in the
oven. Make sure it is pushed all the
way in. (;lose the oven dooL
[_ Press the CONVECTION ROAST pad.
[] Press the number pads to set the
desired oven temperature.
[_] Press the PROBE pad.
[_ Press the number pads to set the
desired internal meat temperature.
[] Press the START pad.
have set, the probe and file oven
mrn off and file oven control
sigmMs. To stop file signM, press file
CLEAR/OFF pad. Use hot pads to
remove the probe from the food.
Do not use tongs to pull on it--they
might damage it.
CAUTION:Topreventpossibleburns,donot
unplugtheprobefromtheovenoutletuntilthe
ovenhascoded.Donotstoretheprobein
theoven.
NOTE:
If theprobeisremovedfromthefoodbefore
thefinaltemperatureisreached,atonewill
soundandthedisplaywiflflashuntiltheprobe
isremovedfromtheoven.
Youwillhearafanwhilecookingwith this
feature.Thefanwillstopwhenthedooris
opened,buttheheatwill notturnoff.
_qlen file oven starts to heat, the word
LOwill be in the display.
After file internal temperature of the meat
reaches 100°F, the changing internal
teInpe_mue will be shown in the display.
Youcanusethetimereventhoughyoucannot
usetimedovenoperations.
Ondoubbovenmodels,youwillnotbeableto
usetheprobeintheupperovenduringtimed
ovenoperations.Thisisbecause,withthe
probe,youarecookingbytemperaturerather
thantime.
Tochange the oven temperature
during the Convection Roast cycle,
press the CONVECTIONROASTpafl
and then press the number pads to
set the new desired temperature.
Convection Roasting Guide
I
Meats Minutes/Lb. Oven Temp. Internal Temp. ]
Beef Rib,BonelessRib, Rare 20-24 325°F 140°Ff
TopSirloin Medium 24-28 325°F 160°F
(3to 5 Ibs.) Well 28-32 325°F 170°F
BeefTenderloin Rare 10-14 325°F 140°Ft
Medium 14-18 325°F 160°F
Perk Bone-in,Boneless(3to 5 Ibs.) 23-27 325°F 170°F
Chops(1/2to 1" thick) 2 chops 30-35 total 325°F 170°F
4 chops 35-40 total 325°F 170°F
6 chops 40-45 total 325°F 170°F
Ham Canned,Butt, Shank(3to 5 Ibs.fully cooked) 14-18 325°F 140°F
Lamb Bone-in,Boneless(3to 5 Ibs.) Medium 17-20 325°F 160°F
Well 20-24 325°F 170°F
Seafeed Fish,whole(3to 5 Ibs.) 30-40 total 400°F
LobsterTails(6to 8 oz.each) 20-25 total 350°F
Poultry WholeChicken(2Y_to 31/2Ibs.) 24-26 350°F 180°-185°F
CornishHensUnstuffed(1to 11/_Ibs.) 50-55 total 350°F 180°-185°F
Stuffed(1to 11/2Ibs.) 55-60 total 350°F 180°-185°F
Duckling(4to 5 Ibs.) 24-26 325°F 180°-185°F
Turkey,whole_
Unstuffed(10to 16Ihs.) 8-11 325°F 180°-185°F
Unstuffed(18to 24Ibs.) 7-10 325°F 180°-185°F
TurkeyBreast(4to 6 Ibs.) 16-19 325°F 170°F
* St_{[]},d bhds gw_eral('v 7vquh_ 30-45 mh_ute_ additio_ml masti_ ' time. ,'_hiehl leg:_ a_d b_vast with/bil to p_wve#t
overtm>w_ting a_td dryi_g" (!j skin.
t' The 1'.S. Deparhnent qj Ag'ricullmvsays "Ibm, beq/i_popuhlT;butyou should know that cookie,S"it to only'14001``m_'(ms
some/bod poi_o_i_g"o_g'a_ismsmaysub"viva."(SourestSq/b Food Bool_._bur Kitche_ Guid_<1%I)At{,'v.,time l9,S'5.)
17
Usingthe timedfeaturesfor convectioncooking.
On double oven models, you can use timed baking or roasting in one oven while using self-clean in the other; you can
also use timed baking or roasting in both ovens at the same time.
Youwill hear a fan while cooking with these features. Thefan will stop when the door is opened, but the heat will not
turn off.
NOTE:Foods that spoil easily--such as milk, eggs, fish, stuffings, poultry and pork--should not be allowed to sit for
more than 1hour before or after cooking. Room temperature promotes the growth of harmful bacteria. Be sure
that the oven light is off because heat from the bulb will speed harmful bacteria growth.
coNvECTIoN
@@@ @@
®® ® @
i i}ilii} ii}iiii I
How to Set an Immediate Start and Automatic Stop
Theovenwill turnonimmediatelyandcookfor a
selectedlengthof time.At theendofthecookingtime,
theovenwill turnoffautomaticatl_
Make sure the clock sho_:s the correct time
of day.
[_ Press the CONVECTIONBAKEor
CONVECTIONROASTpad.
[_ Press the number pads to set the desired
oven teinpet_ature.
[_] Press the COOKTIMEpad.
NOTE"ffyourreciperequirespreheating,youmay
needtoaddadditionaltimetothelengthofthe
cookingtime.
[_ Press the numher pads to set the desired
length of cooking time. The minimum
cooking time you can set is 1 minute.
The oven temperature that you set and
the cooking dine that you entered will be
in the displa)_
[_] Press the STARTpad.
The display.'will show the changing
temperature (starting at 100°F) and the
cooking time. The display starts changing
once the tempeI_auu'e reaches IO0°E
NOTE"Ondoubleovenmodels,whenusingbothovens
atthesametime,thetimesshowinginthedisplaywill
beforthelastovenset.Todisplaythetimesetforthe
firstovenset,presstheCOOKTIMEpadfor thatoven.
The oven will continue to cook for the
i)rogt_ammed amount of time, then shut
off automaficall), unless the Cook and Hold
feature was set, See the Specialfeaturesofyour
ovencentre/section,
%
Press the CLEAR/OFFpad to cleat" the
display if necessary. Remove the food
from the o_en. Remember; e_n though
the oven shuts off aummaticall}, food left
in the oven will continue cooking after
the o_n turns off;
CONVECTION
QOOQ@
@@@@@
@@@@@
@@@@o
@@@@@
_TART
18
How to Set a Delayed Start and Automatic Stop
Youcansettheovencontroltodelay-starttheoven,
cookforaspecificlengthoftimeandthenrumoff
automaticatl_
Make sure the clock sho_s the correct time of
da)_
[_ Press the CONVECTIONBAKEor
CONVECTIONROASTpad.
[_ Press the number pads to set the desired
oven teinpet_att/re,
[_ Press the COOKTIMEpad.
NOTE"ffyourreciperequirespreheating,youmay
needtoaWadditionaltimetothelengthofthe
cookingtime.
[_ Press the number pads to set the desired
cooking time.
Press the DELAYSTARTi)ad.
%
%
Press the number pads to set the time of
dayyou want the oven to turn on and
start cooking.
Ifyouwouldliketocheckthetimesyouhaveset,press
theDE_YSTARTpadtocheckthestarttimeyouhave
set,orpresstheCOOKTIMEpadtocheckthelength
ofcookingtimeyouhaveset.
[_ Press the STARTpad.
NOTE"Anattentiontonewill soundff youareusing
timedbakingorroastinganddonotpresstheSTART
padafterenteringthebakingor roastingtemperature.
_en the oven turns on at the time of day
you have set, the display will show the
changing wmperamre (starting at 100°F) and
the cooking time. The display starts changing
once the mmperamre reaches 100°E
NOTE."Ondoubleovenmodels,whenusingbothovens
atthesametime,thetimesshowinginthedisplaywill
beforthelastovenset.Todisplaythetimesetforthe
firstovenset,presstheDE_Y STARTorCOOK
TIMEpadforthatoven.
The oven will continue to cook for the
programmed amount of time, then shut
off automaficall), unless the Cook and Hold
feaUu'e was set. See the Specialfeaturesofyour
ovencontro/section.
Press the CLEAR/OFFpad to clear the
display if necessary. Remove the food
from the oxen. Remember; exert though
the oven shuts off aummaticall}, food left
in the oven will continue cooking after
the oxen turns off;
Adjustthe oventhermostat--Do it yourself! ge.oom
Youmay find that your new oven cooks differently than the one it replaced. Use your new oven for a few weeks
to become more familiar with it. If you still think your new oven is too hot or too cold, you can adjust the
thermostat yourself.
Do not use thermometers, such as those found in grocery stores, to check the temperature setting of your oven.
These thermometers may vary 20-40 degrees.
NOTE: This adjustment will only affect baking and roasting temperatures; it does not affect broiling, convection or
self-cleaning temperatures. Theadjustment will be retained in memory after a power failure.
(Z>(Z>O(Z)O
OQQG
F-%
(START
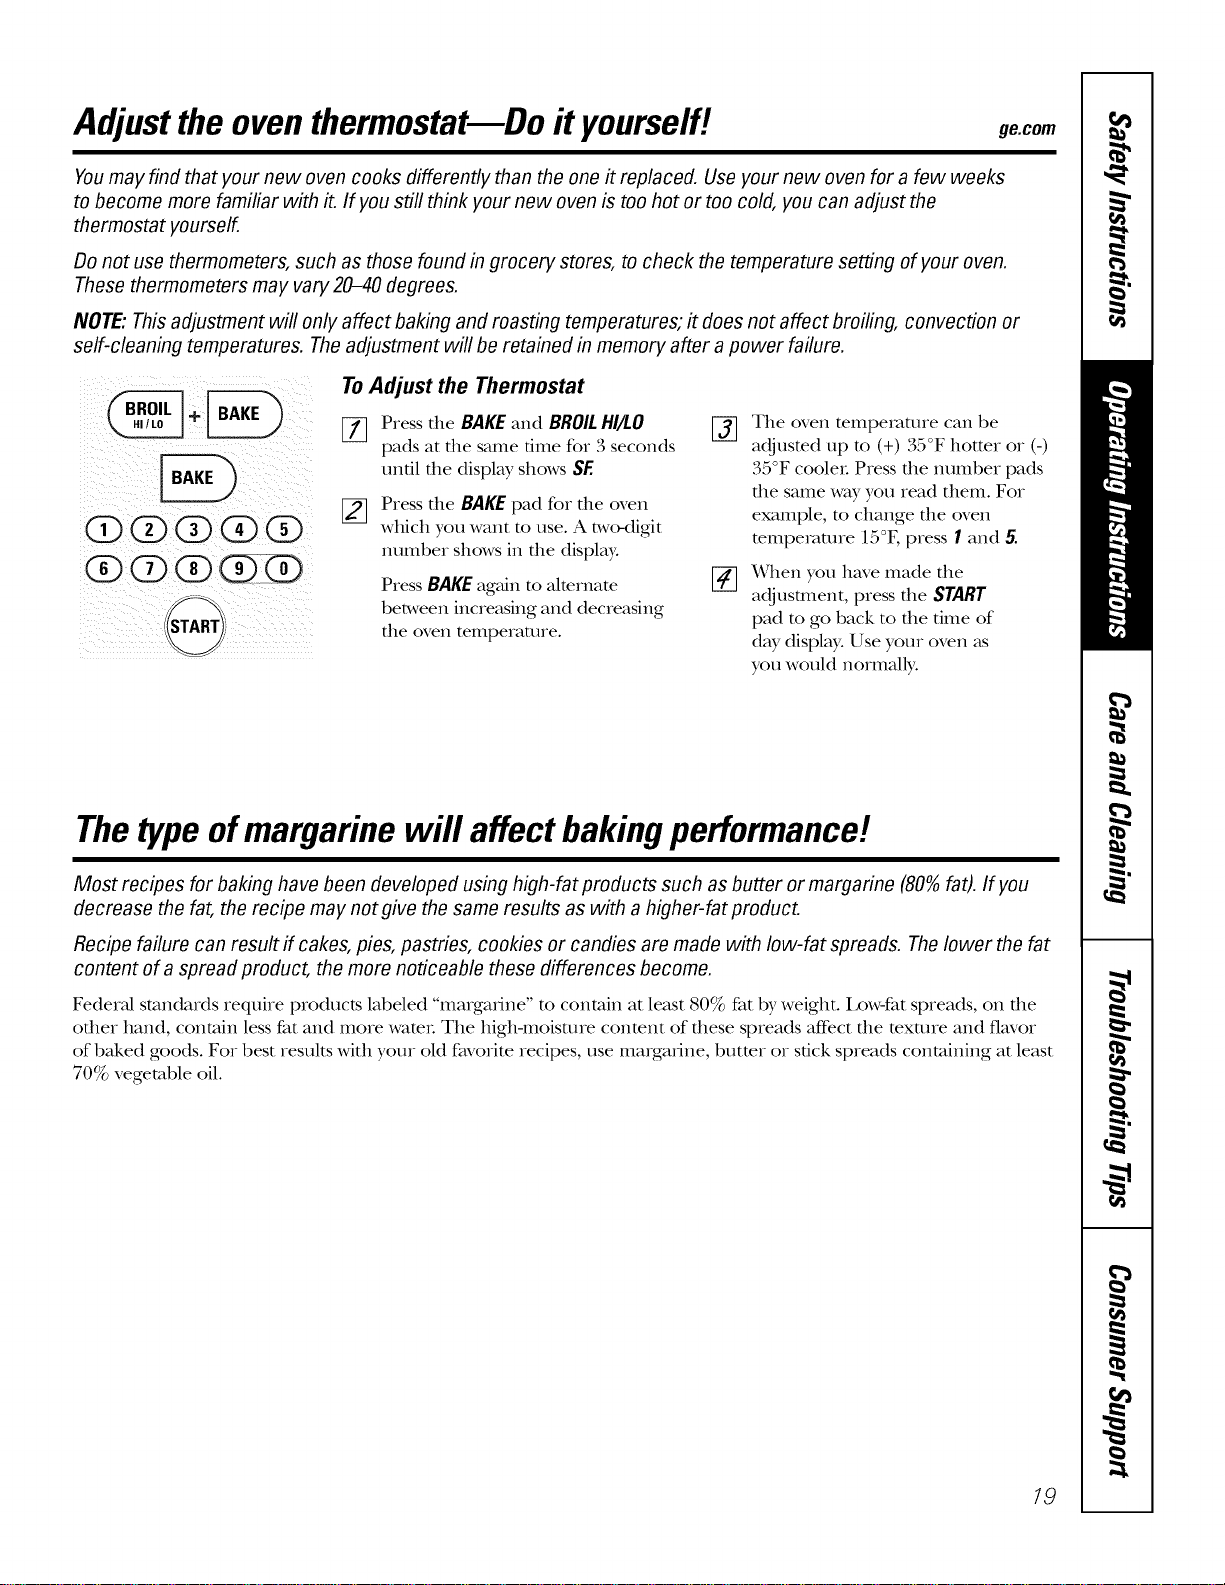
To Adjust the Thermostat
[_ Press the BAKE and BROILHI/I.O
pads at the same time for 3 seconds
until the display shows SE
[_ Press the BAKEpad for the oven
which you want to use. A two<ligit
number shows in the display.
Press BAKEagainto almrnate
between increasing and decreasing
the oven temperature.
%
The oven temperature can be
adjusted tap to (+) 35°F hotter or (-)
35°F cooler. Press the number pads
the same way you read them. For
example, m change the oven
mmpemnne 15°E press 1 and 5.
x_qlen you have made the
adjusunent, press the START
pad to go back to the time of
day display.Use your oven as
you would normally.
Thetypeof margarine will affect bakingperformance!
Most recipes for baking have been developed using high-fat products such as butter or margarine (80%fat). If you
decrease the fat, the recipe may not give the same results as with a higher-fat product.
Recipe failure can result if cakes, pies, pastries, cookies or candies are made with low-fat spreads. Thelower the fat
content of a spread product, the more noticeable these differences become.
Federal standards require products labeled "margarine" m contain at least 80% fat by weight. I,ow-fat spreads, on file
other hand, contain less fat and more wamt. The higlHnoisture conmnt of these spreads affbct the mxture and flavor
of baked goods. For best results with your old favorite recipes, use margarine, butmr or stick spreads containing at least
70% vegetable oil.
19
Usingtheself-cleaning oven.
The oven door must be closed and all controls must be set correctly for the cycle to work properly.
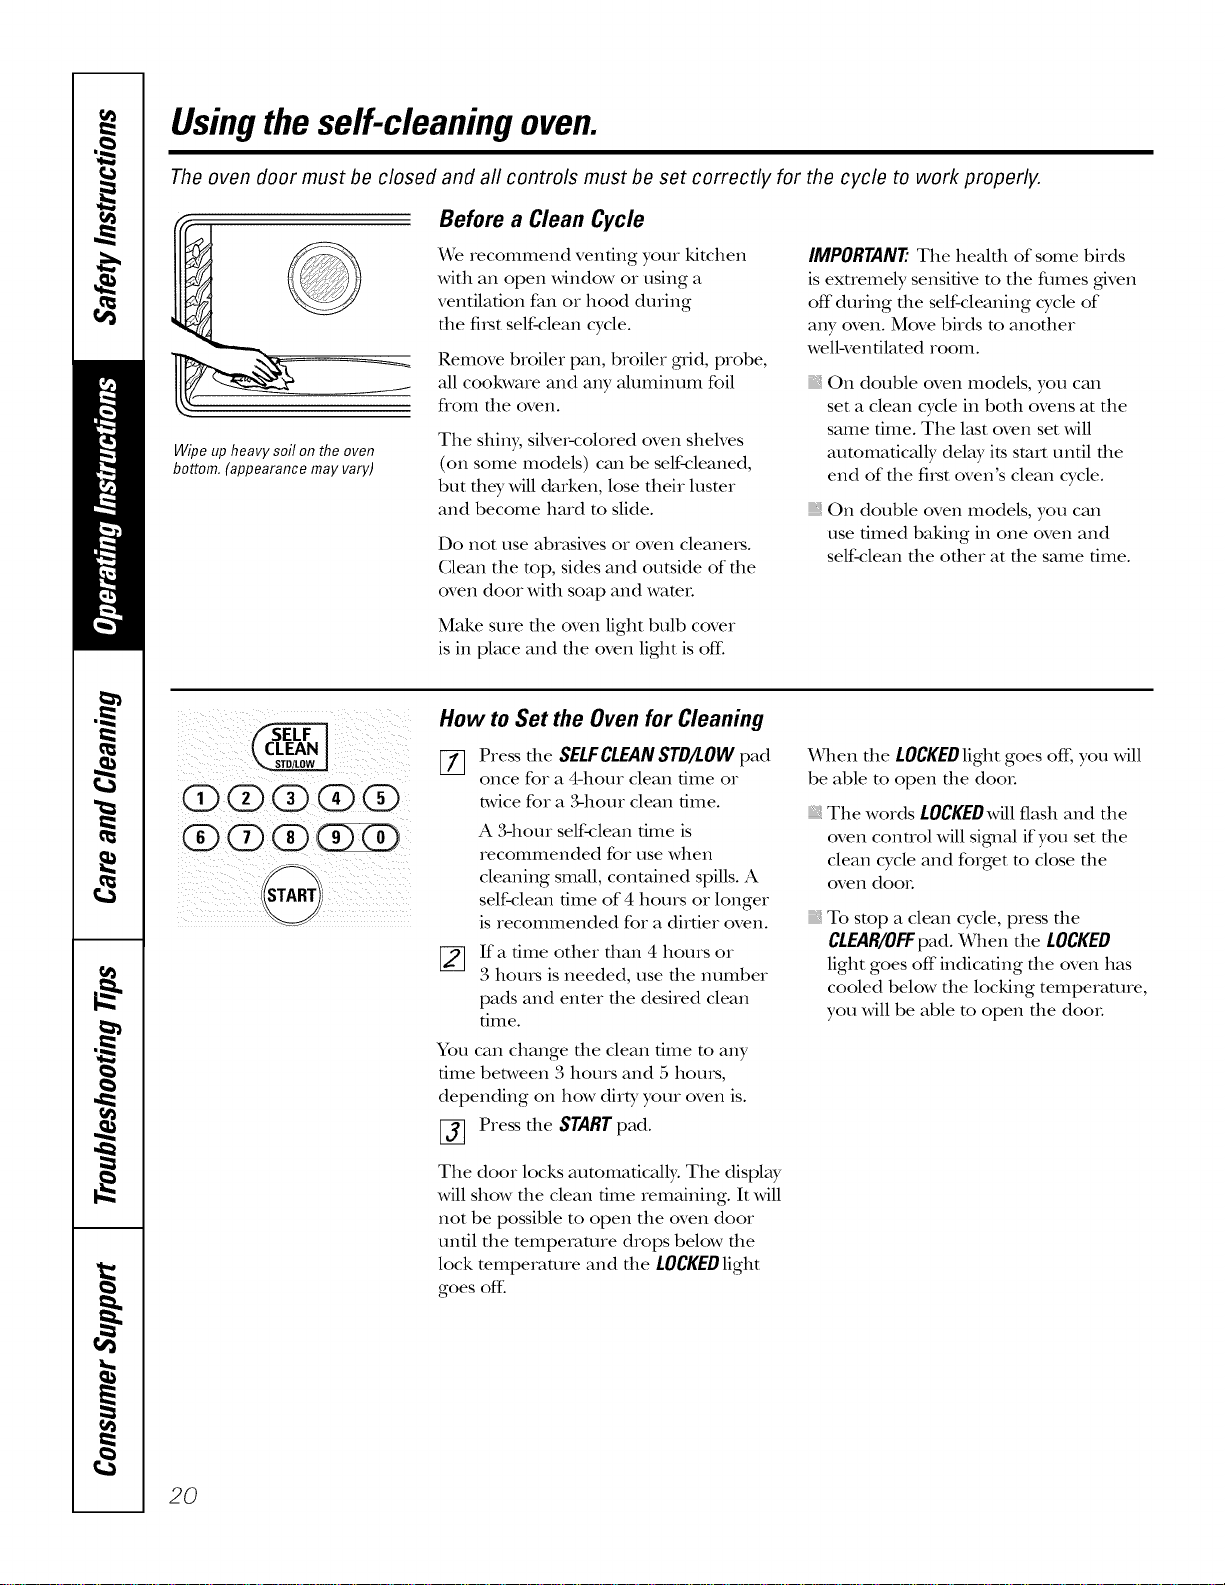
Wipe up heavy soil on the oven
bottom. (appearance may vary)
Before a Clean Cycle
X4rerecommend venting your kitchen
wkb an open window or using a
ventilation fan or hood during
the fi_st self-clean cycle.
Remove broiler pan, broiler grad, probe,
all cookware and any aluminum foil
flom tile oven.
The shiny, siNe>colored oven shelves
(on some models) can be self<:leaned,
but filet Mll darken, lose their luster
and become hard to slide.
Do not use abr_tsives or oven cleaneis.
Clean the top, sides and outside of the
oven door wkb soap and wateL
Make sure the oven light bulb cover
is in place and tile oven light is off:
IMPORTANT'. The healfll of some birds
is exuemely sensitive m the flmles gdven
off during file self-cleaning cycle of
any oven. Move birds to anofller
wellwenfilated room.
On double oven models, you can
set a clean cycle in both ovens at the
same time. The last oven set will
automatically delay its start until tlle
end of the fi_st oven's clean cycle.
On double oven models, you can
use timed baking in one oven and
self-clean the other at the same time.
0(2)0(2)(9
(9 o
"STARTj
How to Set the Oven for Cleaning
[77 Press tile SELFCLEANSTD/LOWpad
once for a 4-hour clean time or
twice for a ,%hour clean time.
A 341our self4:lean time is
recommended for use when
cleaning small, contained spills. A
self-clean time of 4 hours or longer
is recommended for a dirtier oven.
If a time other than 4 hours or
3 horns is needed, use tile number
pads and enter the desired clean
time.
You can change the clean time to any
time between 3 hours and 5 horns,
depending on how dirty your oven is.
_] Press tile STARTpad.
The door locks automatically: The display
Mll show die clean time remaining. It Mll
not be possible to open the oven door
until the temperature drops below die
lock temperature and the LOCKEDlight
goes off:
X_qlen the LOCKEDlight goes off; you will
be able to open the dooL
The words LOCKEDwill flash and the
oven connol will signM if you set die
clean cycle and forget to close die
oven dooL
To stop a clean cycle, press die
CLEAR/OFFpad. When the LOCKED
light goes off'indicating the oven has
cooled below the locking temperature,
you will be able to open tile dooL
2O
ge.com
The oven door must be closed and all controls must be set correctly for the cycle to work properly.
(Z)(Z)O(Z)O
®QQGO
(Z)(Z)O(Z)(Z)
G)Q (Z) G
S-%
fSTART)
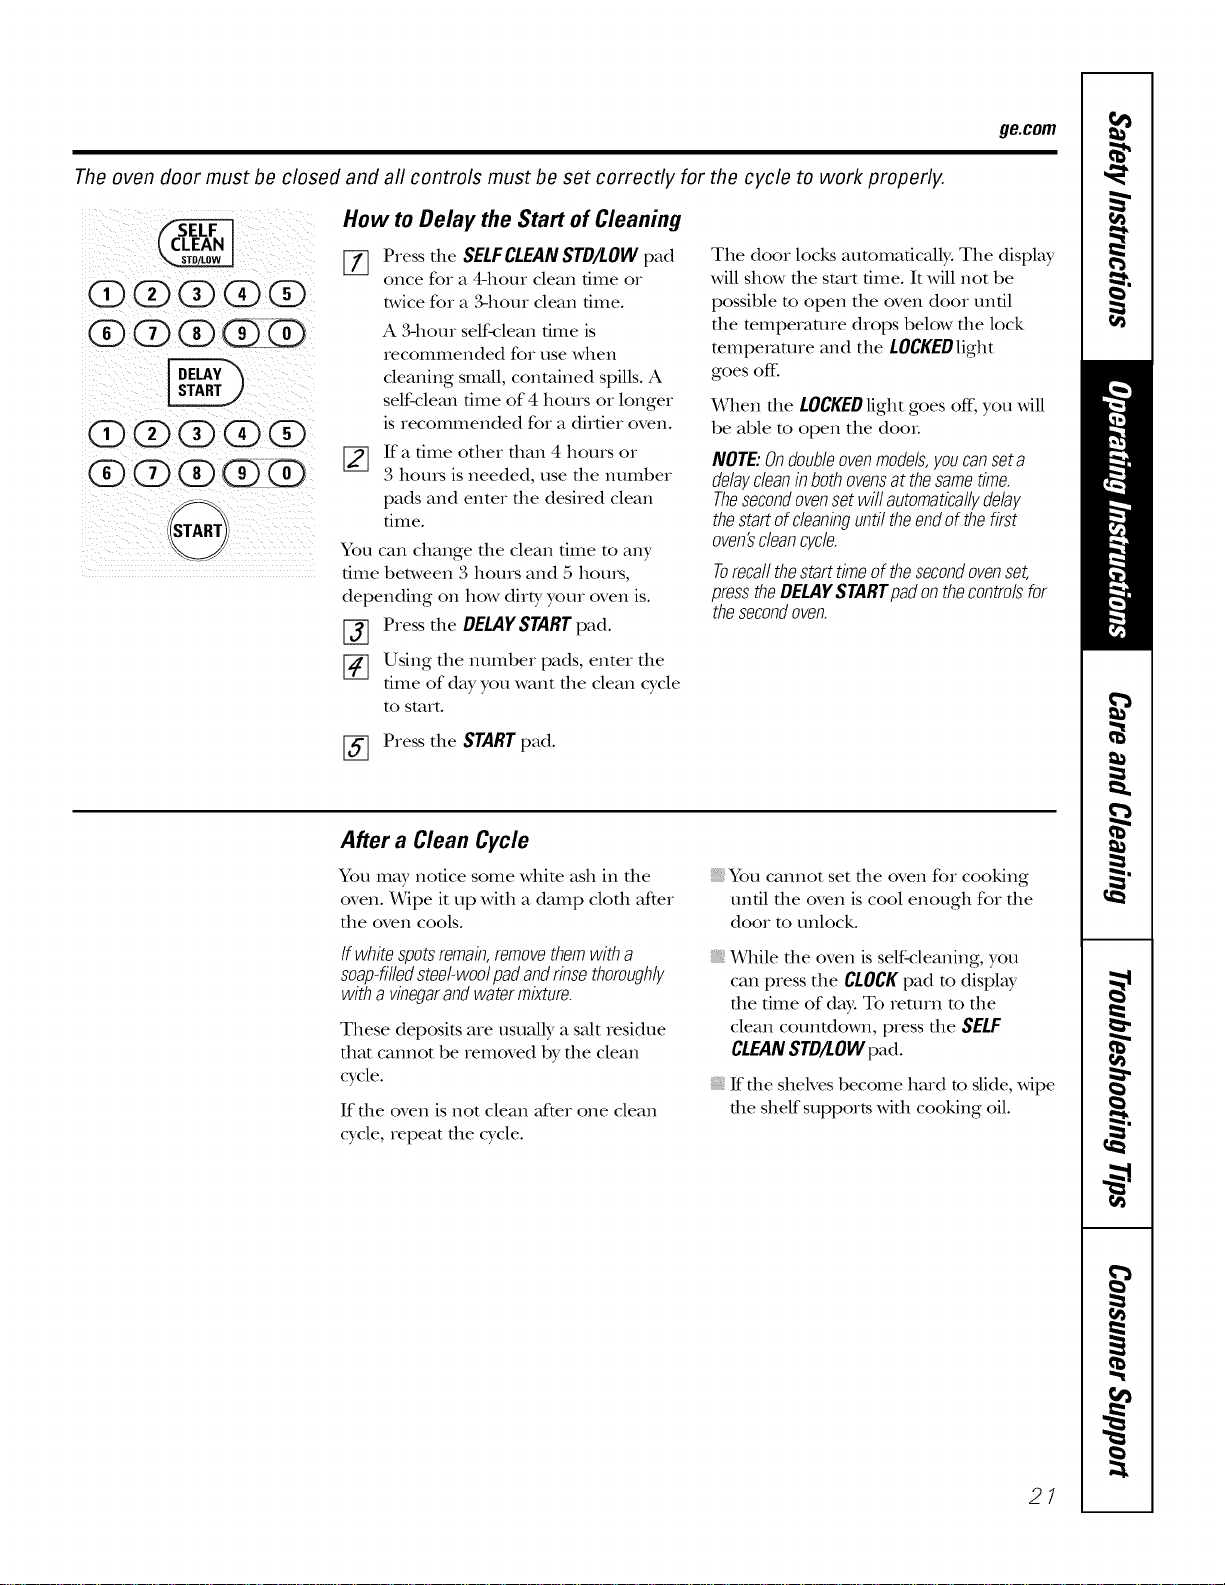
How to Delay the Start of Cleaning
[] Press the SELFCLEANSTD/LOWpad
once fo_ a 4-hour clean time o_
twice fo_ a ,%horn clean 6me.
A 3-hour self-_:lean time is
recommended fo_ use when
cleaning small, contained spills. A
self-clean time of 4 hours oI longer
is recommended fox a dirtie_ oven.
[]
If a time otheI than 4 houIs oi
3 hours is needed, use the numbe_
pads and enter the desired clean
time.
You can change the clean time to any
time between 3 hours and 5 hours,
depending on how dirty you_ oven is.
f-_ Press the DELAYSTARTpad.
[] Using the numbex pads, entei the
time of day you want the clean cycle
to staxt.
The doox locks automatically. The display
will show file stalt time. It will not be
possible m open the oven door until
the mmperamre drops below the lock
mmpexvmlre and the LOCKEDlight
goes off:
When the LOCKEDlight goes off, you will
be able to open the doo_.
NOTE:Ondoubleovenmodels,youcanseta
delaycleaninbothovensat thesametime.
Thesecondovensetwill automaticallydelay
thestartofcleaninguntiltheendofthefirst
oven'scleancycle.
Torecallthestarttimeofthesecondovenset,
presstheDELAYSTARTpadonthecontrolsfor
thesecondoven.
[_ Press the STARTpad.
After a Clean Cycle
You may notice some white ash in the
oven. _qpe it up with a damp cloth after
the oven cools.
If whitespotsremain,removethemwith a
soap-filledsteel-woolpadandrinsethoroughly
witha vinegarandwatermixture.
These deposits are usually a salt _esidue
that cannot be _emoved by the clean
cycle.
If the oven is not clean mCte_one clean
cycle, _epeat the cycle.
You cannot set the oven fo_ cooking
un61 the oven is cool enough fo_ the
doo_ to unlock.
While die oven is self-cleaning, you
can piess the CLOCKpad m display
the time of day. To _etu_n m the
clean counOown, piess the SELF
CLEANSTD/LOWpad.
If the shelves become ha_d to slide, wipe
the shelf suppo,ts with cooking oil.
21
Careand cleaning ofthe oven.
Be sure electrical power is off and all surfaces are cool before cleaning any part of the oven.
How to Remove Protective Shipping Film and Packaging Tape
Gareflflly grasp a corner of the protective
shipping fihn wifll your fingers and slowly
peel it from file appliance surface. Do
not use any shalp items to Feulove file
fihn. Remove all of the film before using
the appliance for the first time.
To assure no damage is done to file
finish of file product, file safest way to
remove the adhesive flom packaging
tape on new appliances is an application
of a household liquid dishwashing
detergent. Apply with a soft cloth and
allow to soak.
NOTE:Theadhesivemustberemovedfromall
parts.It cannotberemovedif itisbakedon.
| i
| i
i
5'
31/2"
Maximum ',
length
i
:Bulb:
i
|
Glass cover
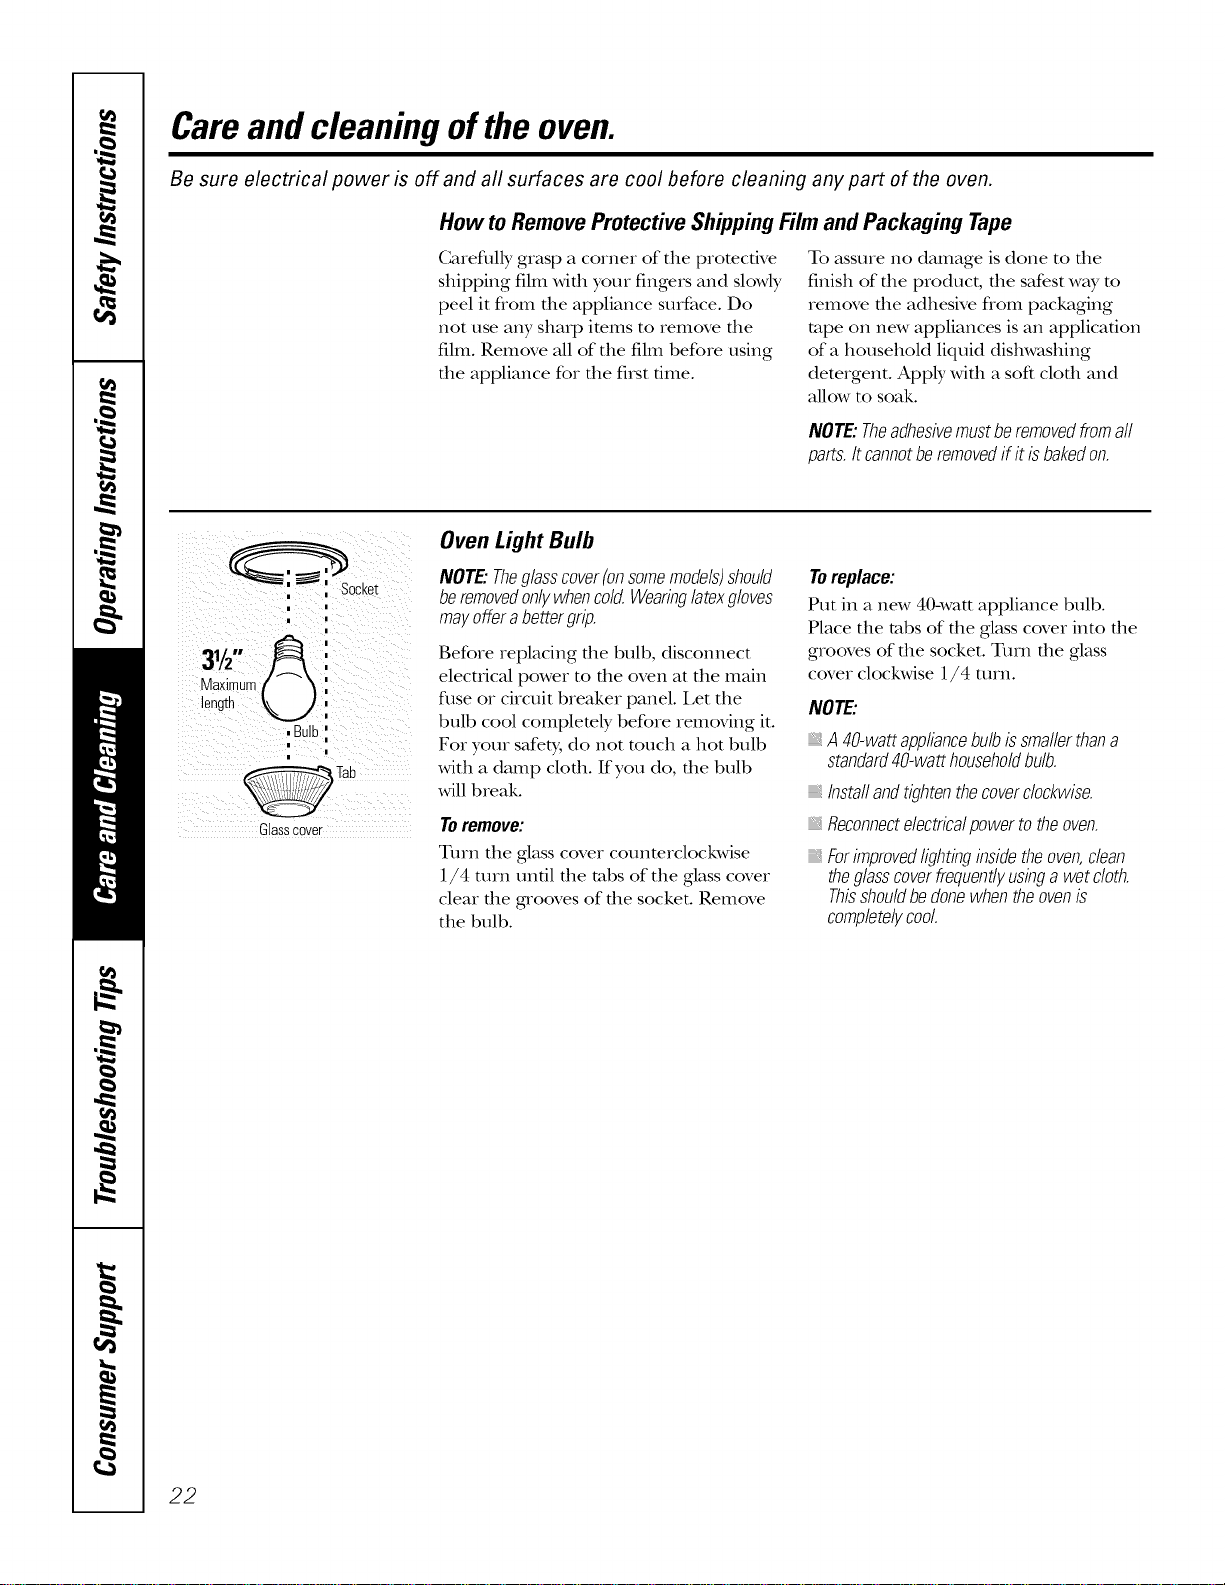
Oven Light Bulb
NOTE."Theglasscover(onsomemodels)should
beremovedon/}/whencold.Wearinglatexgloves
mayofferabettergrip.
Before replacing file bulb, discolmect
elecuical power to file oven at the maill
fuse or circuit breaker panel. I,et the
bulb cool complemly before removing it.
For your safety, do not much a hot bulb
with a damp cloth. If you do, the bulb
will break.
Toremove:
Turn the glass cover counterclockwise
1/4 turn until the tabs of the glass cover
clear the grooves of the socket. Remove
the bulb.
Toreplace:
Put in a new 40-watt appliance bulb.
Place the tabs of the glass cover into the
grooves of the socket. Turn the glass
cover clockwise 1/4 turn.
NOTE:
A40-wattappliancebulbissmallerthana
standard40-watthouseholdbulb.
_Instaflandtightenthecoverclockwise.
Reconnectelectricalpowertotheoven.
Forimprovedlightinginsidetheoven,clean
theglasscoverfrequentlyusinga wetcloth.
Thisshouldbedonewhentheovenis
completelycool.
22

ge.com
Donotrub or cleanthefloorgasket--
it hasanextremelylow resistanceto
abrasion.
If younoticethegasketbecomingworn,
frayedor damagedin any wayor flit has
becomedisplacedonthedoor,youshould
haveitreplaced
Cleaning the Oven Door
Tocleantheinsideofthedoor:
Because the area inside the gasket is
cleaned during the self-clean cycle, you
do not need m clean this by hand.
The area outside the gasket and
the door liner can be cleaned with a
seal>filled or plastic scouring pad,
hot wamr and demtgent. Rinse well
with a vinegar and wamr solution.
Tocleantheoutsideof thedoor:
Use soap and water m flloroughly
clean the rap, sides and flont of the
oven door. Rinse well. You may also
use a glass cleaner m clean the glass
on file outside of die door. Do not let
wamr drip into file vent openings.
If any stain on the door vent uim is
persismnt, use a soft abrasive cleaner
and a sponge-scrubber for best results.
Spillage of marinades, fluitjuices,
tomato sauces and basting mamrials
containing acids m W cause
discoloration and should be wiped
up immediately: When surface is cool,
clean and rinse.
Do not use oven cleaners, cleaning
powders or harsh abrasNes on the
outside of the door.
Lift-Off Oven Door
SI0t
_3
Hinge10ck
Pull hinge locks clownto unlock
Removal position
The door is very heavy. Be careful when
removing and lifting the door.
Donot lift thedoor bythe handle.
Toremovethedoor:
%
[]
%
Fully open tile (loot.
Pull the hinge locks down toward
the (loot flame, to the unlocked
position. A tool, such _ksa small fiat-
blade screwdriver; may be required.
Firmly grasp bed1 sides of tile (loot
at the top.
(;lose door to file door removal
position, which is hMfivay between
the broil stop position and flllly
closed.
[_] I,iff (loot up and out until tile hinge
arm is cleat of the slot.
Toreplace the door:
[_ Firmly grasp bed1 sides of tile door
at the top.
%
Hinge
arm
Hin,
10ck
%
X¥ith the Bottom_11/11 Hin'earm
(loot at the edge_]111_\ I/[
same angle as ofsl0t.
the removal
position, seat the
indentation of
the hinge am1
into the bottom
edge of the hinge slot. The notch in
the hinge am1 [ntlst be flfily seated
into the bottom of the slot.
Fully open tile (loot. If tlle (loot will
not flllly open, the indentation is
not seated correcdy in the bottom
edge of the slot.
Push tlle hinge locks up against tile
flont flame of tile oven cavity, to tile
locked position.
Pushhingelocksuptolock
(;lose the oven (loot:
Press clown and pull out.
Removable Oven Floor
Toremove the oven floor:
%
Remove tlle oven (loot using tlle
instructions in the Lift-Off Oven Door
section.
_] Press down and pull out tile
removable oven fleet.
%
Clean the oven floor with warn1
soap), water.
When reinstalling tile oven fleet; be
sure to slide it all tile way to tile back
of the oven.
IMPORTANT'.Always replace the 23
removable floor before tile next use.
Careand cleaning ofthe oven.
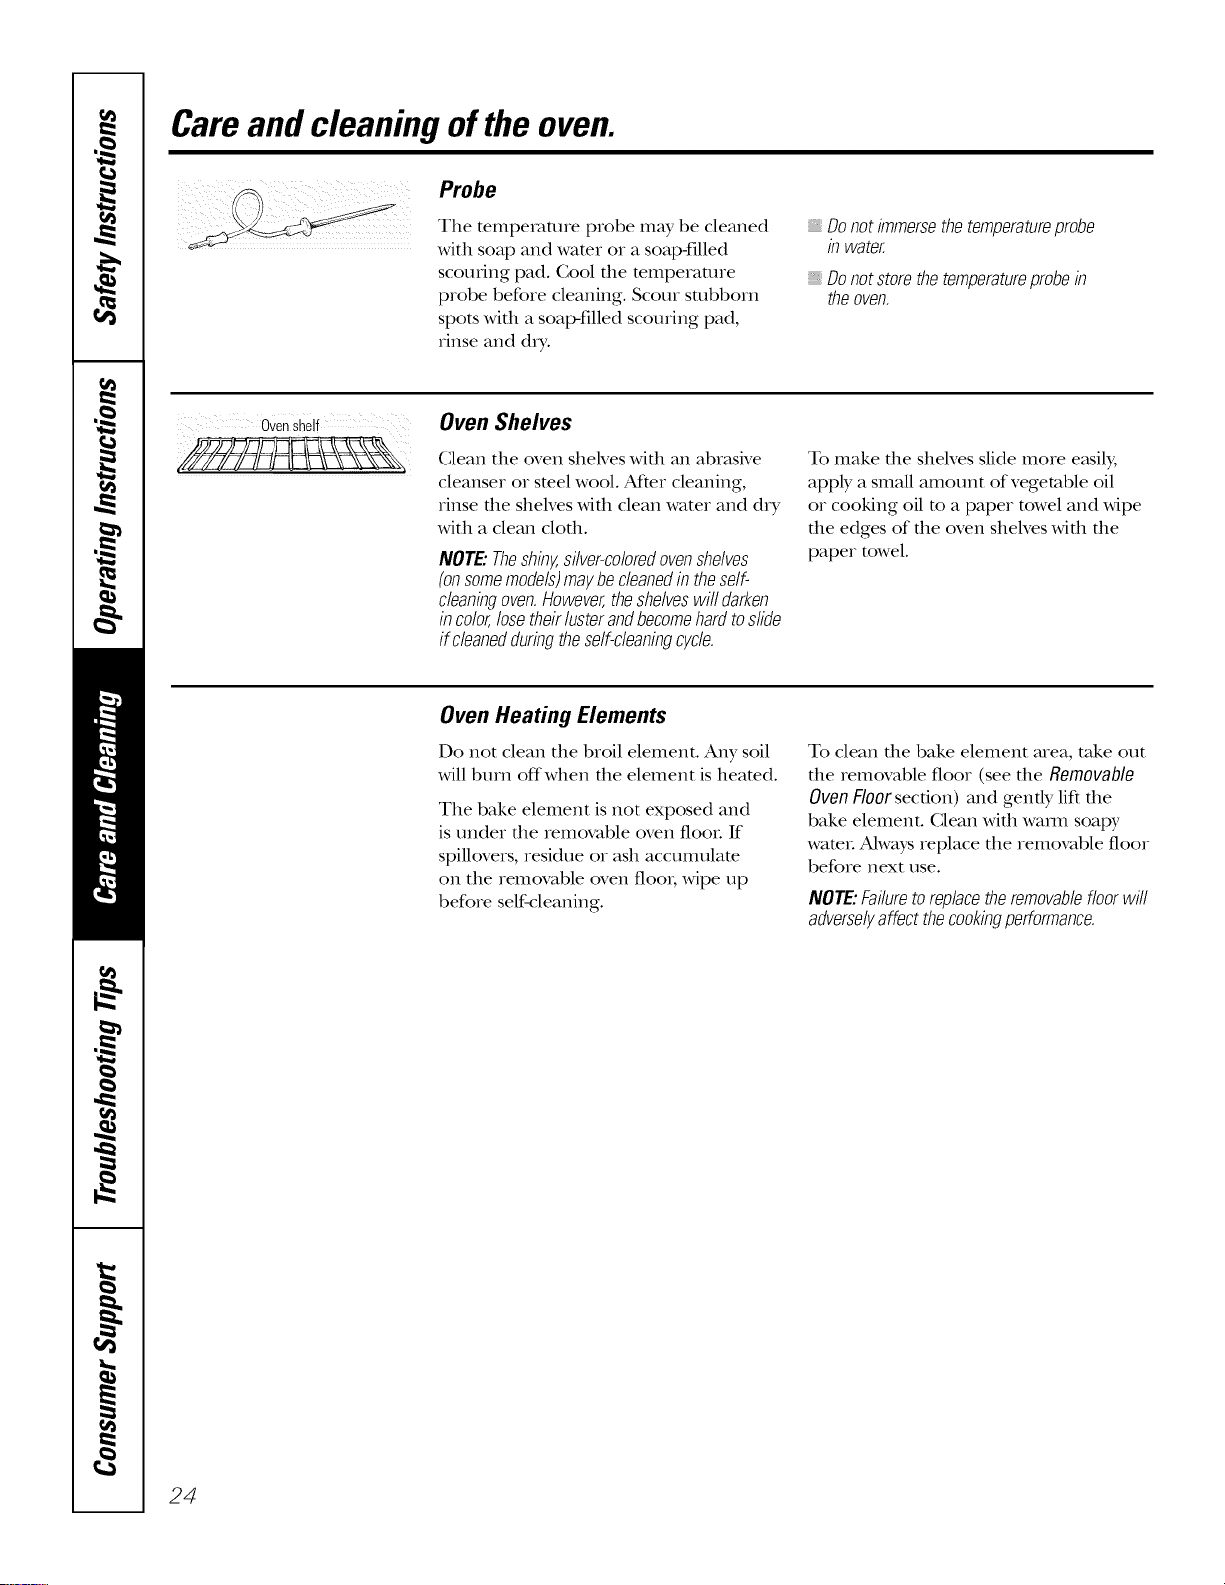
.... Probe
The tempeIatme probe may be cleaned
with soap and water or a soap-filled
scouring pad. Cool the mmperanlre
probe before cleaning. Scour sulbborn
spots with a soap-filled scouring pad,
rinse and d_T.
Donotimmersethetemperatureprobe
in water.
, Donotstorethetemperatureprobein
theoven.
ovenshelf
Oven Shelves
Clean tile oven sheNes Mill an abrasNe
cleanser or steel wool. AfYer cleaning,
rinse file shelves Mill clean water and dry
Mth a clean clofll.
NOTE."Theshiny,silver-coloredovenshelves
(onsomemodels)maybecleanedintheself-
cleaningoven.However,theshelveswifldarken
incolor,losetheirlusterandbecomehardtoslide
if cleanedduringtheself-cleaningcycle.
To make die shelves slide more e_tsil);
apply a smaU amount of vegetable oil
or cooking oil m a paper towel and wipe
tile edges of tile oven shelves with tile
paper towel.
Oven Heating Elements
Do not clean tile broil element. Any soil
will burn offwhen the element is heamd.
Tile bake element is not exposed and
is under file removable oven final If
spillovers, residue or ash accumulate
on tile remc_aP_ole oven floo_; wipe up
before self-cleaning.
To clean die bake element area, take out
the removable floor (see the Removable
Oven Floor section) and gendy lift tile
bake element. Clean with waml soapy
water. Ahvays replace tile removable floor
before next use.
NOTE:Failuretoreplacetheremovablefloorwill
adverselyaffectthecookingperformance.
24

ge.com
Control Panel
It's a good idea to wipe the conuol
panel after each use. Clean Mill mild
soap and water or vinegar and wam_;
rinse with clean water and polish d_y
with a soft cloth.
Do not use abrasive cleanse_, strong
liquid cleansers, plastic scouring pads or
oven cleaners on the control panel--they
will damage the finish. A 50/50 solution
of vinegar and hot water works well.
Stainless Steel Surfaces (onsomemodels)
Donotusea steelwoolpa& # will scratch
thesurface.
To clean die stainless smel surface,
use warm sudsy wamr or a stainless steel
cleaner or polish. Ahvays wipe the surface
in the direction of the groin. Follow the
cleaner insuucdons for cleaning the
stainless smel surface.
To inquire about purchasing stainless
steel appliance cleaner or polish, or m
find the location of a dealer nearest you,
please caU our roll-free number:
NationalPartsCenter
1.800.626.2002
ge.com
25
Before YouCall ForService...
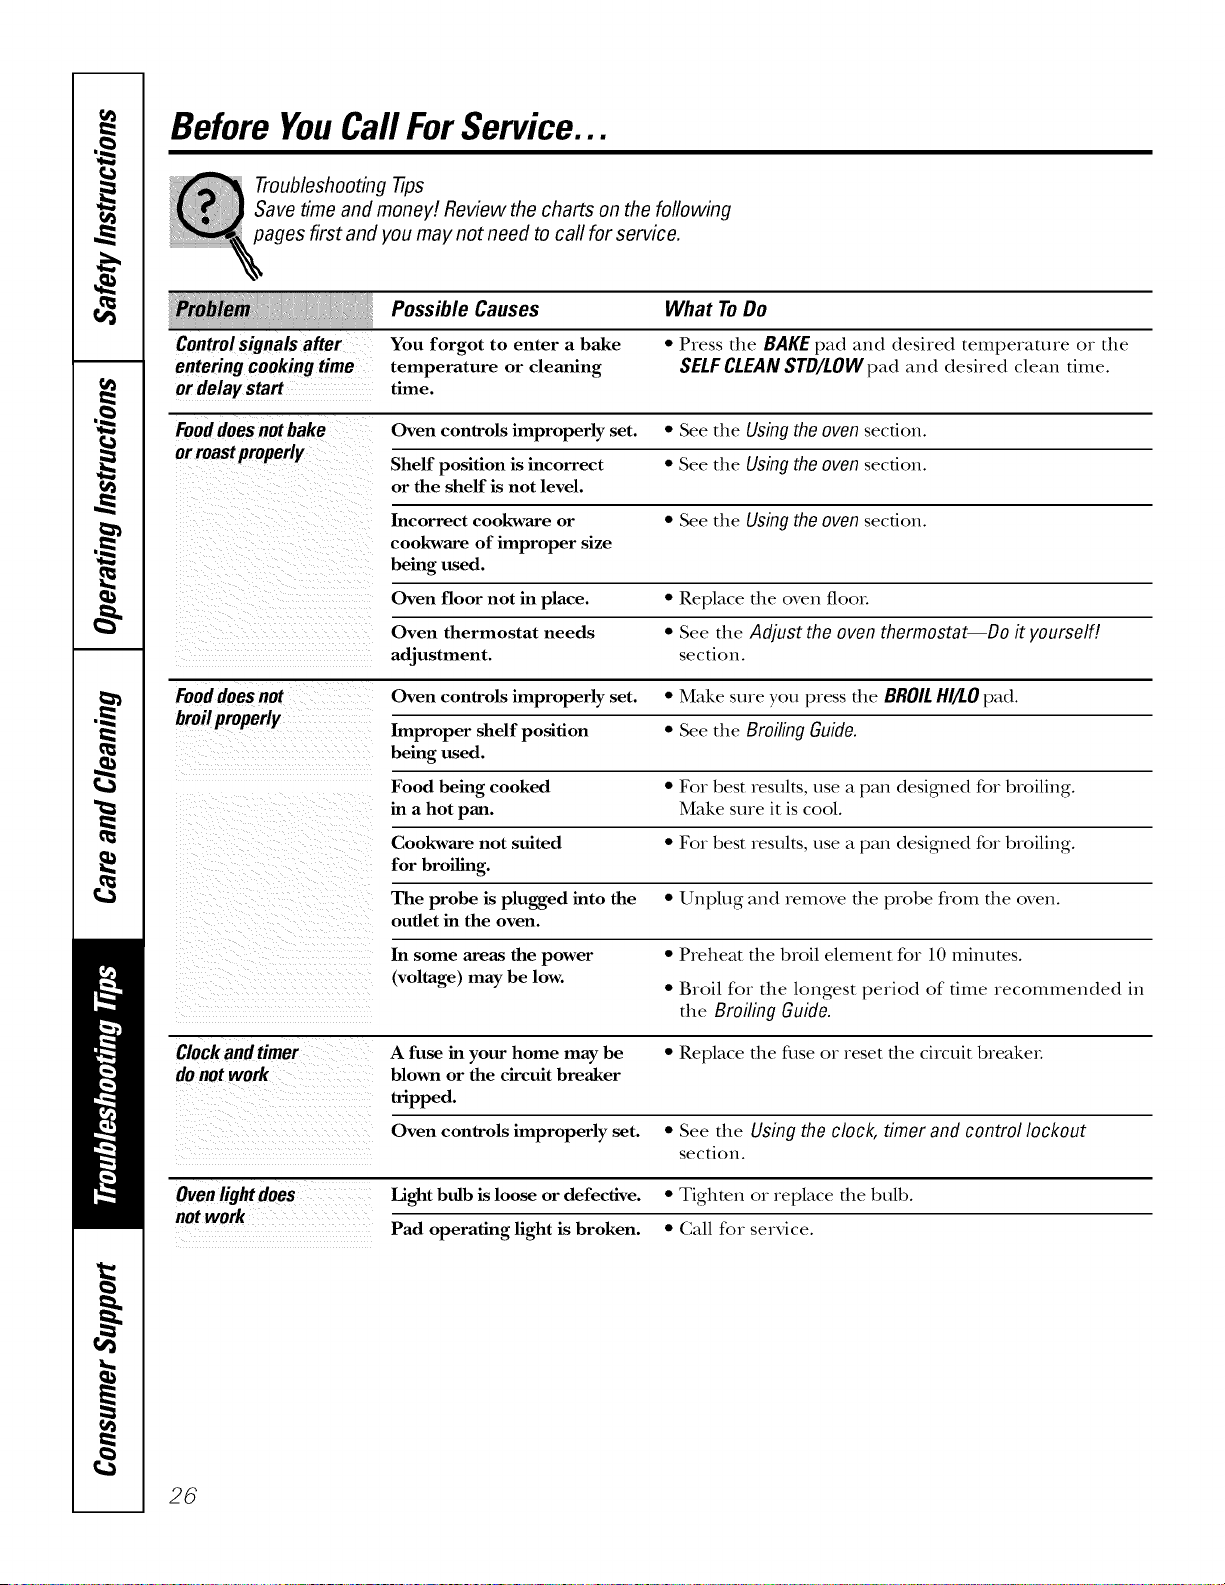
Troubleshooting -tips
Save time and money! Review the charts on the following
pages first and you may not need to call for service.
Controlsignalsafter
enteringcookingtime
or delaystart
Possible Causes
You forgot to enter a bake
temperature or cleaning
time.
What ToDo
* Press the BAKE pad and desired temperature or the
SELFCLEAN STD/LOWpad and desired clean dine.
Fooddoes not bake Oven controls improperly set. • See the Using the oven section.
or roastproperly Shelf position is incorrect • See the Using the oven section.
or the shelf is not level.
Incorrect cool<ware or * See the Using the oven section.
cookware of improper size
being used.
Oven floor not in place. • Replace file oven tool
Oven thermostat needs • See the Adjust the oven thermostat--Do it yourself!
adjustment, section.
Fooddoes not Oven controls improperly set. • Make sure you press the BROILHI/LO pad.
broilproperly Improper shelf position • See the Broiling Guide.
being used.
Food being cooked • For best results, use a pan desi_led for broiling.
in a hot pan. Make sure it is cool.
Cookware not suited • For best results, use a pan desigmed for broiling.
for broiling.
The probe is plugged into the • Unplug and remove the probe flom the oven.
outlet in the oven.
In some areas the power • Preheat the broil element for 10 minutes.
(voltage) may be low.
• Broil for the longest period of time recommended in
the Broiling Guide.
Clock and timer A fuse in your home may be • Replace file fuse or reset file circuit breakeL
donotwork blown or the circuit breaker
tripped.
Oven controls improperly set. • See the Using the clock, timer and control lockout
section.
Oven light does Light bulb is loose or defective. • Tighten or replace the bulb.
not work
Pad operating light is broken. • Call for service.
26

ge.com
Possible Causes What ToDo
Oventemperaturetoo
hotor toocold
Oven thermostat
needs adjustment.
• See the Adjust the oven thermostat--Do it yourself/.
section.
Oven willnot work A fuse in your home may • Replace file fl_se or reset file circuit breakeL
be blown or the circuit
breaker tripped.
Oven controls improperly set. • See the Using the oven section.
Oven will not self-clean The oven temperature • Allow file oven to cool and reset file controls.
is too high to set a
self-clean operation.
Oven controls improperly set. • See the Using the self-cleaning oven section.
The probe is plugged into • Remove the probe flom the oven.
the outlet in the oven.
"Crackling" or This is the sound of the • This is normal.
"popping" sound metal heating and cooling
during both the cooking and
cleaning functions.
Excessive smoking Excessive soil. • Press the CLEAR/OFFpad. Open the windows to rid
during clean cycle the room of smoke. Wait until the LOCKEDlight goes
off\ Wipe up the excess soil and reset the clean cycle.
Oven door will Oven too hot. • Allow the oven to cool below locking temperature.
not open after a
clean cycle
Ovennotclean after a Oven controls not properly set. • See the Using the self-cleaning oven section.
clean cycle Oven was heavily soiled. • Clean up hem T spillovers before starting the clean
cycle. Heavily soiled ovens may need to self-clean
again or for a longer period of time.
"LOCKED"flashes The self-clean cycle has • (;lose the oven dooL
in the display been selected but the
door is not closed.
LOCKEDlight is on The oven door is locked • Press the CLEAR/OFF pad. Allow the oven to cool.
when you want to cook because the temperature
inside the oven has not
dropped below the
locking temperature.
27
Before YouCall ForService...
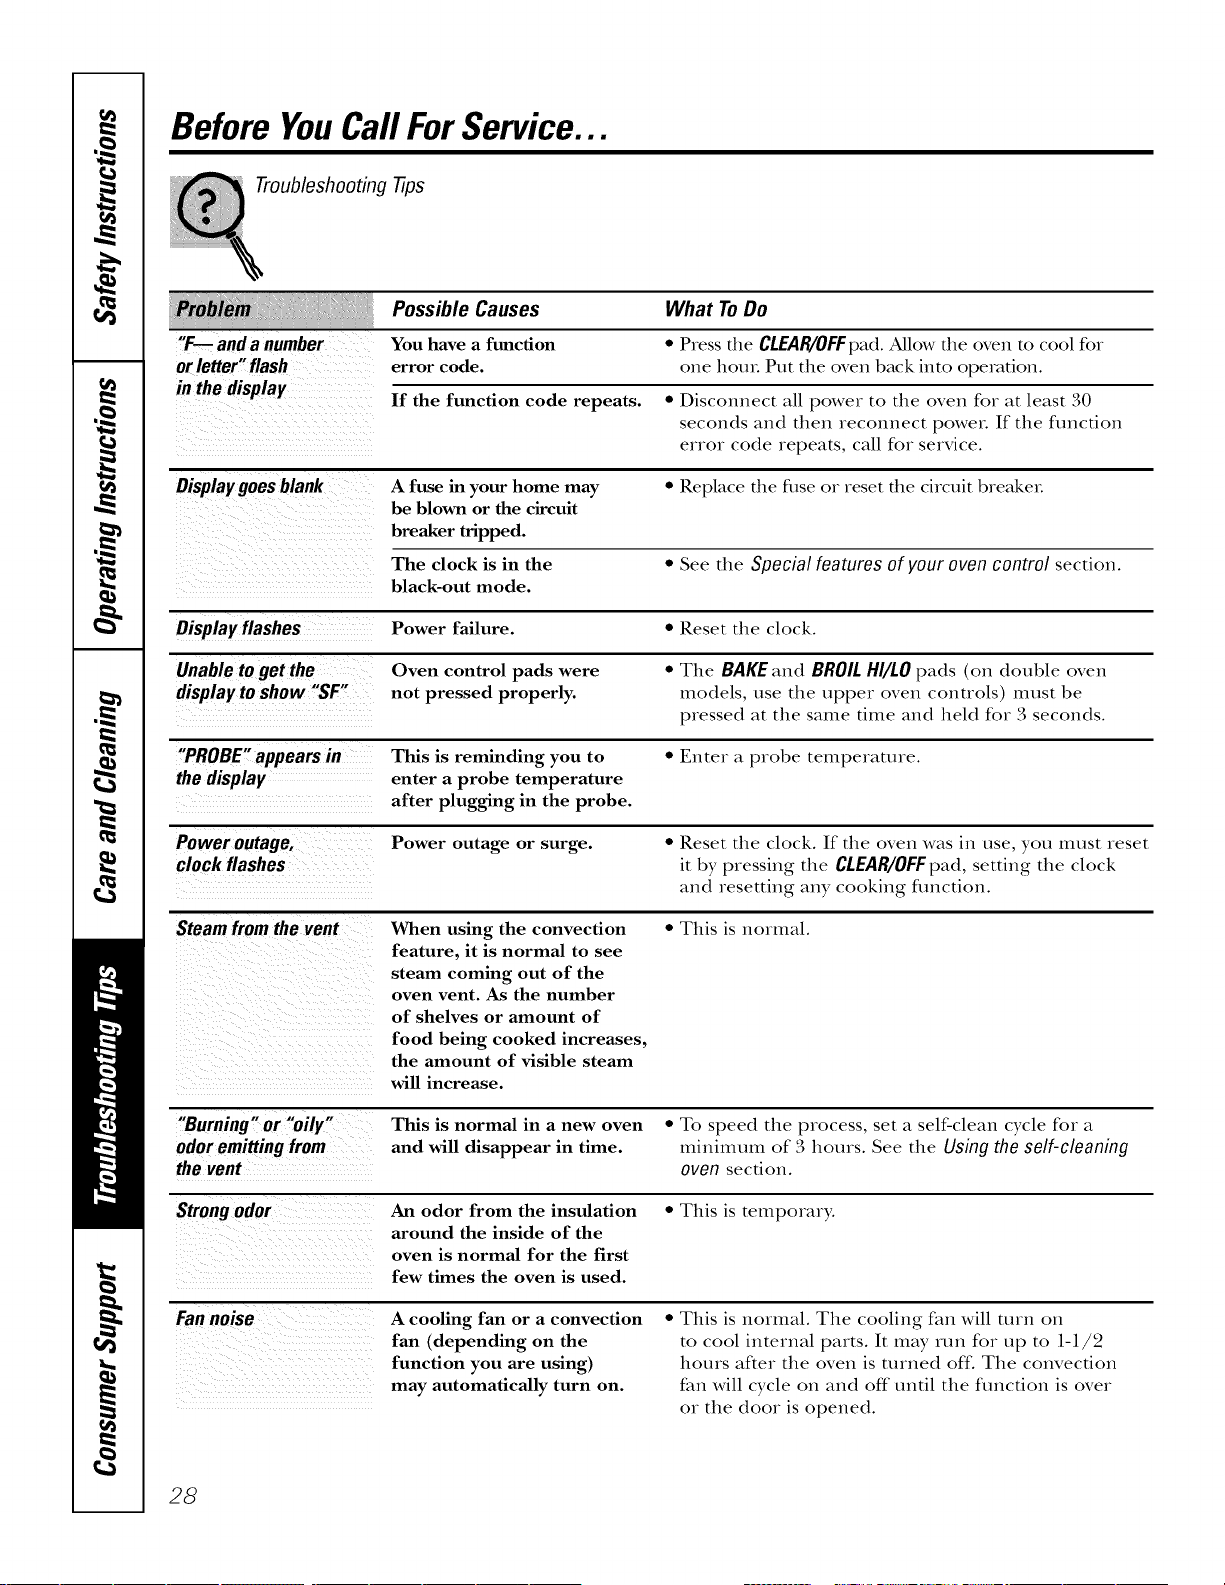
Troubleshooting -tips
iiiii !
"F.-- and a number
or letter" flash
Possible Causes
You have a function
error code.
If the function code repeats. • Disconnect all power to the oven for at least 30
seconds and then reconnect power. If the function
error code repeats, call for service.
Display goes blank A fuse in your home may • Replace the fllse o1 reset the circuit breakeL
be blown or the circuit
breaker tripped.
The clock is in the • See the Special features of your oven control section.
black-out mode.
Display flashes Power failure. • Reset the clock.
Unable to get the Oven control pads were • The BAKE and BROIL HI/LO pads (on double oven
display to show "SF" not pressed properly, models, use the upper oven controls) must be
pressed at the same time and held for 3 seconds.
"PROBE" appears in This is reminding you to • Enter a probe temperature.
the display enter a probe temperature
after plugging in the probe.
Power outage, Power outage or surge. • Reset the clock. If the oven was in use, you must reset
clock flashes it by pressing the CLEAR/OFFpad, setting the clock
and resetting any cooking fimction.
Steam from the vent When using the convection • This is normal.
feature, it is normal to see
steam coming out of the
oven vent. As the number
of shelves or amount of
food being cooked increases,
the amount of visible steam
will increase.
What ToDo
• Press the CLEAB/OFFpad.Allow the oven to cool for
one houL Put the oven back into operation.
"Burning" or "oily"
odoremittingfrom
thevent
This is normal in a new oven • To speed the process, set a self-clean cycle for a
and will disappear in time. mininmm of 3 hours. See the Using the self-cleaning
oven section.
Strongodor
An odor from the insulation
around the inside of the
oven is normal for the first
few times the oven is used.
• This is temporary.
Fannoise
A cooling fan or a convection
fan (depending on the
function you are using)
may automatically turn on.
• This is normal. The cooling fan will mrn on
to cool internal parts. It may run for up to 1-1/2
hours after the oven is turned off: The convection
fan will cycle on and off until the function is over
or the door is opened.
28
GE Service Protection Plus TM
GE, a name recognized worldwide for quality and dependability, offers you
Service Protection Plus'_'--comprehensive protection on all your appliances--
No Matter What Brand!
Benefits Include:
+ Backed by GE
+ All brands covered
+ Unlimited service calls
+ All parts and labor costs included
+ No out-of-pocket expenses
+ No hidden deductibles
+ One 800 number to call
We71 CoverAny Appliance.
Anywhere. Anytime.*
You will be completely satisfied with our service protection or you may request your money back
on the remaining value of your contract. No questions asked. It's that simple.
Protect your refligeratot, dishwasher, washer and dtTer, range, TV, VCR and much more--any brand!
Plus there's no extra charge for emergency service and low monthly financing is available. Even icemaker
coverage and food spoilage protection is offered. You can rest easy; knowing that all your valuable
household products are protected against expensive repairs.
e_.ceyo_._o.fide.ce i. CE..d _.U.s i. the U.S.ton-ftee.t 800.626.2224
if)r more information.
+b\ll brands c(+vcred, up 1(+ 20 years old, in lhe c(mlinenlal U.N.
.......................................... _= =Cut here
Please place in envelope and mail to:
General Electric Company
Warranty Registration Department
P.O. Box 32150
Louis_e, KY 40232-2150
29
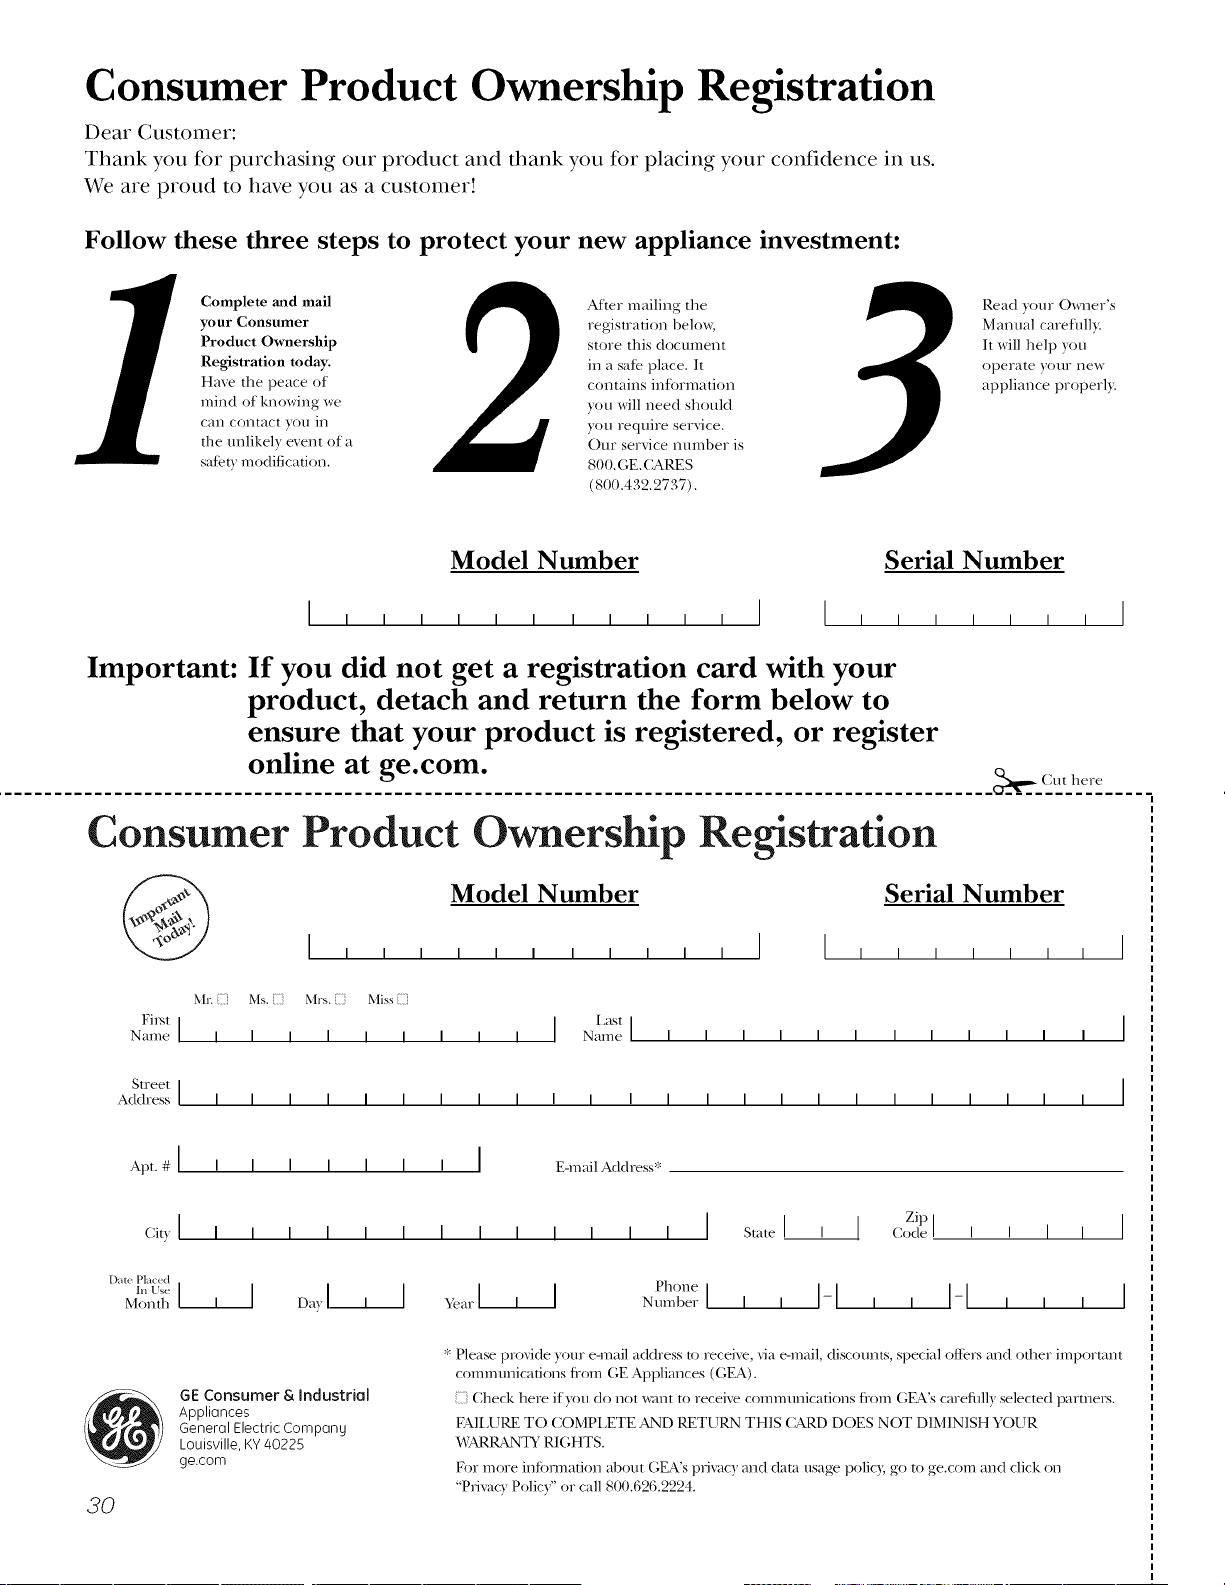
Consumer Product Ownership Registration
Dear Customer:
Thank you for purchasing our product and thank you for placing your confidence in us.
We are proud to have you as a customer!
Follow these three steps to protect your new appliance investment:
Complete and mail
your Consumer
Product Ownership
Registration today.
Have the peace of
mind of knowing we
can contact }Oil ill
the unlikely event of a
satet} modification.
After mailing the
registration belcm,
store this document
in a sate place. It
contains intormation
)ou will need should
)ou require service.
Our service nmnber is
800. (;E. (;ARE S
(800.432.2737).
Read }our ()_aler's
Mamml carefull)
It will help )ou
operate }otlr ilew
appliance properly.
Model Number Serial Number
Important: If you did not get a registration card with your
product, detach and return the form below to
ensure that your product is registered, or register
online at ge.com.
._,,,_ Cut here
Consumer Product Ownership Registration
Model Number
,,,,,,,,,,,I I
Serial Number
I I I I I I
Mr. Ms. ::i! Mrs. Miss ::i!
First I ] I,ast ]
Name I I I I I I I I I Name I I
I I I I I I I I I
, I
Street [
Address I I I I I I I I I I I I I I I I I I I I I I I
ap_.#l, , , , i i , I _-mailac*c._ess*
[)ale Pla(< d
'"_'_1, I Da,I, I ,_arl, I PhoneN.mberlI. I-I.. I-I . .
Mort th
30
GE Consumer & Industrial
Appliances
General Electric Compan U
Louisville, K¥/40225
ge.com
* Please provide your e-mail address to receive, via e-mail, discotmts, special oflel_ and other impormm
corn m tmications fi'om GE Appliances (GEA).
Check here if)'ou do not _mat to receive commtmications fi'om GEA's carefifll) selected partnel_.
FAIIMRE TO COMPI,ETE AND RETURN THIS CARD DOES NOT DIMINISH YOUR
X,tSkRRANTY RIGHTS.
For more inti)rmation about GEA's plivac) and clam usage policy, go to ge.com and click on
"Privac) Polic)" or call 800.626.2224.
GEBuilt-InElectric OvenWarranty.
Aft warranty service provided by our Factory Service Centers, or
an authorized Customer Care®technician. Toschedule service,
on-line, 24 hours a day, visit us at ge.com, or carl 800.GE.CARES
(800.432.2737).Please have serial number and model number
available when calling for service.
Staple your receipt here.
Proof of the original purchase
date is needed to obtain service
under the warranty.
i_ _ _i_ i i
Fromthe dateofth e
originalpurchase
GE Will Replace:
Anypartof die oven which fails due to a defect in materials or workmanship.
During this limited one-yearwarranty,GEwill also provide, freeofcharge,all labor
and in-home se_Mce to replace the defective part.
Service trips to your home to teach you how to
use the product.
Improper installation, delivery or maintenance.
Failure of the product if it is abused, misused,
or used for other than the intended purpose
or used commercially.
Replacement of house fuses or resetting of circuit
breakers.
Damage to the product caused by accident, fire, floods
or acts of God.
Incidental or consequential damage caused by possible
defects with this appliance.
Damage caused after delivery.
Product not accessible to provide required service.
EXCLUSIONOFIMPLIED WARRANTIES--Your sole and exclusive remedy isproduct repa# asprovided in this Limited
Warranty.Any implied warranties, including the implied warranties of merchantability or fitnessfor a particular purpose,
are limited to one year or the shortestperiod allowed by law.
This warranty is extended to the original purchaser and any succeeding owner for products purchased for
home use within the USA. If the product is located in an area where service by a GEAuthorized Servicer is not
available, you may be responsible for a trip charge or you may be required to bring the product to an Authorized GE
Service location for service. InAlaska, the warranty excludes the cost of shipping or service calls to your home.
Some states do not allow the exclusion or limitation of incidental or consequential damages. This warranty
gives you specific legal rights, and you may also have other rights which vary from state to state. Toknow
what your legal rights are, consult your local or state consumer affairs office or your state's Attorney General
Warrantor: GeneralElectric Company.Louisville, KY40225
31
ConsumerSupport.
GEAppliancesWebsite
ge.com
Have a question or need assistance with your appliance? TD, the GE Appliances Website 24 hours a day,
any day of the year! Fox greater convenience and fi,tster service, you can now download (h,vner's Manuals,
order parts or even schedule sex_qceon-line.
ScheduleService
Expert GE repair service is only one step away from your doox. Get on4ine and schedule your service at
your convenience 24 horns any day of the year[ Or c_dl 800.GE.CARES 800.432.2737) during nomml
business hours.
ge.com
RealLifeDesignStudio
ge.com
GE supports the Universal Desigm concept--products, services, and environments that can be used by
people of aU ages, sizes and capabiliues. We recognize the need m design for a wide range of physical and
mental abili0es and impaixments. Fox details of GE's Univexsal Desigm applica0ons, including kitchen
design ideas for people with disabili0es, check out our Website today. Fox the hearing impaired, please call
800.TDD.GEAC (800.833.4322).
ExtendedWarranties
ge.com
Purchase a GE extended warranty and learn about special discounts that are available while your warranty
is still in eff>ct. You can purchase it ondine anytime, or call 800.626.2224 during nomml business horns.
GE Consumer Home Sex_qceswill still be there _ffteryour warranty expires.
PartsandAccessories
ge.com
IndMduals qualified to service their own appliances can have parts or accessories sent directly to their
homes (VISA, MasterCard, and Discover cards are accepted). Order on-line today, 24 hours every day or by
phone at 800.626.2002 during nomml business horns.
Instructionscontainedinthismanualcoverprocedurestobeperformedbyanyuser.Otherservicing generally
shouldbereferredtoqualifiedservicepersonnelCautionmustbeexercised,sinceimproperservicingmaycause
unsafeoperation.
ContactUs
ge.com
If you are not satisfied wifll die service you receive flom GE, contact us on our Website wifll all die derails
including your phone numbex; or wrim m: General Managex; Customer Relations
GE Appliances, Appliance Park
I,ouisville, KY40225
RegisterYourAppliance
Register your new appliance on-line--at your convenience! Timely product registration will allow for
enhanced communica0on and prompt service under the temls of your warranty, should the need arise.
You may also mail in the preprinted registration card included in the packing material.
ge.com
Printed in the United States