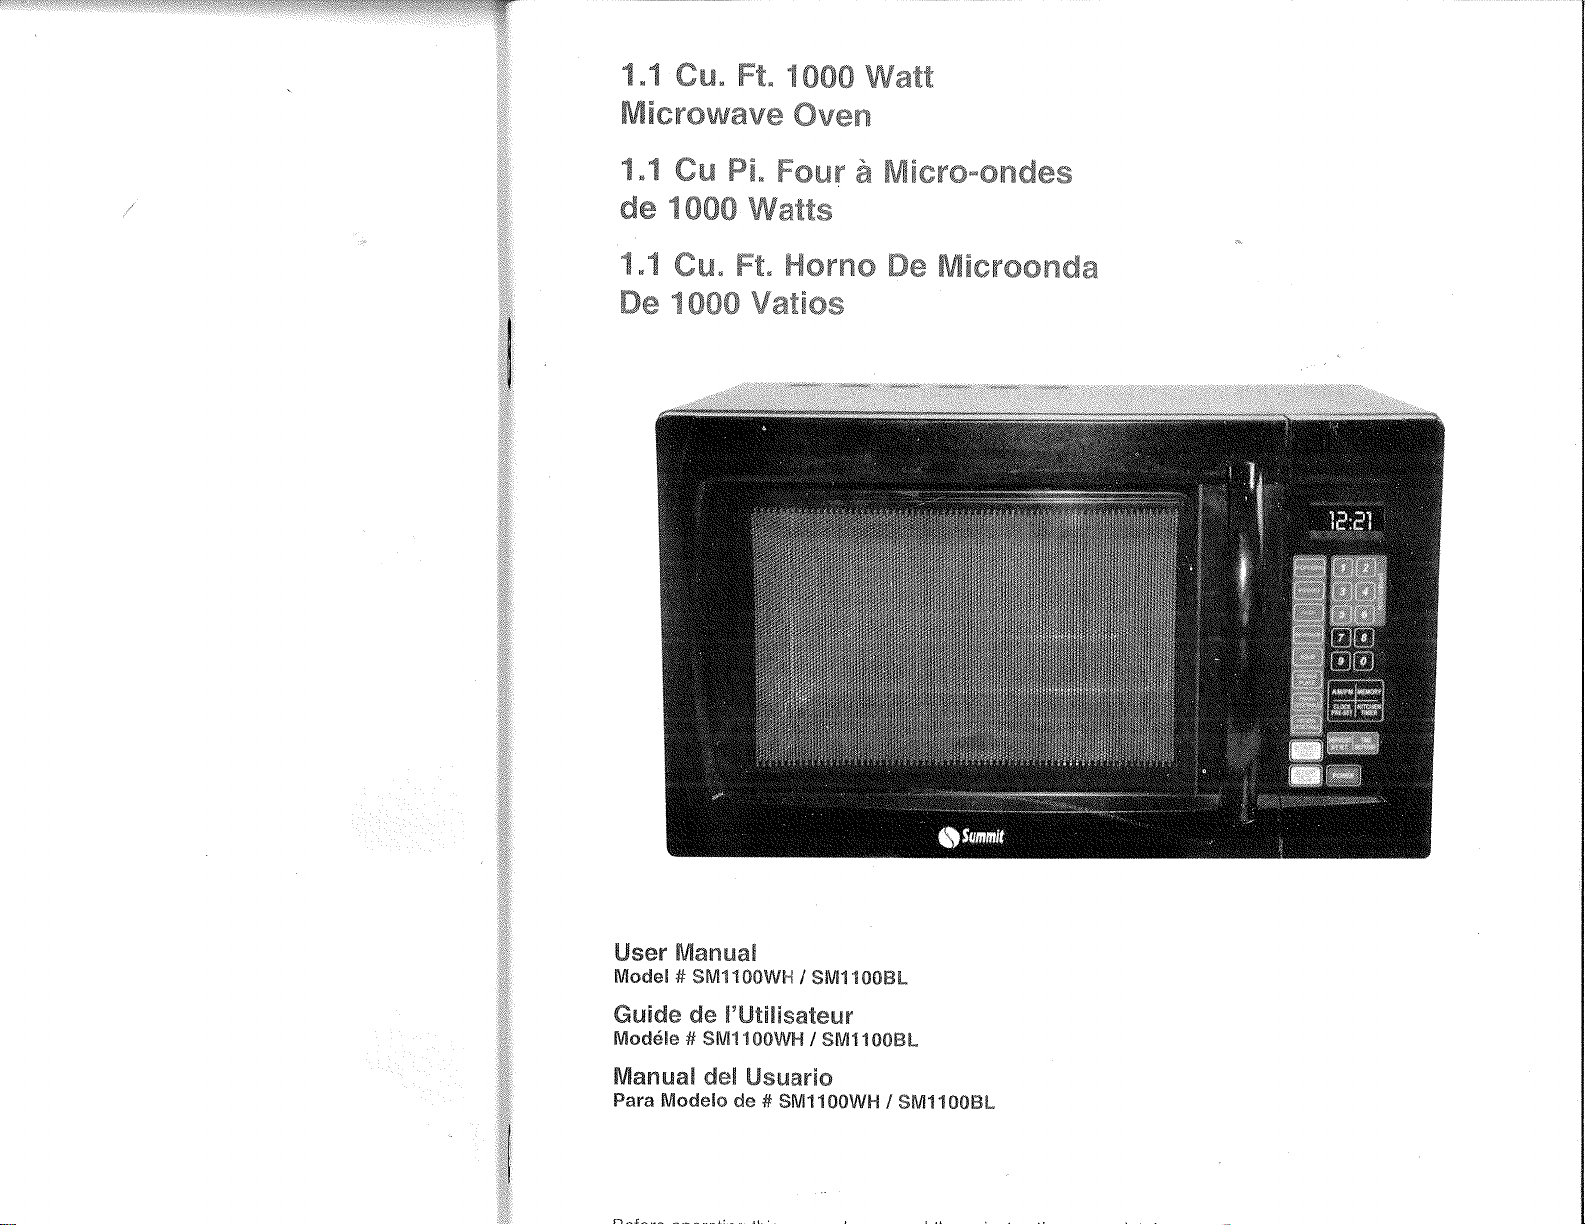
:.rlrç..,:!i',r.,1.i:,rl':r,
,-:.--:-..:.:-:.,,_,.:-:
-
Y
:ìi.
l"$
ffiN.
ffi€.
$ffiffiffi
WmtË
ffWsmræwffiwæ
ffiwæn
$.$
ffim
W&.
ffimu¿r
* WË*ræ-mmdæw
dm ï
ffiffiffi
Wm'åtru
I.l
ffiqx.
ffiË. ffiærrxm
ffiæ
&ffiEmm"mwmdæ
ffiry
"Ê€}ffiffi
Wm€Ëæs
User
Mamuaã
Modeß#
$MnltüW$-{
/
$ru¡110üffi[-
ffi uidc de ñ'Utü[åsatcu¡r
tuTodéte # Sfrfi1 1t{)Wå"{
/ SM11{}0ffi[-
frfia¡rn¡aH del
Llsua¡'tc
Fa¡'a Modelo
de
#
SMtr1ütW!-t/
SM1f
0tffiå_
English
ffieffiffiYw
wffiffiffiffi&Yåffiruffi
PRECAUTIONS
TO AVOID POSSIBLE
EXPOSURE
TO
EXCESSIVE
MICROWAVE
ENERGY
1.
po
not
attempt
to
operate
this oven with the
door open
since
open
door operation can result
in harmful
exposure to microwave
energy, lt is important
not
to defeat
or
tamper
with
the safety
interlocks.
2.
Do
not
place
any object
between the
inside
of the door frame
and
the door
or
allow soil
or cleaner residue
to accumulate
on sealing
sudaces.
3.
Do
not
operate the
oven if it is
damaged. lt
is
particularly
important
that the
oven
door close
properly
and
that
there is
no
damage
to the:
.
Door (bent),
.
Hinges
and latches
(broken
or loosened),
.
Door
seals and sealing
surfaces.
4. The
oven should
not
be adjusted
or repaired
by anyone
except
properly
qualified
service
personnel.
ADDENDUM
lf
the apparatus
is not
maintained in
a
good
state of
cleanliness, its
surface
could be degraded
and
affect the lifespan
of
the apparatus
and lead
to a
dangerous
situation.
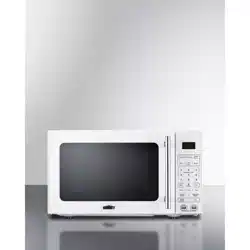
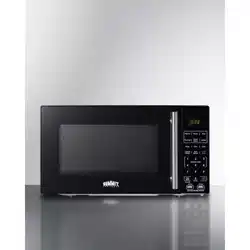
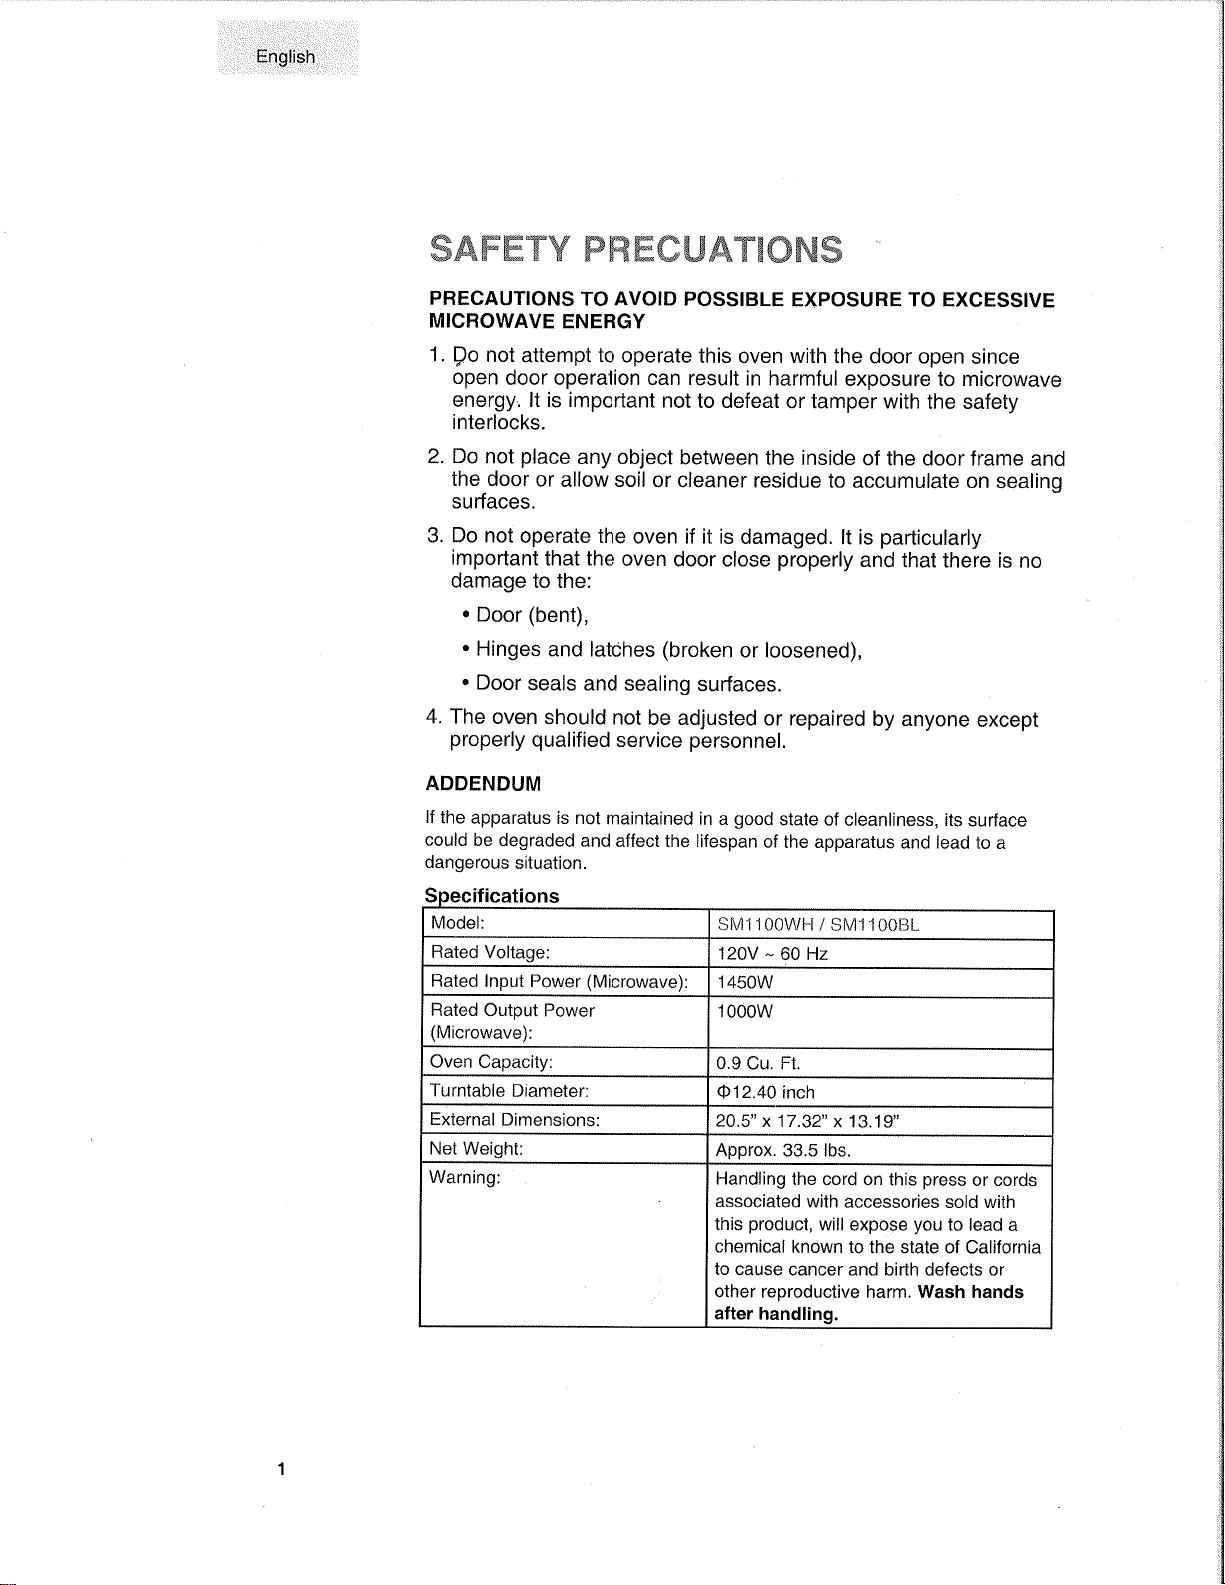
cations
Model:
sM1100wH
/ sM1'1008t
Rated
Voltage:
120V
-
60 Hz
Rated
lnput Power
(Microwave):
1450W
Rated
Output
Power
(Microwave):
1000w
Oven
Capacity:
0.9
Cu, Ft.
Turntable
Diameter:
O12.40 inch
External
Dimensions:
20.5"
x 17.32"
x 13.19"
Net Weight;
Approx.
33.5 lbs.
Warning:
Handling
the cord on
this
press
or cords
associated
with accessories
sold with
this
product,
will
expose
you
to lead
a
chemicaf known
to the
state of California
to cause
cancer and birth defects or
other
reproductive
harm. Wash hands
after
handling.
r€il*î{ffi
TryT
English
Tmhtæ üf
ffimmtænts
page
PRECAUTIONS
TO AVOID
POSSIBLE
EXPOSURE
TO EXCESSIVE MICROWAVE
ENERGY..................
,.....^........,..^1
SPEC|F|CAT|ONS.............
...................1
TMPORTANT SAFETY
INSTRUCTIONS
................
...........^.,..... 3-4
ADDTTTONAL SAFETY
T1PS..,..........
........^......,........5
GROUNDTNG
TNSTRUCTIONS................
................6
UTENSILS
GUIDE
......7'v
Materials
you
can use
in microwave
oven
..............8
Materials to
be
avoided
in microwave
oven.............
..........,.........9
SETTTNG UP
YOUR OVEN..........
.........,.....^......9-10
Names of Oven Parts and
Accessories
..................9
Turntable lnstallation
......,..,..............10
Countertop
lnstallation....
..................10
lnstallation....
................10
oPERATION
........,.. 11-19
Control
Panel and Features
.......^.....11
Operating
lnstructions
................12-19
CLEANING
AND
CARE
.....................20
TROUBLESHOOTING
.......................21
WARRANTY
..................22
I
:
I
a
Å,
,{
{
q
,:à
{
,,i
:l

English
ff HW
pffi
ffiT&äWY
ffiÅffi
ffirY
Ëffi
ffirffi
Eiffi-flËffi
trdffi
When
using electrical appliances,
basic
safety
precautions'should
be
followed,
including
the following:
WARNING
-
To reduce the
risk of burns,
electric
shock, fire, injury
to
persons
or exposure
to excessive
microwave
energy:
1. Read all instructions
before using the appliance.
2.
Read and follow
the
specific
"PRECAUTIONS
TO AVOID POSSIBLE
EXPOSURE TO EXCESSIVE
MICROWAVE ENERGY''
on
page
1.
3.
This
appliance must be
grounded
and connected only to
properly
grounded
outlet. See
"GROUNDING
INSTRUCTIONS"
on
page
6.
4. lnstall
or
locate this
appliance only
in
accordance
with
the
provided
installation instruction on
page
10.
5. Some
products
such as whole eggs and sealed containers
--
for
example, closed
glass
jars,
may explode and should
not
be
heated
in
this oven.
6.
Use this appliance
only
for
its intended use as described
in
this
manual.
Do
not use corrosive chemicals or vapors in this
appliance.
This type
of oven
is
specifically designed to heat, cook, or dry food.
It is not
designed
for industrial
or laboratory use.
7, As with
any appliance,
close
supervision
is necessary
when used by
children.
8.
To reduce the risk of fire in the oven cavity:
a. Do
not
overcook
food.
Carefully attend appliance
when
paper,
plastic,
or other combustible materials are
placed
inside the oven
lo
facilitate
cooking.
b. Remove wire twist-ties from
paper
or
plastic
bags before
placing
bag in oven.
c.
lf
materials
inside
the oven
ignite, keep
oven door closed,
turn oven off, and disconnect the
power
cord or shut off
power
at the fuse or circuit breaker
panel.
d. Do not use the cavity for storage
purposes.
Do not leave
paper
products,
cooking utensils, or food
in the
cavity
when not in
use.
9. Liquids, such as water, coffee, or tea, are able to be overheated
beyond
the boiling
point
without appearing
to
be boiling due
to
surface tension
of the
liquid. Visible bubbling or boiling
when the
container is removed from
the
microwave oven is not always
present.
THIS
COULD
RESULT
IN VERY HOT LIQUIDS SUDDENLY
BOILING
OVER
WHËN
A
SPOON OR OTHER UTENSIL
IS
INSERTED INTO
THE
LIQUID.
To
reduce the risk
of injury to
person:
a. Do not overheat
the
liquid.
b. Stir the
liquid
both before and
halfway
through heating
it.
c. Do not use
straight-sided
containers with
narrow necks.
d. After heating, allow
the
container
to stand in
the
microwave
oven
for a short
time before
removing
the container.
e. Use extreme care
when
inserting
a spoon or other utensil
into
the container.
ffi
l.
ËngliÈl
10. Do not
deep
fry
food
in
the microwave.
lt
is difficult
!o
controlthe
fat which
could
cause
a
fire hazard.
1
'l
. Pierce
foods
with
heavy
skins such as
potatoes,
whole squash,
apples
and
chestnuts
before
cooking.
12.
The
contents
of
feeding
bottles
and baby
jars
should
be stirred
or
shaken
and
the
tempeiature
should
be checked
before
serving
in
order
to
avoid
burns.
13.
cooking
utensils
may
become
hot because of
heat
transferred
from
the
hea'ted
food.
Potholders
may be
needed to handle
the
utensil'
14.
Do not
cover
or block
any openings
on the
appliance.
15.
Do not store
or use
this
appliance
outdoors.
Do not use this
product
near
water,
for
example,
nea(
a kitchen
sink,
in a
wet
basement,
near
a swimming
pool,
or similar
locations'
'16.
Do
not operate
this appliance
if it
has a damaged
cord
or
a
plug'
if
it is
not
rúorking
properly,
or
if it has been
damaged
or dropped.
17.
Do
not immerse
cord
or
plug
in water.
Keep cord
away
f rom
heated
surface.
Do not
lel cord
hang over
edge
of table
or
counter'
18. Use
only
thermometers
that are specifically
designed
for use
in
microwave
ovens.
19. Be
certain
the
glass
tray
and roller
rings are
in
place
when
you
operate
the oven.
20.
When cleaning
surfaces
where the
door
and
the oven
meet,
use
only
mild, nonàbrasive
soaps,
or detergents
applied
with a
sponge
or soft'cloth.
21. This
appliance
should
be serviced
only by
qualified
service
personnel.
Conlact
nearest
authorized
service
facility
for
examination,
repair, or
adjustment.
SAVE
THESE
INSTRUCT¡ONS
Thank
you
for using
our
Summit
!!lg-9s\yl!"'
product.
This easy-to-use
manual
will
guide you
in
getting
the best use
of -ser¡al
Number
your
mrcrowave.
Remember
to record
the
model
and serial
number.
They
are on
a
label in
back
of
the microwave.
Staple
your
receipt
to
your
manual.
You will need
it to obtain
warranty service.
Date
of Purchase
Engltsf'
Adc*stümmmfr
SæfætV
Tõñ*
1.
2.
3.
4.
5.
6.
7.
8.
9.
The
oven
must
be
on
a
leveled
surface
The
turntable
and
turntable
roller
rest
must
be in
the oven
during
cooking.
place
the
cookware
gently
on
the
turntable
and
handle
it
carefully
to avoid
possible
breakage.
lncorrect
use
of
browning
dish
may
cause
the
turntable
to break,
Use
only
the
specified
bag
size
when
using
Direct
Access
Popcorn'
Theovenhasseveralbuilt-insafetyswitchestoensurethatthepower
remains
off
when
the door
is
open.
Do
not
tamper
with
these
switches'
Do not
operate
the
microwave
oven
empty.
Operating
the
oven
with
no
food
or food
that
is
extremely
low
in moisture
can
cause
fire,
charring
or
sparking.
Do not
cook
bacon
directly
on
the
turntable.
Excessive
local
heating
of
the
turntable
may cause
the
turntable
to break.
Dotlotheatbabybottlesorbabyfoodinthemicrowaveoven'Uneven
heating
may
occur
and
could
cause
physical injury'
Do not
heat
narrow-necked
containers,
such
as
syrup
bottles'
10. Do
not
attempt
to deep{ry
in
your
microwave
oven'
11.
Do
not attempt
home
canning
in
this
microwave
oven,
as
it
is impossible
to
besureallcontentsofthejarhavereachedboilingtemperature.
12. Do
not
use
this
microwave
oven
for commercial
purpose'
This
microwave
oven
is
made
for
household
use
only.
13.
To
prevent delayed
eruptive
boiling
of
hot
liquids
and
beverages
or
scalding
yourself, stir
liqúid
before
placing the container
in
the
oven
and
again
ñalruay
through
cooking
time.
Let
stand
in the
oven
for a
short
time
and stir
again
before
removing
the
container.
14.
use
carefully
when
cooking
food
in
the
microwave
oven
to
avoid
burning
due
to excessive
cooking.
15. when
the appliance
is operated
in the
combination
mode,
children
should
only
use
the oven
under
adult
supervision
due
to the
temperatures
generated.
16. Failure
to
maintain
the oven
in a
clean
condition
could
lead
to deterioration
that
could
adversely
atfect
the
life
of
the appliance
and
possibly result
in
a
hazardous
situation'
Engl.ish
ffi
nrur.¡ne$ü
mç
ü mstmf;
ümtnmm
DANGER:
Electric Shock
Hazard:
Touching
some of
the internal
components
can cause
serious
personal
injury
or death.
Do
not disassemble
this appliance.
WARNING: Electric Shock Hazard: lmproper use of the
grounding
can
result
in
electric shock. Do
not
plug
into an outlet until
appliance is
properly
installed
and
grounded.
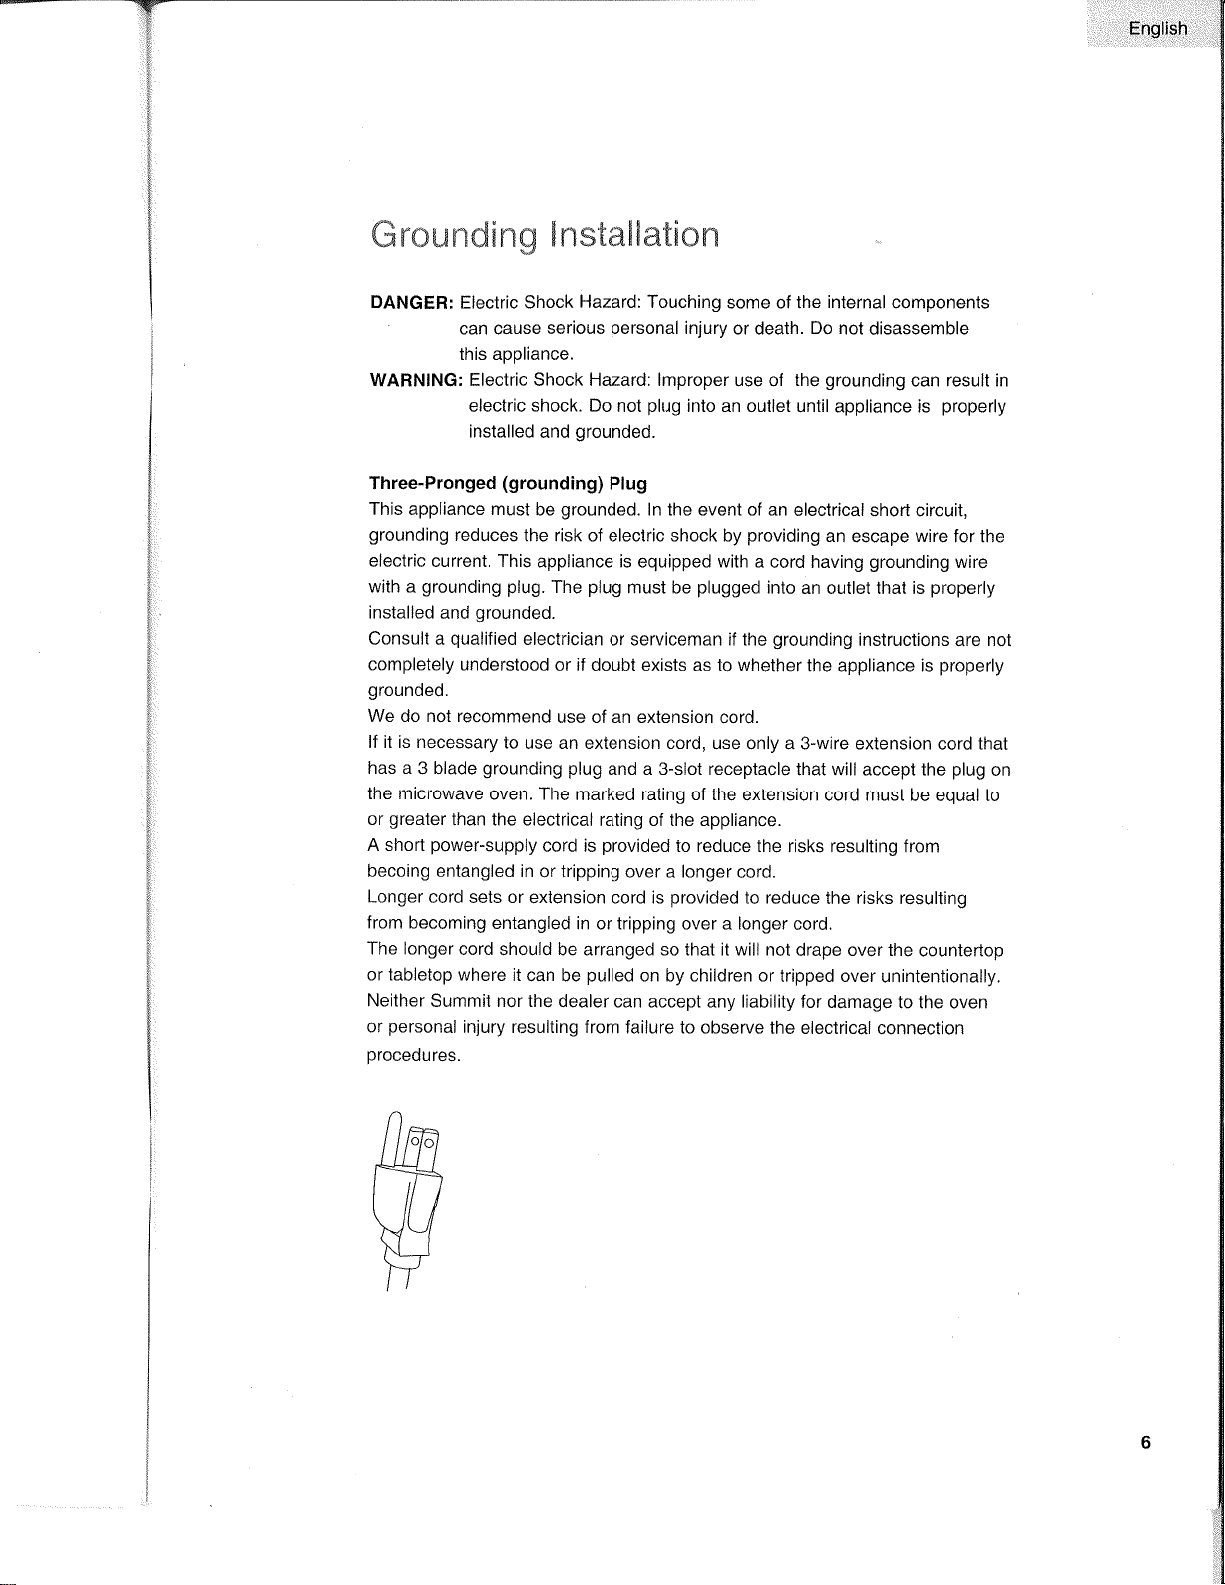
Three-Pronged
(grounding)
Plug
This
appliance must
be
grounded.
ln the event of an
electrical short
circuit,
grounding
reduces
the
risk
of eleclric shock by
providing
an escape wire for
the
electric
current. This
appliance is equipped with a cord
having
grounding
wire
with a
grounding
plug.
The
plug
must be
plugged
into
an outlet that is
properly
installed
and
grounded.
Consult a
qualified
elect¡'ician
or serviceman if the
grounding
instructions
are nol
completely
understood or if
doubt exists as to whether
the appliance is
properly
grounded.
We do not recommend
use of an extension cord.
lf it is necessary
to
use an extension cord, use only a
3-wire extension cord that
has a 3 blade
grounding
plug
and a 3-slot receptacle that will
accept the
plug
on
the microwave
oven. The
marked rating of the extension
cord must be equal
to
or
greater
than
the electrical
rating of the appliance.
A short
power-supply
cord
is
provided
to reduce the
risks
resulting
from
becoing entangled
in or tripping
over a longer cord.
Longer cord
sets or extension
cord is
provided
to reduce
the
risks
resulting
from becoming
entangled in
or tripping over a longer
cord,
The longer
cord should
be arranged so that it will not
drape over the
countertop
or tabletop where
it can
be
pulled
on by children or tripped
over
unintentionally,
Neither
Summit nor the dealer
can accept any liability
for damage to
the oven
or
personal
injury resulting from
failure to observe the
electrical connection
procedures.
Ënglish
L-itemm[[s
Lìupdæ
CAUTIoN:
Personal
lnjury
Hazard:
Tightly-closed
utensils
could
explode.
Closedcontainersshouldbeopenedandplasticpouchesshouldbepierced
before
cooking.
see the
instructions
on
"Materials
you
can
use
in microwave
oven
or to
be
avoided
in microwave
oven."
There
may
be
certain
non-metallic
utensils
that are
not
safe
to
use
for
microwaving.
lf
in doubt,
you
can
test
the
utensil
in
question
following
the
Procedure
below.
Utensil
Test:
1.
Fill a
microwave-safe
container
with 1
cup
of cold
water
(250m1) along
with
the
utensil
in
question.
2. Cook
on
maximum
power
for
1
minute.
3.
Carefully
feel
the
utensil.
lf
the empty
utensil
is
warm'
do
not
use
it for
microwave
cooking.
4. Do
not
exceed
1 minute
cooking
time'
Ensliçh
Materials
you
can use
in microwave
oven
Utensils
Remarks
Aluminum
foil
Browning
dish
Dinnerware
Glass
jars
Glassware
Oven
cooking bags
Paper
plates
and cups
Paper
towels
Parchment
paper
Plastic
Plastic
wrap
Thermometers
Wax
paper
Shielding
only.
Small smooth
pieces
can be
used
to cover thin
parts
of meat
or
poultry
to
prevent
overcooking.
Arcing can occur
if foil is too close
to
oven
walls. The
foil
should
be at
least 1 inch
(2.5cm)
away
from oven
walls.
Follow manufacturer's
instructions. The bottom
of
browning
dish must
be
at
least
3/'l
6
inch
(5mm)
above the
turntable.
lncorrect
usage may cause
the
turntable
to break.
Microwave-safe
only. Follow
manufacturer's
instructions.
Do
not use cracked
or chipped dishes.
Always
remove
lid.
Use
only to
heat food
until
just
warm.
Most
glass
jars
are
not heat resistant
and
may break.
Heat-resistant
oven
glassware
only.
Make
sure there
is
no metallic
trim. Do not
use cracked
or chipped
dishes.
Follow
manufacturer's
instructions.
Do not
close
with
metal tie, Make
slits to allow
steam
to escape.
Use
for shorl-term
cooking/warming
only.
Do
not
leave
oven unattended
while cooking.
Use
to cover
food for reheating
and
absorbing
fat. Use
with supervision
for a short{erm
cooking
only.
Use
as a cover
to
prevent
splattering
or a
wrap for steaming.
Microwave-safe
only. Follow
the manufacturer's
instructions. Should
be
labeled
"Microwave
Safe". Some
plastic
containers
soften, as
the food inside
gets
hot.
"Boiling
bags" and
tightly closed
plastic
bags
should
be
slit,
pierced
or
vented as directed
by
package.
Microwave-safe only. Use
to cover
food during
cooking
to
retain moisture.
Do not allow
plastic
wrap
to touch food.
Microwave-safe only
(meat
and
candy thermometers).
Use as
a cover to
prevent
splattering
and
retain moisture.
English
Materials to be avoided in microwave
oven
May cause arcing. Transfer food into microwave-safe dish.
May cause arcing. Transfer food into microwave-safe dish.
Metal shields the food from microwave energy.
Metal
trim may cause arcing.
May cause arcing and could cause a fire in the oven.
May
cause a fire in the oven,
Plastic
foam may melt or contaminate the liquid inside
when
exposed
to
high temperature.
Wood
will dry out
when used in the microwave oven and
may
split
or crack,
Utensils Remarks
Aluminum
tray
Food
carlon with
metal handle
Metal or metal-
rimmed utensils
Metal twist ties
Paper bags
Plaslic foam
Wood
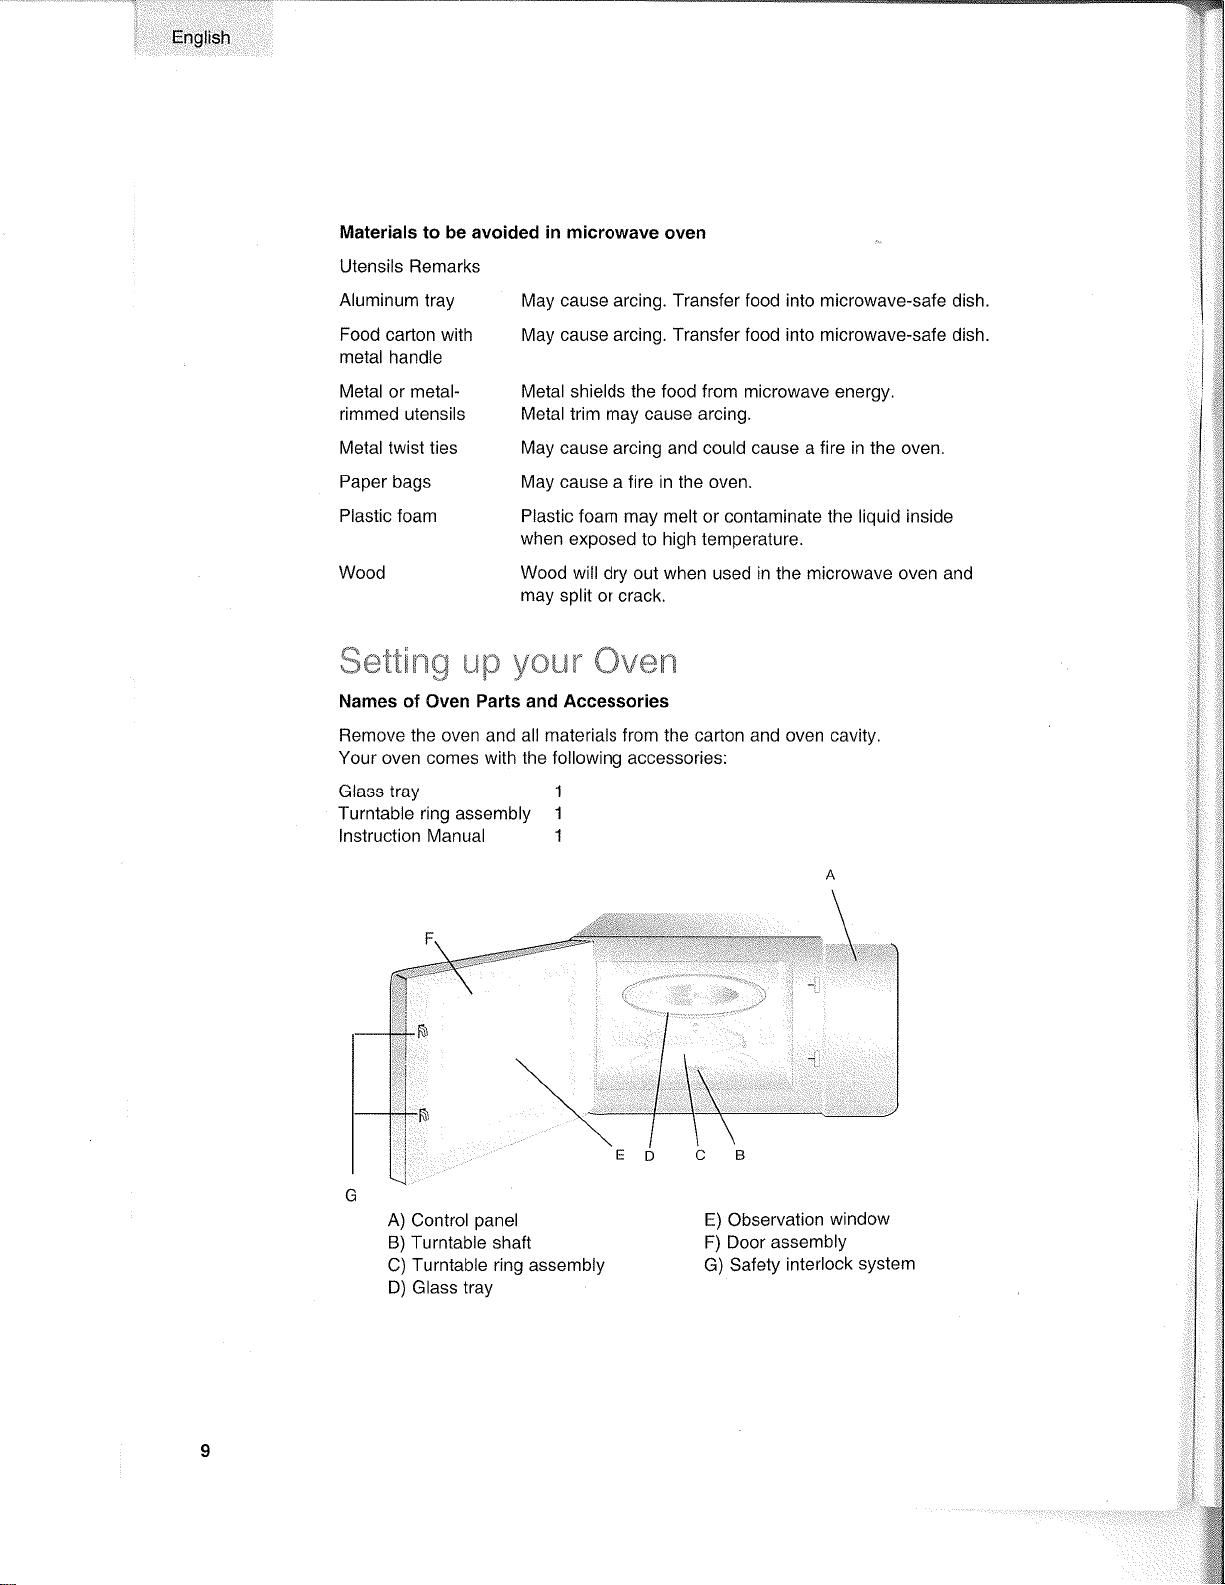
Names
of
Oven
Parts and Accessories
Remove the oven and all materials from the carton and oven cavity
Your oven comes with the following accessor¡es:
Glass tray 1
Turntable
ring
assembly
1
lnstruction Manual 1
ffi*ttürxü
åJF3
yffiL*n"
ffiv*n
A)
Control
panel
B) Turntable shaft
C)
Turntable ring assembly
D) Glass tray
\
E) Observation
window
F) Door
assembly
G)
Safety
interlock
system

-_Y'fl
'ë
.,
FnsriÈli:
Turntable
lnstallation
a. Never
place
the
glass
tray upside
down.
Hub
(underside)
The
glass
tray should
never be restricted.
\
-..\
"-
b.
Both
glass tray and turntable
ring assembly
ctassrray
-(.
)
;-)
must
always be used
during
cooking.
'-\-'-li'-'"q
I
c. All
food
and
containers of
food are always
I
placed
on the
glass
tray
for cooking.
Turnrabte shaft
-
I
d.
lf
glass tray or turntable
ring
assembly
cracks
or
breaks, contact
your
nearest authorized
service
center.
Gountertop
Installation
Remove all
packing
material and accessories.
Examine the
oven
for
any
damage such as dents
or broken
door. Do
not install if oven
is damaged.
Cabinet:
Remove any
protective
film found on the
microwave oven
cabinet
surJace.
Do not
remove the
light brown
Mica cover that
is
attached
to the
oven
cavity
to
protect
the magnetron.
lnstallation
1. Select a
level surface
that
provides
enough open
space
for the intake and/or
outlet
vents.
A
minimum clearance of
3.0 inches
(7.5cm)
is required belween
the oven
and
any adjacent
walls. One
side must be open.
(1)
Leave a minimum
clearance
of
't
2 inches
(30cm)
above the oven.
(2)
Do not
remove the legs
from the bottom
of
the oven.
(3)
Blocking the
intake and/or
outlet openings can damage
the oven.
(4)
Place the oven as
far away from
radios
and
TV as
possible.
Operation
of microwave
oven may cause interference to
your
radio or
TV
reception.
2.
Plug
your
oven
into a standard household outlet.
Be sure the
voltage and the
frequency is the
same
as the voltage
and
the frequency on
the rating label.
WARNING:
Do not
install oven over a range cooktop or other
heat-producing
appliance.
lf installed near or over a heat source,.the
oven could
be
damaged and
the
warranty
would be
void.
Iurntable
ring assembly
10
E¡glish
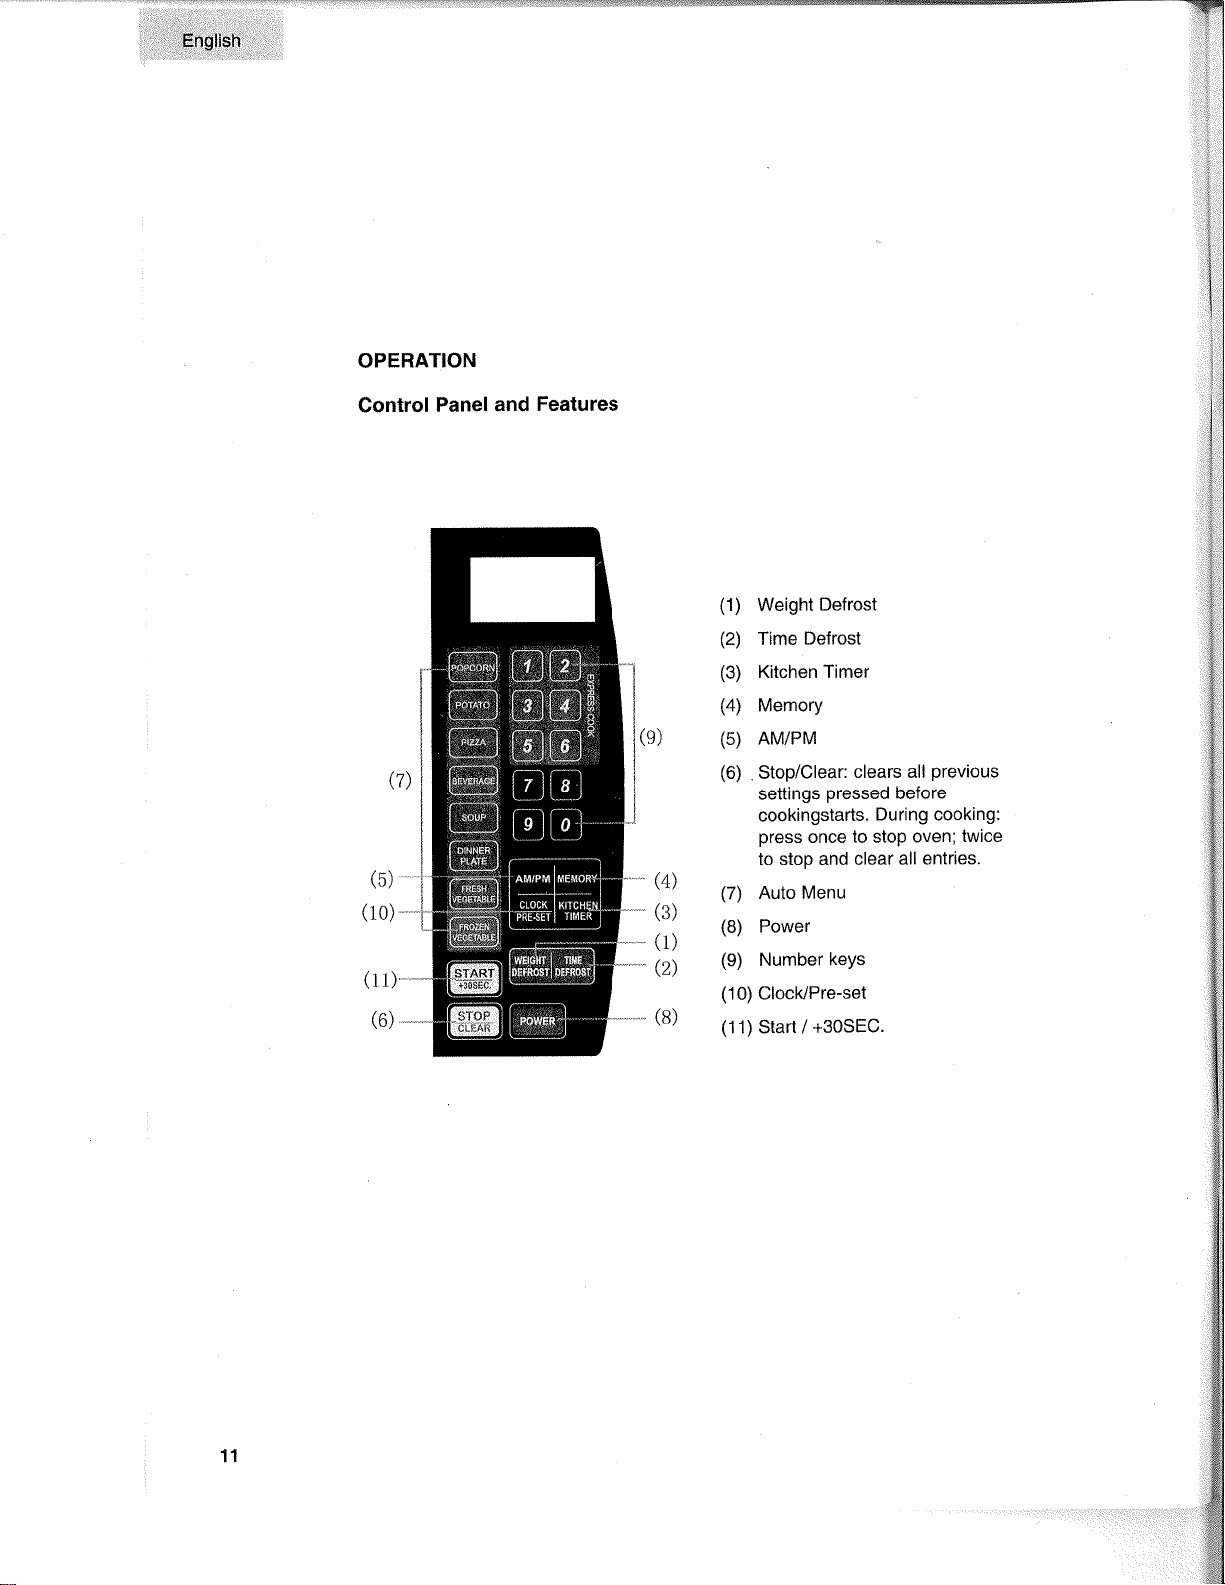
OPERATION
Control
Panel and
Features
(5)'
(10)
-
(4)
(3)
-
(1)
-Q)
(1)
Weight
Defrost
(2)
Time
Defrost
(3)
Kitchen Timer
(4)
Memory
(5)
AM/PM
(6)
Stop/Clear:
clears all
previous
settings
pressed
before
cookingstarts.
During cooking:
press
once
to stop oven;
twice
to stop and
clear all entries.
(7)
Auto Menu
(8)
Power
(9)
Number
keys
(10)
Clock/Pre-set
(1
1) Start /
+30SEC.
(l1)*
(6)
---
11
ïw
'::::
EngliÈh
üB:ær.ætrcm
1.
POWER
LEVEL
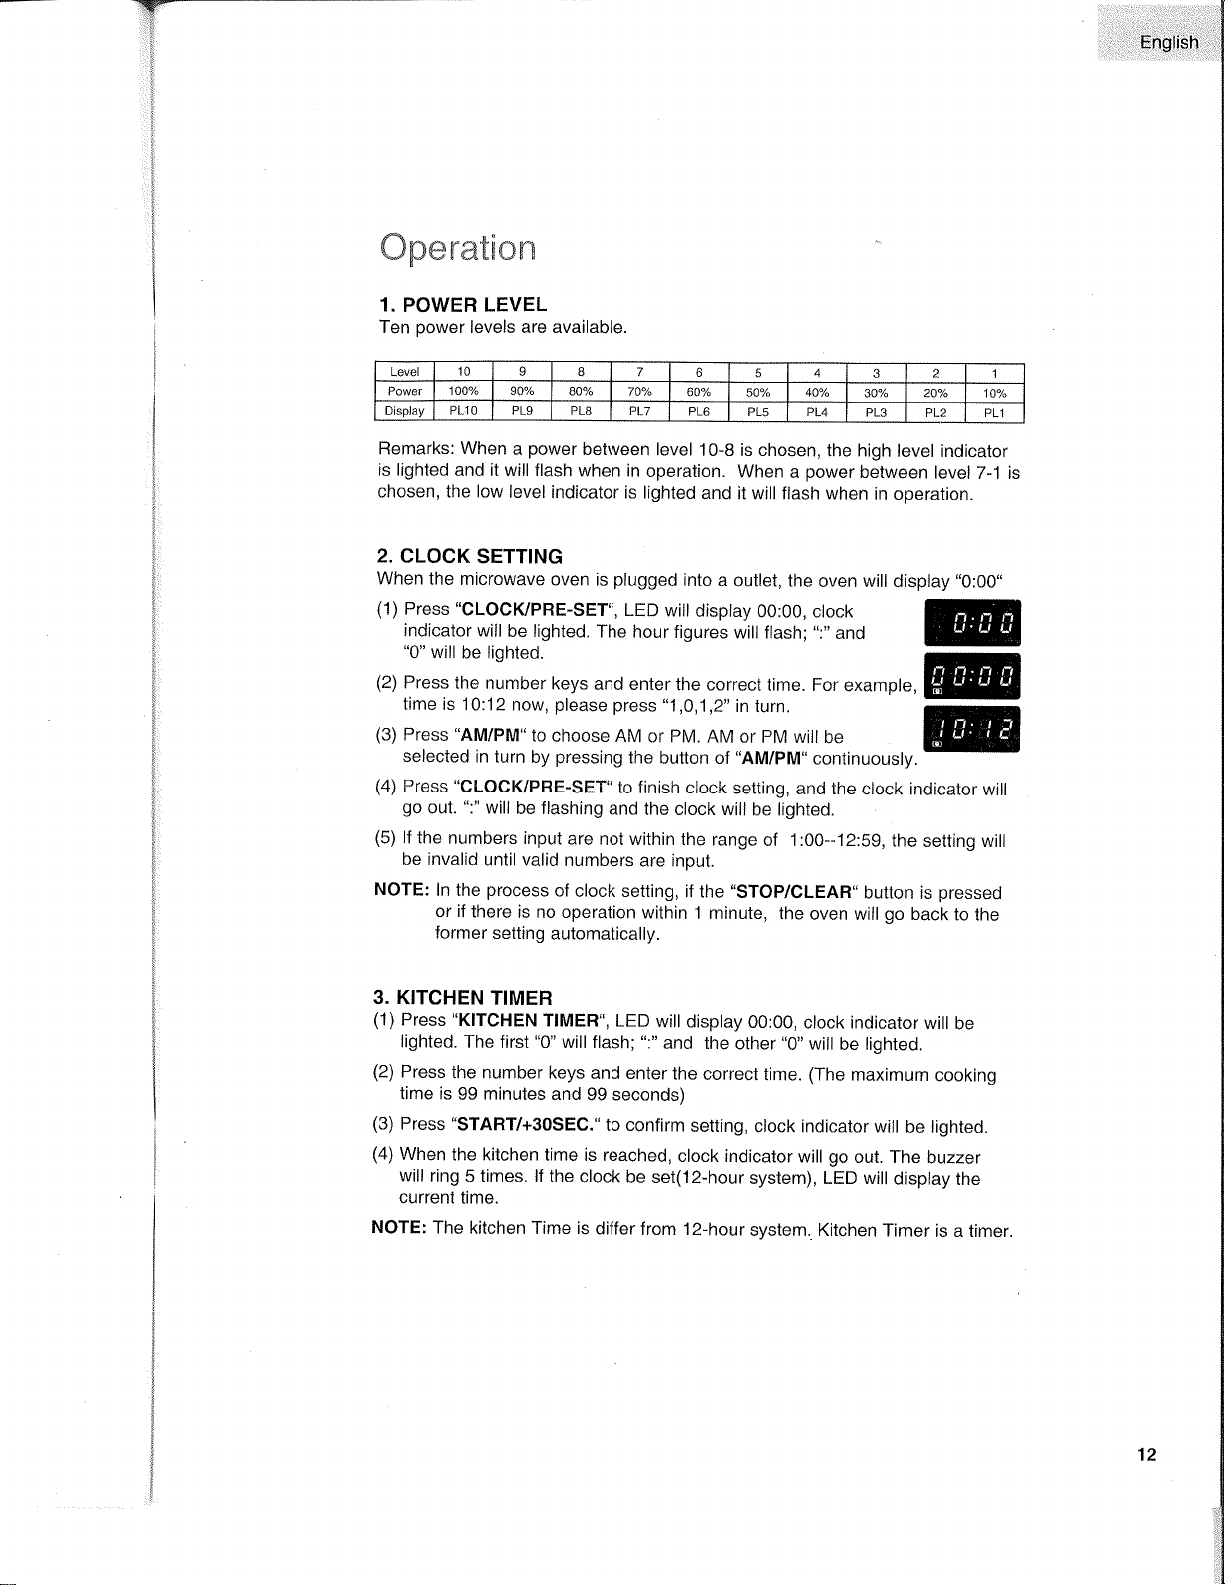
Ten
power
levels are available.
Remarks:
When
a
power
between level
10-B
is chosen, the
high
level indicator
is lighted and it
will flash
when in
operation.
when
a
power
between
level
7-1 is
chosen, the low level
indicator is lighted
and
it will flash when
in
operatlon.
splay
"0:00"
@
2. CLOCK
SETTING
When the
microwave
oven is
plugged
into
a
outlet, the
oven
will
di
(1)
Press'CLOCI(/PRE-SET",
LED
will disptay
00:00, ctock
indicator
will
be lighted.
The hour
figures
will flash;
":"
and
"0"
will
be lighted.
(2)
Press the
number
keys
and enter
the correct
time. For example,
time
is
10:12 now,
please press "1,0,1,2"
in turn.
(3)
Press
"AM/PM"
to choose
AM
or PM. AM
or
PM
will
be
selected
in turn
by
pressing
the button
of
"AM/PM"
continuously.
(4)
Press
"CLOCIIPRE-SET"
to finish
clock
setting,
and the clock
indicator
will
go
out.
":"
will
be flashing
and the
clock will
be lighted.
(5)
lf
the numbers
input
are
not within the
range
of 1 :00--12:59,
the
setting will
be invalid
until valid
numbers
are input.
NOTE:
ln
the
process
of
clock setting, if
the'STOP/CLEAR'button
is
pressed
or if
there
is no operation
within 1
minute, the
oven
will
go
back
to the
former
setting
automatically.
3. KITCHEN
TIMER
(1)
Press
"KITCHEN
TlMER", LED
wilt
display
00:00,
clock indicator
will
be
lighted.
The first
"0"
will flash;
":"
and
the
other
"0"
will
be lighted,
(2)
Press
the
number keys
and enter
the
correct time.
(The
maximum
cooking
time
is
99
minutes
and
99 seconds)
(3)
Press 'START/+3OSEC."
to confirm
setting,
clock indicator will
be lighted.
(4)
When
the kitchen time
is reached,
clock indicator
will
go
out. The
buzzer
will
ring
5 times. lf the clock
be
set(12-hour
system), LED wilt
display
the
current
time.
NorE:
The
kitchen Time is
differ
from 12-hour
system. Kitchen
Timer is
a timer.
Level
10
I 7
6
5
A
3 2 1
Power 100"/" 90./. aoo/" 70/"
60% 50% 40%
30y" 20v" 100/"
Display
PLIO PL9
PL8 PL7
PL6
PL5 PL4 PL3
PL2 PL1
12

English
4. MICROWAVE
COOK
(1)
Keep on
pressing "
POWER
"
to choose
microwave
power.
'@
"
and
"fEl"
or
"
[3,ì"
will be lishted.
(2)
Press number
keys
to input
the
cooking time;
the
maximum
cooking
time is
99
minutes
and 99 seconds.
(3)
Press
"START/+30SEG."
to
start
cooking,
and
the
remained cooking
time
will be
displayed.
":",
'@
'
,
.g
'
or
"
IJl'
l"
indicators
will be
f lashing'
NOTE:
ln the
process
of cooking,
if the
"STOP/CLEAR'
button
is
pressed
or
if there
is no operation
within
1
minute, the
oven
will
go
back
to the
former
setting automatically.
5. EXPRESS
COOK
(1)
ln
waiting
state, instant
cooking
at 100%
power
level can
be started
by
select a cooking
time
from 1 to 6 minutes
by
pressing
number
padsl
to
6.
Press
"START/+30SEC" to
increase
the cooking
time; the
maximum
cooking
time
is 99
minutes
and 59 seconds.
(2)
ln waiting
state,
instant cooking
at
100%
power
level
with 30
seconds'
cooking
time
can be started
by
pressing "START/+30SEC".
Each
press
on
the
same button
will
increase cooking
time by 30
seconds.
the
maximum
cooking
time
is 99 minutes
and
59 seconds,
NOTE:
Each
press
on
"START/+30SEC"
can
increase
the cooking
by 30
seconds
for the microwave
and
Auto
menu cooking,
However,
the
operation
will not
work under
"Weight
Defrost"
operation'
6. WEIGHT
DEFROST
FUNCTION
(1)
Press'WEIGHT
DEFROST",
LED
willdisplay
"dEF1";when
at the same
time
"l#.
'ffi
"
indicators
will
be lighted.
(2)
Press numerical
pads
to input
weight
to be defrosted."oz"
indicator
will be
lighted.
lnput the
weight
ranged between
4-1OO Oz'
(3)
lf the weight
input
is not within
4-100,
the input
will
be invalid.
No
"beep"
will be sound
and
the microwave
will not
work until
valid
numbers
are
input.
(4)
Press
,,sTART/+30SEQ.
!o
start
defrosting
and the
remained
cooking
time
willbe displayed.
":",'@'and
"[äf*ì'indicators
will be
flashing
and the
"Oz"
indicator
will
go
out,
13
rqY-
ì!.
English
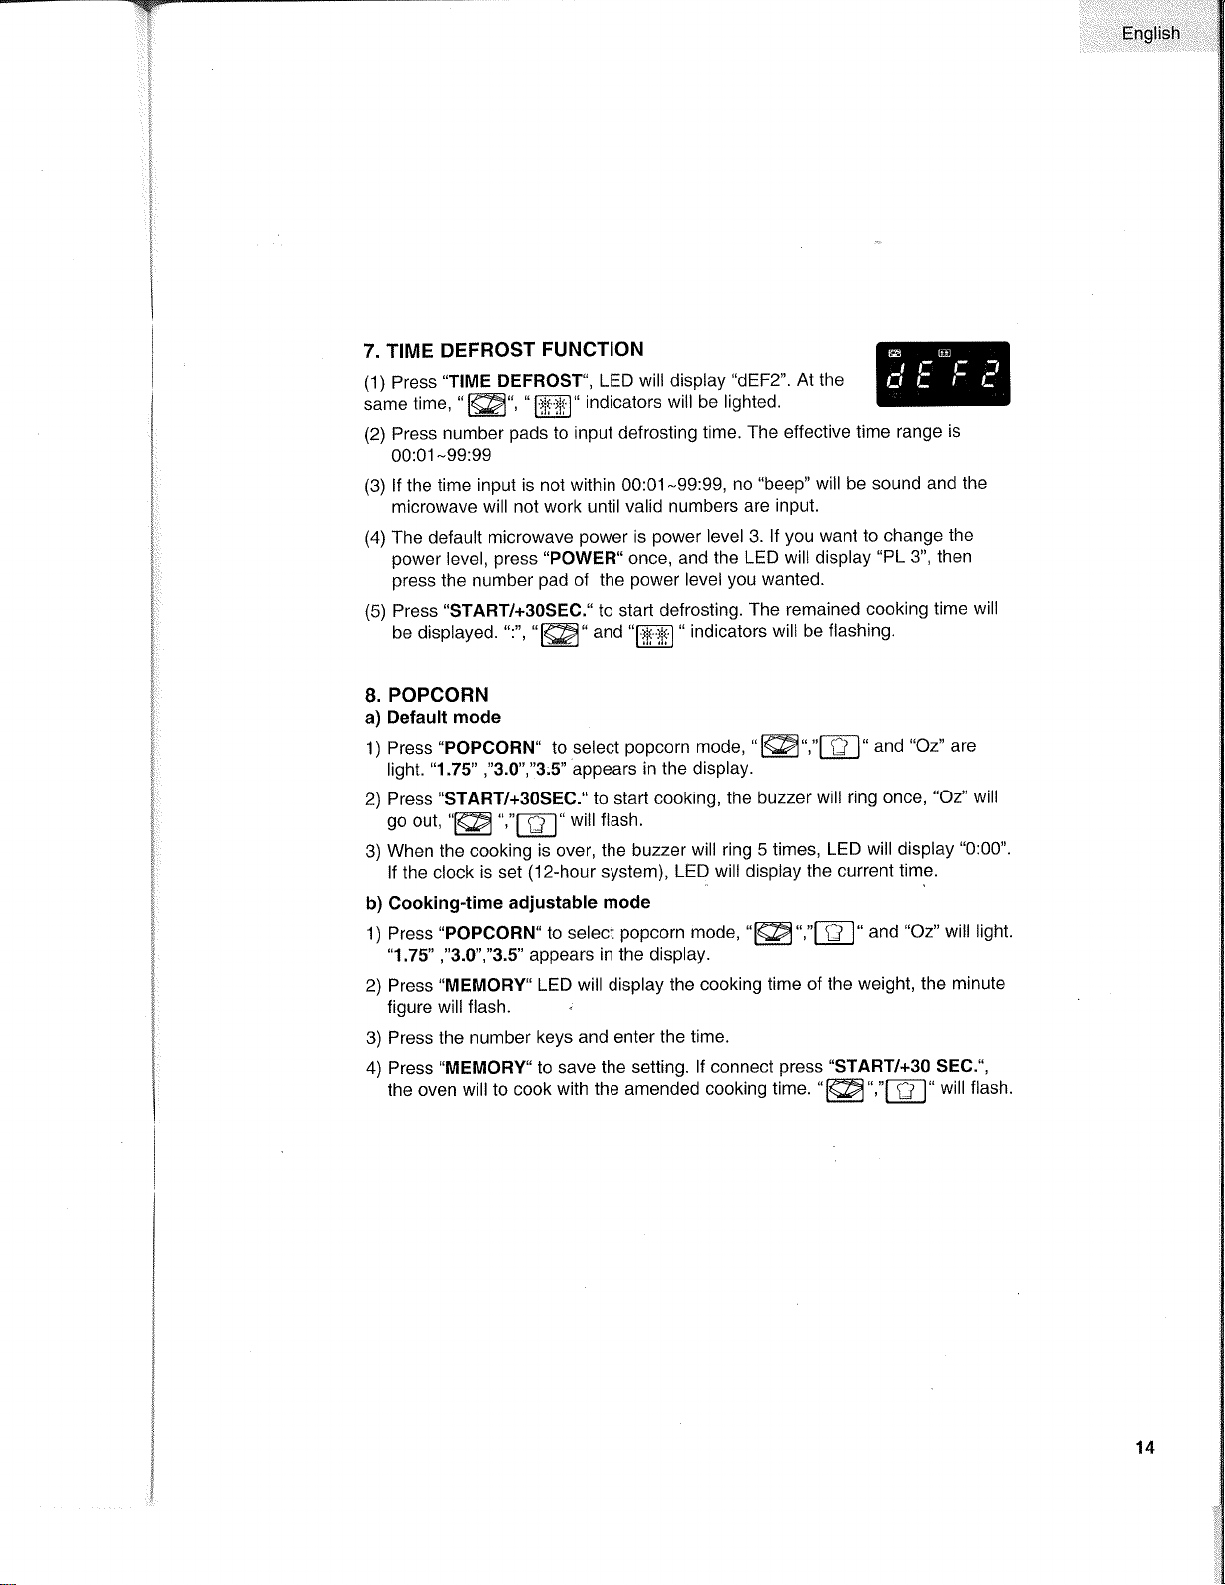
7. TIME
DEFROST
FUNCTION
(1)
Press'TIME
DEFROST., LED
willdisplay
"dEF2".
At the
same
time,
"fæl","f indicators will be
lighted.
(2)
Press
number
pads
to
input defrosting
time. The
effective time
range
is
00:01-99:99
(3)
lf the
time input is not within 00:01-99:99,
no
"beep"
will be sound and
the
microwave
will not work until
valid numbers
are
input.
(
)
The default microwave
power
is
power
level
3.
lf
you
want
to change
the
power
level,
press "POWER"
once, and
the LED will display
"PL
3", then
press
the number
pad
of the
power
level
you
wanted.
(5)
Press
"START/+30SEC."
to starl
defrosting.
The remained
cooking
time will
be displayed.
",",
"læ'and
"fläJilì "
indicators
will be
flashing.
8.
POPCORN
a) Default
mode
1)
Press
"POPCORN"
to
select
popcorn
mode,
"l@","l-tJ" and
"Oz"
are
light.
"1.75"
,"3.0","3:S"
appears
in the display.
2) Press
"START/+30SEC." to start cooking,
the buzzer
will
ring once,
"Oz"
will
go
out,
'@ ',"E"
will flash.
3)
When the cooking
is over, the
buzzer
will ring 5 times,
LED
will
display
"0:00".
lf the clock
is set
(12-hour
system), LED
will display
the current
time.
b) Cooking-time
adjustable
mode
'l)
Press'POPCORN'to
select
popcorn
mode,
"f@",'E"
and
"Oz"
will light.
"1.75'
,'3.0',"3.5"
appears
in the display.
2)
Press
"MEMORY'LED
will
display
the cooking
time of the
weight, the minute
figure will flash.
3) Press the number
keys and enter
the time.
4) Press
"MEMORY.
to save
the sett¡ng.
lf
connect
press "START/+30
SEG.",
the oven willto
cook
with the amended cooking
time.
"@",'E'
will flash.
14
ìi:.,:r,:,,..irEngli$.
hi
::.
r::r:r.
YT
:.1:
::
:-i
r:
Users
can
change
the cooking
time
e.g.:
Users set'POPCORN"
time for
3
minutes
and 1S
seconds
1) Press'PoPcoRN.
button
once
or
twice
when
the
oven is
on call
(the
screen
will
display
"1
.75"
for
once
press
and
"9.0"
for
twice),
then
press
.MEMORY"
button,
LED
screen
will
display
the default
cooking
time of current
food weight
(which
is
not 0:00
),
for
example
1'30".
On the screen
the first
number
1
glints,
press
number
button to
input
3; the second
number
3
glints, press
number
button to input
1;
the third
number
0
glints,
press
number button
to
input
5. Then
the first
number
3
glints
again.
(lt
is similar
as clock setting).
2) Press "MEMORY'
again to save
current
setting. lf
you
press
.START/
+30SEC."
to
begin
cooking
directly,
the
program
will
save the latest setting
of
cooking
time
automatically.
3) To
change the
set
cooking
time, repeat
step 1),
the
screen will firsily
display
the
saving time
(3:15
for
example
),
press
number
button
to reset
cooking
time,
and the
follow
step 2.
4)
When
completed,
when
you
press
"POPCORN"
button,
screen
displays food
weight
1.75
,
3.0 or 3.5, but
cooking
time follows
the
saved time
sett¡ng.
5) To
go
back to
initial
settings,
press "POPCORN"
button for
more than
three
seconds,
The
buzzer will sound,
then
go
back
to initial
setting.
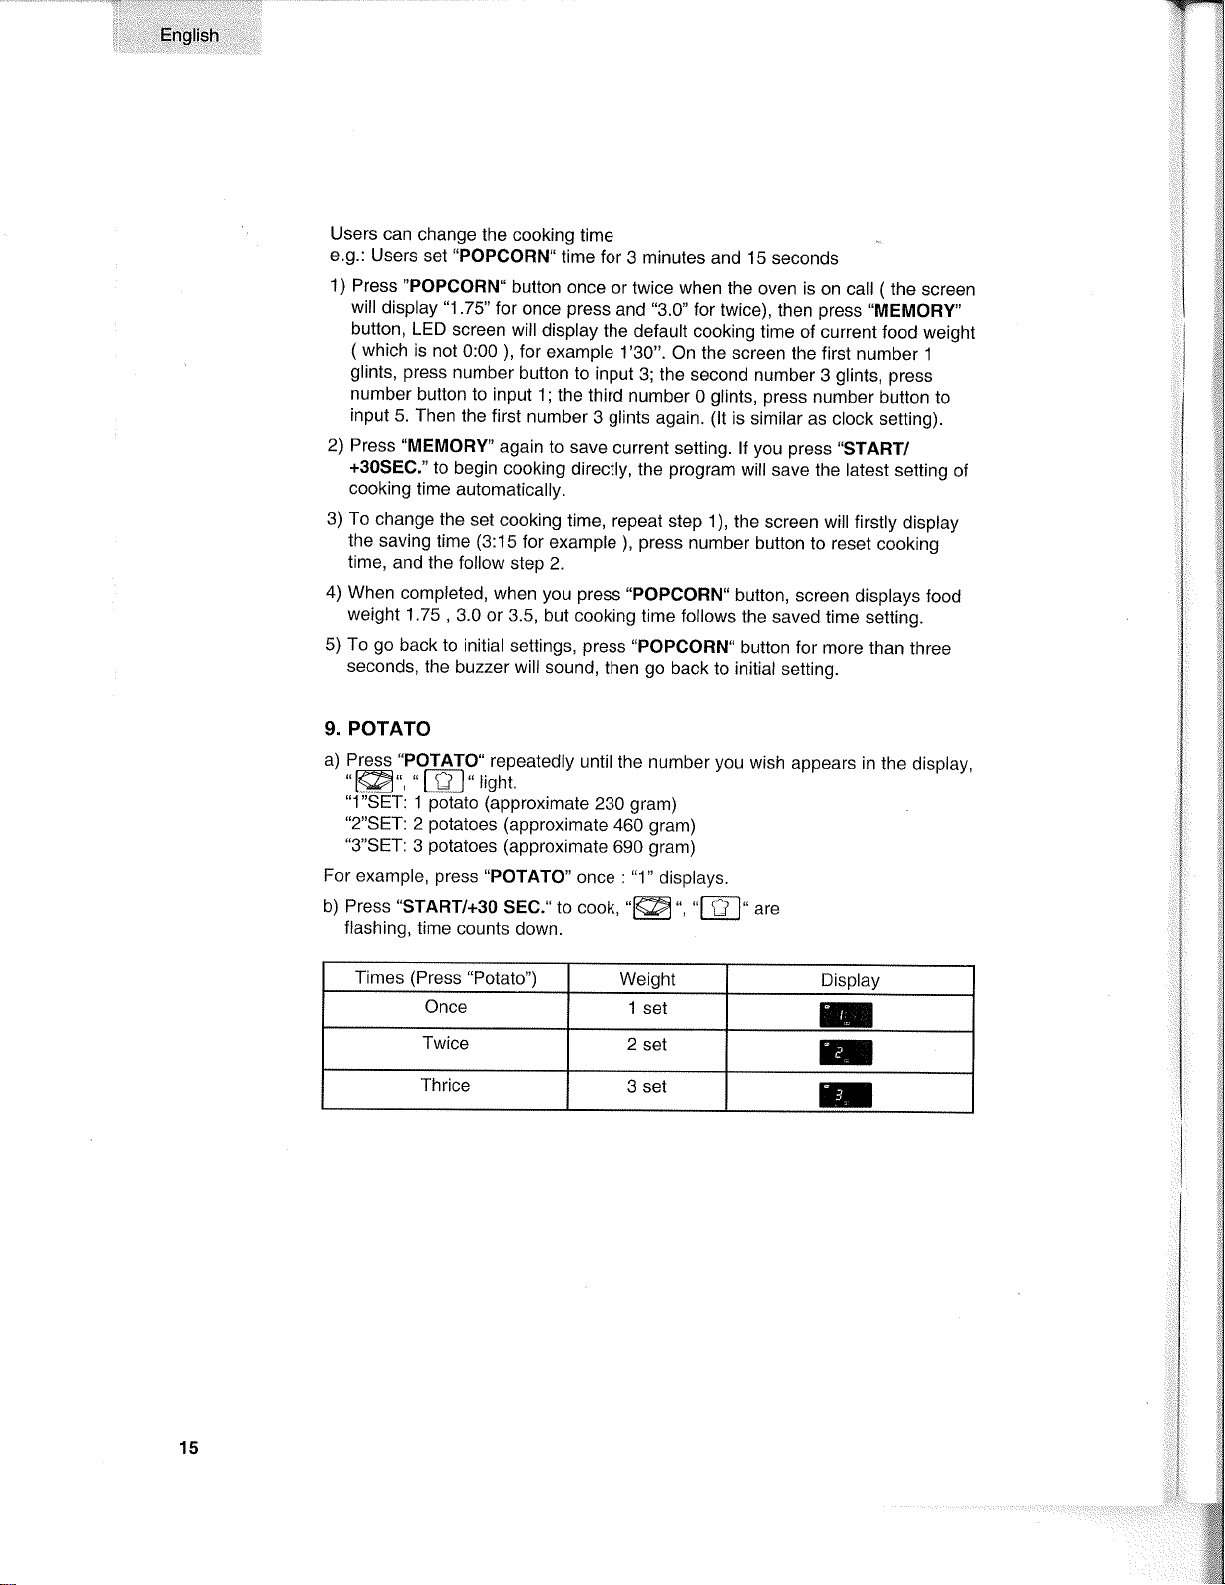
9. POTATO
a) PIggq
.POTAfO"
repeatedly
until the number
you
wish
appears in
the display,
,@.
,,[D-],,lghì
"1"SET:
1
potato
(approximate
230
gram)
"2"SET:
2
potatoes
(approximate
460
gram)
"3"SET:
3
potatoes
(approximate
690
gram)
For example,
press
"POTATO"
once
:
"1"
displays.
b) Press
"START/+30
SEC." to
cook,
"l@
", "ft-l"
ur"
flashing,
time
counts
down.
Times
(Press
"Potato")
Weight
Display
Once
1 sel
E
Twice
2
sel
E
Thrice
3 sel
E
::
j
'*g
:iW
j1lâl
Ì¡¿tl
,*s
15
,AT
,Ì
English
10.
Plzz[
a) Press
"PIZZA"
repeatedly
until
the number
you
wish appeafs
in the
display,
'ffi"'"[F]'r¡ght'
You can reheat
1
-3
slices
of
Pizza each
time.
For
example,
press
"PIZZA" twice,
"2"
appears
in the
LED^
b)
Press
"START/+30
SEC."
to cook,
"l@.,'E'are
flashing, time
counts
down.
11.
BEVERAGE
a) Press
'BEVERAGE" iepeatedly until
the
number
you
wish
appears
in
lhe
display,
"
@
'8","f
¡:l"tisht.
You can reheat
1-3 cups
of beverage
each
time
(approximate 250 ML).
For example,
press "BEVERAGE" twice,
"2"appears
in
the display.
b)
Press
"START/+3O
SEC."
to cook,
"lffi",
'E'
are
flashing,
time counts
down.
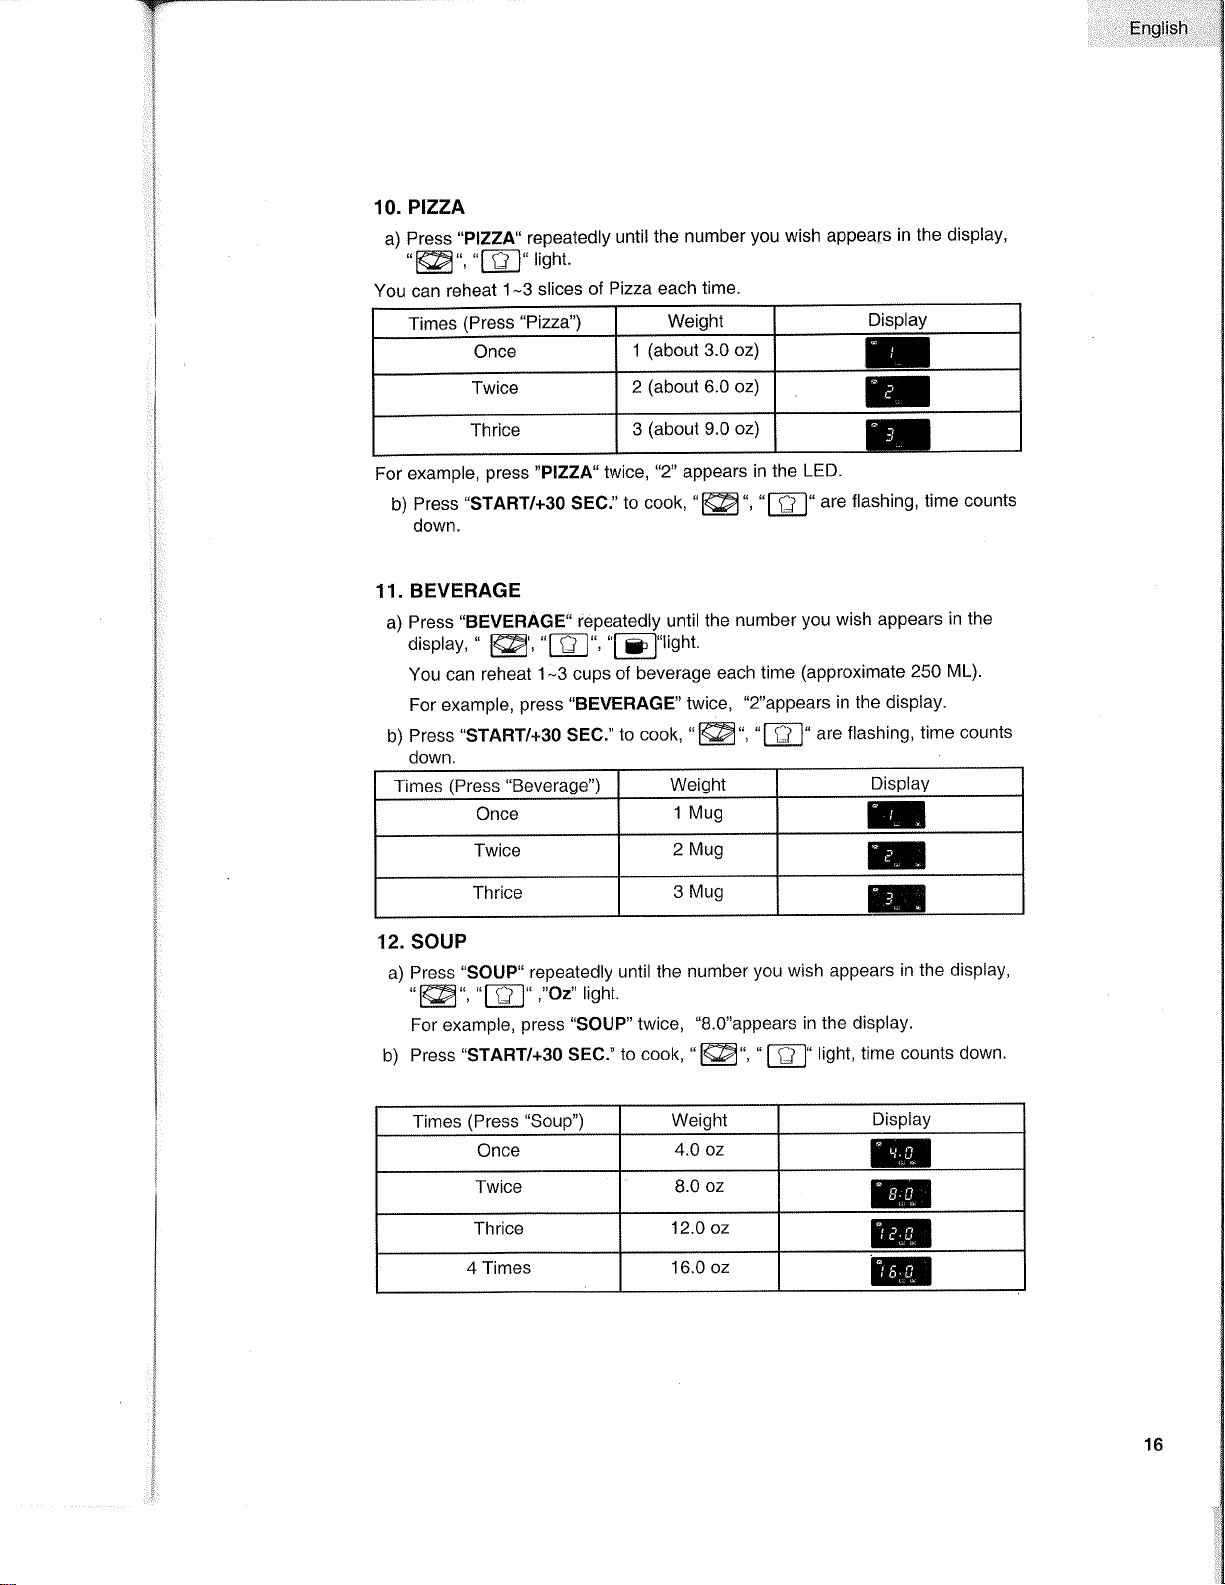
12. SOUP
a) Press
"SOUP"
repeatedly
until the
number
you
wish appears
in the
display,
'ffi',
"8',"o2"
lisht
For example,
press "SOUP"
twice,
"B.O"appears
in the display.
b) Press
"START/+30
SEC."
to cook,
"
@',
"
f-tl"
light,
time counts
down.
Times
(Press
"Pizza") Weight
Display
Once
1
(about
3.0 oz)
U
Twice
2
(about
6.0 oz)
E
Thrice 3
(about
9.0
oz)
Ð
Times
(Press "Beverage")
Weight
Display
Once
1 Mug
u
Twice
2
Mug
H
Thrice
3
Mug
H
Times
(Press "Soup") Weight
Display
Once
4.O oz
m
Twice
8.0
oz
H
ïhrice
12.0 oz
@
4 Times
16.0 oz
@
16

E¡glish
13.
DINNER PLATE
a) Press
"DINNER
PLAlli¡epeatedly
until the
number
you
wish
appears
in
the display,
'@',
'l-ÊJ'
and
"oz"
lisht.
For example,
press "DINNER PLATE" twice,
"12.0"
appears in
the display.
b)
Press
"START/+30 SEC."
to cook,
{ffi'
'E'
are
flashing,
time counts
down,
14. FRESH
VEGETABLE
a) Press
"FRESH VEGETAELE"
repeatedly
until the
number
you
wish appears
in the display,
'@
,
'tll-J"
and
"oz"
lisht.
For
example,
press "FRESH
VEGETABLE"
twice,
"8.0"
appears
in the
display'
b)
Press.START/+3O
SEC."
to cook,
"Oz"
disappears,
'@',
"fFl"
are
flashing,
time counts down.
15. FROZEN
VEGETABLE
a) Press
"FROZEN VEGETABLE"
repeatedly
until
the number
you
wish
appears
in the
display
'@'
'E'and
"Oz"
light.
For example,
press "FROZEN VEGETABLE"
twice,
"8.0"
appears
in the
display.
b) Press
"START/+30 SEC."
to cook,
"Oz"
disappears,
'@',
"f-Êl"
ut"
flashing,
time counts
down.
Times
(Press
"Dinner
Plate")
Weighl
Display
Once
9.0 0z
E
Twice
12.O Oz
@
ïhrice
18.0 Oz
@
Times
(Press "Fresh
Vegetable")
Weight
Display
Once
4.0 Oz
m
Twice
8.0
Oz
@
Thrice
16.0 Oz
Effi
Times
(Press "Frozen
Vegetable")
Weight
Display
Once
4.0 Oz
@
Twice
8.0 Oz
@
Thrice
16.0 Oz
@
17

Ënglish
16. PRË.SËT
FUNTTIOhI
(1)
Set the
clock first.
(Consult the instruction of clocl< setting.)
(2)
Set a cedain
cooking
procedure(one
or
two blocks),
the sett¡ng
method
and
display are same as relevant cooking
procedure.
(Defrosting
is
beyond
pre-set
cooking).
(3)
Press
"CLOC¡(/PRË-SËT"
to display current time
and
hour figure is
flashing,
the icon
"
:
"
and other
"
0
"
keep lighiing on.
(4)
Press number keys to
input
the cooking
time.For
exarnple:
to set lhe time
is 1212,
you
can
press
the number
keys
"1","2","1","2"
in order.
(5)
Press
"ÅM/pM'to
choose AM or
PM. AM
or PM will be selectecl
in turn
by
press
tlre
button of
"AM/pM"
continuously.
(6)
Press
"STAFIT/+3O
SHt."
to confirm the
preset procedure.When
ìt ir
confirmed,
the
unit
will
go
back
the
clock
states.
(7)
Cooking
will begain when time arrives.
'r
7"
ft/tEMÛRY
FUNCT',rOr\¡
(1)
Press
"MFMORY"
lo
clroose memory 1-5
procedure.
l-he LËlf wili clisplay
'1,2,3...5.
(2)
lf the
procedure
has
been set,
press
"$T'Affif/
+3ü SffiC." to uso
it
lf not,
continue
lo
set
lhe
prclcedure.
Only ç¡6
or two
slagc:s
t:an
be set.
(3)
/{fter finishing the setting,
press
"UlËfltTüFlY"
to save the
procedure
ancl turn
back to lhe waiting states. lf
you press
"$Té,ãST/"{-SS
SHü.,"
it can
save
and operate the setting.
NÕT"ffi:
Auto
menu cooking cannot be sel as mernory
procedure.
'r
E"
MtiLr{-ffiTÅGffi
cüûK[f\$ffi
This microwave oven
can
l:e
set with 2 stages cooking.
Exam¡lle: To deÌrost lreef of 40
oz
first
and
then
cook wìÌh lull
pcwr:r
for
l0 nrinules.
1) Press
"V1,tffi{ffit"{"f-
mffiFf:fmSï"
to choose defrost by
weiaht lunctinn,
2)
Press
"4","0"
in sequence;
3) Press
"fsÖWËffi"
c¡noe to choose full
power;
4) Press
'1","0",'0",'0'
in sequence;
5) Press
"$fanV
+3û
Sec."
to
staft cool<ing.
hÍÕ'frË:
(1)Time
defrost and auto
function cooking can't
be set as one of
the
2
stages cooking.
(2)
Weight defrosl can
lle set
as
the first
stage cooking clnly.
.¡c
English
19.
LOCK
FUNCTION
FOR
CHILDREN
Lock:lnwaitingState,press.SToP/CLEAR..for3seconds,therewillbea
ron¡
,,0"u0,,
de-noting
the
entering
the
children-lock
state;
meanwhile,
LED
will
display'
F
Lock off
: ln
locked
state,
press
"
STOP/CLEAR
"
for
3
seconds'
there
will
be
a
long
"beep"
denoting
that
lock
is
released'
20.
INQUIRING
FUNCTION
(1)
ln clock
state,
press
.AM/PM'
to display
"4"
or
"P" for 3
seconds.
ln
cooking
',"tut",press.,IC.LOCIíPRE-SET-'theLEDwilldisplayclockforthree
secoñds
and
the
"4"
or
"P"
for
another
3
seconds'
(2)lnpre-setstate,LEDwilldisplaytheclockandthesecondswillbeflashing
'-'
át i¡,u,su.e
time.
press,,nvl/pfvl,,and,,A',
or,'p"
w¡l
be
displayed
for
3
seconds.Thenpress"cLocllPRE-sET..toinquirethepre-settime.The
pre-set time
wili
be
flashing
for 3
seconds,
then
"4"
or
"P" will
be
displayed
foranother3seconds.Afterthat,theovenwillturnbacktotheclockstate.
(3)
ln
the
microwave
cooking
state,
press'POWER"
to
inquire
microwave
'-,po*",level,andthecurrentmicrowavepowerwillbedisplayed'Afterthree
seconds,theovenwillturnbacktothepreviousstate.lnthelevel2cooking
state,
the
inquiring
way
can
be
done
by
the
same
way
as
above'
21. COOKING
END
REMINDING
FUNCTION
Whenthecookingisover,thebuzzerwillsoundS..beep',toalertuserthe
cooking
is finished'
22.
OTHER
SPEC!FICATIONS
(1) ln standby
state,
if the
set
clock
digital
tube
displays
current
time'
the
"
:
"
will
flash;
otherwise,
it shows
"0:00"'
(2) ln
setting
function
state,
LED
displays
corresponding
setting'
(3) ln working
or
pause state,
LED
displays
remaining
cooking
time'
(4)
During
working,
if
it
pauses or
opens
the
oven
Ooor'
"l@"
will
light'
after
restarting,
it
will
flash
constantly'
(5)
Refer
to
the
sample
for
other
details'
19
English
1.
Turn
off
the
oven and remove
the
power plug
from
the wall socket
before cleaning.
2. Keep
the inside
of the oven clean.
When
food splatters or spilled
liquids
adhere to
oven walls, wipe with
a damp
cloth. Mild
detergent
may be
used if the
oven
gets
very dirty.
Avoid the use
of spray
and other harsh
cleaners
as they may stain,
streak or
dull the door
surface.
3.
The
outside
surfaces should
be cleaned with
a damp cloth. To
prevent
damage to the
operating
parts
inside
the
oven,
water
should
not be
allowed to seep into the
ventilation
openings.
4. Wipe
the door
and window on
both sides, the
door seals and
adjacent
pafts
frequently with
a damp cloth
to remove any spills or
spatters. Do
not
use abrasive
cleaner.
5. Do not allow
the
control
panel
Ìo become wet.
Clean with
a soft,
damp cloth. When
cleaning the control
panel,
leave
oven door
open
to
prevent
oven from
accidentally turning on.
6. lf
steam accumulates
inside
or around the outside
of the oven door,
wipe with
a soft cloth. This
may
occur when the microwave
oven is
operated
under high humidity
condition. This
is normal.
7. lt is
occasionally
necessary to remove
the
glass
tray for cleaning.
Wash
the tray in warm
sudsy water
or in a
dishwasher.
B. The roller
ring and
oven floor should be
cleaned regularly
to avoid
excessive noise.
Simply
wipe
the bottom
surface of the
oven with
mild detergent.
The roller ring
may be washed in
mild
sudsy water or
in
a dishwasher. When
removing
the roller ring from
cavity floor
for
cleaning,
be sure to replace
in fhe
proper position.
9. Remove
odors
from
your
oven
by combining a cup of water
with
the
juice
and
skin
of one lemon
in a
deep
microwaveable
bowl,
microwave
for 5 minutes.
Wipe thoroughly
and dry with
a soft cloth.
10.
When it
becomes necessary
to replace
the oven light,
please
consult a dealer to
have it replaced.
#[*ænrn-lg æne$
ümnæ
20
l:,l
''English
T"r"*u¡h
ilgffih
üü¡tür
r r r
dr.åt
¡v
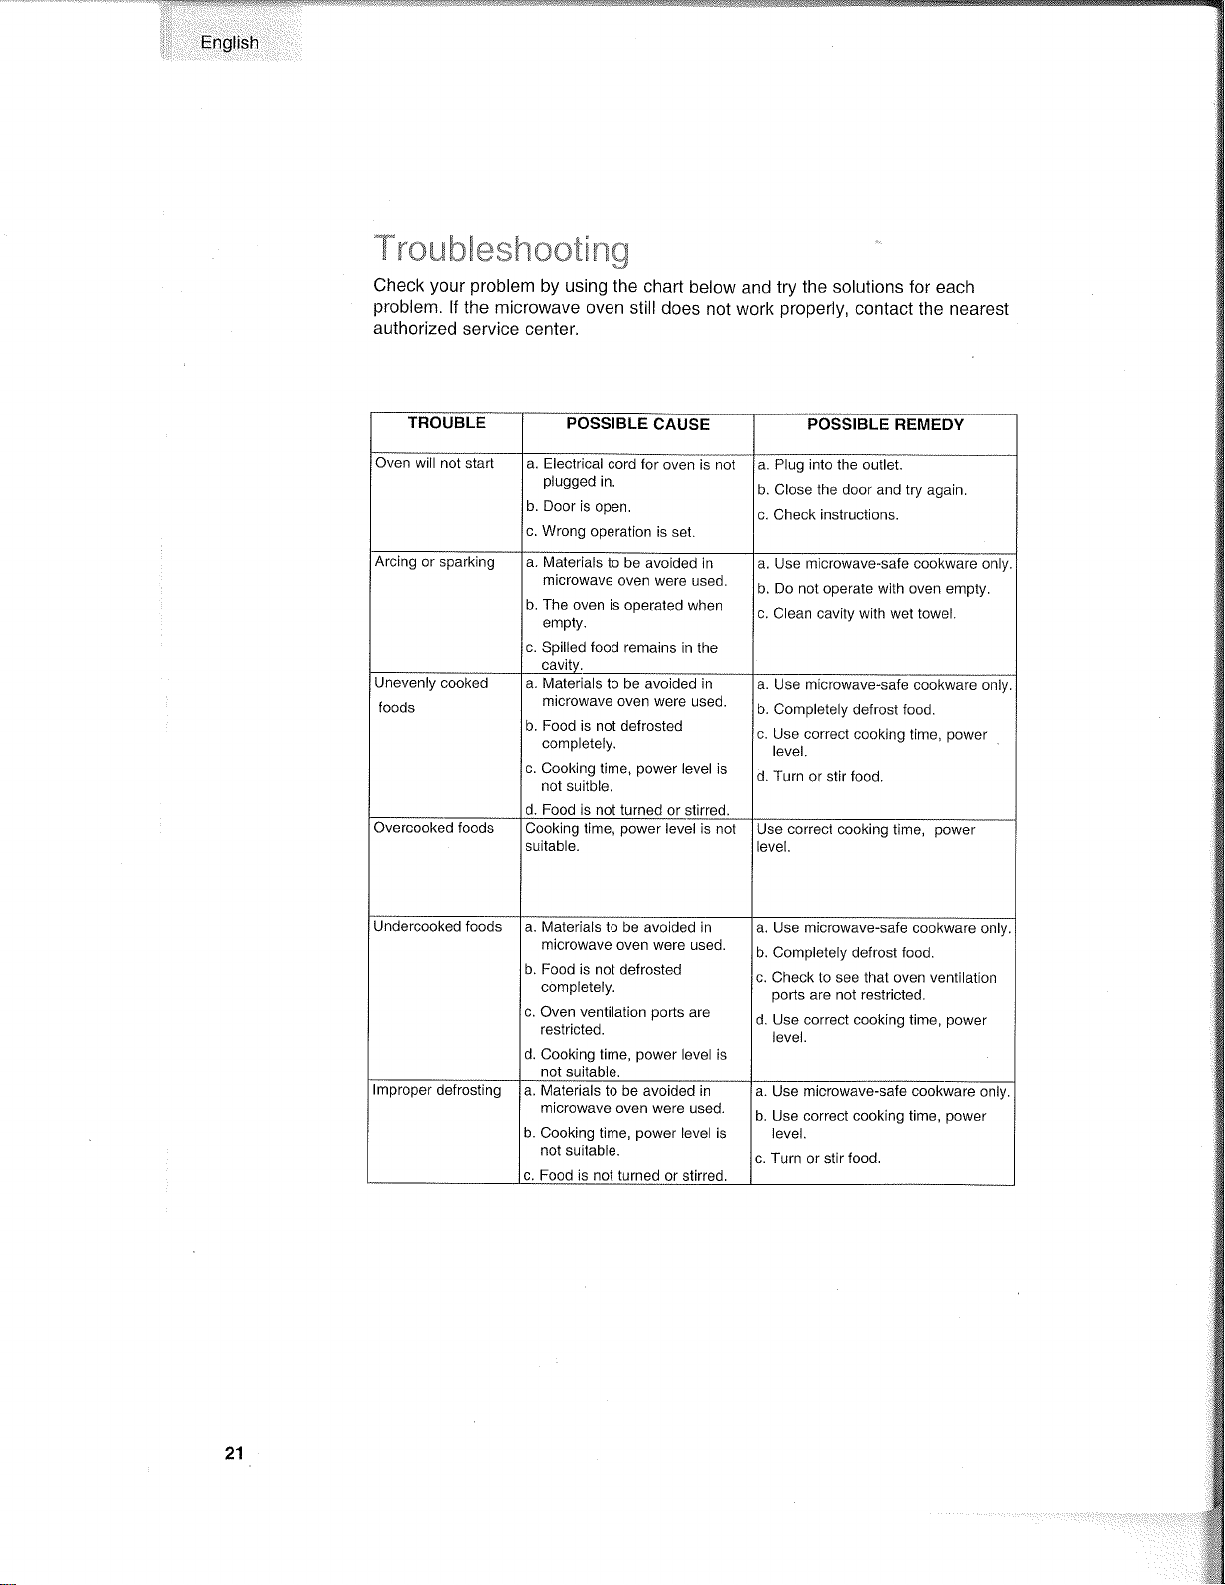
Check
your
problem
by using the
chart
below
and
try
the solutions for
each
problem.
If
the microwave oven
still does
not work
properly,
contact
the nearest
authorized
service center,
POSSIBLE
CAUSE
a. Electrical
cord for
oven is not
pìugged
in.
b. Door
is open.
c. Wrong
operation
is
set.
a. Plug into the outlet,
b. Close the door and try
again,
c. Check instruclions.
a. Materials
to
be avoided
in
microwave
oven
were used.
b. The oven
is operated when
empty.
c.
Spilled
food
remains
in the
a. Use mìcrowave-safe cookware
only.
b. Do nol operate with oven empty.
c. Clean cavity with wet towel.
Unevenly
cooked
foods
a. Materials
to be avoided in
microwave oven
were used.
b. Food is not defrosted
completely.
c. Cooking
time,
power
level is
nol suitble.
d,
Food
is not turned or stirred.
a.
Use mÍcrowave-safe
cookware only.
b. Completely
defrost food.
c.
Use correcl cooking
time,
power
level.
d. Turn or stir food.
Cooking
time,
power
level is
nol
suitable,
Use correct
cooking time,
level.
Undercooked
foods a. Materials
to be
avoided in
microwave
oven were used.
b. Food ¡s not
defrosted
completely.
c.
Oven
ventilation pofis
are
restricted.
d. Cooking t¡me,
power
level is
not suitable
a. Use microwave-safe
cookware
only
b. Completely defrost food.
c. Check to see that oven ventilatiot'ì
pons
are not restricted.
d. Use correct cookíng time,
power
ievel.
a. Materials
to be avoided in
microwave oven were
used.
b.
Cooking time,
power
level is
not suítable.
c. Food ìs not turned
or stirred.
a.
Use microwave-safe
cookware
only.
b. Use correct cooking time,
power
level.
c. TLrrn or stir food.
21
Ënglish
FELIX STORCH,
INC.
770 GARRISON
AVENUE BRONX,
NY 10474
SUMMIT
LIMITED WARRANTY
Summit
Appliances
warrants
this
product
to be
free from defects
in
materials
and workmanship
for a
period
of one
year
from the
date
of original
purchase
or
delivery.
Any
parts
determined
to
be
defective
will be replaced by
SUMMIT
at
no
charge to
you.
Plastic
parts,
liners and outer
cabinets are
warranted to be
manufactured
to commercially
acceptable
standards
and free
from
defects
at
the time of delivery.
This limited
warranty
does
not apply
to:
1 . lmproper installation
2. Customer
misuse, negligence
or damage
3.
lncorrect electrical current
4.
Products with the serial number
altered or
removed
5.
Products
sold or
used outside
the fifty United States
or the
District of Columbia
6. Commercial
or
lndustrial Users
7.
Damage to this
product
from accidents,
alterations,
failure to follow
instructions, fire, floods, earthquakes,
war, civil disturbance
or
Acts of
God.
SUMMIT
is not liable for consequential
or incidental
damage.
SUMMIT
APPLIANCE
DIV.
FELIX
STORCH,
INC.
770 GARRISON
AVENUE
BRONX, NY 10474
(71
8)328-8700
FACTORY REGISTRATION CARD
THANK YOU FOR
PURCHASING
A
QUALITY
SUMMIT@
APPLIANCE
Address
Summit Model Number
Customer's
Name
Serial
Date
of
Delivery
*
Apt. No
State__ Zip
City__
State
!
Apartment
n
Office
tr
Other
n
Dealer
n
Other
n Recommendation
City
Dealer's
Name
ls this unit for:
fl
Private
Home
Reasons for selecting
this unit:
! Size D Price
22
MPffiffiTANT'
Do Not
Return
This
Product
To
The Store
lf
you
have a
problem
w¡th
lhis
product,
pìease
contacl
the
"summit Customer
Satisfaction Center" at
(800) 287-8799 or
(718)
328-8700.
DATED PROOF
OF
PURCHASE,
MODEL # AND SERIAL
#
REOUIRED
FOR WARRANTY
SERVICE
HMPffiffiTAhJT
Ne
pas
retourner cet anicle
au
magasin
En cas de
problème
avec cet adicle,
veu¡llez contacter
le
"Centre satisfaction
client" de Summit au
(800)
287-8799
or
(718)
328-8700.
uNE
pREUVE
D'ACHAT onrÉe,
le
ruuvÉno
ou
lr¡ooÈt-E
rr
lE ruu¡¡Éno
or sÉntE
sorur
oBlrcArornES
pouR
aÉNÉrlcìER
DE LA
coUvERTURE
oFFERTE PAR
LA
GARANTIE.
$tr\,4['üiÌl
¡\NT"ry:
No Devuelva
Este
Producto al
Ëstablecimiento
Compra.
SÌ t¡ene
problemas
con
este
producto,
por
favor
póngase en conlaclo con
el
"Cenlro
Haier de Alención
al Cliente" en
el
(800)
287'8799 or
(71
8) 328-8700.
pARA
EL sERvtcto oe onRnrurÍn
sE
BEQUIERE
PRUEBA
DE coMPlìA,
FECHADA,
No. DE MODELO
Y
No, DE SERIE
Made in China
Fabriqué
en Chine
Hecho
en China
*M{rIt
Summit
Appliance
Division
Felix Storch,
lnc.
Bronx,
NY 10474
Printed
in China
:ti$
lssue: January 07