
1
Use and Care
Manual
Refrigerator
225D6783P011 REV. 0

2
index
Welcome
Quick Installation Guide
Parts and Features Ingenious Model
Quick Reference Guide Ingenious
Where to Start
Know Your Product
Temperature Control
Air Regulator
Exterior Display
Smart Station
Smart Fill IceFactory
Compartments
Take&Go Egg Box
Express Chill Zone
Safety Glass Spill Guard Shelf
Shelves
Air Flow
How to Get the Most from Your Refrigerator
Choosing a location
Positioning
Installation
Levelling
Minimum requirements for correct electrical installation
General Temperature Control
Express Chill Zone Function
Exterior Temperature Control
Power Cool Function
Holidays Function
Alarm Function
Lock Function
Energy Saver
Fruits & Veggies Crisper
Deli Fresh Compartment
Meat Keeper
Humidity Control
Medium Shelf
Wide Shelf
Double Capacity Shelf
Jumbo Drinks Shelf
Dairy Shelf
7
7
6
5
4
3
3
ingenious model
6
6
8
9
9
10
10
12
16
16
12
16
16
17
17
18
19
22
23
22
22
22
23
24
24
25
25
25
25
25
25
26
27
Cleaning and Servicing Your Refrigerator
Increased Temperatures of Areas Close to Freezer
General Precautions
Holidays and Absences
Moving
Power Outages
Normal Operating Sounds
Changing the Bulb
Frequently Asked Questions and Operating Guide
29
29
29
30
30
30
31
31
32

3
welcome
O
ur aim is to make your life better every day; that’s why we create appliances
which adapt to your lifestyle and through their technology allow you to enjoy
each moment.
Today we invite you to join this world, so you can discover the ingenuity
and versatility that our line of refrigerators offers you.
You will nd all of the information you need for running your refrigerator
inside this booklet. We invite you to read it and to enjoy your new product.
Thank you for choosing us.
Before beginning, we’ve included a quick guide and a brief description of
the most important parts of your new refrigerator.
quick installation guide
choosing a
location
installation
positioning
cleaning
packaging
connection
Select a large, clean,
and dry space.
Let the refrigerator
stand for 6 to 8 hours.
THIS IS VERY
IMPORTANT SO THAT
THE GAS CAN SETTLE.
Allow for a 5 cm space
on each side, 10 cm at
the back, and between
5 and 10 cm at the top.
Before connecting the
plug, clean the
refrigerator with a cloth
or soft sponge and a
neutral soap.
Remove all packaging
including tape,
cardboard, plastic,
and Styrofoam.
Connect the plug to
the correct outlet.
Leave it empty and
closed for 4 hours
before usage.
2
3
4
5
6

4
Exterior
Handles
Wheels - Levellers
Display
Access to Smart Station
Inside Freezer
Shelves
Air Regulator
Express Chill Zone
Smart Fill Ice Factory
Medium Shelf
Wide Shelf
Inside Cooler
Shelves
Multiple Use Compartment
Fruits and vegetables compartment
Air Flow Outlets
Take & Go Egg Box
Internal Temperature Control
Refrigerator Light
Cold Meats Comparment
Medium Shelf
Smart Station
Double Capacity Shelf
Jumbo Drinks Shelf
a
b
c
d
e
f
g
h
i
j
k
l
m
o
p
q
r
s
t
u
v
w
Ingenious Model

5
quick reference guide for the ingenious model
For
more details on the use and the specications of the benets described
below, we recommend you consult the rest of the manual.
express chill zone
Inside the freezer you’ll find
this separate compartment
designed to rapidly cool
your favourite foods and
drinks. You can control it
from the exterior display
and it will let you know
when your foods and drinks
are ready. )
exterior display
take & go egg box
smart fill ice factory
power cool
smart station
Specially designed to allow
easy organisation of your
favourite foods. Furthermore,
thanks to its external
access you will always have
these on hand. Not having to
open the refrigerator door,
thanks to this special access,
will help save energy.
)
Practically designed to allow you to operate certain additional
functions like the Express Chill Zone, as well as the refrigerator
temperature. )
You can take this
multipurpose egg box
wherever you want.
In addition, it’s designed to
hold loose eggs or a carton.
You can also put
the Take&Go in the
“Double Capacity” shelf at
the door.
)
This no-spill ice-maker has a
removable cylinder which
can be easily filled and when
in place, automatically fills
the ice-trays. It also comes
with a storage box that can
be used as an ice-bucket.
)
The Power Cool function
is great for rapidly cooling
a large amount of room
temperature food once it’s
placed in the refrigerator.
As soon as you get back
from the supermarket,
simply activate it and it
will rapidly cool the
refrigerator interior.
)
2
3
(pg.
(pg.
19
18
(pg. 23
(pg.
16
(pg.
12
4
5
6
(pg.
12

6
where to start?
choosing a location
Choose a place for your refrigerator. We recommend a large space that
can be kept clean and dry to prevent oxidation.
positioning
T
o ensure that the refrigerator works correctly, it’s important that air can
circulate. We recommend the following minimum surrounding distances:
•
10 cm on both sides, 10 cm at the back,
between 5 and 10 cm on top.
•
Don’t position it near heat-generating appliances
such as hobs, heaters, or in areas exposed to
sunlight. This could overwork the refrigerator,
making it less efcient and increasing energy
consumption.
•
Don’t lean it against a wall.
Observing these distances and recommendations
will guarantee you a fully-functioning product, as
it will prevent the components from direct contact
with walls and furniture, thus avoiding unpleasant
sounds.
installation
Y
ou must remove all packaging including:
tape, cardboard, plastic, and/or Styrofoam (EPS).
The refrigerator must not be connected to an
energy source before installation.
important
Let the refrigerator stand for 6 to 8 hours before
connecting it to allow the cooling gas and the
compressor oil to settle.
To p
Base
Corner
packaging
model
ingenious ingenious prismatic prismatic glass glass
Capacity
Total Dimensions
(closed doors)
cm cm cm cm cm cm
Depth
Width
Total Dimensions
(open doors)
Depth
Width
working width
door opening direction
working depth

7
levelling
To level the refrigerator use
the two levelling screws
found on the base at the
front. Make sure that the
refrigerator is placed on level
ground. Adjust the levelling
screws to ensure that the
refrigerator doesn’t move
during day-to-day use.
Turn the screws anti-
clockwise to lift the front of
the refrigerator and clockwise
to lower it.
The front part of the
refrigerator should be a little
higher than the back causing
it to tilt backwards slightly.
Levelling requires two people;
one to tilt the unit backwards
and the other to turn the screws.
To level it, lift the front by turning the screws until there is a 48 mm (1.9
in) gap between the oor and the base of the refrigerator, as indicated in
the gure on the right.
observe the following when installing:
important –
after leaving the refrigerator to stand 6 to 8 hours
and before plugging it in:
1. Clean
the interior of your refrigerator with a cloth or soft sponge, and
a neutral soap or a soda bicarbonate solution.
2.
Plug it in to the correct outlet.
3. Leave
it on, empty and closed, for 4 hours before putting food inside.
4.
A
void opening the door before optimum temperature has been
reached.
5.
If you want to move your refrigerator to another location, disconnect
it. When it has been repositioned repeat steps 3 and 4.
caution
I
n the case of physical, mental or sensorial difculties (including
children), or if you don’t have sufcient experience or knowledge to
handle this product, you will need the assistance of a capable adult
to ensure safety.
Children should always be supervised. This product is not a toy.
Levelling
screws
Front
wheels
Back
wheels
mm84
Front
Front
Front
Levelling
screws
Front
wheels
Back
wheels

8
minimum electrical requirements:
Check the voltage
and frequency
characteristics in
accordance with
your country of
residence.
electrical installation:
1. Install your refrigerator to
the closest outlet. The use of
an extension cord is not recommended
2.
Where
possible, avoid connecting other electrical
appliances to the same outlet as your refrigerator while
it’s in use. This will prevent uctuations in voltage and
overheating of the refrigerator.
3.
T
o connect and disconnect your refrigerator, take the
cord by the plug and remove it. Never pull on the cable.
4.
Y
our refrigerator comes equipped with a type “Y”
polarised power cord, which includes a grounding cable.
Do not remove the ground prong by using a two-prong
adaptor, or cut the cable to replace the original plug for
a two-prong plug.
5.
If you live in a region where there are voltage and
frequency variations, don’t connect your refrigerator
into the outlet. You must install an automatic voltage
regulator with a minimum power of 500 Watts for 1000
Watts. Make sure the regulator can handle your region’s
variations in tension.
6.
If
the supply cord is damaged, it must be replaced
by the manufacter, its service agent or similarly
qualied persons in order to avoid a hazard.
important:
Ignoring the above-mentioned advice places the
responsibility for any personal or material risk
entirely with the customer.
CountryNominal Characteristics
115 V ~ 60 Hz
Brasil 127 V ~ 60 Hz / 220 V ~ 60 Hz
Europa 220 V - 240 V ~ 50 Hz
Medio Oriente 220 V - 50 Hz / 110 V ~ 60 Hz
Peru 220 V ~ 60 Hz
Ecuador115 V ~ 60 Hz
Venezuela115 V ~ 60 Hz
Colombia 115 V ~ 60 Hz
Chile220 V ~ 50 Hz
El Salvador115 V ~ 60 Hz
Argentina 220 V ~ 50 Hz
Canada115 V ~ 60 Hz
Mexico

9
32°C 10°C
N 32°C 16°C
Subtropical ST 38°C 16°C
Tropical
T 43°C 16°C
Temperatura ambiente
Temperature Range
Class Symbol
Room Temperate Range
within which our products are
designed for use.
(Storage temperatures should
comply with these.)
Temperate SN +10 to + 32
Mild Temperate
N
+16 to + 32
Subtropical
ST
+18 to + 38
Tropical T +16 to + 43
Symbol Maximum Minimum
Mild Temperate
Values in Celsius Degrees
know your product
The
refrigerator is designed to work within the room temperatures specied
in the table below.
note: The internal temperature can be affected by factors such as the
location of the refrigerator, the room temperature, and how often the doors
are opened. Adjust the temperature controls accordingly to compensate
for these factors.
For Chile and Europe:
For Brazil, Ecuador, Colombia, and Argentina:
temperature control
The internal temperatures of the freezer compartments and the cooler can
be regulated to allow them to be adjusted for suitable conservation of food.
When using your refrigerator for the rst time, we recommend maintaining
the original factory positions (in mid-position). Let it stand for 4 to 6 hours to
allow the temperature to stabilise.
If you need to change the temperature after this period you can adjust it with
the controls.

10
general temperature control
The refrigerator control has temperature graduations for both compartments
that vary from minimum (least cold) to maximum (coldest). If needs be, adjust
the control and monitor the food for a couple of hours. You can readjust it
until you obtain the desired refrigeration level. You will have to wait between
4 and 6 hours until the refrigerator reaches the selected temperature.
air regulator
Your refrigerator has an additional
control that regulates the air ow
between the freezer and the cooler.
It’s calibrated in the factory to ensure
optimum function, so we recommend
you don’t alter its position.
If you wish to adjust it, put a coin into
the central slot. By turning it to the right
you’ll generate greater air ow to the
freezer, accelerating the freezing process. However, you’ll notice that the
cooler will take longer to reach the correct temperature.
By turning the control to the left, the air ow to the cooler will increase,
delaying the freezing process according to the following guide:
note: For some models the temperature control is located on the exterior
control or display. If your model has an external control or display,
see page 72 to understand how it works.
important
Changing the position of the air regulator will alter the time it takes the
cooler to reach the correct temperature but not the temperature itself.
note: Do not overll the refrigerator
. Leave space between food and
use the shelves provided to hold everything. This will facilitate the
necessary air circulation and prevent it from lower performance.
regulator position
Freezer Temperature
Cooler Temperature No variation
Least cold Suggested Coldest
Cold days
Few foods stored
Infrequent door opening
Hot Days
Many foods storedMaximum
Mínimum
Medium Recommended for normal use
position when to use
Minimum
Maximum
Turn the knob towards Minimum
for less chill or towards Maximum
for greater chill.
Frequent door opening

11
cautions
1. The room temperature inuences the performance of your
refrigerator. The higher the external temperature, the colder the
selected temperature in the cooler should be.
2.
W
e recommend selecting a lower temperature if you frequently open
the cooler door.
3.
When placing your food inside the refrigerator
, try not to block the
airways. This will allow adequate circulation and keep the inside
temperature stable and uniform, thus only freezing the items in the
freezer.
4.
Use the top compartment to freeze food, conserving it for longer
.
Use the lower compartment to refrigerate food. if your refrigerator
has a rapid cooling compartment, you should take into account that
some fresh fruit and vegetables are cold-sensitive and it is not a
good idea to keep them in this compartment.

Alternatively
, consult the express chill zone section on page 12.
original “Parts and Features” on page 4.
12
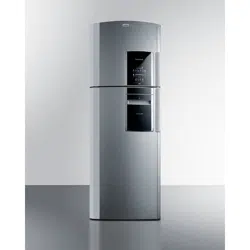
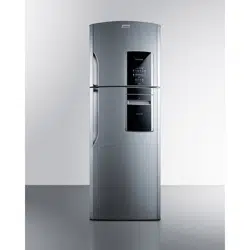
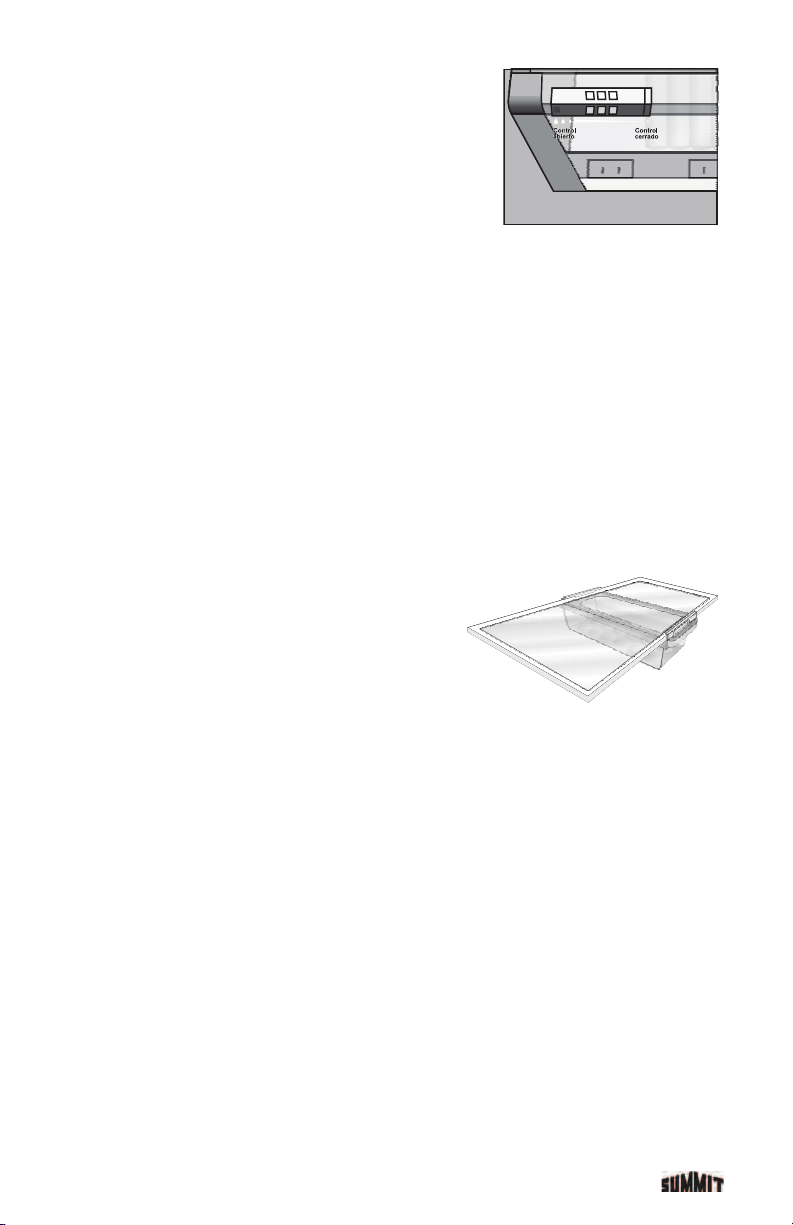
exterior display
(only available with certain models)
So
me models have an external display that will allow you to operate certain
functions additional to those that come as standard.
Power
Cool
Function
Express Chill
Zone Button
Temperature
Control
Holidays
Function
Alarm
Function
Lock
Function
Energy
Saver
Indicator
express chill zone function
(only available with certain models)
Designed to rapidly cool food and
drinks. V
ia the exterior panel you
can control the functions of the
express chill zone; the area found
at the top part of the freezer. This
is labelled with the letter d in the
The express chill zone, with its predetermined cooling temperatures for
food and drink, offers great versatility.
On top of this, it gives you three timing options of 20, 15, or 10 minutes,
so that you can select the option which best suits your needs.
note: Before activating the Express Chill Zone Function, you must
deactivate the Holidays or Power Cool functions. If you activate Holidays
or Power Cool while the express chill zone function is on, you will hear an
alarm that signals the programmes can’t be carried out.
13
how does it work?
First, place
the food and drink that you want to cool rapidly into the express
chill zone. Make sure to lower the bottom hatch of the express chill zone
before closing the freezer door.
To activate the express chill zone, press the express chill zone button on
the display a number of times until you reach the desired time. After 5
seconds it will start to work.
A countdown clock on the display screen will show the remaining time.
When the time is up, an alarm will sound, the countdown clock will read
“0” and the button light will ash for a minute, indicating that your food and
drink are ready to be taken out. The alarm will sound until you press the
express chill zone button.
The express chill zone Function will deactivate automatically:
a. If you keep pressing the express chill zone button, thereby
exiting the programme before the required time has lapsed.
b. If you press the express chill zone button once the programme
is completed and the alarm is sounding.
c. Once the cooling time has lapsed, the alarm has sounded for one
minute and stopped.
table of recommended chilling times
note: T
imes vary depending on the initial temperature of your foods and
drinks. If upon programme completion, the items haven’t reached the desired
temperature, you can add additional minutes using the display. The express
chill zone can be reprogrammed after 5 minutes have passed since last
use. If you decide to cool your items for longer, be alert for when the alarm
rings to indicate the foods and drinks are ready and remove them from
the compartment. This will prevent them from freezing, which is especially
important for carbonated beverages.
The following table outlines the times required to cool room temperature
drinks (25° to 30°) in the express chill
zone:
TIP: If you use the cooler for beer and
soda, you can bring them to the perfect
temperature before your guests arrive
using the express chill zone.
important: Y
ou should not store carbonated drinks with the intention of
freezing them in the express chill zone. This programme should only be
used to cool them. DO NOT exceed the recommended times. Your alarm
will sound for a minute after the time has lapsed, which is when you need
to take your items out of the compartment.
Ignoring the above-mentioned advice places the responsibility for any
consequences entirely with the customer.
Beverages Times
Red Wine 30 min
White Wine 45 min
Sparkling Wine 45 min
Beers 60 min
Sodas 45 min

14
Y
ou can also use the express chill zone to accelerate some desserts prepa-
ration. Below you will nd some receipes to get the best of the express
chill zone.
Strawberry Charlotte:
Ingredients
Filling:
1 cup of whipping cream
½ cup of sugar (to taste)
2 cans of sweetened condensed milk
The juice of 8 limes
Grated lime rind to taste
Strawberries (blackberries, raspberries, kiwis or any fruit you prefer are also suitable)
Base:
Lady fingers
Brandy or cognac to soak the lady fingers (to taste)
Method:
For the base: Line the base and sides of the dish with the lady fingers.
If you prefer, soak them with brandy or cognac.
Filling:
Whip the cream at maximum speed, adding sugar little by little to sweeten to taste.
Whip until firm peaks form in the cream. Whip the condensed milk in another bowl,
adding lime juice little by little until the milk thickens. Add grated lime rind to taste
Pour a layer of the condensed milk with lime over the lady fingers, and then cover
with strawberries and the whipped cream. Cover with another layer of lady fingers,
then the condensed milk with lemon, and strawberries again.
Refrigerate and serve cold.
Rice Pudding:
Ingredients
1 cup of rice
3 cups of water
A pinch of salt
1 cinnamon stick
1 litre of milk
3/4 cup of sugar
1 spoonful of vanilla extract
Ground cinnamon to taste
Method:
Put the rice, water, cinnamon stick and salt in a large saucepan. Heat and
bring to boil, then lower the heat and cover the pan, leaving it to cook until
almost all the water is absorbed.
Add the milk and sugar turn up the heat and stir constantly until the
mixture thickens. Add the vanilla and leave on the heat for 2 minutes.
Remove from the heat and leave to cool for 30 minutes. Spoon the
mixture into a large serving bowl or into small bowls, and refrigerate.
Sprinkle with a little ground cinnamon to decorate.

15
important:
Desserts must be covered
once they are in the express chill zone. You can
cover them using paper or a lid.
In case your initial time cocludes and you wish to keep using your Eexpress
chill zone you must turn your container and press the time botton again.
Chocolate Covered Strawberries:
Ingredients
1/2 kg of strawberries
300 g of dark cooking chocolate
You can use any chocolate you prefer, be it white, milk chocolate or
dark chocolate.
Method:
Wash and disinfect the strawberries, leaving the stalks on. Once they are
washed and disinfected, dry them carefully using a paper towel.
Put the strawberries on a tray that is either covered in aluminium foil or
waxed, making sure that the strawberries are not touching each other.
Put this in the express chill zone so that they cool whilst you melt the chocolate.
Chop the chocolate into small pieces and melt in a bain-marie using tepid water.
Make sure that the water in the bain-marie doesn’t boil; only heat to the
temperature necessary to melt the chocolate.
Once the chocolate is melted, take the strawberries out of the express chill zone.
Remove the stalks and dip the strawberries in the melted chocolate.
Once covered, put them back on the tray. Once all the strawberries are covered
and put back on the tray, put the tray in the refrigerator for 10 minutes before
serving to allow the chocolate to stick better to the strawberries.
You should consume this dessert on the day you prepare it.

16
exterior temperature control
On models with the exterior
door display, press the
“Fridge Temp” to change the
temperature level until the level
you want lights up.
The “Cold” level (least cold) light is found on the left-hand side, and when
all the lights are illuminated the refrigerator is at the “Coldest” temperature.
power cool function
This is designed to speed up the cooling and freezing of the
entire refrigerator
. We recommend activating this function
once you return from the supermarket as you will be storing
various room temperature items in the refrigerator.
note: BEFORE ACTIVATING THE POWER COOL
FUNCTION, the Holidays and Express Chill Zone Functions
must be deactivated as these functions cannot work simultaneously.
The Power Cool Function helps to cool your foods faster since the refrigerator
will work at its maximum cooling power. After this time, the refrigerator will
return to working as normal. It is activated by pressing the Power Cool
button. This turns the LED light on, which indicates that the function has
been activated.
holidays function
This assists you in saving energy when you go on holidays.
For periods longer than a fortnight we recommend you unplug
the refrigerator, clean it, and leave the doors wide open.
To use this function, press the Holidays button; the LED
indicator will light up telling you that the function is now
activated. To deactivate it, the Holidays button must be
pressed again. Once the cooler door is opened the function
will deactivate automatically.
note: BEFORE ACTIVATING THE HOLIDAYS FUNCTION,
the Power Cool and the Express Chill Zone functions must be deactivated
as these functions cannot work cannot work simultaneously.
alarm function
The
Alarm Function is activated by pressing the Alarm button.
The alarm will sound if this function has been activated and the
door has been left open for a period of time longer than a minute;
accordingly, if this function is not activated and the door is left
open, the alarm will not sound. Activating this function helps you
to avoid leaving the door open by mistake, thus preventing your
refrigerator from being less efcient and consuming more energy.
The alarm will stop sounding once the door has been closed. To use this function,
press the Alarm button until the light turns on. You can deactivate it at anytime by
pressing the button again until the light turns off.

17
lock function
Th
is function blocks the exterior control of the display,
preventing anyone else from changing its control conguration.
To use this
function, press the Lock button for 3 seconds; the button will
then light up telling you that the function has been activated. If
you press any button other than the Lock button, the light will
icker and you will hear a beeping sound that indicates the display is blocked.
To deactivate this function, simply repress the Lock button for 3 seconds and
the light will go off, indicating the function has been disabled. We recommend
that you activate the Lock Function when you need to clean the display.
energy saver
This indi
cator informs you when your refrigerator is working
at its maximum energy saving level. It will automatically light
up at the very moment the refrigerator starts to save energy.
The indicator light will turn on only if:
•
Y
ou go on a trip for a period longer than 5 days.
•
T
he door is not opened constantly (dependent on your
refrigerator load as well as the room temperature).
•
Y
ou activate the Holidays Function.
smart station
(only available with certain models)
The Smart Station provides quick access to
a special zone in your refrigerator.
This compartment allows you to easily grab
food without having to open the refrigerator
door. It comes with a multi-positional shelf
that you can adjust according to your
needs.
The Smart Station has both internal and
external access. You can put your foods
into the refrigerator via the internal access,
while the external access lets you take
out food from this compartment without
opening the refrigerator door. This will
make your refrigerator more energy-
efcient.
T
o open the Smart Station’s internal
compartment press the button located beside
the medium shelves in the centre.
Press it and pull it towards you to open the
door. To close, push it until you hear a click.
18
suggestions on how to
get the most from your
Smart Station
Y
our Smart Station’s capacity offers
you maximum versatility and is
perfectly adaptable to your lifestyle.
Below are some suggestions of
its many uses:
Furthermore, you can also put
ingredients for a specic recipe into
your Smart Station; for instance, a
cake, sauce or pasta, etc.
Later, you can access these
quickly without having to open the
refrigerator door each time you
need a new ingredient.
On top of all this, the external
access door to your Smart Station
can be opened out and used to
temporarily hold up to 8 kg of food
and drink.
note: Be careful that children do not
hang or are left on the door because
they can be hurt.
note: The Smart Station comes with an
air conductor which brings cold air from
the
freezer to the Smart Station
guaranteeing the perfect temperature for
your favourite
foods. Make sure to leave the airway
clear.
capacity
1 packet yellow cheese singles
1 packet yellow cheese singles
1 packet sausages
1 packet ham (300 g)
3 drinking yoghurts
1 litre orange juice
1 litre milk
Jar of mayonnaise (370 g)
1 packet sausages or 4 of baby carrots
2 drinking yoghurts
8 Petit Suisse
4 mini-cartons fruit juice
2 mini-cartons milks
1 bottle of wine
1 soda (1 ltr) or 1 juice (1 ltr)
1 half-litre bottle of water
3 cans of beer
4 fruit juices (250 ml each)
2 hydrating drinks (500 ml each)
Water bottle (1 ltr)
1 bottle of juice (1 ltr)
3 apples
1 disposable plate of food
5 half-litre containers with individual
portions ready for the week

19
In case of a spillage, you can take the following
steps to easily clean the exterior door:
To remove and replace the exterior door of your
Smart
Station you will need a small screwdriver:
1.
Open the exterior access door
2. Use the at part of the screwdriver to remove
the door from the base on the left hand side.
3.
Find the hinge and screw the screwdriver into
it.
4.
Once you have unscrewed the hinge, pull the
door to the right until it comes away.
5.
T
o replace the door, rst attach it to the bolt on
the right-hand side.
6.
Slide the edge to the right using the
screwdriver, and align it with the marked
groove.
7.
Use light movements until you hear a click
indicating that the door is properly positioned.
smart ll ice factory
(only available with certain models)
This no-spill ice-maker with removable cylinder feeds directly into the
ice-tray
. It comes with a storage box that can
hold up to 900g of ice.
starting up:
Remove the water cylinder found at the top
of the Smart Fill Ice Factory (SFIF) by pulling
the top middle part towards you.
Once removed, place the water cylinder on a
at surface. Open the top, which you’ll nd in
the middle centre. To avoid spillages, make
sure that there’s no residual ice obstructing
the valve of the cylinder before you ll it with
water. Pour 180 ml of puried water into the
cylinder or ll it to the maximum level.
Replace the top, placing pressure on the
middle. It’s essential that it’s secure in the
centre in order to avoid water leaking out.
Put the cylinder back in its original position
making sure it’s securely connected. You
should be able to see and hear the water
lling the ice-tray which indicates that the
cylinder is correctly installed.
20
note: It’
s important that once you have completed the above steps you make
sure that the water cylinder is correctly installed to prevent water freezing in
the cylinder’s interior.
caution: Only ll with drinking water.
removal of ice
1. After a while, your ice cubes will be
ready for use. To remove them, pull the
handle slowly towards you until it’s fully
down. At this point it will be necessary
to pull the handle a little more forcefully
until you hear the ice fall into the lower
compartment of your Smart Fill Ice
Factory.
2.
This compartment can hold up 3
complete releases of the ice-tray. To
remove the ice, simply lift and pull the
storage box that you will nd in the lower
part. This box is designed to be brought
wherever you wish. To make more ice,
repeat the process.
note: The cylinder can only hold one load at
a time. Before repeating the process, make
sure that the tray is empty.
note: The ice produced may vary in size.
cleaning the smart ll ice factory
When cleaning your Smart
Fill Ice Factory it is imperative that you only use
a soft sponge with water and a neutral soap. Afterwards, leave it to dry.
DO NOT use a steel wool sponge or detergent to clean the SFIF (specially
the ice-bucket), as this could affect how it works, change how it looks, and
affect the avour of your ice cubes.
cleaning the cylinder
Only use a soft sponge with water and a neutral soap to clean.
Afterwards,
leave it to dry. Don’t use steel wool sponges or detergents, knives or forks
as these could scratch or damage the central valve. If there’s frozen water
inside the cylinder, let it melt or use tepid water to speed up the process.
important:
When removing the ice cubes, pull
the handle all the way down. You will feel resis-
tance at this point, but you need to pull a little more
so that the ice-tray twists and releases the ice into
the lower compartment. Once this point has been
reached, the process is complete.
21
cleaning the tray
1. Firstly
, open the front door where
you see a small lip on the right-hand
side. Pull the door towards you until
completely open.
2.
Then, to remove the ice-tray from its
tting, take it by the right-hand side
and at the same time, pull it down
and towards you. Finally
, pull it out by
the centre, keeping it horizontal.
3.
T
o replace the ice-tray in the Smart
Fill Ice Factory, align the short sides
with the lateral ttings and push it
until it’s completely inserted.
4.
Afterwards, push the tray by the
right-hand side until you hear a click,
which will ensure the tray securely in
place while working.
5.
Close the lid of the Smart Fill Ice
Factory
. Your device will be ready for
use once again.
i
mportant:
Use t
epid water to remove residual ice which will form with
regular use of the Smart Fill Ice Factory. This residue could form on the
lid you use to ll the water cylinder, the cylinder valve, and the ice-box,
thus affecting the working of different parts of the system.
Don’t use ice-picks, forks, or knives to remove the residual ice as to do
so could damage the Smart Fill Ice Factory.
22
compartments
fruits & veggies crisper
Designed to keep your fruit and veg fresh.
deli fresh compartment
(only available with certain models)
This compartment has been designed
to give you greater organisational space
inside your cooler
. It can be used to hold
delicate fruits and vegetables.
To remove the drawers:
Pull on the drawer by the top lip.
Gently lift it and pull on it again
until it slides out completely.
meat keeper
(only available with certain models)
This Gourmet compartment has been
designed for the storage of
cheeses and cold meats. It attaches to
one of the cooler shelves and
can be slid from one side to the other at
your convenience.
T
o remove this compartment:
Pull it towards you and lift it up until
the device comes away.
23
humidity controls
The humidity controls can be found in
the Fruits & Veggies Crisper and the Deli
Fresh Compartment.
The primary function of this control is to
maintain the humidity at a suitable level for
the storage of your items, thus conserving
them for longer. When used correctly, the
humidity control allows an air ow to travel
inside the compartment in accordance with
your needs.
We recommend that you keep the
control turned off to conserve leafy green
vegetables, and turned on to conserve fruits.
take&go egg box
(only available with certain models)
This innovative egg box attaches
to one of the cooler shelves and
can be slid from side to side at your
convenience.
It can hold up to 12 eggs (loose or
in a carton) and is designed to be
put in dif
ferent parts of your cooler;
underneath the shelf, on top of it,
or inside the “Double Capacity”
shelf located on the inside of the
refrigerator door.
As well as this, because of its
portable nature, you can use it to store and
carry sauces and leftovers.
In certain models the egg box can’t be hung from the shelf.

For details on how to use this, see page 12.
24
express chill zone
(only available with certain models)
This practical compartment has been
devised to rapidly cool foods and drinks.
Closing the lid causes the express chill
zone temperature
to be lower than that of the rest of the
freezer. This allows you to rapidly cool items
such as bottles of wine, beer, and food. It
can also be used to accelerate the freezing
process, saving you time.
The control for this compartment is found on the exterior display of your
refrigerator.
If you don’t wish to use the express chill zone, you can lift the lid and use
the space in the same way as the rest of the freezer.
safety glass spill guard shelves
The shelves which your refrigerator comes with are made from high-
resistance glass.
They can be positioned in various places, depending on your needs.
The maximum load of the cooler shelves is 18kg, while the freezer shelf
can hold 15kg.
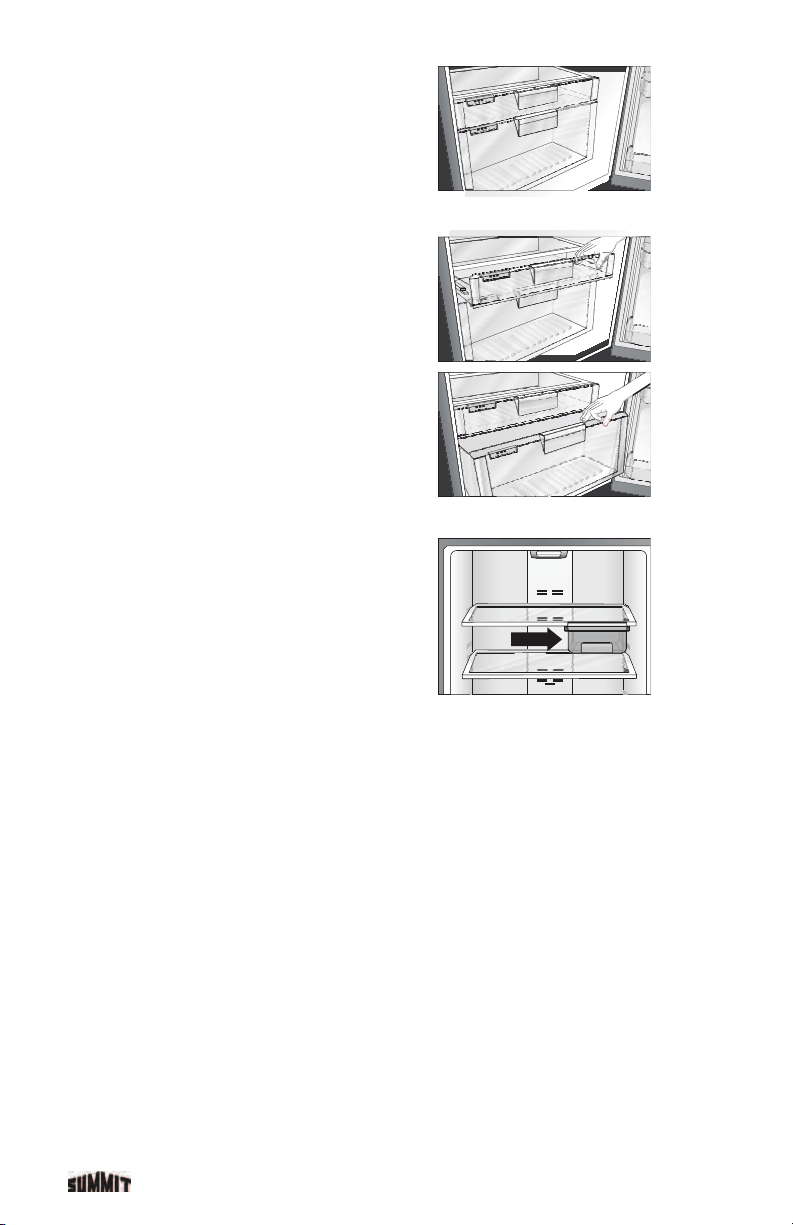
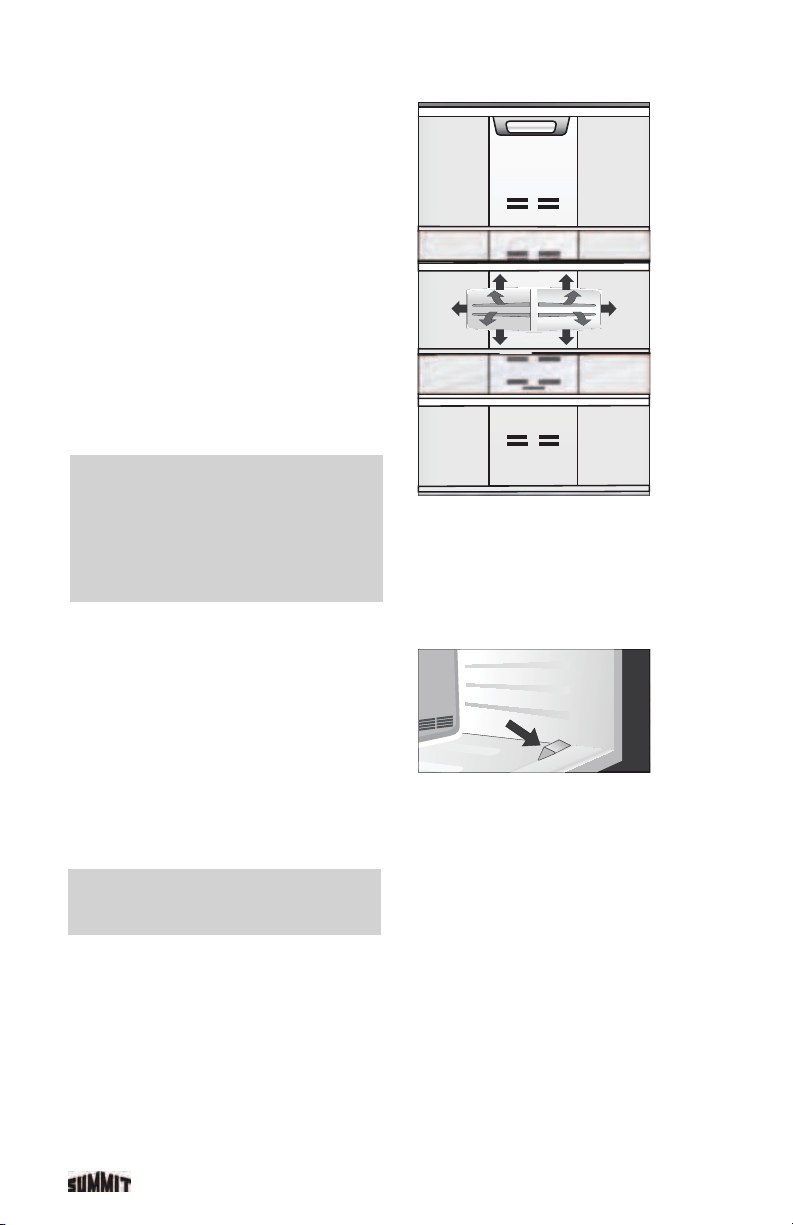
how to remove the shelves
If you need to remove the cooler
shelves:
1. Remove all items from the shelf.
2. Hold the front part of the shelf with
both hands.
3.
Pull it towards you, taking care not
to let go of until it has been completely removed from the refrigerator.
4.
T
o return it to its original position, place it on the protruding holds,
holding it with both hands until it’s securely in place.
5.
T
o change around the other shelves, repeat the above steps.
freezer shelves
1. Remove all items from the shelf.
2. Hold the front part of the shelf with
both hands. Lift it gently and pull it
towards you without letting go.
3.
T
o return it to its original position,
place it on the desired rail and push
it until securely positioned.
4.
T
o change around the other
shelves, repeat the above steps.

This shelf provides
enough space to store tall bottles (1.5 ltr or 2.5 ltr).
d jumbo drinks shelf
25
shelves
a medium shelf
(only available with certain models)
The smaller size of this shelf makes it
very versatile. It is ideal for storing jars
or shorter containers.
This shelf can only be positioned as
seen in the image on the right. We
recommend you only remove it if you
wish to clean it.
b wide shelf
(only available with certain models)
This shelf
is the only one of its kind on
the market which can store gallon-sized
containers
c double capacity shelf
This shelf is the only
one of its kind on the market which can store gallon-
sized containers
to remove any of the refrigerator shelves for cleaning,
follow the below instructions:
1.
Remove all items from shelf.
2.
Hold the shelf and pull it upwards to free it.
3.
T
o replace it, put it back on to the shelf supports, and push it. Make
sure it slots back into place fully.
dairy shelf
(only available with certain mode
ls)
This shelf has a rotating lid which you
must ensure to close before
shutting the door of your refrigerator.
Make sure that your items don’t prevent the lid from closing.
n
ote:
W
hen cleaning your refrigerator, remember that you must use a soft
sponge and neutral soap so as not to damage your product’s features.
a
b
c
d
26
air distribution
Y
our refrigerator’s air ow system is
entirely automatic and intuitive.
You don’t need to defrost your
refrigerator as this will happen
automatically.
(No Frost System)
This system ensures the optimal
conservation of your food as it
increases air ow and distributes it
evenly throughout the refrigerator.
Furthermore, a suitable temperature
is maintained via a level sensor which
activates the air ow in the refrigerator
when necessary.
important: The air ow exits must
never be obstructed.
note:
The Smart Station comes with
an air conductor which brings cold air
from the freezer to the Smart Station
guaranteeing the perfect temperature
for your favourite foods.
important:
A
void placing objects
too close to the air conductor grille
in your freezer which leads to
your Smart Station, as this could
prevent air from owing correctly
into the Smart Station.

27
getting the most from your refrigerator
After Buying
Your Foodstuffs
After
getting home from the supermarket, refrigerate or freeze perishable
foods as soon as possible.
We recommend that you press the Power Cool button so that the food can
quickly reach a suitable temperature.
To make sure that liquids which may leak from meat packaging don’t con-
taminate other foods in your refrigerator, we recommend that you keep all
meat in the Meat Keeper provided with some models. If your model doesn’t
contain this feature, store your meat products in plastic bags.
How to Store
Your Food
• Store cooked food in closed containers and place them on a
shelf above where raw foodstuffs are being stored. This will avoid
contamination.
•
T
o prevent contamination between different foods we recommend
keeping food in lidded containers, wrapped up, or well-sealed using
aluminium foil, plastic wrap, or a lunch-box.
•
Do not store food in an open tin, transfer it into another container as
oxygen in the air could react with the metal and damage your health.
•
Ham, cold meats, and cheese should be kept in individual sealed bags
or airtight plastic containers.
•
Allow hot foods to cool somewhat before storing them inside small
containers in the refrigerator. You will save light and prevent other foods
in the refrigerator from being heated and thus adversely affected.
•
Make sure that jugs of avoured or natural water have secure lids to
prevent undesirable odours affecting them.
•
If you wish, store your fruit and vegetables in plastic bags in your
refrigerator drawers. This micro-environment will prevent different
gases from mixing and thus conserve your food for longer.
•
W
e recommend you don’t wash fruit and vegetables before storing
them in the refrigerator, as doing so could damage the skin and
increase decomposition rate. If they are very dirty, keep them in
a plastic bag so that they don’t
taint the other foods stored in the
compartment.
•
W
e recommend the refrigeration
of eggs. Don’t wash them before
storing, as this could damage their
natural protective layer, and thus
contaminate the interior of the egg.
Keep them in their protective carton,
with the air pocket facing upwards
(the thick part). Wash them just
before use to avoid contaminating the
food you’re preparing. For the same
reason, abide by the use-by date.
Fruit and garden produce
which should not be mixed.
To avoid undesired avours
and odours be aware of the
following information:
Cabbage, celery, carrots, gs,
and potatoes absorb apple and
pear
odours.
Figs and grapes absorb turnip
odours.
Mushrooms and gs absorb
onion odours.

28
• If you need additional space to store
your vegetables, the following fruits
and garden produce can be kept on
the higher shelves as they are more
cold-resistant: artichoke, broccoli,
peas, spinach, cabbage, leek,
turnip, spring onions, and parsley.
To prevent them from drying out and
their aromas from mixing put them in
plastic bags.
• Don’t keep garlic in the refrigerator
as the cold and darkness promote
germination.
• With other models it is recommended
that you keep milk near an airway.
However, with our air ow system
you can store it on the refrigerator
door shelves as the air is distributed
evenly throughout.
• Sodas and beers keep perfectly on the upper door shelves, where they
are easily accessible and exposed to the cold quickly and directly.
• When putting in and taking out food and drink try not to leave the door
open too long. This will reduce your refrigerator’s energy consumption
and make it more efcient.
• When freezing food, prepare small portions and place them in such a
way that the air in the freezer can circulate around them. This will make
freezing time faster and ensure you use the entire portion.
• Always take heed of use-by dates on frozen food as indicated by the
manufacturer.
• Do not place sealed glass containers which have any liquids inside in
the freezer, as these could break and cause an accident.
• Products such as sorbet or pieces of ice should not be consumed at too
cold temperature.
• When putting a food item into the freezer try to avoid putting it on top of
or too close to an item that is already frozen.
A
void storing food in the freezer for excessive durations of time.
See the following quick reference guide:
note: If you own the Ingenious Model and want to go to the
Time 1 month 3 months 6 months 9 months 12 months
Sausages Fish Pork Fruit pulp Chicken
Ham Seafood Vegetables Beef
Ice-cream Shrimp
Desserts Prawns
Maximum storage times for frozen food
Food
The following fruits and garden
produce should be stored in
the crisper due to their delicate
nature:
Asparagus, blackberries,
mushrooms, strawberries, gs,
and grapes.
To protect them further we
recommend you keep them
in the Veggie Balcony, which
comes with certain models.
This has been designed to
ensure that delicate foods are
not bruised and that those little
odds and ends don’t get lost
and go off, which could affect
the rest of your food.
troubleshooting section and customer service, go to page 32.
29
solving problems
cleaning and servicing
your refrigerator
• Always disconnect your refrigerator
before any type of servicing.
•
Never use toxic products, abrasives,
or steel-wool sponges as these will
damage the surface of your product.
•
Use a soft sponge or damp cloth, and
a neutral soap to wash. Rinse the refrigerator, and dry it with a clean
and dry cloth. You can also use a solution of bicarbonate of soda (one
tablespoon dissolved in two litres of tepid water) to clean the inside.
•
Don’t use steel-wool sponges or sharp objects as these could scratch
the refrigerator or its shelves.
•
T
o make cleaning easier all our models come with high-resistance
glass shelves with anti-spill edges. These give you time to clean liquid
spillages before they spread.
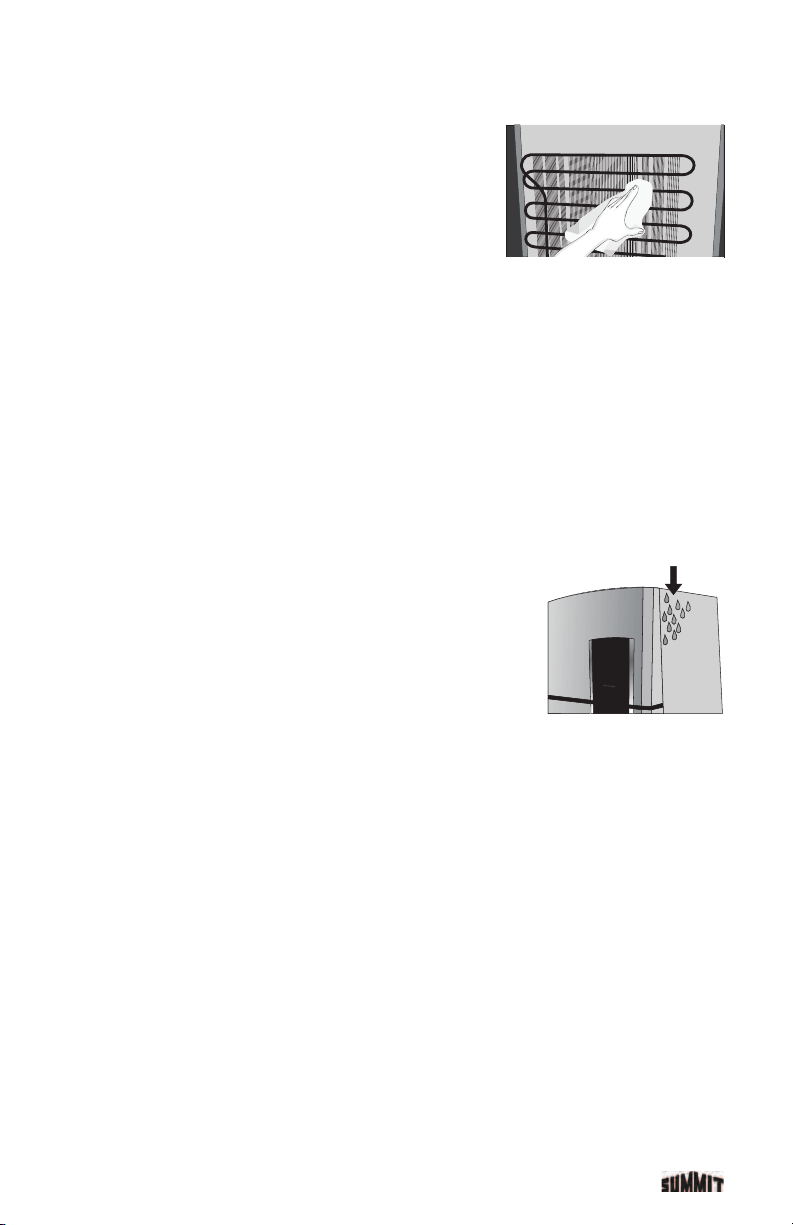
•
Use a brush, cloth, or sponge to remove dust build-up from the
condenser. Try to do this at least once every 6 months.
heating of areas near the freezer
Y
our refrigerator comes with an anti-condensation
mechanism.
The heating of some areas external to your
refrigerator is normal. This happens to prevent
water droplets from condensing on the outside of
your refrigerator. However, if room temperature
and humidity are higher than usual, light
condensation may form. Dry with a cloth.
general precautions
• Don’t touch the inside of the freezer door with wet hands.
• Don’t let children hang from the doors or play near the refrigerator
when the door is open, as they may injure themselves, bang into it, or
get trapped.
•
Don’t let children hang from shelves or the Smart Station door
, as
excessive weight could break these.
•
Sometimes, it can cause trouble to reopen the refrigerator door
immediately after closing. This normal occurrence is a result of a
vacuum formation inside the refrigerator, caused by air at different
temperatures combining. Wait 10 to 15 seconds and the doors will
open easily once again.
Before throwing out your old refrigerator or freezer, take the following pre-
cuations to prevent the risk of a child entrapment.
•
T
ake off the doors
•
Leave the shelve
s in place so that children may not easily climb inside.

30
holidays and absences
• For absences greater than a fortnight unplug your refrigerator
.
•
Leave your refrigerator
, including the ice-box, clean and empty.
•
Leave the door partly-opened, using something to block it from closing,
as this will facilitate ventilation and prevent bad odours from building up.
•
For
short absences you can leave your refrigerator plugged in. Remember
to save energy by activating the Holidays Function.
•
Remember that power outages can occur when you are not at home.
moving
important: If you have to lay the unit on its side for transportation
purposes, make sure to place it on its left-hand side (looking at the front of
the refrigerator).
Before moving your refrigerator from its place, make sure the levelling
screws are not touching the oor so that the wheels can freely move the
refrigerator.
important: After moving your refrigerator, follow the installation instructions
so that the refrigerant gas and the compressor oil can settle.
power outages
• The
majority of energy supply interruptions are corrected within a few
hours. Your refrigerator’s interior temperature will not be affected within the
rst 4 hours. If the power outage persists for more than 6 hours, we suggest
placing bags of ice in both the cooler and the freezer to conserve the food.
•
A
void opening refrigerator doors.
•
If you notice variations in the voltage, we recommend that your turn of
f
and/or disconnect your refrigerator until the voltage returns to normal.
Increases and decreases in the light intensity from the bulbs indicate
these variations are occurring.
•
If
you model comes with the Power Cool, Holidays, and Express Chill Zone
functions, these will be deactivated (indicated by the lights switching off).
This won’t affect your refrigerator upon the power returning, but you will
have to reactivate these functions to continue using them.

31
normal operating sounds
While
in operation, your refrigerator will make some typical sounds. Below,
you can nd a description of the normal operating sounds:
•
Cracking.
You hear this when the ice breaks. It’s the same sound which
occurs when the ice-trays are removed from the freezer and exposed
to room temperature.
•
Compressor
noise. This is a characteristic of the motor. It means that
the compressor is working.
•
Gas expansion noise.
This is a noise similar to water boiling.
•
C
ooling system noise. This is characteristic of the ventilator, which
shows that the system is functioning. It is commonly heard when you
close the refrigerator door.
changing the light bulb
Some models have lighting in the cooler and the freezer
, while others only
have a cooler light.
T
o replace the bulb, following the instructions below:
1. Disconnect your refrigerator
.
2.
Remove
the bulb cover by pressing inwards on the sides of the cover,
moving the cover downwards from the front. Once the cover has come
away from the upper supports, pull it towards you to remove it from the
temperature control.
3.
Remove the bulb by turning it anti-clockwise.
4. Replace the bulb with another of the same electrical characteristics and
dimensions.
5.
Once you have changed the bulb, put the light bulb cover back on by
aligning the back tabs of the cover with the temperature control slots.
Then, push the cover upwards until you hear a click.
important:
Some models come with LED lighting for their food compartment. If this
component ceases to work, blows, or there are variations in brightness,
you have to phone a skilled technician as to ensure coverage by the
guarantee it must be he/she who replaces the component.
32
frequently asked questions and operating guide
Problem
Probable Cause What to Do
When filling the
cylinder, water
spills out when
the door is open
or close.
Cooler or freezer
door is difficult
to open
Express Chill
Zone hasn’t
cooled the
drinks and/or
foods
Functions display
won’t activate
Express Chill Zone’s
Alarm Function
won’t stop
sounding
Express Chill
Zone, Turbo Cool,
and/or Alarm
won’t activate
Refrigerator
isn’t working
* Check the energy supply.
* Make sure that the plug is properly connected to
the socket.
* Check the mains fuse.
Call an authorised service centre.
Connect the plug.
Plug another device into the socket to check it,
and change the plug if necessary.
The lid of the Express Chill
Zone is open.
Lock Function is activated.
Damaged supply cable.
Disconnected plug.
Defective plug socket.
Power Fault.
Low voltage (this can be noticed
by the bulb lights flickering in
the house).
You are trying to activate
a function while another is
already activated.
You have removed the drink or
food from the Express Chill Zone
but you haven’t deactivated the
function to turn off the alarm.
An inadequate cooling time
has been selected, with too
big a load of goods to
be chilled.
A vacuum is created when you
close and try to re-open the
cooler and freezer doors in
too quick succession.
Install an automatic voltage regulator with a
minimum power of 500 Watts and a minimum
current of 10 Amps.
Deactivate the activated function, and then
select the one you wish.
Press the Express Chill Zone Function to stop
the alarm sounding.
Deactivate the Lock Function to be able to
activate the functions display.
Cooling times vary in accordance with the siz
e
of the load of drinks or foods, and
their initial
temperature. As a result, it is recommended that you
select the same time again or an option of even
more time, and leave until your items have the
desired temperature reached.
Close the lid of the Express Chill Zone and
reprogramme the time.
1.-Wait a few minutes for the vacuum
pressure to dissipate (don’t try to open it
immediately).
2.- Open the freezer door first, and then the
cooler door.
It is possible that the seal tank has not been
located in the correct position.
The water tank is
overflowing.
Do not fill the container to the top.
The maximum water level is marked on the
cylinder.
The water from
the water
dispenser
tastes unusual.
The dispenser has not been
filled by pure drinking water.
The dispenser must be filled by pure
drinking water.
The dispenser has not been
filled cleaned.
Clean the tank for the first time of use, and
it is recommendable to clean it every 30 days.
The water tank has been
cleaned with detergents and
odorous cleaning products.
There is spillage in the
water tank.
Don’t use detergents or odorous cleaning
products.
The water dispenser is not
used regularly.
If you don’t use your water tank frecuently
throw the water, and clean the system.
33
frequently asked questions and operating guide
Problem
Probable Cause What to Do
External
condensation on
exterior door
(depending on
model)
External
Condensation
Refrigerator is
not cooling items
Unusual Noises
Smart Station
isn’t chilling
Ice cubes
vary in size
See installation instructions.
See operating and user guide.
Only open refrigerator doors for necessary time.
Don’t allow air outlets to be obstructed.
See installation instructions.
Adapt them in accordance with instructions.
Adjust the levelling knobs.
See the installation instructions.
The variation in size of ice cubes is normal.
The access door is not being closed properly.
Refrigerator is exposed to direct heat or sunlight.
Door is being left open for excessive amounts of time.
The air circulation is obstructed.
It has been installed in an unsuitable place.
The accessories are not well positioned.
The levelling is not adequate.
It has been installed in an unsuitable place.
Freezer duct or grille obstructed.
The water cylinder wasn´t filled up to the
maximum level.
Don’t add more water as this could spill out
and/or could mean more force will be required to
release the ice cubes.
The refrigerator is resting on a sloped floor,
and/or it itself is inclined. Thus, some ice-tray
cubes might not get fully filled. (The water
cylinder has the exact volume space for
water as the ice-tray.)
The refrigerator must have a certain incline
backwards. This may cause the ice-tray to lie
slightly unevenly.
Check that there aren’t any objects or foods
obstructing the air-way in the freezer´s air flow
grille (grille at the front of the compartment).
It is normal for atmospheric humidity to be higher
than 75%.
Check that there aren’t any objects inside the
access door keeping it from closing.
Elevated humidity in the atmosphere
(higher than 75 % RH).
The knob on the exterior temperature display
has been incorrectly set.
On high temperature and high humidity
enviroments your refrigerator may show
condensation on the acces door.
This is a normal condition in the performance
of the unit. Sweep it with a dry cloth
whenerver you feel it is needed.
Ice-tray hasn´t
been filled to
maximum
capacity
Smart Fill Ice
Factory - When
filling the cylinder,
water spills out
from the lower
part where the
valve is.
Smart Fill Ice
Factory - It has
become difficult
to open water
cylinder lid
Smart Fill Ice
Factory won’t
release ice
Clean the ice accumulation with tepid water.
Clean with a soft sponge.
The valve was obstructed by ice.
The ice-tray has an excess of scale.
The programme has an in-built system to
prevent over-filling and ice sticking.
The lid of the cylinder has not been properly
closed.
Water has spilt onto the lip area of the cylinder
or this has been filled to excess. Ice has been
generated, impeding the opening of the lid.
You aren’t giving it that extra pull to twist
the ice-tray.
The cylinder hasn’t been positioned correctly, and
the ice-trays can´t be filled with water.
Take out the cylinder and fill it up to maximum
capacity.
Check that the tray doesn’t have ice stuck to it, or
that there isn’t an excess of water.
Press the lid of the cylinder in the middle.
Remove ice residue, which may be near the valve,
with tepid water.
Pull the handle more firmly until completely
twisting the tray.
Pour water into the cylinder again. Make sure that
the cylinder has been positioned properly by
watching for water falling into the trays.

Revised07/20/12
PARTS AND LABOR WARRANTY INFORMATION
SUMMIT Appliances are manufactured to provide outstanding value, and your satisfaction is our goal on every
product. All SUMMIT major appliances carry a one year limited warranty on both parts and labor. All
refrigerators and freezers carry an additional four years on the compressor. Certain exclusions may apply.
Certain models (including SUMMIT ranges, wall ovens, and cook tops) are manufactured for us in the U.S. and
carry the manufacturer's warranty (also one year parts and on-site labor).
For details on specific warranty issues, please refer to the warranty packed with the product, or contact us.
Your warranty rights are protected by mailing back the registration card packed with each unit.
GENERAL PARTS AND LABOR WARRANTY
Summit warrants, to the original purchaser of every new unit, the cabinet and all parts thereof, to be free
from defects in material or workmanship, under normal and proper use and maintenance service as
specified by Summit and upon proper installation and start-up in accordance with the instruction packet
supplied with each Summit unit. Summit’s obligation under this warranty is limited to a period of 12
months from the date of original purchase.
Any parts, covered under this warranty, that are determined by Summit to have been defective, within the
above said period, are limited to the repair or replacement, including labor charges, of defective parts or
assemblies. The labor warranty shall include pre-approved standard straight time labor charges only and
reasonable travel time, as determined by Summit.
COMPRESSOR WARRANTY
In addition to the warranty period stated above, Summit warrants its hermetically sealed compressor to be
free from defects in both material and workmanship, under normal and proper use and maintenance, for a
period of 60 months from the date of original purchase. Compressors determined by Summit to have
been defective within this extended time period will, at Summit’s option, be either repaired or replaced
with a compressor or compressor parts of similar design and capacity. The above said extended
compressor warranty applies only to hermetically sealed parts of the compressor and DOES NOT apply
to any other parts or components, including, but not limited to, cabinet, paint finish, temperature control,
refrigerant, metering device, driers, motor starting equipment, fan assembly, or any other electrical
component, etc.
WARRANTY CLAIMS
All claims for labor or parts must be made directly through Summit. All claims should include: model
number of the unit, the serial number of the cabinet, proof of purchase, date of installation, and all
pertinent information supporting the existence of the alleged defect. In case of compressor warranty, the
compressor model tag must be returned to Summit along with the above listed information. All claims
should be filed within 30 days of completed repair or the warranty claim could be refused.
THINGS NOT COVERED BY THIS WARRANTY
Summit’s sole obligation under this warranty is limited to either repair or replacement of parts, subject to
the additional limitations below. This warranty neither assumes nor authorizes any person to assume
obligations other than those expressly covered by this warranty.

Revised07/20/12
NO CONSEQUENTIAL DAMAGES: Summit is not responsible for economic loss; profit loss; or
special, direct, indirect, or consequential damages, including without limitation, losses or damages
arising from food or product spoilage claims whether or not on account of refrigeration failure.
WARRANTY IS NOT TRANSFERRABLE: This warranty is not assignable and applies only in favor of
the original purchaser/user to whom delivered. Any such assignment or transfer shall void the
warranties herein made and shall void all warranties, express or implied, including any warranty of
merchantability or fitness for a particular purpose.
IMPROPER USE: Summit assumes no liability for parts or labor coverage for component failure or
other damages resulting from improper usage or installation or failure to clean and/or maintain product
as set forth in the warranty packet provided with the unit.
ALTERATION, NEGLECT, ABUSE, MISUSE, ACCIDENT, DAMAGE DURING TRANSIT OR
INSTALLATION, FIRE, FLOOD, ACTS OF GOD: Summit is not responsible for the repair or
replacement of any parts that Summit determines have been subjected after the date of manufacture
to alteration, neglect, abuse, misuse, accident, damage during transit or installation, fire, flood, or act
of God.
IMPROPER ELECTRICAL CONNECTIONS: Summit is not responsible for the repair or replacement
of failed or damaged components resulting from electrical power failure, the use of extension cords,
low voltage, or voltage drops to the unit.
NO IMPLIED WARRANTY OF MERCHANTABILITY OR FITNESS FOR A PARTICULAR PURPOSE:
There are no other warranties, expressed, implied or statutory, except the parts & labor warranty and
the extended compressor warranty specifically described above. These warranties are exclusive and
in lieu of all other warranties, including implied warranty and merchantability or fitness for a particular
purpose. There are no other warranties which extend beyond the description on the face hereof.
OUTSIDE CONTIGUOUS UNITED STATES: This warranty does not apply to, and Summit is not
responsible for, any warranty claims made on products sold or used outside the Contiguous (48)
United States. To be clear, this warranty excludes the states of Alaska and Hawaii and all off-
shore territories.
REQUESTINGSERVICE
If you are in need of service, please either fill out a service request on our website,
http://www.summitappliance.com/support
, or call us at 800-932-4267 or 718-893-3900. Please be prepared to
give us the following information: your name, address, phone, email, model, serial, date of purchase, place of
purchase, and the problem you are having.