OWNER’S MANUAL LG Electronics AIR CONDITIONER
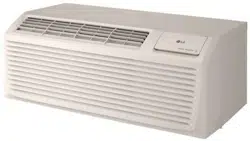
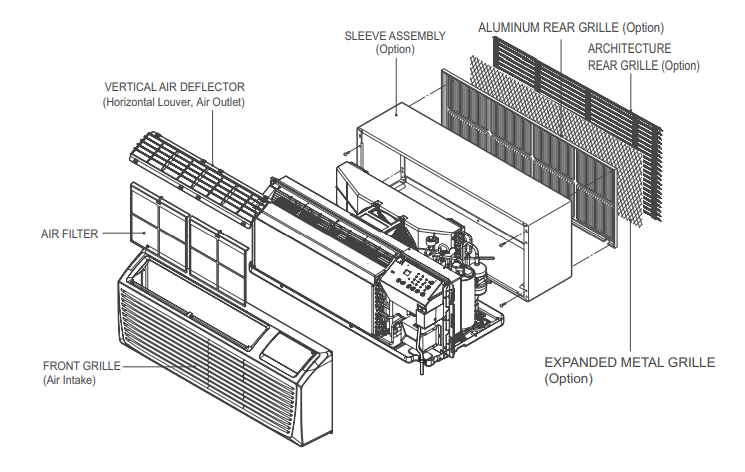
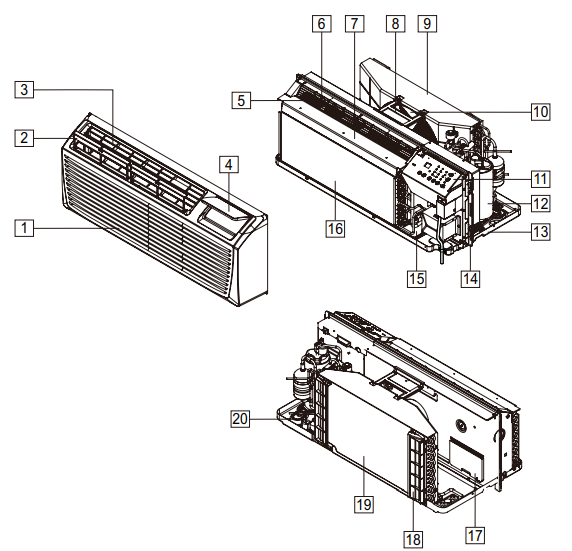
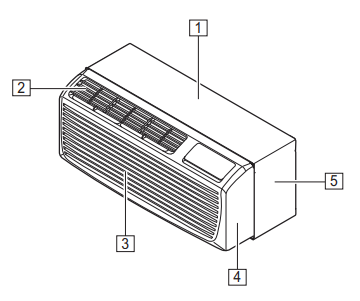
PRODUCT OVERVIEW
 WARNING
- This air conditioner should be installed in accordance with the National Electric Code. Expanded Metal Grille Should be applied for better performance in PTAC and PTHP Units. For Installation purpose and better appearance Aluminum Rear Grille or Architecture Rear Grille can be applied in PTAC and PTHP Units.
PREPARING FOR INSTALLATION
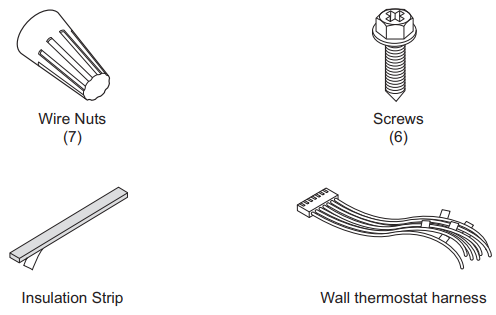
Contents of Installation Kit
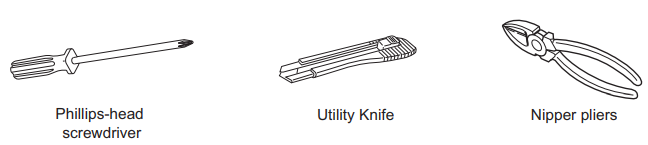
Tools and Materials Needed
INSTALLATION
How to Install the Unit
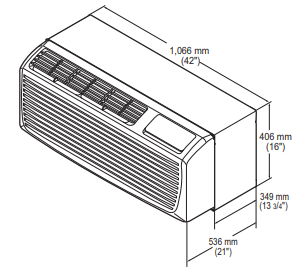
- Measure the wall sleeve and air conditioner dimensions. You can install the new air conditioner according to these installation instructions to achieve the best performence. All wall sleeves used to mount the new air conditioner must be in good structural condition and have the rear grille(sold separately) that securely gets attached to the sleeve or the flange of the sleeve to secure the new air conditioner.
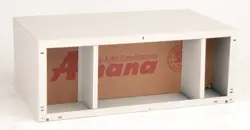
Dimension of air conditioner
Dimension of sleeve assembly (optional)
- To avoid vibration and noise, make sure the unit is installed securely and firmly.
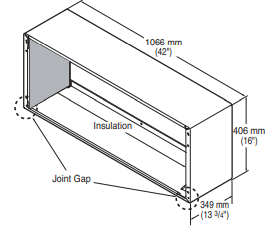
- When installing the sleeve & Front grille, make certain there is nothing within 21” back & front of sleeve & front grille, that would interfere with heat radiation and exhaust air flow
- An insulation strip must be attached.
- After assembly of sleeve & front grille, the gap should be over 20” from both sleeve & grille. (See the figure 1.)
- Take out the insulation strip from the upper packing.
- Attach the insulation strip onto the rear upper side of the wall sleeve.
 CAUTION
- Require 2 people to lift the air conditioner, it is HEAVY
- Before installation, Check the insulation on the inner side of the sleeve. If there is no insulation, place the insulation.
- Check the bottom corner's joint gap of the sleeve, If there is, fill the gap with putty.
How to connect power supply cord
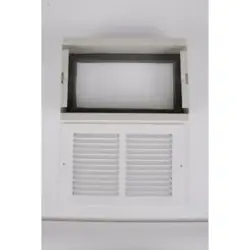
- Remove the front grille by pulling it out at the bottom to release it, then lift it up along the unit top front.
- Remove cover by removing 2 screws from front.
- Connect accessory power supply cord, and attach power cord to base pan with screws.
- Replace cover with screws. Tighten securely.
- Slide the unit into the wall sleeve and secure with 4 screws through the unit flange holes.
- Reinstall the front grille by hooking the top over the unit top, then pushing it in at the bottom.
Disassembly Instructions
Front grille
- To remove the front grille, pull out the bottom of the front grille and then lift up. Re-install the component by referring to the removal procedure.
- To reinstall the front grille, place the tabs over the top of the unit and push the bottom of front grille until the clips snap into place.
Angle of discharge grille louvers
- This Room Air Conditioner (PTAC) discharges air from the top of the unit through reversible, 2- position discharge grille louvers. The unit is shipped from the factory with the discharge grille louvers at an angle of 40° off vertical. In an alternate position the louvers will be at an angle of 15° off vertical.
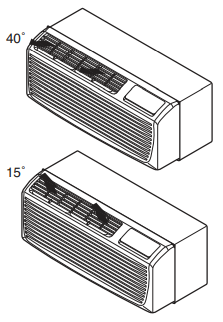
- To adjust the air direction, remove the front grille. Remove the 4 screws that fasten the discharge grille to the front grille. Rotate the discharge grille 180°, then assembly the discharge grille to the front grille with 4 screws.
 WARNING
- This appliance should be installed in accordance with the National Electrical Code
- Use of extension cords could cause serious injury or death
- Do not use an extension cord with this air conditioner.
- Do not use surge protectors or multi-outlet adapters with this air conditioner.
- Never push the TEST button during operation. Doing so can damage the plug.
- Do not remove, modify, or immerse this plug. If this device trips, the cause should be corrected before further use.
Installation Procedure:
- Disconnect all power to unit.
- Mark the hole location on sleeve then drill 1/8in holes. See Figure 2 for hole dimensions on sleeve.
- (Optional) Adjustable side extension panels can be attached to cover open space left between subbase and wall.
- Attach side extension panels to subbase using one black screw on each side so that panel end extends dimensions from the subbase.
- Bring power into the subbase electrical junction box using one of the knockouts for conduit connections.
- Take electrical junction box cover off and use field supplied wire nuts to connect power to receptacle wires.
- Attach subbase to wall sleeve. Subbase has side tabs for mounting the subbase to sleeve. Be sure hole on the side tab is lined up with the pre drilled hole on side of sleeve. Once holes are aligned, attach subbase to sleeve with one one screw on each side.
- Level subbase flush with floor by adjusting leveling bolts beneath each end of subbase.
- Remove the access cover from the subbase and plug the power cord into receptacle. Route power cord out of subbase through cord notch in subbase.
- Restore power to unit.
OPERATION
Before Operation
Preparing for Operation
- Contact an installation specialist for installation. This is NOT a do-it-yourself project.
- Plug in the power plug properly.
- Use a dedicated circuit.
- Do not use an extension cord. Consult a professional installer or electrician.
- Do not start/stop operation by plugging/unplugging the power cord.
- If the cord/plug is damaged, replace it with only an authorized replacement part.
Usage
- Being exposed to direct airflow for an extended period of time could be hazardous to your health. Do not expose occupants, pets, or plants to direct airflow for extended periods of time. In other words, don't sit in the draft.
- Due to the possibility of oxygen deficiency, ventilate the room when used together with stoves or other heating devices.
- Do not use this air conditioner for non-specified special purposes (e.g. preserving precision devices, food, pets, plants, and art objects). Such usage could damage the items.
Cleaning and Maintenance
- Do not touch the metal parts of the unit when removing the filter. Injuries can occur when handling sharp metal edges.
- Do not use water to clean inside the air conditioner. Exposure to water can destroy the insulation, leading to possible electric shock.
- When cleaning the unit, first make sure that the power and breaker are turned off. The fan rotates at a very high speed during operation. There is a possibility of injury if the unitʼs power is accidentally triggered on while cleaning inner parts of the unit.
MAINTENANCE
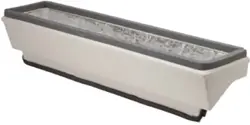
Air Filter
Check the air filter at least twice a month to see if cleaning is necessary. Trapped particles in the filter can build up and block the airflow, reducing cooling capacity and causing an accumulation of frost on the evaporator
Cleaning the Air Filter
- Remove the air filter from the front grille assembly by pulling the air filter up slightly.
- Wash the filter using lukewarm water below 40 °C (104 °F).
- Gently shake the excess water from the filter and replace.
Cleaning the Front Grille and discharge air grille
- The Front Grille and discharge air grille can be cleaned with a mild soap or detergent. Under no circumstances should hydrocarbon based cleaners (e.g. acetone, benzene, naphtha, gasoline, etc.) be used to clean the front or air grilles.
- Use care when cleaning the control area. Do not use an excessively wet cleaning cloth.
Vent Filter
Before cleaning the vent filter, disconnect power to the unit by unplugging the power cord at the wall outlet or subbase, or disconnect power at the fuse box or circuit breaker. If unit is operated with vent door closed, the vent filter does not need to be cleaned.
Cleaning the Vent Filter
- Remove the front grille as described in front grille Removal.
- Remove the 4 screws securing the unit to the wall sleeve with a Phillips-Head screwdriver.
- Slide the unit out of the wall sleeve far enough so that the vent filter is accessible. Remove the shipping screw from the ventilation door.
- Remove the vent filter by unscrewing the two screws at the top of the filter and gently pulling the filter away from the partition panel.
- Wash the filter using lukewarm water below 40 °C (104 °F). Reinstall the filter by reattaching the hook to the bottom of the vent door and replacing the two screws, slide the unit back into the wall sleeve, secure it in place with 4 screws and reinstall the front grille.
TROUBLESHOOTING
Normal Sounds You May Hear
- High Pitched Chatter Today's high efficiency compressors may have a high pitched chatter during the cooling cycle.
- Sound of Rushing Air At the front of the unit, you may hear the sound of rushing air being moved by the fan.
- Gurgle/Hiss Gurgling or hissing noise may be heard due to refrigerant passing through evaporator during normal operation.
- Vibration Unit may vibrate and make noise because of poor wall or window construction or incorrect installation.
- Pinging or Swishing Droplets of water hitting condenser during normal operation may cause pinging or swishing sounds
Air conditioner does not start.
The air conditioner is unplugged.
Make sure the air conditioner plug is pushed completely into the outlet.
The fuse is blown/circuit breaker is tripped.
Check the house fuse/circuit breaker box and replace the fuse or reset the breaker.
Power failure.
If power failure occurs, turn the mode control to off. When power is restored, wait 3 minutes to restart the air conditioner to prevent tripping of the compressor overload.
The current interrupter device is tripped.
Press the RESET button located on the power cord plug. If the RESET button will not stay engaged, discontinue use of the air conditioner and contact a qualified service technician.
Air conditioner does not cool/heat as it should
Airflow is restricted.
Make sure there are no curtains, blinds, or furniture blocking the front of the air conditioner
The temp control may not be set correctly.
Set the desired temperature to a level lower or higher than the current temperature
Air conditioner freezing up.
The cooling coils are iced over.
Ice may block the air flow and obstruct the air conditioner from properly cooling the room. Set the mode control at High Fan or High Cool.
Water drips outside.
Hot, humid weather.
This is normal.
Water drips indoors.
The air conditioner is not tilted to the outside.
For proper water disposal, make sure the air conditioner slants slightly from the case front to the rear.
Water collects in base pan.
Moisture removed from air and drains into base pan.
This is normal for a short period in areas with little humidity; normal for a longer period in very humid areas.
Your home appliance and smartphone is not connected to the Wi-Fi network.
The password for the Wi-Fi that you are trying to connect to is incorrect.
Find the Wi-Fi network connected to your smartphone and remove it, then register your appliance on LG ThinQ.
Mobile data for your smartphone is turned on.
Turn off the Mobile data of your smartphone and register the appliance using the Wi-Fi network.
The wireless network name (SSID) is set incorrectly.
The wireless network name (SSID) should be a combination of English letters and numbers. (Do not use special characters.)
The router frequency is not 2.4 GHz.
Only a 2.4 GHz router frequency is supported. Set the wireless router to 2.4 GHz and connect the appliance to the wireless router. To check the router frequency, check with your Internet service provider or the router manufacturer.
The distance between the appliance and the router is too far.
If the distance between the appliance and the router is too far, the signal may be weak and the connection may not be configured correctly. Move the location of the router so that it is closer to the appliance.