Loading ...
Exploded View & Hardware Parts
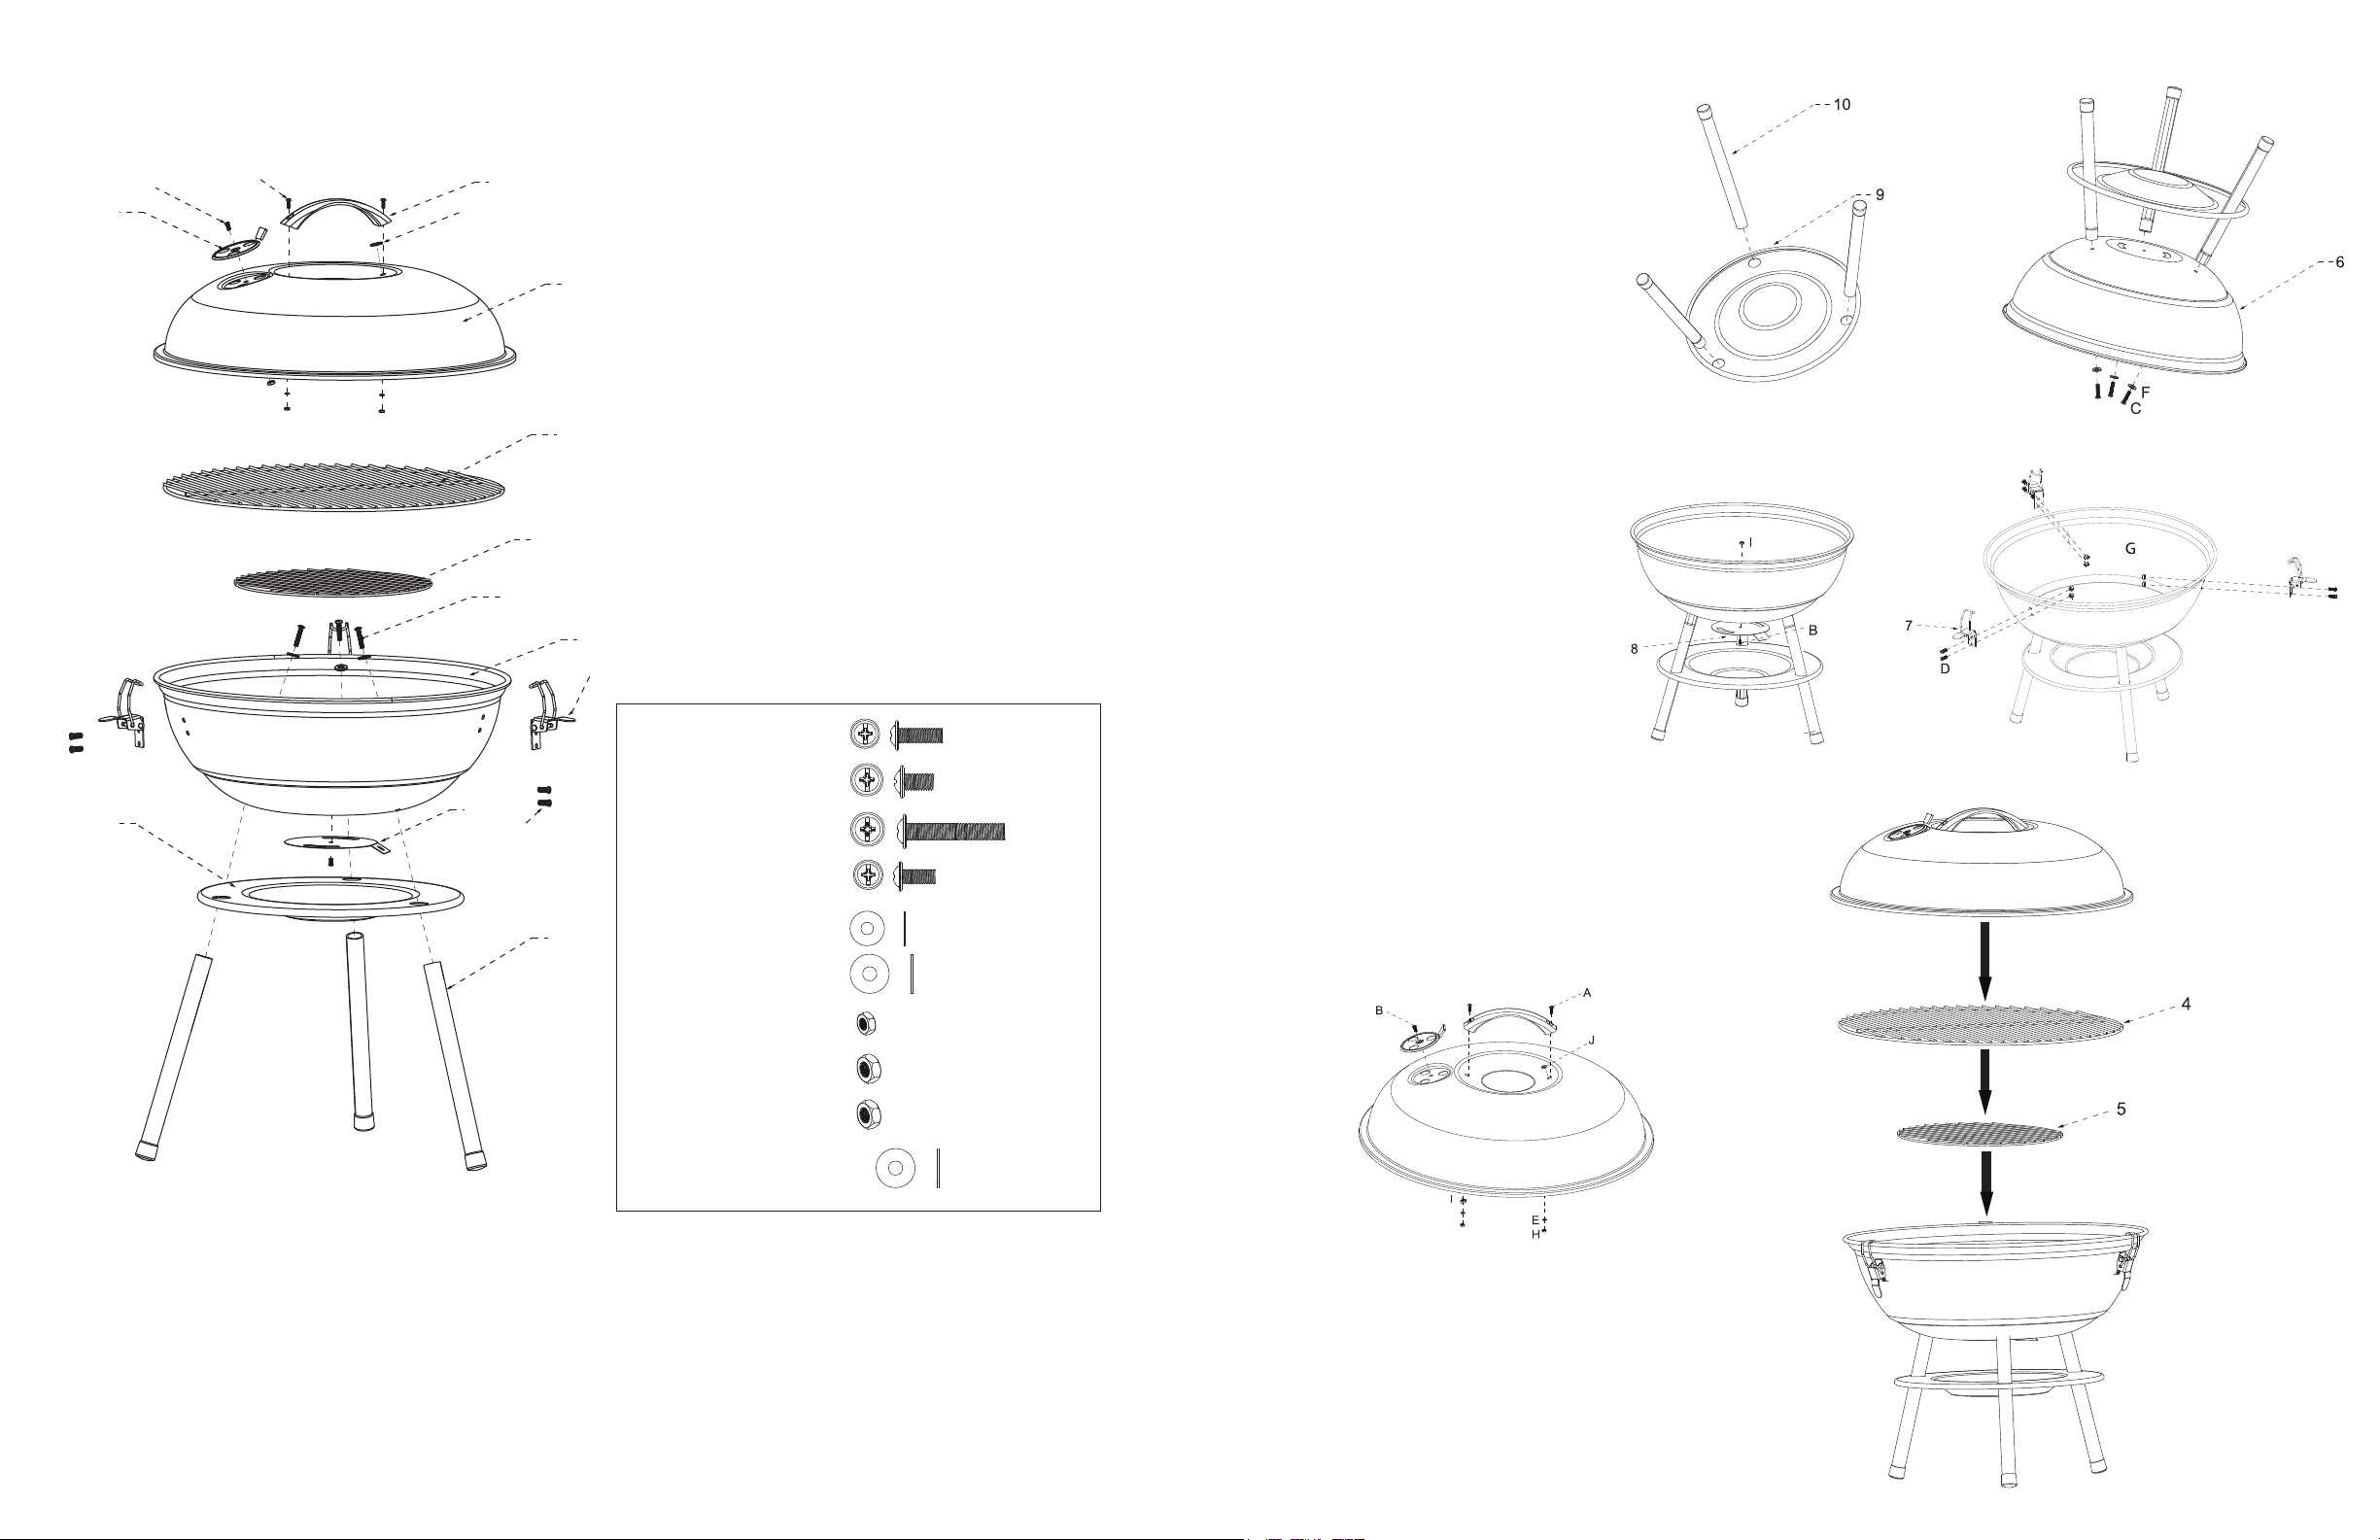
EXPLODED VIEW
HARDWARE LIST
1. Lid handle x1pc
2. Lid air vent x1pc
3. Lid x1pc
4. Cooking grid x1pc
5. Charcoal grid x1pc
6. Fire bowl x1pc
7. Lid hinge x3pc
8. Bottom air vent x1pc
9. Ash tray x1pc
10. Leg x3pc
1
J
2
3
4
E
H
G
F
I
5
6
7
D
8
9
10
A
B
C
A. Handle Screw 2 pcs
B. Vent Screw 2 pcs
C. Leg Screw 3 pcs
D. Hinge Screw 6 pcs
E. Handle Washer 2 pcs
F. Leg Washer 3 pcs
G. Hinge Nut 6 pcs
H. Handle Nut 2 pcs
I. Vent Nut 2 pcs
J. Soft Handle Washer 2 pcs
ASSEMBLY STEPS
Step 1:
Put the legs (10) through hole of
ash tray (9) and attach to the
rebowl (6). Finger tighten to hold
them together one by one. Tighten
the screws using a screwdriver.
Do not twist leg too tighten.
Step 2:
1. Install the bottom air vent (8)
to re bowl (6).
2. Attach lid hinges (7) to the
rebowl (6). Finger tighten to
hold them together one by
one. Tighten the screws
using a screwdriver.
Step 3:
1. Attach the lid handle (1) to the lid (3).
2. Attach the lid air vent (2) to the lid (3).
Step 4:
Place charcoal grid (5) onto rebowl (6).
Place cooking grid (4) on rebowl (6).
PRE-ASSEMBLY CHECK LIST
1. To assure fast and easy assembly, follow the instructions below in their proper sequence.
2. Check all parts carefully and compare them to the parts list.
3. Report any missing parts to the company from with you purchased the product.
NOTE: For some models, Part C Leg Screw and Part F Leg Washer may be located in the Leg. For
some pre-assembled models, Steps 2 and 3 may have already been completed.
STOP! if you experience any missing or broken parts or have any questions regarding assembly,
please call our Customer Service team at 1-866-994-6390.