Loading ...
Loading ...
Loading ...
14 WWW.WEBER.COM
®
BURNER IGNITION & USAGE
Summary lighting instructions are on the
right fold-out table (Q
®
1200, Q
®
2000,
Q
®
2200).
METHODS OF BURNER
IGNITION
There are two ways to ignite
the burner. The first is by
using the ignition system built
into your grill. The second is
with a match.
Next are the steps for igniting
your grill using the ignition
system. On the following page
are steps for igniting your grill
with a match.
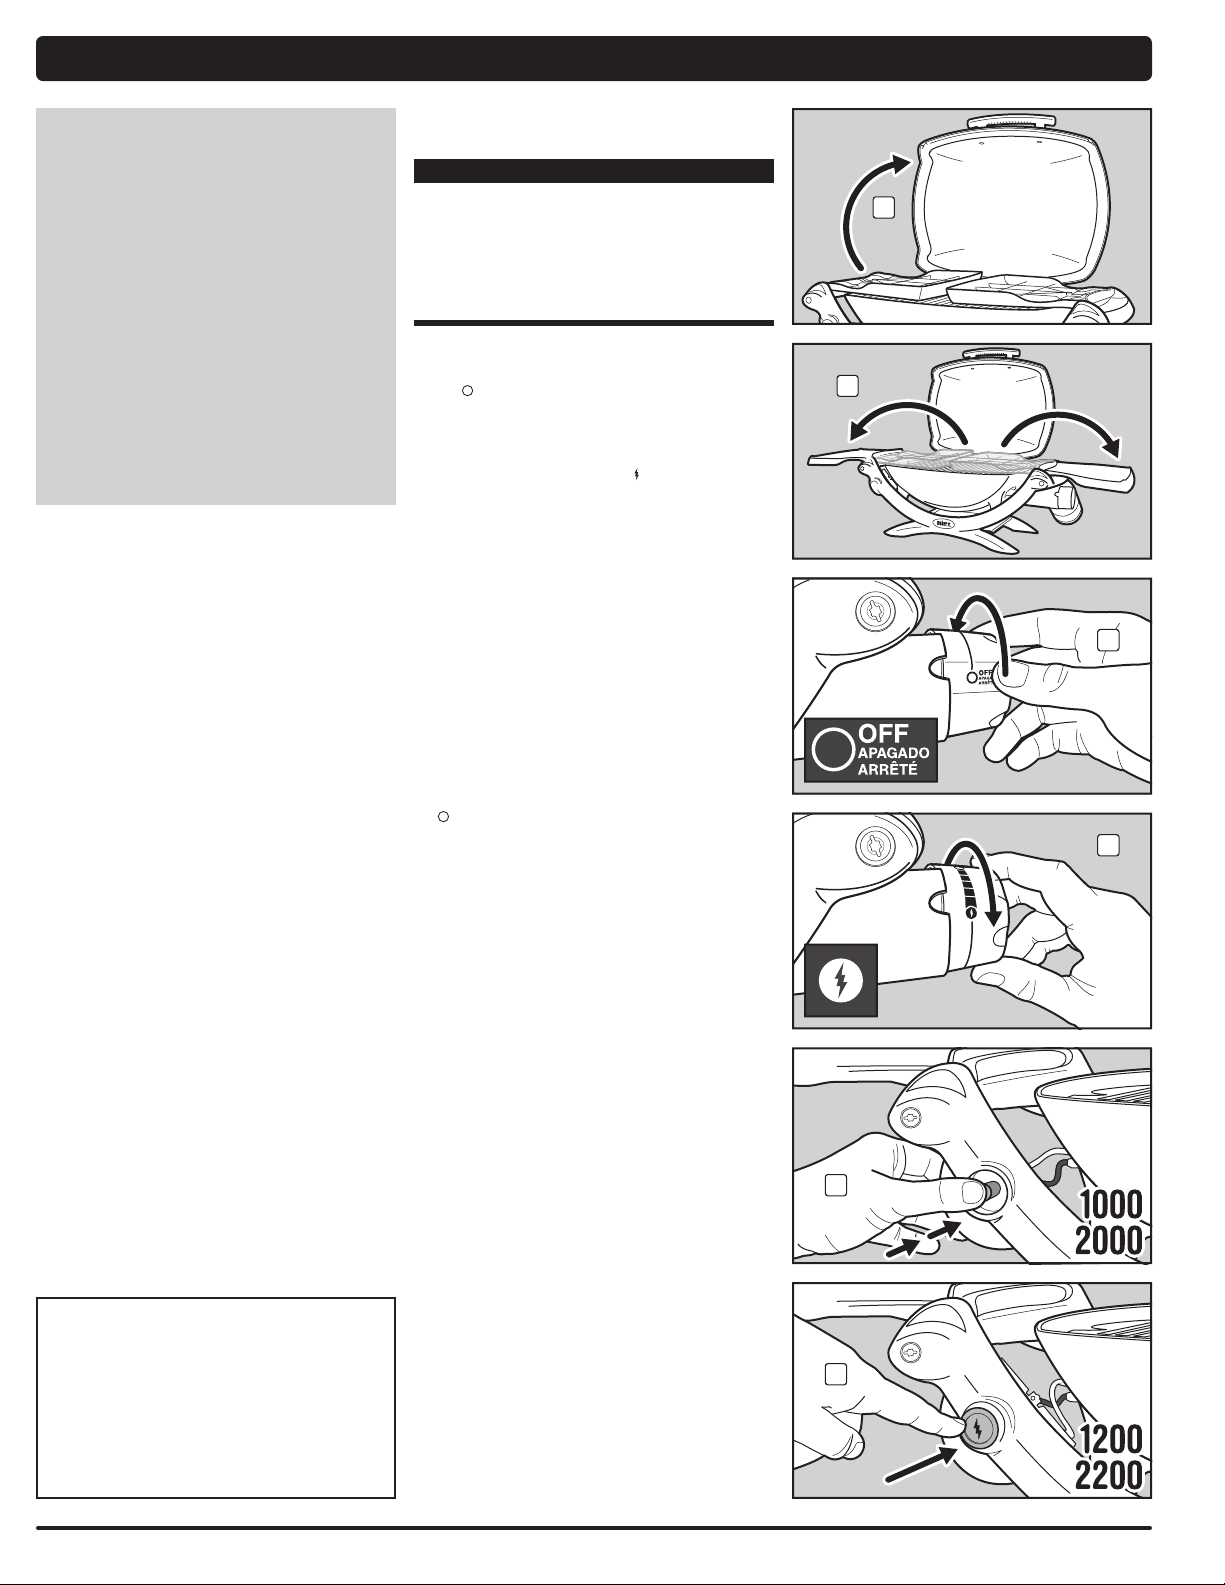
BURNER IGNITION
A) Open the grill lid (1).
m DANGER
Failure to open the lid before igniting the
grill’s burner, or not waiting five minutes
to allow the gas to clear if the grill does
not light, may result in an explosive flare-
up which can cause serious bodily injury
or death.
B) Unfold the side tables(2) (Q
®
1200, Q
®
2000,
Q
®
2200).
C) Make sure the burner control knob is turned to the
off (
) position(3). Check by pushing burner control
knob in and turning it clockwise until it stops.
D) Confirm that the cylinder is properly installed. Refer
to “INSTALLING THE LP CYLINDER.”
E) Push burner control knob in and turn it
counterclockwise to start/high (
) position (4).
F1) Push the red igniter button several times, so it clicks
each time (5) (Q
®
1000, Q
®
2000).
OR
F2) Push and hold in the electronic igniter button (6)
(Q
®
1200, Q
®
2200). You will hear the igniter clicking.
G) Check that the burner is lit by looking through the
cooking grates. You should see a flame.
m WARNING: Do not lean over the open
grill while igniting.
m WARNING: If burner fails to ignite within
five seconds, stop, turn the burner
control knob to off and wait five minutes
to allow the gas to clear before you try
again or light with a match.
TO EXTINGUISH BURNER
Push burner control knob in and turn it clockwise to the
off ( ) position.
m CAUTION: Do not fold in side tables until
grill is cold (Q
®
1200, Q
®
2000, Q
®
2200).
Some batteries have a plastic
protective wrap around them.
This plastic must be removed
before you attempt to ignite
your grill. Do not confuse this
plastic with the battery label.
2
1
3
4
6
5
Loading ...
Loading ...
Loading ...