Loading ...
Loading ...
Loading ...
8 INSTALLATION
Joining the Appliances
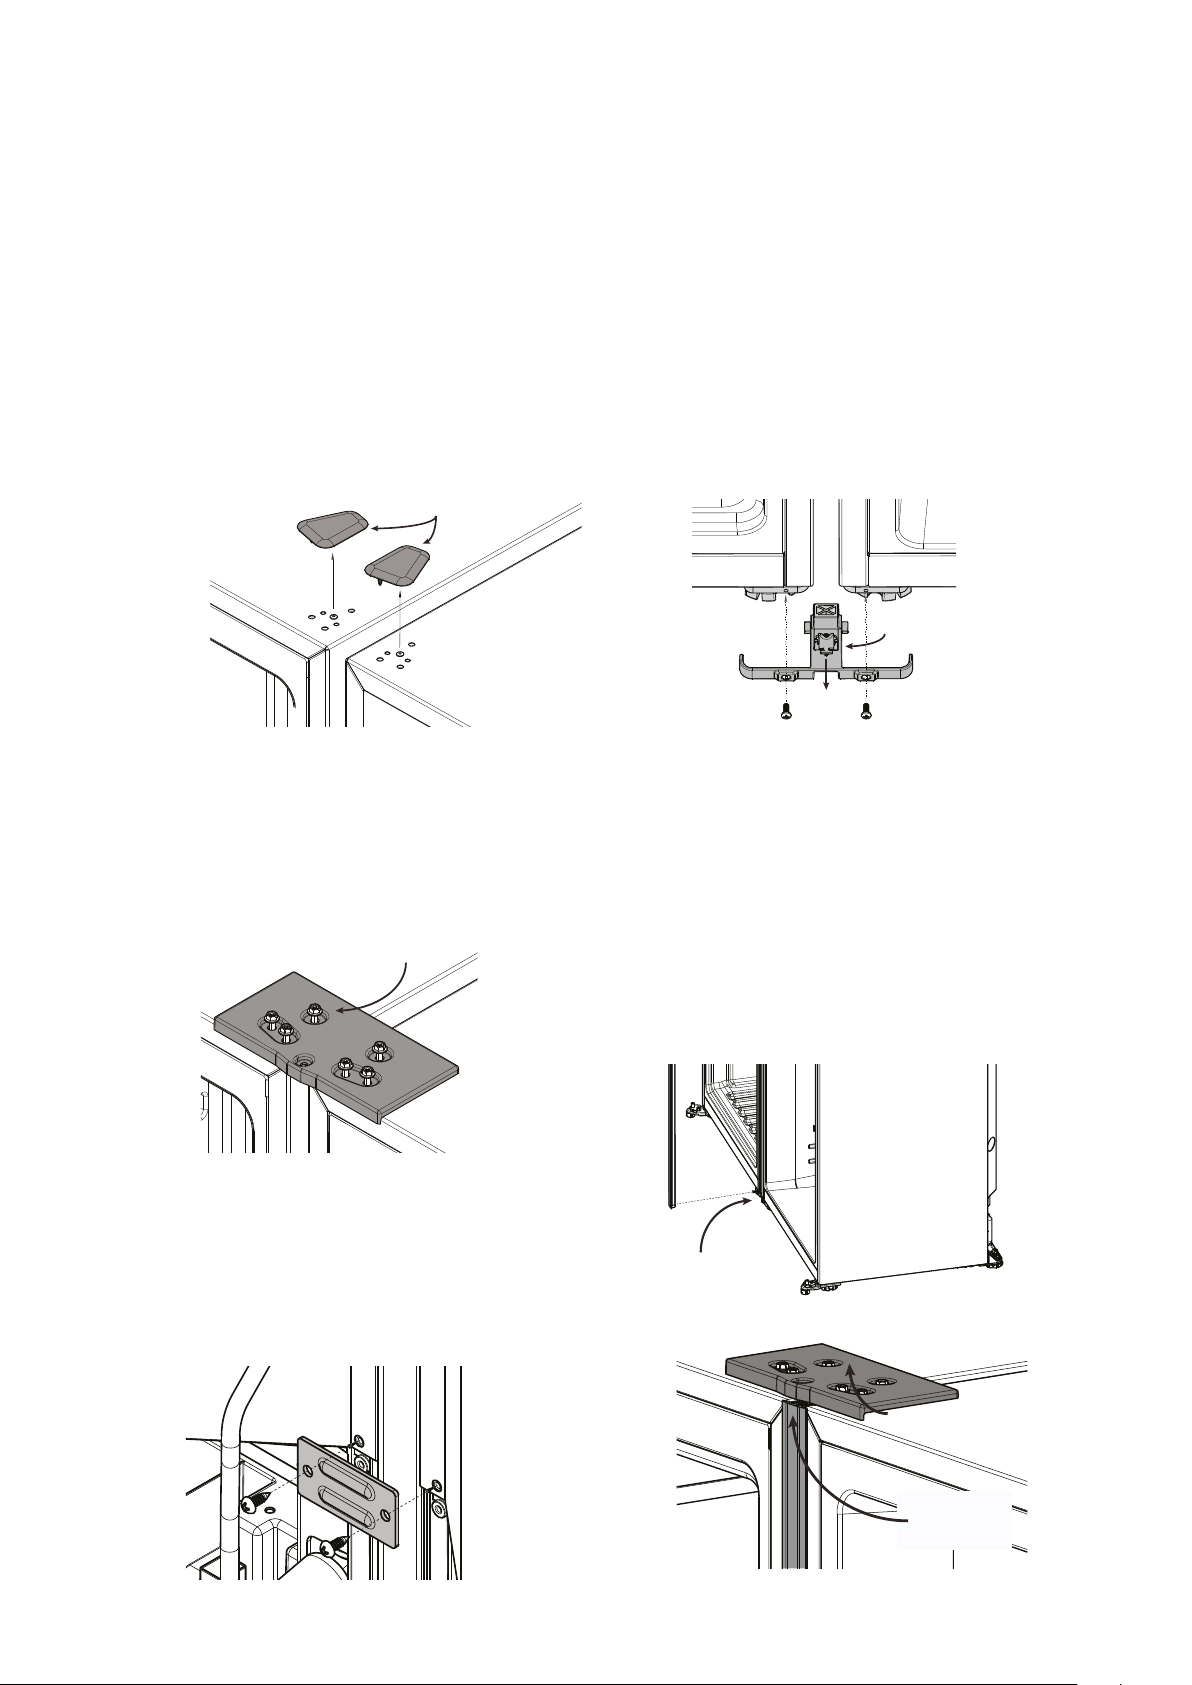
Your appliances are delivered with hole covers that cover
the screw holes. These holes are located on the top of the
cabinet, opposite from the door hinge. Carefully remove
these covers, care must be taken to avoid damaging the
appliances.
Carefully pull the appliances together adjacent to the final
installation location, then adjust the front and rear feet to
the same height.
Top-front and bottom-rear bracket installation
Install the top-front bracket
• Place the protective cardboard between the bracket
and the cabinets.
• Assemble the top-front bracket, fit the screws in
place, but do not tighten them yet leave the screws
loose.
Install the rear-bottom bracket
• Unscrew the 2 central-upper compressor cover
fasteners.
• Remove 2 screws.
• Assemble the rear-bottom bracket using the
replacement screws provided.
Bottom-front bracket installation
– Position the bottom-front bracket
• Position the bottom-front bracket between the two
cabinets.
• Fasten with the two M4 screws using a phillips head
screwdriver.
• Extract the tensioner.
Fit the centre cover
• Push the centre cover between the two cabinets
• Engage the bottom end of the centre cover into the
tensioner of the bottom-front bracket.
• Lift the top-front bracket (screws should be loose
enough) and slide the centre cover underneath.
• Tighten the screws in the top-front bracket.
• Adjust the tensioner screw as required.
• Fasten the centre cover to the top-front bracket by
means of the provided self-tapping screw
Remove covers
Do not tighten
Extract the
tensioner
Fit bottom first
Lift top-front
bracket
Slide centre
cover under
INSTALLATION
Loading ...
Loading ...
Loading ...