
Loading ...
Loading ...
Loading ...
12
ENGINE SPEED
Your engine speed has been factory set.
CARBURETOR
Your carburetor has a nonadjustable fixed
main jet for mixture control.
IMPORTANT: Never tamper with the
engine governor, which is factory set for
proper engine speed. Over speed ing
the engine above the factory high speed
setting can be dangerous. If you think
the engine-governed high speed needs
adjusting, take your unit to a qualified
service center, which has proper
equip ment and experience to make any
nec es sary adjustments.
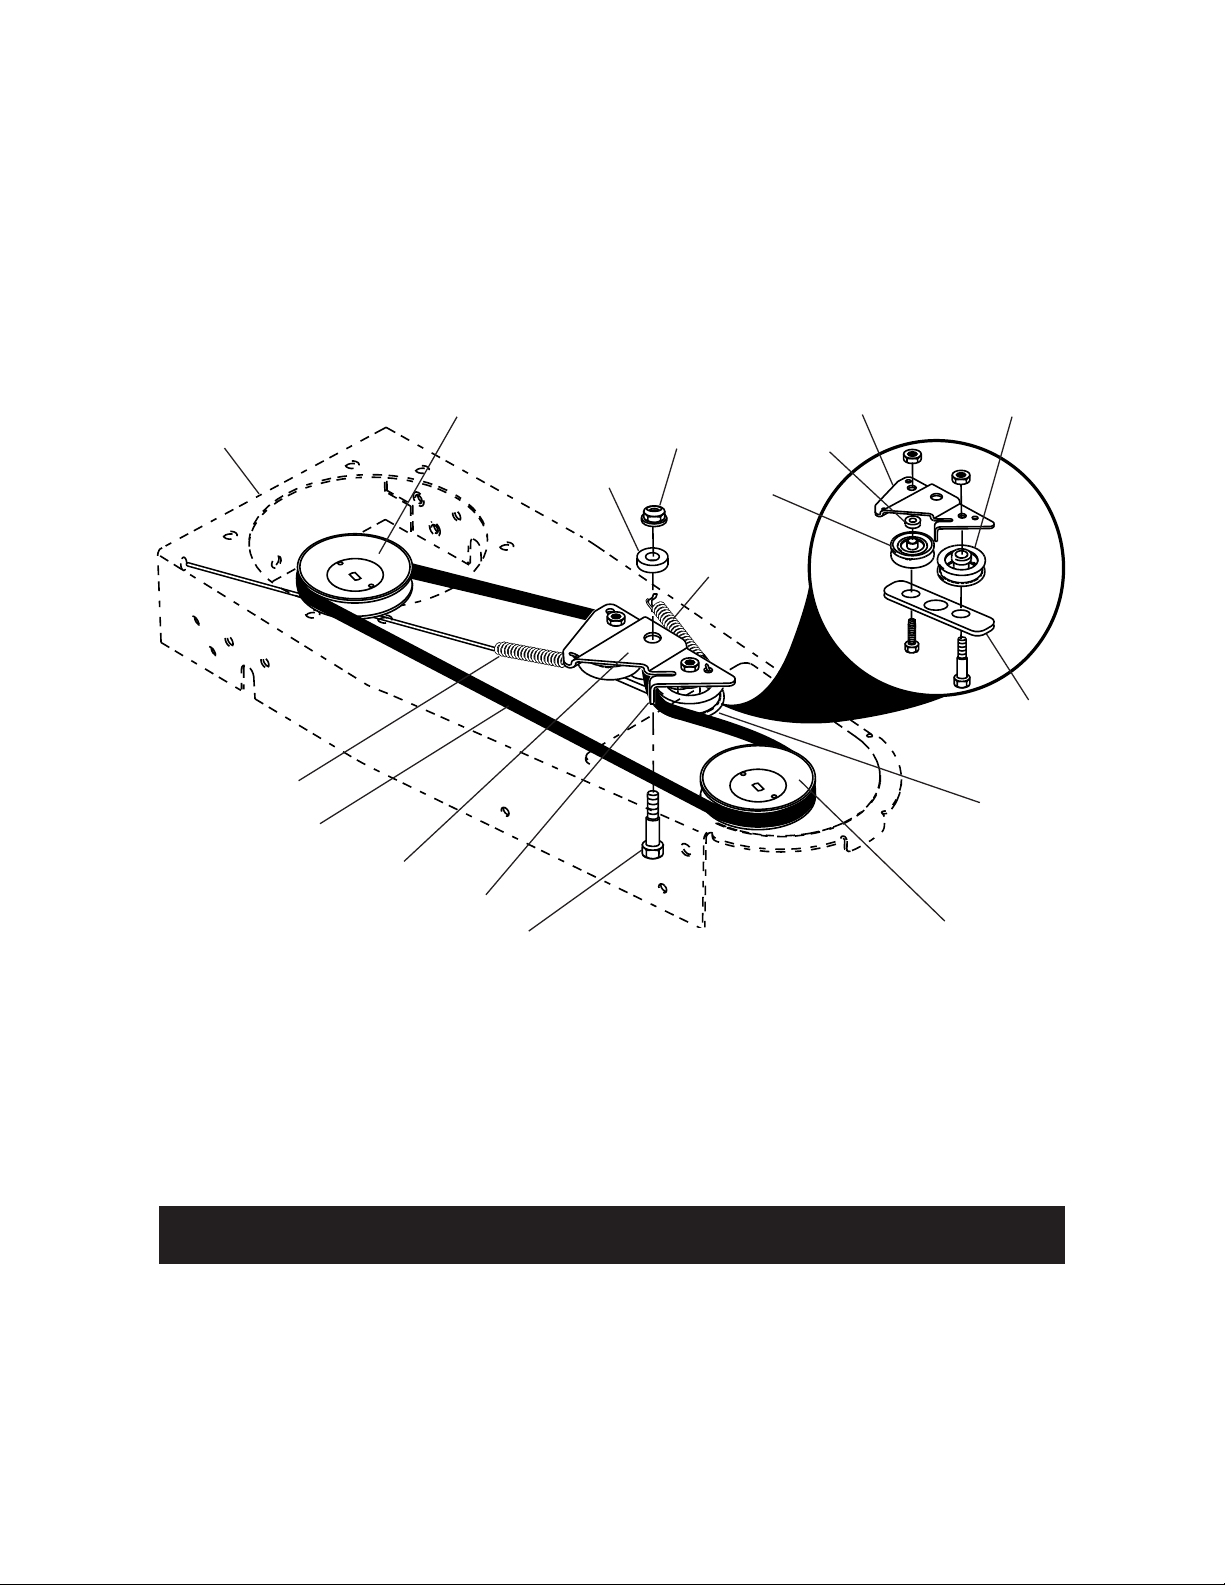
12. Position belt and idler assembly in
trimmer, reconnect idler spring and
assemble idler to chassis.
13. Install belt around trimmer head pulley
and engine pulley.
NOTE: Be sure belt is inside belt keeper.
14. Replace debris shield and tighten the
four (4) screws securely.
15. Replace chassis cover and tighten
screw securely.
8. Remove belt from trimmer head pulley.
9. Note the position of the control cable
and idler return spring, then remove
idler assembly from chassis and re-
move belt and idler from trimmer.
10. Remove belt from idler assembly by
re mov ing bottom belt keeper and idler
pulleys.
11. Assemble new belt, idler pulleys and
bottom belt keeper to idler bracket.
Tighten pulley bolts securely.
NOTE: Be sure belt is inside top belt
keeper on idler assembly.
Belt
Idler bracket
Engine pulley
Trimmer head pulley
Top belt keeper
Chassis
Flat idler
Nut
Spacer
Bot tom
belt
keep er
Idler assembly
Spacer
Bolt
V-idler
Flat idler
Control cable
Idler
spring
STORAGE
Immediately prepare your trimmer for stor-
age at the end of the season or if the unit
will not be used for 30 days or more.
TRIMMER
When trimmer is to be stored for a period
of time, clean it thor oughly, remove all
dirt, grease, leaves, etc. Store in a clean,
dry area.
1. Clean entire trimmer (See "CLEAN-
ING" in the Maintenance section of this
manual).
2. Lubricate as shown in the Main te-
nance section of this manual.
3. Be sure that all nuts, bolts, screws, and
pins are securely fas tened. Inspect
moving parts for damage, breakage and
wear. Replace if necessary.
Loading ...
Loading ...
Loading ...