Loading ...
Loading ...
Loading ...
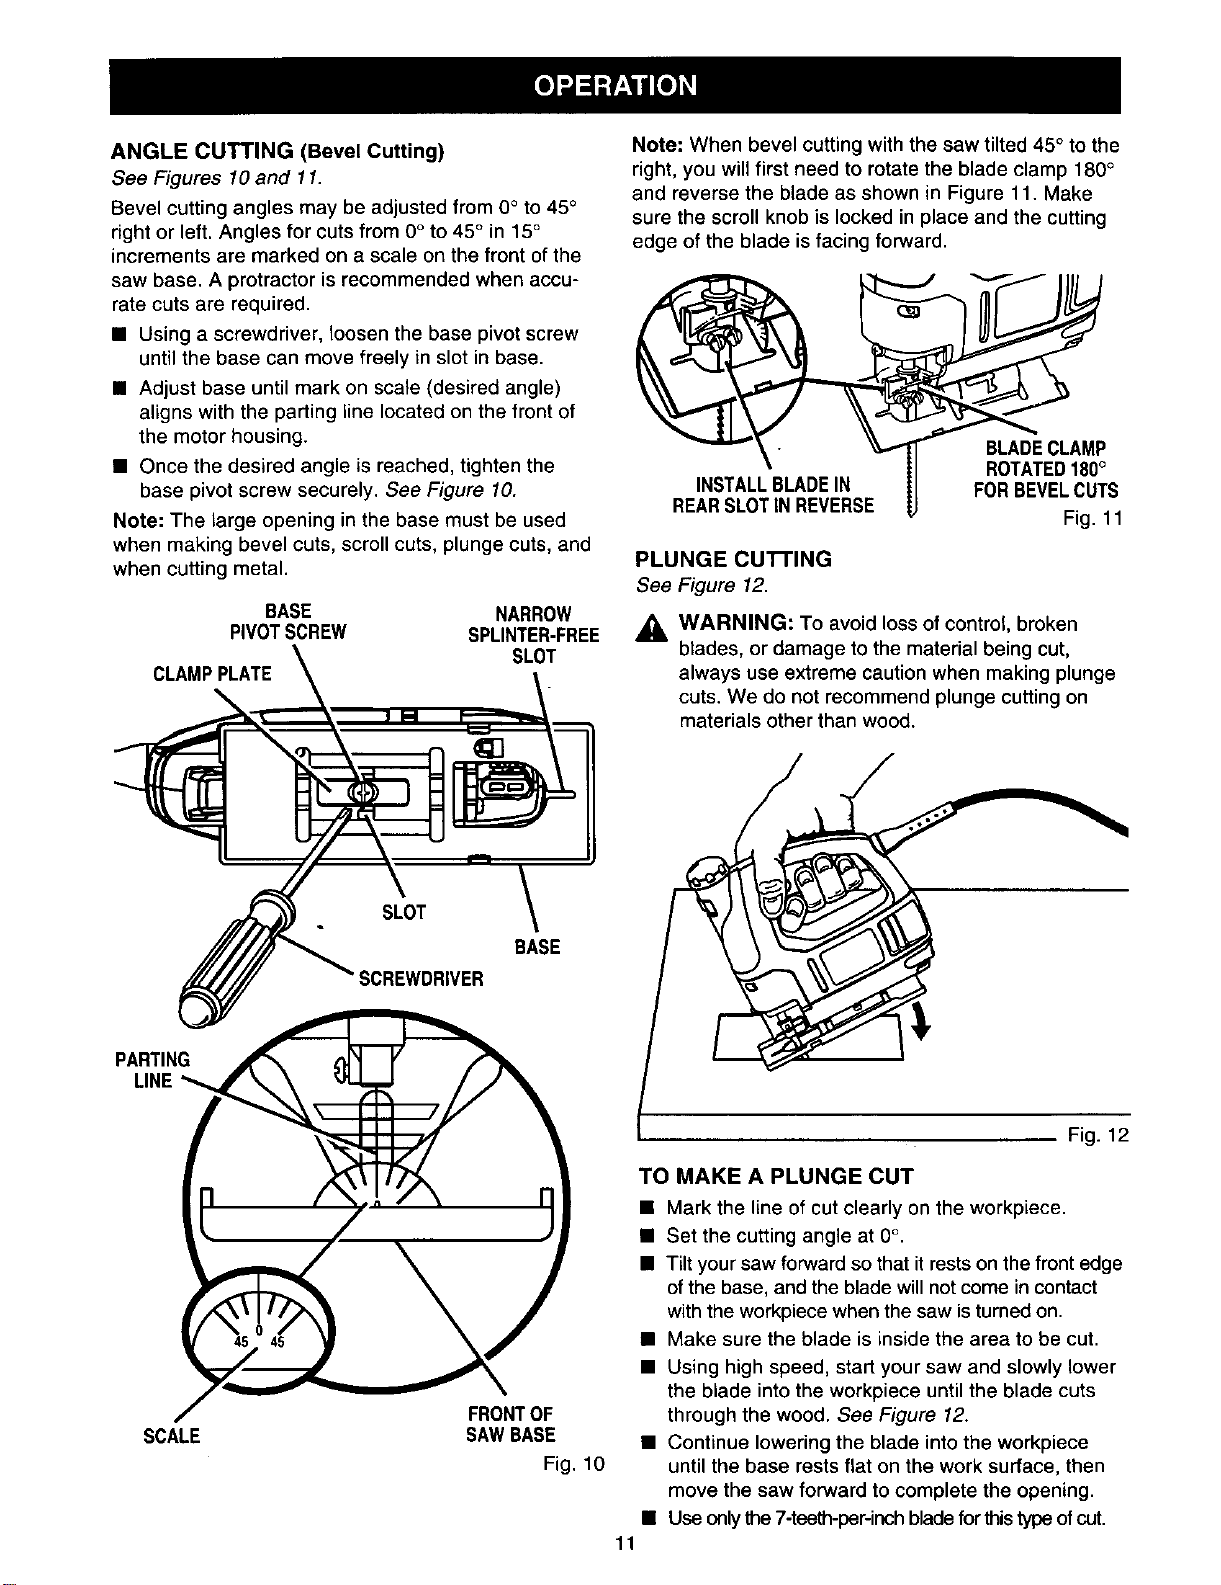
ANGLE CUTTING (Bevel Cutting)
See Figures 10 and 11.
Bevel cutting angles may be adjusted from 0° to 45°
right or left, Angles for cuts from 0° to 45° in 15°
increments are marked on a scale on the front of the
saw base. A protractor is recommended when accu-
rate cuts are required.
• Using a screwdriver, loosen the base pivot screw
until the base can move freely in slot in base.
• Adjust base until mark on scale (desired angle)
aligns with the parting line located on the front of
the motor housing.
• Once the desired angle is reached, tighten the
base pivot screw securely. See Figure 10.
Note: The large opening in the base must be used
when making bevel cuts, scroll cuts, plunge cuts, and
when cutting metal.
BASE NARROW
PIVOTSCREW SPLINTER-FREE
SLOT
CLAMPPLATE
SLOT
BASE
SCREWDRIVER
PARTING
LINE
SCALE
FRONTOF
SAWBASE
Fig. 10
Note: When bevel cutting with the saw tilted 45 ° to the
right, you will first need to rotate the blade clamp 180°
and reverse the blade as shown in Figure 11. Make
sure the scroll knob is locked in place and the cutting
edge of the blade isfacing forward.
INSTALLBLADEIN
REARSLOTIN REVERSE
BLADECLAMP
II ROTATED180°
II FORBEVELCUTS
v Fig. 11
PLUNGE CUTTING
See Figure 12.
_k, WARNING: To avoid loss of control, broken
blades, or damage to the material being cut,
always use extreme caution when making plunge
cuts. We do not recommend plunge cutting on
materials other than wood.
11
m mm
TO MAKE A PLUNGE CUT
• Mark the line of cut clearly on the workpiece.
• Set the cutting angle at 0%
• Tiltyour saw forward so that it restson the front edge
of the base, and the blade willnot come in contact
with the workpiece when the saw isturned on.
• Make sure the blade is inside the area to be cut.
• Using high speed, start your saw and slowly lower
the blade into the workpiece until the blade cuts
through the wood. See Figure 12.
• Continue lowering the blade into the workpiece
until the base rests flat on the work surface, then
move the saw forward to complete the opening.
• Use onlythe7-teeth-per-inchbladefor this typeofcut.
Loading ...
Loading ...
Loading ...