Loading ...
Loading ...
Loading ...
re and (;leaning
Gas Cool:top
sub-assemblies
Slits
Holes
Usea sewingneedle,
twist-tie and/ortoothbrush
to unclogthesmall holes
andslits in tbe burnerbeads
andburnerrings.
Toaid reassembly,each
brassBurnerHeadis
markedwith a clockface.
Replacethe BurnerHead
with the arrow pointing
tothe rear ofthe cooktop
(12o'clockposition).
NOTE: Before removh_g the burner parts,
remember their size mad location. Replace
them in the same location after demlh_g for
proper burner operation.
For proper ignition, make sure the small holes in
the bm'ner rings are kept open. A sewing needle
or wire twist-tie works well to unclog them.
The silts in the burner heads of your cooktop
must be kept clean at all times for an even,
mthmnpered flmne.
You should clean the sm'iace burners routinel)',
especially alier bad spillovers, which could clog
these openings.
To remove burned-on t0od, soak the bm'ner
heads and rings in a solution of mild liquid
detergent and hot water fin" 20-30 minutes.
[TOV inoYe sttlbborn stains, tlse a toothbrush.
Clean the bm'ner bases in place on the cooktop.
To remove the burner parts:
1. I,ifl oil' the bm'ner cap and bm'ner head.
2. Remove the bm'ner ring locking nut using
a 11A_;"socket wrench, crescent wrench or
channeMock pliers.
3. i,ift ott the bm'ner ring. Do not remove
the burner bases.
get0re putting the burner parts back, shake out
excess water and then dry them thoroughly by
setting them in a warm oven fin" 30 minutes.
Replace the bm'ner parts. Make sure that the
rings, heads and caps are replaced in the
correct location. There are flmr medium sets
and one large set of rings, heads and caps.
To replace the burner parts:
Make StlI'e all parts are for the correct btlrnei;
are in the correct location and are firefly seated.
1. _Mign the locator pin on the burner ring
into the labeled hole in the bm'ner base.
Seat in place and push toward the electrode
to set gap i)roperl>
2. Replace the burner ring locking nut and
hand-tighten. Using the wrench or pliers,
turn the nut 1/4 turn to secure it in place.
3. _Mign the two locator pins in the burner head
into the holes in the burner ring. Seat in place.
NOTE: Make sure the burner head pins
completely engage in the burner ring holes
and that burner head is level.
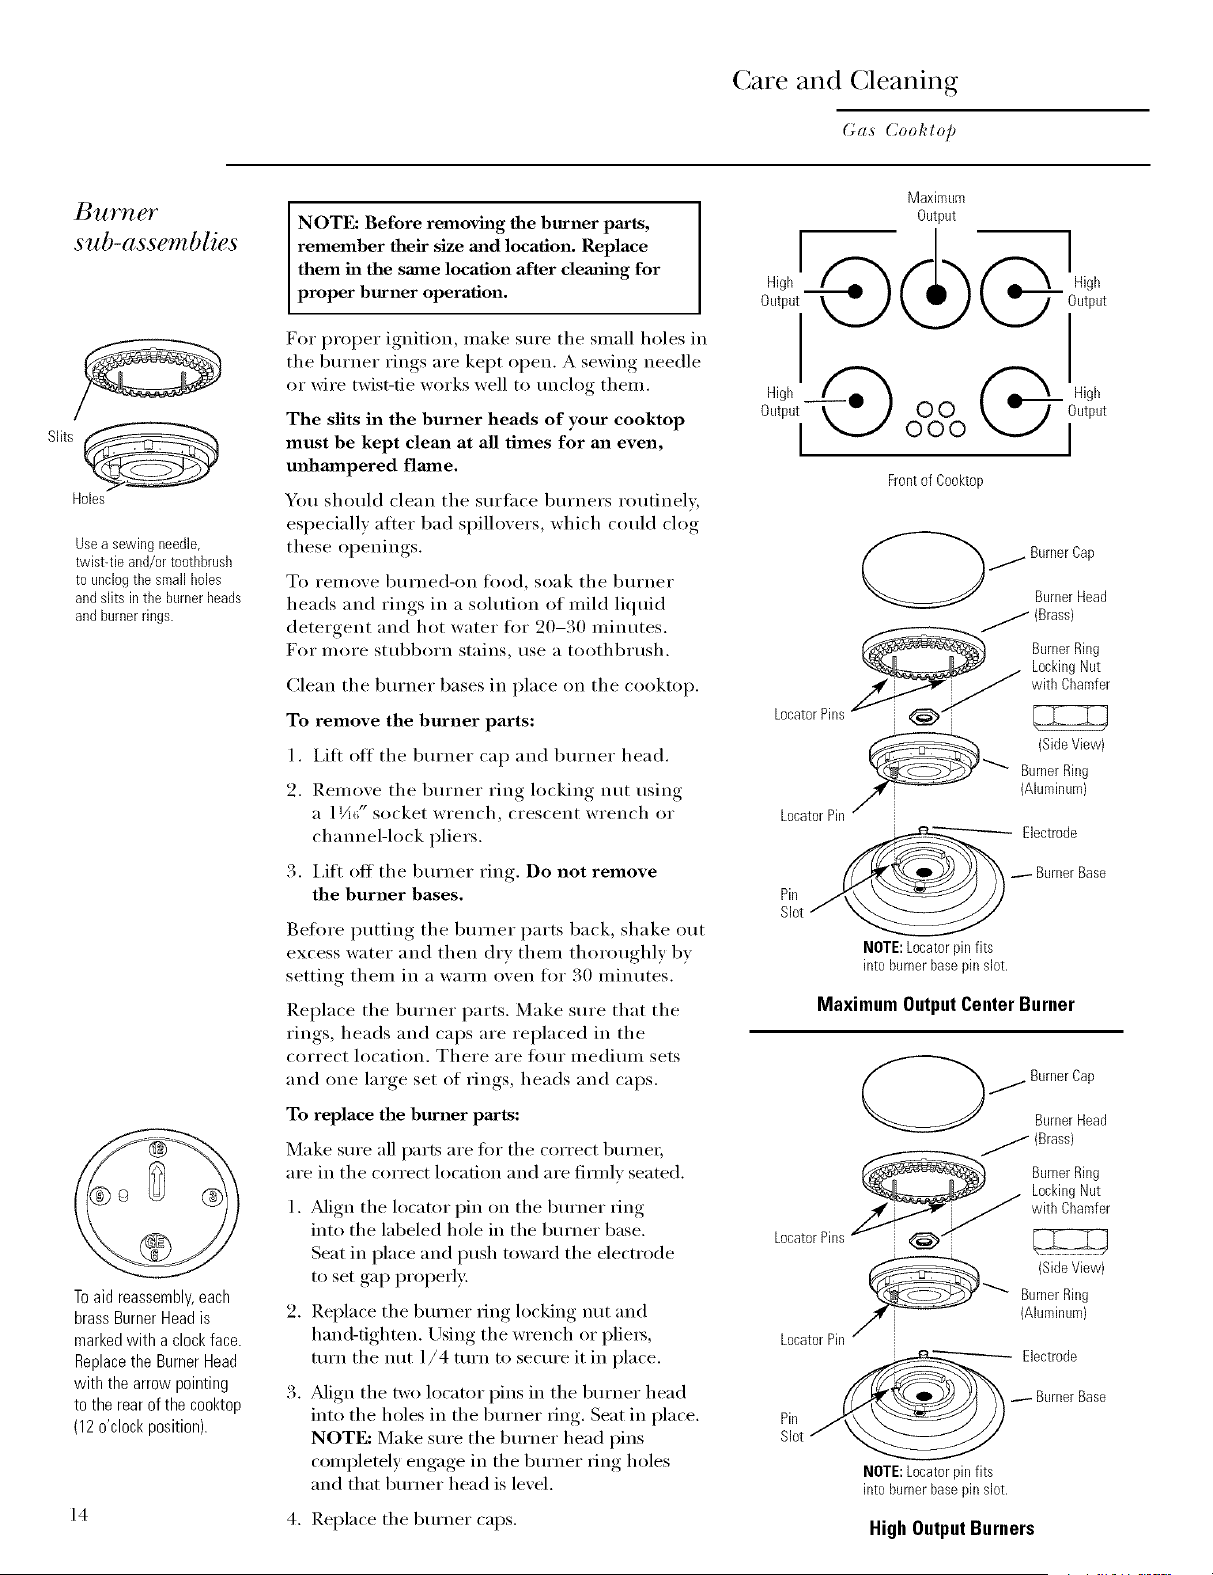
Maximum
Output
High
Output 0 0
] 000
Front of Cooktop
(Brass)
BurnerRing
LockingNut
witbChamfer
LocatorPins
LocatorPin /__
Pin
(SideView)
BurnerRing
(Aluminum)
Electrode
BurnerBase
NOTE:Locaterpin fits
into burnerbasepin slot.
MaximumOutputCenterBurner
LocatorPins
LocatorPin
Pin
z
/ (Brass)
BurnerRing
LockingNut
witbChamfer
(SideView)
BurnerRing
(Aluminum)
Electrode
BurnerBase
NOTE:Locaterpin fits
into burnerbasepin slot.
14 4. Replace the burner caps. High Output Burners
Loading ...
Loading ...
Loading ...