Loading ...
Loading ...
Loading ...
TYPICAL OPERATIONS (Continued)
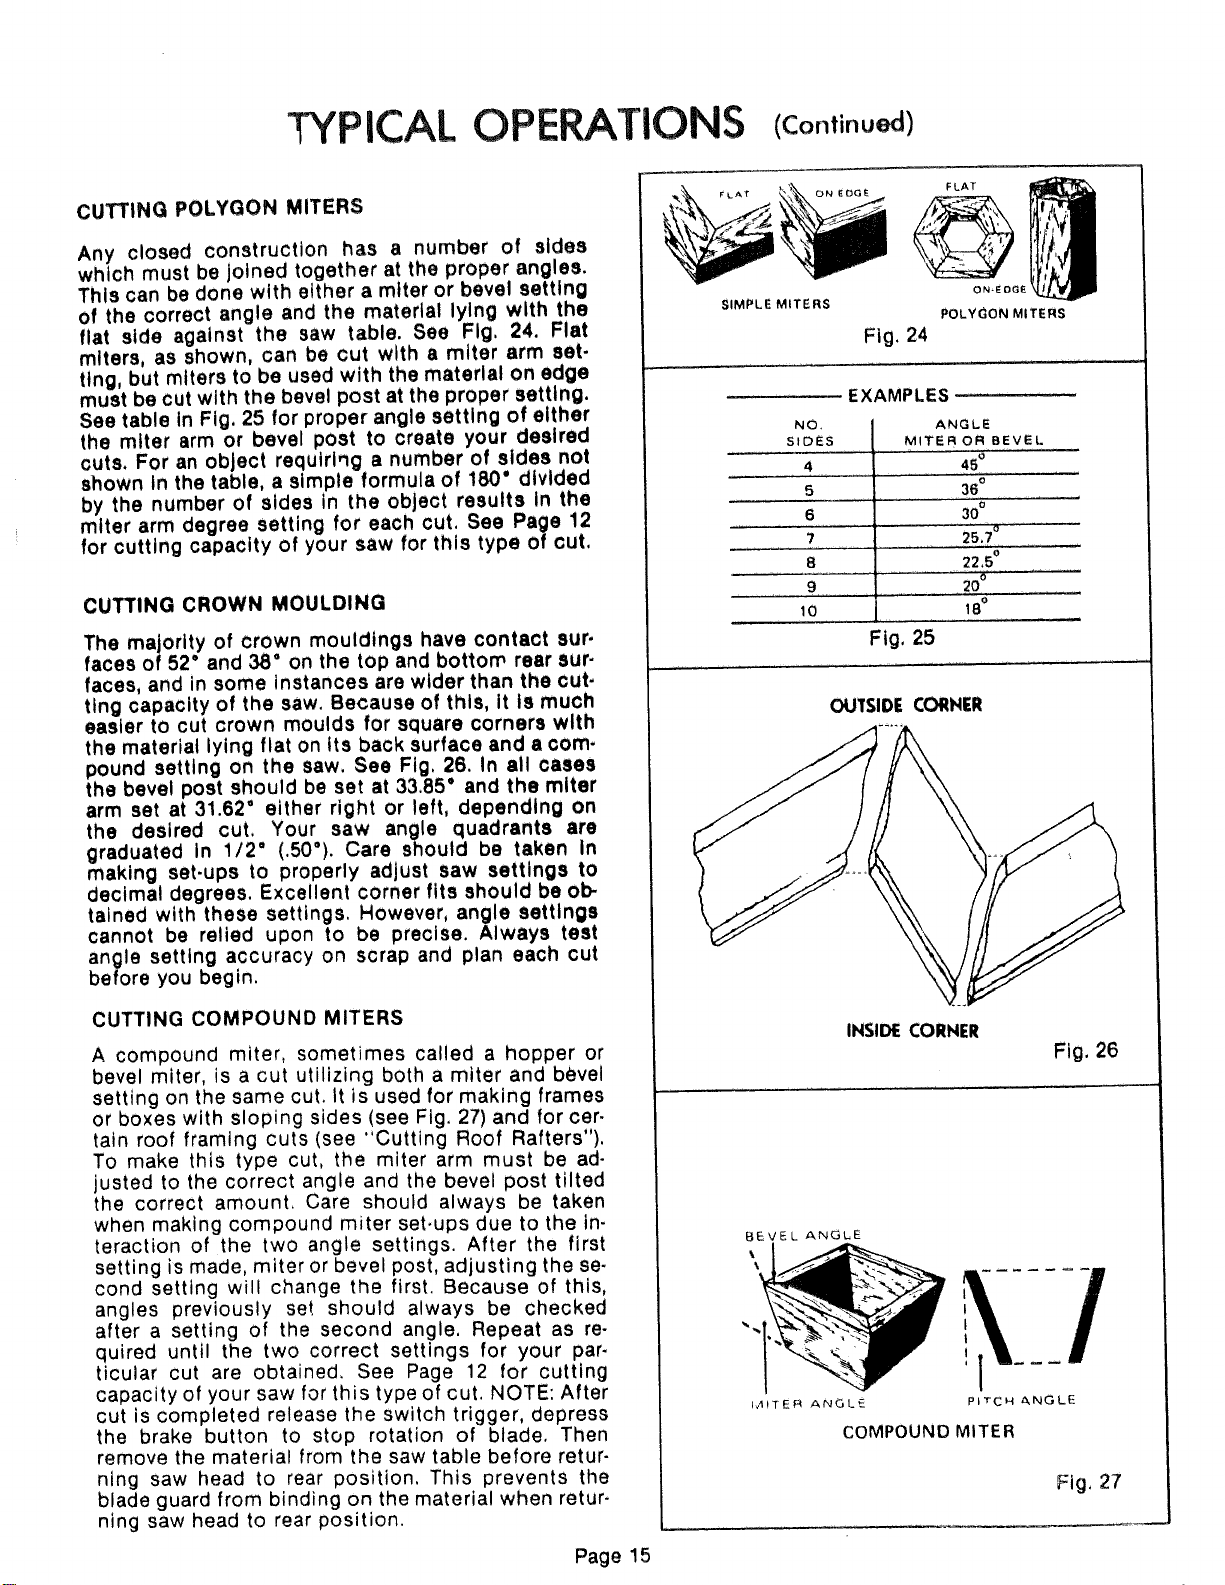
CUTTING POLYGON MITERS
Any closed construction has a number of sides
which must be joined together at the proper angles.
This can be done with either a miter or bevel setting
of the correct angle and the material lying with the
flat side against the saw table. See Fig, 24. Fiat
miters, as shown, can be cut with a miter arm set-
tlng, but miters to be used with the material on edge
must be cut with the bevel post at the proper setting.
See table In Fig, 25 for proper angle setting of either
the miter arm or bevel post to create your desired
cuts. For an object requtrl,lg a number of sides not
shown In the table, a simple formula of 180' dtvlded
by the number of sides in the object results In the
miter arm degree setting for each cut. See Page 12
for cutting capacity of your saw for this type of cut.
CUTTING CROWN MOULDING
The majority of crown mouldings have contact sur.
faces of 52" and 38 ° on the top and bottom rear cur.
faces, and in some instances are wider than the cut.
ttng capacity of the saw. Because of this, it ts much
easier to cut crown moulds for square corners with
the material lying flat on its back surface and a com.
pound setting on the saw. See Fig, 26. in all cases
the bevel post should be set at 33.85' and the miter
arm set at 31.62' either right or left, depending on
the desired cut. Your saw angle quadrants are
graduated In 1/2 ° (.50°). Care should be taken In
making set-ups to properly adjust saw settings to
decimal degrees. Excellent corner fits should be ob-
tained with these settings, However, angle settings
cannot be relied upon to be precise. Always test
angle setting accuracy on scrap and plan each cut
before you begin.
CUTTING COMPOUND MITERS
A compound miter, sometimes called a hopper or
bevel miter, is a cut utilizing both a miter and bevel
setting on the same cut. It is used for making frames
or boxes with sloping sides (see Fig. 27) and for cer-
tain roof framing cuts (see "Cutting Roof Rafters").
To make this type cut, the miter arm must be ad-
justed to the correct angle and the bevel post tilted
the correct amount, Care should always be taken
when making compound miter set,ups due to the in-
teraction of the two angle settings. After the first
setting is made, miter or bevel post, adjusting the se-
cond setting will change the first. Because of this,
angles previously set should always be checked
after a setting of the second angle, Repeat as re-
quired until the two correct settings for your par-
ticular cut are obtained, See Page 12 for cutting
capacity of your saw for this type of cut. NOTE: After
cut is completed release the switch trigger, depress
the brake button to stop rotation of blade, Then
remove the material from the saw table before retur-
ning saw head to rear position, This prevents ttle
blade guard from binding on the material when retur-
ning saw head to rear position.
Page 15
FLAT
ON_EOG_
POLYGON MITERS
Fig. 24
EXAMPLES
NO,
SIDES
4
5
6
?
8
9
10
ANGLE
MITER OR BEVEL
45°
36°
30°
22,5°
20°
18°
Fig, 25
OUTSIDE CORNER
INSIDE CORNER
Fig. 26
i_.l_T E R ANGL_
PITCH ,_,NG LE
COMPOUND MITER
Fig, 27
Loading ...
Loading ...
Loading ...