Loading ...
Loading ...
Loading ...

- 5 -
08/2021
Copyright © 2021, Fast ČR, a.s.
EN
Hand mixer with
arotating bowl
User'smanual
BEFORE FIRST USE
■ Prior to using this appliance, please read the user‘smanual thoroughly, even in cases,
when one has already familiarised themselves with previous use of similar types of
appliances. Only use the appliance in the manner described in this user’smanual.
Keep this user‘smanual in asafe place where it can be easily retrieved for future use.
In the event that you hand this appliance over to somebody else, make sure to also
include this user‘smanual.
■ We recommend saving the original cardboard box, packaging material, purchase
receipt and responsibility statement of the vendor or warranty card for at least the
duration of the legal liability for unsatisfactory performance or quality. In the event
of transportation, we recommend that you pack the appliance in the original box
from the manufacturer.
■ Carefully unpack the appliance and take care not to throw away any part of the
packaging before you find all the parts of the appliance.
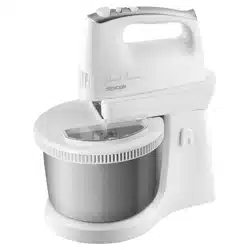
DESCRIPTION OF THE APPLIANCE AND ACCESSORIES
A1 Motor unit
A2 Bowl lid with filling opening
A3 Stainless steel bowl
A4 Stand with bowl base
A5 Attachment release button
A6 Switch for setting speeds and
turning off
A7 TURBO pulse button for maximum
speed
A8 Motor unit release button
A9 Tilting stand arm
A10 Button for tilting the stand arm
A11 Set of kneading attachments
Suitable for kneading dough
A12 Set of beater attachments
Suitable for whipping whipped
cream, creams, mashed potatoes,
spreads, egg whites and yolks
A13 Differentiation ring of kneading
attachments
A14 Differentiation ring of beater
attachments
APPLICATION OF THE HAND MIXER
■ The hand mixer is intended for beating and kneading a standard amount of
ingredients in the household.
■ Food is processed using two types of chrome-plated steel attachments that are easy
to wash and exchange.
BEFORE FIRST USE
■ Before first use, thoroughly wash all parts that come into contact with food (beater
and kneading attachments, bowl and lid) in hot water using neutral dishwashing
detergent. Then rinse everything with clean water and allow to dry naturally or dry
out thoroughly using awiping cloth. The attachments are also suitable for washing
in adishwasher.
■ Wipe the outer parts of the stand A4 and tilting arm A9 using alightly dampened
wiping cloth.
Attention:
Do not rinse or submerge the stand A4 or motor unit A1 and its
power cord in water. Neither the stand nor the motor unit are
intended for washing in adishwasher.
OPERATION
SELECTING ATTACHMENTS
Beater attachments
■ These are used to prepare batter dough, mashed potatoes, whipped cream,
whipped egg whites and creams. Do not use the beater attachments to mix yeast
dough.
Kneading attachments
■ These are used for kneading yeast dough and dough for noodles, for mixing minced
meat, spreads and puff dough.
SELECTING ASPEED
Level 1: Suitable as the starting speed for mixing alarger amount of ingredients or
dry ingredients.
Level 2: Suitable for processing liquid ingredients and for mixing salad dressings.
Level 3: Suitable for mixing ingredients when preparing cakes, biscuits and bread.
Level 4: Suitable for whipping up butter or sugar when preparing sweets, desserts, etc.
Level 5: Suitable for whipping eggs, sauces, creams, etc.
TURBO button: The TURBO pulse button is equivalent to speed level 5 and is used for
ashort increase to maximum speed.
ASSEMBLY
Warning:
Prior to assembling the hand mixer, the motor unit A1 must be
disconnected from the mains power socket and the switch A6
must be set to position 0 (off). Attaching the attachments while
the motor unit is connecting to mains power, may result in
accidentally turning on the unit and serious subsequent injuries.
■ Select the attachment types suitable for the intended task and insert them into the
holes on the underside of the motor unit. ATTENTION – the connection parts of the
attachments are not identical and can only be attached into the intended holes on
the underside of the motor unit. The attachment with the differentiation ring (A13
on the kneading attachment, A14 on the beater attachment) can only be attached
into the right hole on the underside of the motor unit (when viewed from the front),
the attachment without the ring can only be inserted into the left hole.
■ Push the selected attachments in until they safely click into position. Gently pull on
both the attachments to check that they are correctly attached.
Attention:
Do not combine the beaters and the kneading attachments. Only
use the same type of attachments at the same time.
■ Press button A10 to release the lock on arm A9 and tilt open the arm.
■ Put the bowl into the stand, filled with the ingredients that you wish to process.
■ Press button A10 and tilt down the arm into the horizontal position.
■ Insert the motor unit A1 with the attached attachments on to the tilting arm and
lightly push towards the arm towards it until you hear an audible click. The motor
unit is securely attached to the arm when it is not possible to lift it independently.
Note:
The Motor unit can be used independently without the stand. In such
acase setup the appliance according to the instructions provided above,
continue with chapter TURNING ON AND OFF. It will be necessary to hold
the motor unit in your hand during operation.
TURNING ON AND USE
■ Plug the power cord of the hand mixer into apower socket.
■ Using switch A6, set the desired speed in the range of 1–5.
■ We recommend to start at a lower speed and to increase it gradually. You can
change the speed setting even while the hand mixer is running. We recommend
that runny doughs and sauces are processed at lower speed levels; this will prevent
ingredients from splashing out of the bowl.
Attention:
Items such as spoons, kitchen knives, forks, etc. must not be
placed into the bowl while mixing as this could result in injury or
damage to the hand mixer.
■ While the appliance is running, the bowl located on the stand will turn automatically.
This ensures that ingredients are evenly mixed.
■ If you wish to increase the speed to maximum for ashort moment, press the TURBO
A7 button. Nevertheless, do not hold down the TURBO button for longer than
30seconds, otherwise there is arisk of the hand mixer overheating.
Releasing stuck-on ingredients
■ If despite the even mixing action achieved by the rotating bowl, some ingredients
(e.g. dough) stick to the edge of the bowl, then turn the hand mixer off by sliding
switch A6 to position 0 (off).
■ Tilt open the arm by pressing button A10.
■ Using an ordinary scraper, remove the stuck-on ingredient on the edge of the bowl
and put it into the middle of the bowl.
■ Press button A10 and tilt the arm back down into the operating position. Continue
processing.
Operating time of the hand mixer
■ Use level 1 and 2 only for the initial incorporation of ingredients when making
dough. Leave the mixer running no longer than 3 minutes and then switch to
ahigher level based on the type of filling that is being made.
■ When beating, use the mixer continuously for no longer than 10 minutes.
■ When kneading thick, heavy dough, do not allow the mixer to run for longer than
5 minutes.
■ In the event of overloading (long running time, excessively thick dough, excessive
amount of ingredients) the built-in thermal protection will shut off the mixer. If this
happens, set the speed switch to zero, pull the power cord out of the power socket
and allow the mixer to cool down for approximately 15 minutes.
Loading ...