Loading ...
Loading ...
Loading ...
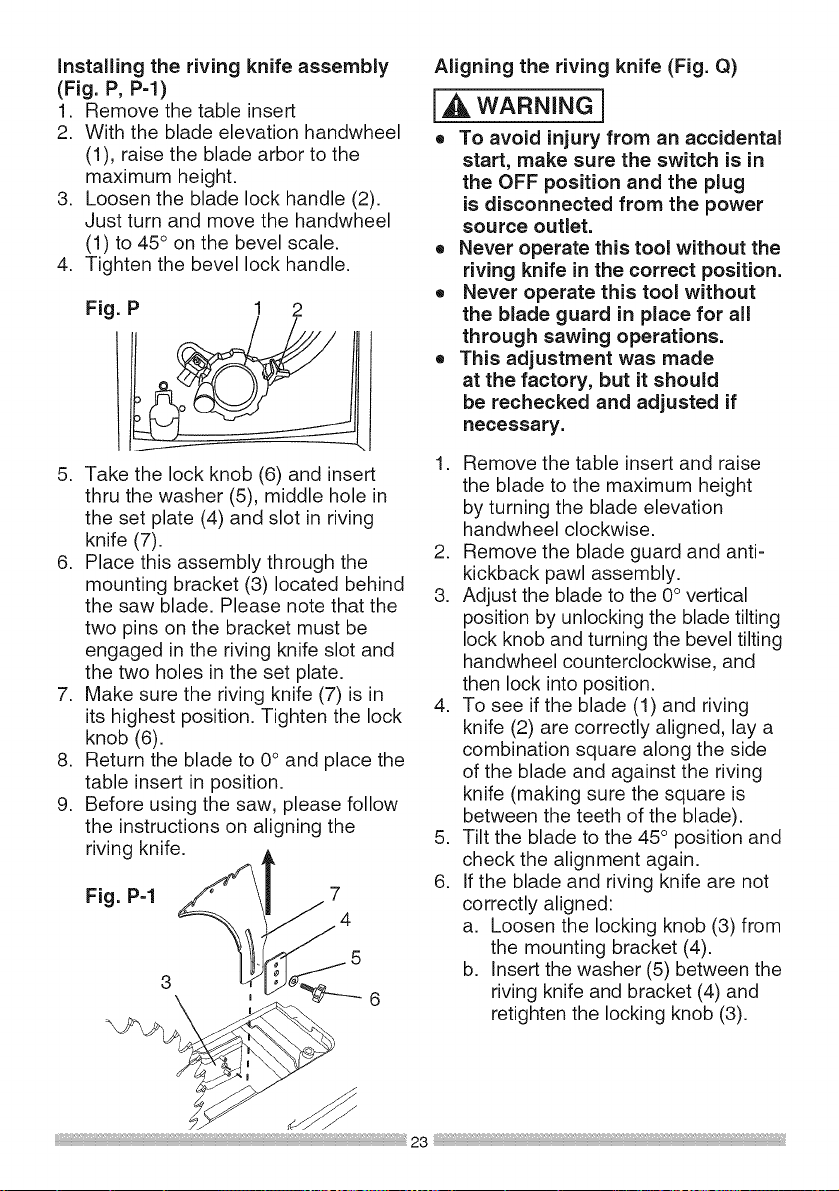
Installingthe riving knife assembly
(Fig. P, P=I)
1. Remove the table insert
2. With the blade elevation handwheel
(1), raise the blade arbor to the
maximum height.
3. Loosen the blade lock handle (2).
Just turn and move the handwheel
(1) to 45 ° on the bevel scale.
4. Tighten the bevel lock handle.
Fig. P 1 2
5. Take the lock knob (6) and insert
thru the washer (5), middle hole in
the set plate (4) and slot in riving
knife (7).
6. Place this assembly through the
mounting bracket (3) located behind
the saw blade. Please note that the
two pins on the bracket must be
engaged in the riving knife slot and
the two holes in the set plate.
7. Make sure the riving knife (7) is in
its highest position. Tighten the lock
knob (6).
8. Return the blade to 0° and place the
table insert in position.
9. Before using the saw, please follow
the instructions on aligning the
riving knife, l
Fig. P-1 3 _54
Aligning the riving knife (Fig. Q)
I,A WARNING 1
o To avoid injury from an accidental
start, make sure the switch is in
the OFF position and the plug
is disconnected from the power
source outlet.
o Never operate this tool without the
riving knife in the correct position.
o Never operate this tool without
the blade guard in place for all
through sawing operations.
o This adjustment was made
at the factory, but it should
be rechecked and adjusted if
necessary.
1. Remove the table insert and raise
the blade to the maximum height
by turning the blade elevation
handwheel clockwise.
2. Remove the blade guard and anti-
kickback pawl assembly.
3. Adjust the blade to the 0° vertical
position by unlocking the blade tilting
lock knob and turning the bevel tilting
handwheel counterclockwise, and
then lock into position.
4. To see if the blade (1) and riving
knife (2) are correctly aligned, lay a
combination square along the side
of the blade and against the riving
knife (making sure the square is
between the teeth of the blade).
5. Tilt the blade to the 45 ° position and
check the alignment again.
6. If the blade and riving knife are not
correctly aligned:
a. Loosen the locking knob (3) from
the mounting bracket (4).
b. Insert the washer (5) between the
6 riving knife and bracket (4) and
\h__, retighten the locking knob (3).
Loading ...
Loading ...
Loading ...