Loading ...
TOOLS REQUIRED:
3/8-in Wrench
7/16-in Wrench
Cross4ip Screwdriver
HARDWARE iNCLUDED:
26-INCH CABINET HARDWARE
#14 - 10 x 5/8-in Hex Screws
(Qty: 16)
#14 - 10 x 3/4 Cross4ip Screw
(Qty: 4)
HARDWARE iNCLUDED:
40° & 524NCH CABINET HARDWARE
#14 - 10 x 3/4-in Screws
(Qty: 16)
1/4 - 20 x 5/8 Screw (Qty: 16)
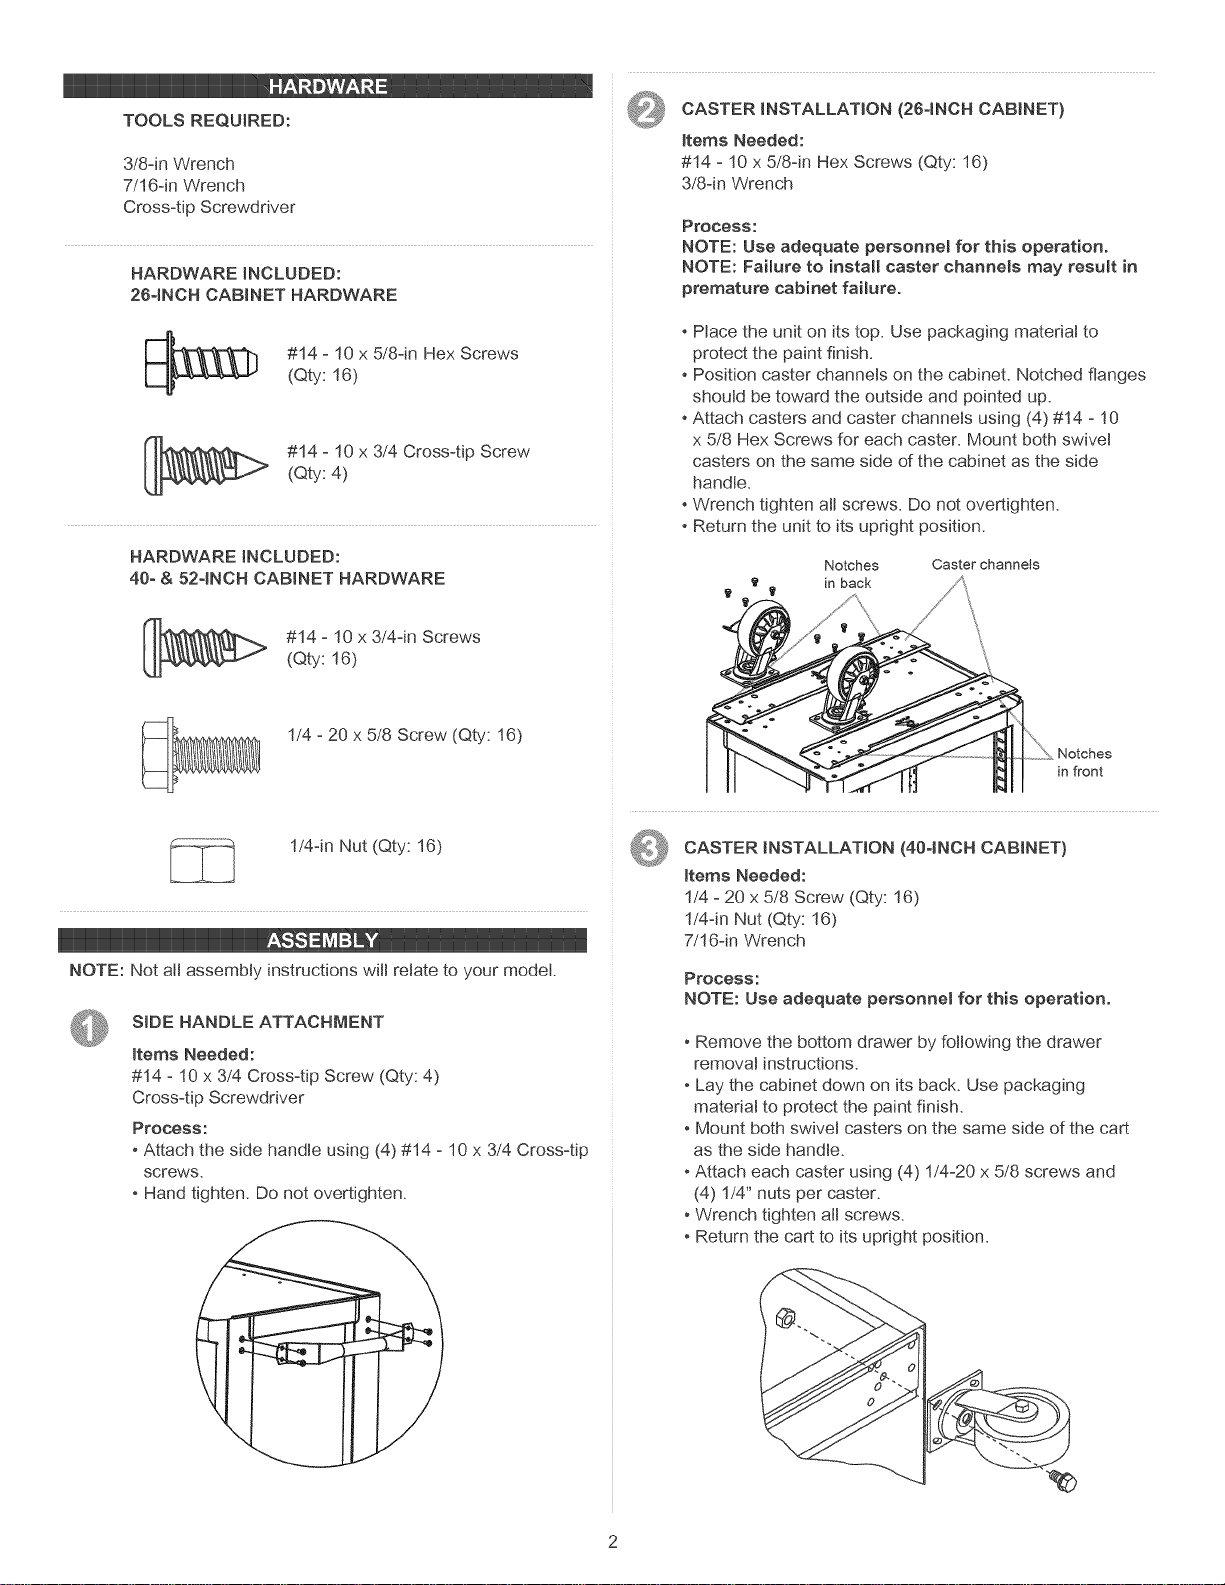
CASTER iNSTALLATiON (26-iNCH CABINET}
items Needed:
#14 - 10 x 5/8qn Hex Screws (Qty: 16)
3/8-in Wrench
Process:
NOTE: Use adequate personnel for this operation.
NOTE: Failure to instaR_easter channels may result in
premature cabinet failure.
Place the unit on its top. Use packaging materiat to
protect the paint finish.
Position caster channels on the cabineL Notched flanges
should be toward the outside and pointed up.
Attach casters and caster channels using (4) #14 - 10
x 5/8 Hex Screws for each caster. Mount both swivet
casters on the same side of the cabinet as the side
handle.
Wrench tighten all screws. Do not overtighten.
Return the unit to its upright position.
Notches Caster channels
in back
\
Notches
in front
1!4-in Nut (Qty: 16)
NOTE: Not att assembly instructions wilt relate to your model.
SiDE HANDLE ATTACHMENT
Items Needed:
#14 - 10 x 3/4 Cross-tip Screw (Qty: 4)
Cross-tip Screwdriver
Process:
- Attach the side handle using (4) #14 - 10 x 3/4 Cross-tip
screws.
- Hand tighten. Do not overtighten.
CASTER iNSTALLATION (40-INCH CABINET)
Items Needed:
1/4 - 20 x 5/8 Screw (Qty: 16)
1!4-in Nut (Qty: 16)
7/16-in Wrench
Process:
NOTE: Use adequate personne_ for this operation.
Remove the bottom drawer by following the drawer
removal instructions.
Lay the cabinet down on its back. Use packaging
materiat to protect the paint finish.
Mount both swivet casters on the same side of the cart
as the side handle.
Attach each caster using (4) 1/4-20 x 5/8 screws and
(4) 1/4" nuts per caster.
Wrench tighten atl screws.
Return the cart to its upright position.
Loading ...
Loading ...
Loading ...