Loading ...
Loading ...
Loading ...
TO INSTALL OPTIONAL FLUSH CUTTING
BLADES
See Figures 6 and Z
Flush cutting blades should be used when making
close or flush cuts to wails
[] Unptug your saw.
WARNING: Failure to unplug your saw could
result in accidental starting causing possible
serious injury
[] Using the 5/32 in, allen wrench provided with
your saw, loosen the blade ctamp screw and
remove regular saw blade.
[] Tighten blade clamp screw securely.
[] Loosen set screw and turn base assembly
clockwise 90 °. See Figure 6
BASEASSEMBLYtN FLUSH
CUTTINGPOSITION
SETSCREW
FLUSHCUTTING
NOTCHES
BASEASSEMBLYIN
REGULARCUTTINGPOSITION
Fig. 6
[] Align in desired notch, then tighten set screw
securely.
[] Remove allen wrench and store it in alien wrench
holder
[] Plug your electronic reciprocating saw into power
supply source,
[] Depress and release the switch trigger of your
saw in quick, short starts and stops until blade
clamp is in its full rear' position. See Figure 7,
Unplug your saw,
WARNING: Failure to unplug your saw could
result in accidental starting causing possible
serious injury_
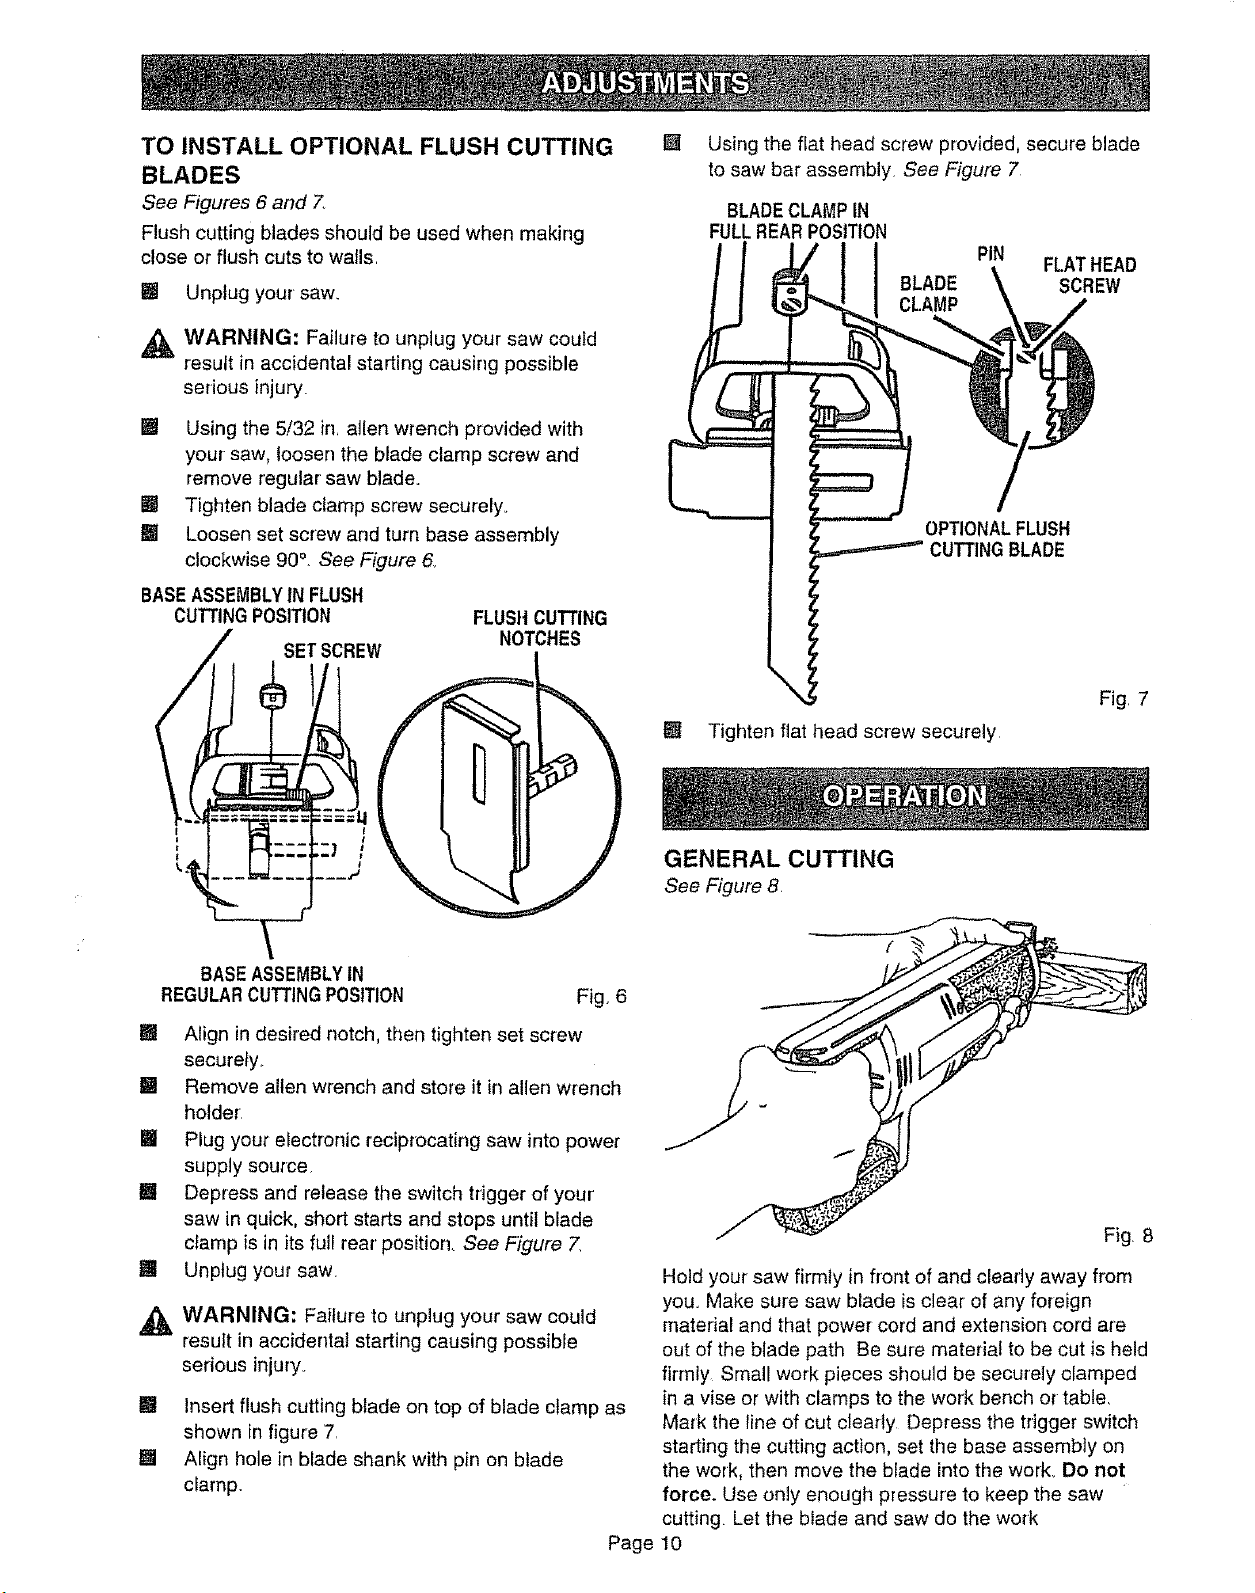
[] Insert flush cutting blade on top of blade clamp as
shown in figure 7
[] Align hole in blade shank with pin on blade
clamp.
Page
[]
Using the flat head screw provided, secure blade
to saw bar assembly See Figure 7
BLADECLAMPIN
FULLREARPOSITION
BLADE
CLAMP
PIN FLATHEAD
SCREW
E Tighten fiat head screw securely
GENERAL CUTTING
See Figure 8.
Fig, 7
i
Fig, 8
Hold your saw firmly in front of and cleady away from
you. Make sure saw blade isclear of any foreign
material and that power cord and extension cord are
out of the blade path Be sure material to be cut is held
firmly Small work pieces should be securely clamped
in a vise or with clamps to the work bench or table.
Mark the Iine of cut clearly Depress the trigger switch
starting the cutting action, set the base assembly on
the work, then move the blade intothe work. Do not
force. Use only enough pressure to keep the saw
cutting. Let the blade and saw do the work
10
Loading ...
Loading ...