ge.com
©
Sa]bOl Instructions .... 2-9
Operating Instructions
Auto Features ......... 20
Care and
Cleaning .......... 33, 34
Changing the
Power I,e\'el .......... 13
Cooking Guide ..... 15, 16
Deti'osting Guide .... 18
Exhaust Feature . .37, 38
Features of Your
Microwave Oven . .11, 12
Microwave Temps ...... 32
Other Features .... 95-31
Replacing Bulbs .... 35, 36
Sensor Features .... 91-24
Time FeattH'es ...... 14-19
7}rmbleshooting Tips ...39
Things That Are
Nomml _Aith Your
Microwax e Oxen ....... 4(1
Consumer Support
Consumer
Support ...... Back Cover
Optional Kits ...........
Product
Registration ....... 41, 42
XAhrrantv ............. 43
Espa_d
For a Spanish version
ot this manual,
visit our _A'ebsite at
ge.colll.
PaI'a cons/lltai" tlna
ve_ion en espafiol
de este manual
de instrucciones,
visite nuestro sitio
de internet ge.com.
Write the model and serial numbers here:
Model #
Serial#
Find lhese numbers on a label inside
tile o\en.
DE68-O3448A
PIO,1I8 70
49-40570 07-07JR
IMPORTANTSAFETYINFORMATION.
READALLINSTRUCTIONSBEFOREUSING.
ii_?iiiii!+++;;iii!lii
WARNING!
Foryour safety theinformation in this manual must be
foflowed to minimize therisk of fire or explosion, electric
shock, or toprevent property damage, personal injury,
or loss of life.
PRECAUTIONSTOAVOID
POSSIBLEEXPOSURETO
EXCESSIVEMICROWAVEENERGY
_: Do Not Attempt to operate
this ()\ell with the door open
Sill((' op('//-dooF op('l_Hioll
(an r('suh in hm:mflfl
e×posure to lHi( rOW_lV('
energ}. It is important not
to (te_('_t or umlper _itl/
the s_d(,tv intcrhxks.
_: Do Not Place any object
b('tw('('H th(' o\('11 [_'()111
{il(e and tl/e door or allow
soil or cleaner residue to
t_((umulate on setding
St tFJitC('S+
Do Not Operate the o\'('n if it
is damag('d. It is particulady
importam that the oven door
(lose propcrb+ _and that tile)'('
is no damage to thc:
(,oo1(,is,.>.
h.lg(+.,l(__..h(+
.........................(broken or loosened),
(.,o1-s(++,_+.lids(+.,,l+
.........................Stll?t_t( (!S+
The Oven Should Notbe
a(!j usted or repaired by
qu_difi('d s('r\'i((" t)er.',oml('l.
SAFETYPRECAUTIONS
When using electrical appfiances, basic safety
precautions should be foflowed, including the foflowing:
J} Re_d an(I i()llow tl)e i_:Install or lo(_te this
specific precautions ill
the Precautions to Avoid
Possible Exposure to
Excessive Microwave
Energy se(doH above.
J} This t_t)pli_ul( e must be
grounded. Conne(t only
to _ t)ropcrly grounded
outlet. See the Grounding
InstFuctZons Se(tiOl/ Oil
page 8.
appliance only in
accordance with tile
t)rovided [nstMlation
h/swtl( tl()l/S.
i;i;This l/li(row_l_e ()veil is
intended/or household use
ml(t is UI listed lbr
installation over elc(-tri(
and g_s rmlges.
ii::This microwave oven is
not approved or tested/or
marine use.
_e.com
Use this appfiance only for its intended purpose asdescribed in this
Owner's Manual
_5}Do not lnount this applimace over a
sink.
J? To reduce the risk of fire in the ()\el/
J? This o_vl-d/e-rm/ge oven _*,_s(tesiglled
{i)r use over ranges no wider allan 36"
It ma} be installed o\er both #,_lsand
elecuJc cooking equipment.
J? Do not operate this appliance if it has
a (Imnaged power cord or plug, if it is
not working llml)( rly or it it has been
damaged or dropped. If die power
(oral is damaged, it must be replaced
1)vGeneral Ele(tric SelMce or an
authorized service agent using a
power cord a\ ailable tix)m General
Ele(t)Jc.
_: 1)o not c(wer or block any openings
on tilt' al)plim/t e.
_: List, this applimlce only/t)r its
intended else as described in riffs
manual. Do not use corrosive
chemicals or vapors in this appliance.
This mierowa_v oxen is specifically
designed to heat, (tI'_ r or took fi.)o(I,
and is not intended t_)r laboratory or
in(t ust]Jal use.
J? Do not store this appliance outdoors.
Do not use this product near wate_m
tDr ex_tlIIple, ill _t Wet b_tselI/ellt, I/('_tl"
aswimming pool, near a sink or in
similm: lot adons.
_: Keel/power cord awa}/ix)m heated
sIIr/itces.
_: 1)o not immerse power cord or plug
ill WaWl3
J? Do not store am,ihing (tirecdy on top
of the illiCt'ow;-i\ e ()\ell S/ll?tilee when
the lllicl'ow_\ e O\ell is ill opel_ltiOll.
- Do not over(ook/k)od. Carefltllv
auend applian(e when pallet; plastic
or oilier combusdble mawrials are
placed inside the o\en while cooking.
- P-enlo\e wire twist-ties and metal
handles/i'om paper or l)lasue
containers 1)elk)re placing them in
the oven.
I)o not use tl/e ()\ell /_)r storage
puqloses./)o not lea\ e paller
products, cooking utensils or t[)od
in the oven when not in use.
- If materi_ds inside the o',en iglfite,
kee t) tl/e oven door closed, turn file
o_'n off and disconnect the l)()_'r
cord, or shut off power at the fitse or
circuit breaker panel. It the door is
opened, the {ire _lyr spread.
- Do not use tl/e Sensor Features
t_,_ice in succession on tl/e same tbod
pordon. If/L)od is undercooked after
the/irst countdown, use JTllleCook t_)r
additional cooking ume.
N See door surli_ce cleaning
insmmtions ill die Care and cleaning
of the microwave oven section of this
mamml.
_: This appliance should be serviced
only by (tualilied service t)ers(mnel.
Conta(t nearest authorized selMce
/imility lot examination, repair or
a(!iustment.
J_ ,ks with rely appliant e, (lose
supervision is necessary when used
by children.
iiiiiiii!ilili !!iiiiiii iiiii
3
IMPORTANTSAFETYINFORMATION.
READALLINSTRUCTIONSBEFOREUSING.
WARNING!
ARCING
If you see arcing, press the CLEAR/OFFpad and correct
the problem.
Arcing is the ini_ rowave ternl
Ior sparks in the oven. Arcing
is caused Iv:
N The metal shelf not
installed correctly so it
touches the n/ierowa_e wall.
_: Metal or fi)il touching the
side of tile oven.
i;i;Foil not molded to fi)od
(upturned edges act like
_llltel/ll_lS).
+;i:Metal, smh as twist-ties,
t/ouhry t)ins or gold-
rinmled dishes, ill the
lllit rowave.
ii::Recycled paper towels
containing small metal
pieces being used ill the
nlicrowave.
FOODS
_: l)o not t_ot / l/opeorn ill
Your mi_ rowave oven unless
ill a special lnit ro_,,ave
t/opt orn a_ tessorv or unless
you use pOl/COrn labeled
ti)r use ill lnit rowave ovens.
_: Son/e llro/hlcts such as
whole eggs and sealed
( ont ainers--/k)r exal//l)le ,
eh)sed.jarslare at/le to
exlflode and should not be
heated ill this mi_ rowave
oven. Such use o/ tile
nlicrowave oven could
resuh ill il_ju W.
_? l)o not boil eggs ill a
lllicrowave oven. Pressllre
will build u11inside egg yolk
and will cause it to burst,
t/ossibly resulting ill ill.j_?r.
()perating tile microwave
with no/ood inside tor
nlore than a minute or two
III_IV ca/Ise (tal/lage to the
oven _lll(I Co/lld s|2117t a lift'.
It increases tile heat around
the n/agnetron and tan
shorten tile liti' of the oven.
Foods with untlroken outer
"skill" sHth as t)ot:atoes, hot
dogs, sausages, ton/aloes,
apples, chicken li_ers and
other gJt)lets, and egg yolks
should tie pierced to allow
stealil to escape (lilting
cooking.
_e.COITI
SUPERHEATEDWATER
Liquids,such as water,
coffee or tea are able tobe
overheated beyond the
boiling point without
appearing tobeboiling.
Visiblebubbling or boiling
when the container is
removed from themicrowave
oven isnot always present.
THISCOULDRESULTIN VERY
HOTLIQUIDSSUDDENLY
BOILINGOVERWHENTHE
CONTAINERISDISTURBED
ORA SPOONOROTHER
UTENSILISINSERTEDINTO
THELIQUID.
To red uce die risk of il{jmT
tO persons_
-- Do not oveflleat the liquid.
-- Stir tile liquid bodl bet6re
and halt\ray din)ugh
heating it.
--I)o not use swaight-sided
(omainers with narrow
necks.
-- After heating, alh)w tile
cont_liner to stand ill tile
microwave oven tk)r a short
ti]ne belt)re removi]lg the
comaine_:
-- Use extrelile (are ]_rhell
il/sertill_ a St)OOl/ or other
/ltel/sil il/to the COlltainer.
ii::A_oid heating baby tbod in
glass jars, even with die lid
o/E Make sure all in/hnt
/6od is dloroughly cooked.
Stir/t)od to distribute tile
heat evenh. Be carefill to
prevem scalding when
wa]?l/ling /t)]?l//Hla ()r breast
milk. The (ontainer may
/vel cooler than tile milk
really is. Alwax_s test the
milk betore/ceding tile
bal r<
i;i;Don't de/i'ost/i'ozen
1)everages in narrow-necked
bottles (espe(ially
(arbonated beverages).
E_en if tile container is
opened, pressm:e can build
up. This can cause the
container to burst, possibly
resulting in i_iuvy.
ii::Itot/t)()(ts and steam (an
cause bm:ns. Be careflll
when opening any
containers of hot tbo(I,
in(luding pop_ orn bags,
(()()king pouches and
boxes. To prevent possible
illjm T, direct steam _l_r_l_'
fl:om hands and/ace.
s;_I)o llO[ o'_er(ook potatoes.
They (ould dehydrate and
(at(h fire, (ausmg damage
tO VO/Ir o'_ell.
i;i;Cook meat and poultr}
thoroughly--meat to at
least an INTERNM,
temperature of 160°F
and poultv} to at least an
INTERNAl temperature
of 180°E Cooking to these
temperat iires /lSllally
protects against /oo(t-
borne illness.
iiiiiiiiii!iii!iiii!!H!
5
IMPORTANTSAFETYINFORMATION.
READALLINSTRUCTIONSBEFOREUSING.
A WARNING!
ii iiiiiiKiii!lii
MICROWAVE-SAFECOOKWARE
Make sttre all cookwm'e tlsed
ill yoHr l//]c£ow_t\ e o_,el/ is
suitable li)r microwa_ing.
Most glass casseroles, cooking
dishes, measuring cups,
CllMalX1 clips, t)otlel) of chil/a
dilmerware which does not
hax e metallic trim or glaze
with a metallic sheen (an be
Hsed. SOl/le cookware is
labeled "suitable lot
mlcrow_wiltg."
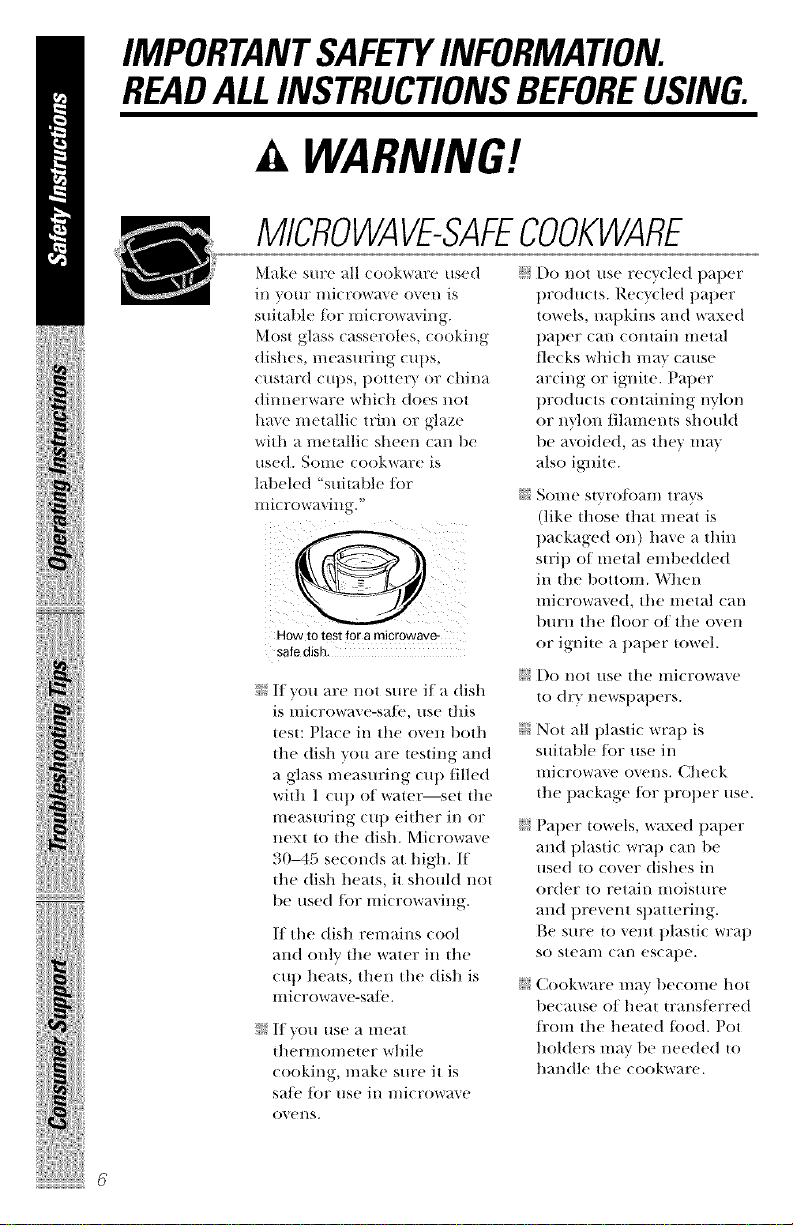
HOW TOtest for a microwave
safe dlSn
If you are not sure if a dish
is microwave-sa/i,, use this
test: Place in the oven both
the dish you are testing and
a glass measuring cup tilled
with 1 cup of wate_mset file
measm:ing cup either in or
next to tile dish. Microwave
30-45 seconds at high. If
the dish heats, it should not
be used/i)r mi(rowaving.
If tile dish remains cool
and only the water in the
cup heats, then tile dish is
microwave-sa/i,.
If you use a meat
thermometer while
cooking, make sure it is
sa]_' tk)r lisp ill microwave
ovel/s.
J} Do not use recycled paper
products. Recycled paper
towels, napkins and waxed
paper can comain metal
flecks which mm cause
arcing or ignite. Paper
prod ucts containing nylon
or talon/ilaments should
be avoided, as they lna_,
also ignite.
i)i_ Sol//e s|vt'()Jk)_Hll tt'_vs
(like fl_ose fl_at meal is
pa( kaged on) have a thin
strip of metal emt)edded
in the t)ottoln. When
microwaved, tile metal Call
burn tile floor of tile oven
or ignite a paper towel.
_} I)o not use tile microwave
tO dv} I/ev_st)at)el's.
N Not all plastic wrap is
suitable/i)r use in
microwave ovens. Check
the package/i)r prot)er use.
J} Paper towels, waxed paper
and plastic wrap can be
used to cover dishes in
order to retain moisture
and prevent spattering.
Be sure to vent plasdc wrap
so steam can escape.
+_}(',ookware l//W,; t)econ/e hot
because of heat trans/i'rred
t_:om tile heated too(t. Pot
holders may be needed to
handle tile (ookware.
_e.com
J? "Boilal)le" cooking pouches
and tightly closed plastic
bags should be slit, pierced
or vented as dire(ted b_
t)ackage. If they are not,
t)lastic (ould burst during
or imme(tiawlv alter
cooking, t)ossibly resulting
in i_im_y. Also, plastic
storage containers shouM
be +_tleast partially
mtcovered t)e(mlse they
torm a tight seal. When
looking with comainers
tightly co_ered witll t)lastic
wYat) , Fet//ove coveril/g
carefltllv and direct steam
away fi:om hands and fi_ce.
_: Llse loll only as directed
in this mmmal. When using
loll in the mi(rowave o_en,
kee t) the/i)il at least 1" away
h'om the sides of the oven.
ii::Plastic cookware -Plastic
cookware designed fi)r
microwave cooking is very
useflfl, but should 1)e used
carefltlh. E_en microwave-
sa/i' t)lastic may not be as
tolerant ot overcooking
conditions as are glass or
ceramic materials and may
sofwn or char if sut)jected
to short t)eriods of
o_ercookh_g. In h)nger
exl)osllres to ovel'cookiltg,
the/ood and cookware
could ignite.
Follow thoso Ouidolinos:
Use microw_x e-sat2:
t)last cs only art(
use them in strict
(x)mt)limtce with
the cook\_ aFe
lltal/tt/_tc| IIY(W_S
l'eCOlttl//elt (t_ltioI/s.
I)o not microwaxe
etttt)t" }' (oltiaitteFs.
:13'!Do.,,t t,e,',t itthild,:e.
to use t)lasti( (ookware
without COml)lete
supervision.
iiiiiiii!ilili !!iiiiiii iiiii
7

IMPORTANTSAFETYINFORMATION.
READALLINSTRUCTIONSBEFOREUSING.
WARNING!
Improper useofthe grounding plug can result in a risk of
electric shock.
ii_iiiiii!iii+iL_iii_!lii
GROUNDINGINSTRUCTIONS
Ensureproperground
existsbeforeuse.
This applian(e iil[lst l)e grotmded.
lit the ev(ll| Of all electri(al shot|
circldt, gromMing re(hines d_e risk
of ele<tri( shock by l)roviding an
escal)(? wit( tor tlle elec|ri( (;/trrel/t.
This appliance is equit_ped wid_ a
power (ord having a gromMing
wit( wid_ a gromMing l_lug. The
l)lug must be plugged into an omlet that is prop( rly installed
and gromMed.
Constllt a qualitied e/(etrician or s(rxice technician if the
grounding instructions are not completely !lnderstood, or if
doubt exists as to whether the appliance is ln:Op( rly gromMed.
If the outlet is a standard 2-prong wall omlet, it is yore: personal
responsibility and obligation to have it replaced with a properly
grounded 3-prong wall omleL
Do I/or/Hl(ler any (ir€/llnsta_l( es (tit or rei/lOVe the third
(gromM) prong fi:om the pow(r cord.
Do not use an adapter plug with this appliance.
Do not use an (xtension cord with this appliance. If the power
cord is too short, haxe a qualilied el(etrieian or service
technician install an omlet near the appliance.
For best operation, 1)h_g this appliance into its own el(etrical
outlet to pre_ent flickering of lights, blowing of fl_se or tripping
of circtfit breake_a
ge.COIgl
THEVENTFAN
The tml will operate automatically under certain condi6ons
(see Automatic Fan teature). Take care to prevem the starting
and spreading of accidemal cooking fres while tile veil| t_lll
is in use.
ii::Clean tile mlderside of die microwave often, l)o n()t allow
grease to build ut> on tile microwave or the/hn tilte_
ii::[n tile e_em of a grease fre on the sur/ace units below tile
microw_o..e oven, smother a/lalllillg [)all Oil tile stlrl_€e tlllit
by covering the pan completely with a lid, a cookie sheet or
a/lat tl?_.
i_i;Use care when cleaning tile veto/ira filter. Corrosi_v cleaning
agents, such as lye-based oven cleaners, may damage tile t]lte_:
N When preparing flaming/oods under tile microwave, turn
the/hn on.
ii::Never leave surthce milts beneath your nlicrowave oven
unattended at high he_t settings. Boilovers (m_se sn/oking
and greasy spillovers thin 1raft ignite mid spread if the
n/icrowa_e veto /an is operming. "Ik>minimize autoln_tic tml
operation, use adequate-sized cookware and use high heat
on sm:tilce units only when ne< essarv.
READANDFOLLOWTHISSAFETY
INFORMATIONCAREFULLY.
SAVETHESEINSTRUCTIONS
i_iiiiiii,,,,,,,,,iiiiiiiii
9
ii!ii'iiiiYi!HiiiiHHIHii
ilililiiiiiii i
iiiii iiiiii
!iii!iiiiiiiiiii_iiiiiiililiil]iiii
_i_,l_!iiii!iiiii
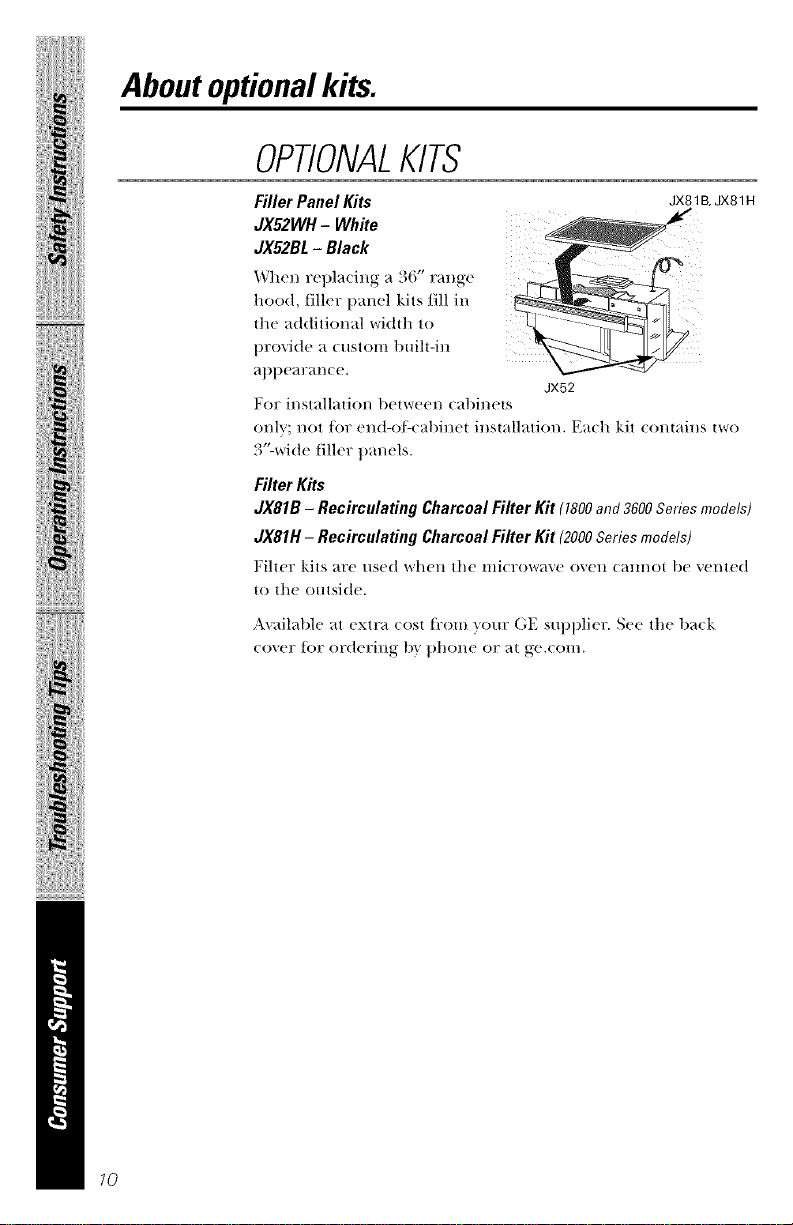
Aboutoptionalkits.
OPTIONALKITS
Filter Kits
JX81B - Recirculating Charcoal Filter Kit (1800and 3600Series models)
JX81H- Becirculating Charcoal Filter Kit (2000Series models)
Fiher kits are used _rl]el] tl]e l]li(row_lxe ovell (_lHI]ot 1)e v(tHted
to the outside.
Axailable at extra (os_ fi'om your (;E stq)l)lier. See the ba(k
(oxer t_)r or(teriDg l)}' t)hone or ;_| ge.(oln.
10
Aboutthefeaturesofyour
microwaveoven.
ge.com
Throughout this manual, features and appearance may vary from
yourmodel
///////l!!!\\\_x
0
iiiiii!i!i_i!iiiiiii!!i[
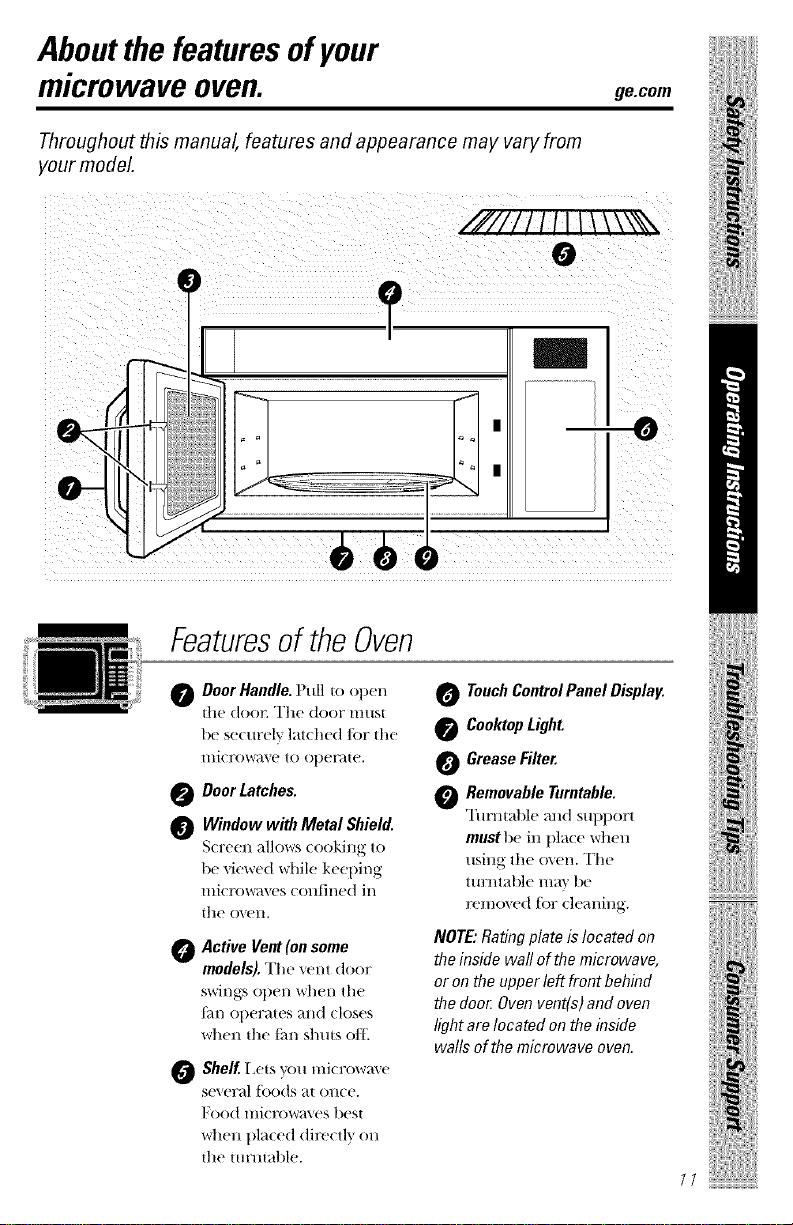
Featuresof theOven
_Door Handle. Pull to open
t]l(' (10012 T]I(' (tOOF Hl/tst
be s(,(urclv lat(h(_(l tot tl_(_
lllJ( F()W_IX(? to ()p(_l_lt(k
0 Door Latches.
Window with Metal Shield.
S(Y('(ql _lllOWS (()()king to
1)(' Vi('W('(| whih' kccl)ing
IlIJCI'OVv_dV('S COIl[Ill('(] ill
t]l(' o_ ('l 1.
O Active Vent (on some
models). The xent (leer
SWillS% Op('// WI/('I/thu
(i_l/ol)('l:_t('s _I1(] clos('s
wh(ul flw [im shuts oil
O Shelf. I,(,ts you microw_w('
st'\e]:_l [oo(ts _t OHC('.
Foo(t mic_x)w_\ ('s b('st
\_tl('n lilac('(1 (li_x'ctlv OH
th(' turHt_d)lu.
O TouchControIPanel Display.
@ CooMop Light.
O Grease Filter.
O Removable Turntable.
TurHt_O)l(' mid sut)t)ort
using th(' o\ ('n. Th('
t tllynt:abl(' 111_¢,' b('
_x'mov('d fl)r cleaning.
NOTE: Rating plate islocated on
the inside wail ofthe microwave,
or on the upper left front behind
the 171oo/:Oven vent(s) and oven
light are located on the inside
walls of the microwave oven.
iiiiiii[!ilil,i__!!iiii[ii_iiiii
17
Aboutthe features of yourmicrowave oven.
Youcanmicrowave bytime,with thesensorfeatures or with the autofeatures.
ii_iiiiii!iii_iL_iii_!lii
12
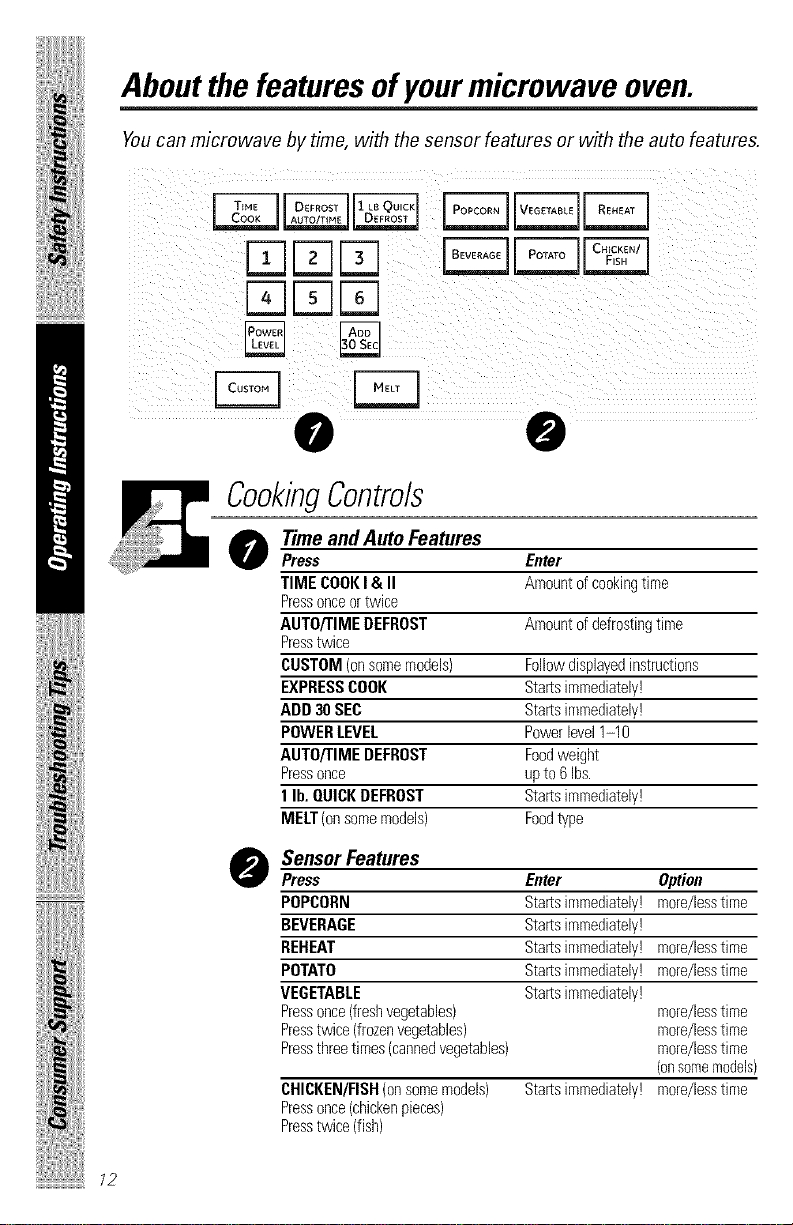
CookingControls
O Timeand AutoFeatures
Press Enter
TIME COOKI& II Amountofcookingtime
Pressonceortwice
AUTO/TIME DEFROST Amount ofdefrostingtime
Presstwice
CUSTOM (onsomemodels) Followdisplayed instructions
EXPRESSCOOK Startsimmediately!
ADD 30 SEC Startsimmediately!
POWER LEVEL Powerlevel1-10
AUTO/TIME DEFROST Foodweight
Pressonce upto6 Ibs.
1lb.QUICK DEFROST Startsimmediately!
MELT(oilsomemodels) Foodtype
O SensorFeatures
Press Enter Option
POPCORN Startsimmediately! more/lesstime
BEVERAGE Startsimmediately!
REHEAT Startsimmediately! more/lesstime
POTATO Startsimmediately! more/lesstime
VEGETABLE Startsimmediately!
Pressonce(freshvegetables) more/lesstime
Presstwice(frozenvegetables) more/lesstime
Pressthreetimes(cannedvegetables) more/lesstime
(onsomemodels)
CHICKEN/FISH(onsomemodels) Startsimmediately! more/less time
Pressonce(chickenpieces)
Presstwice(fish)
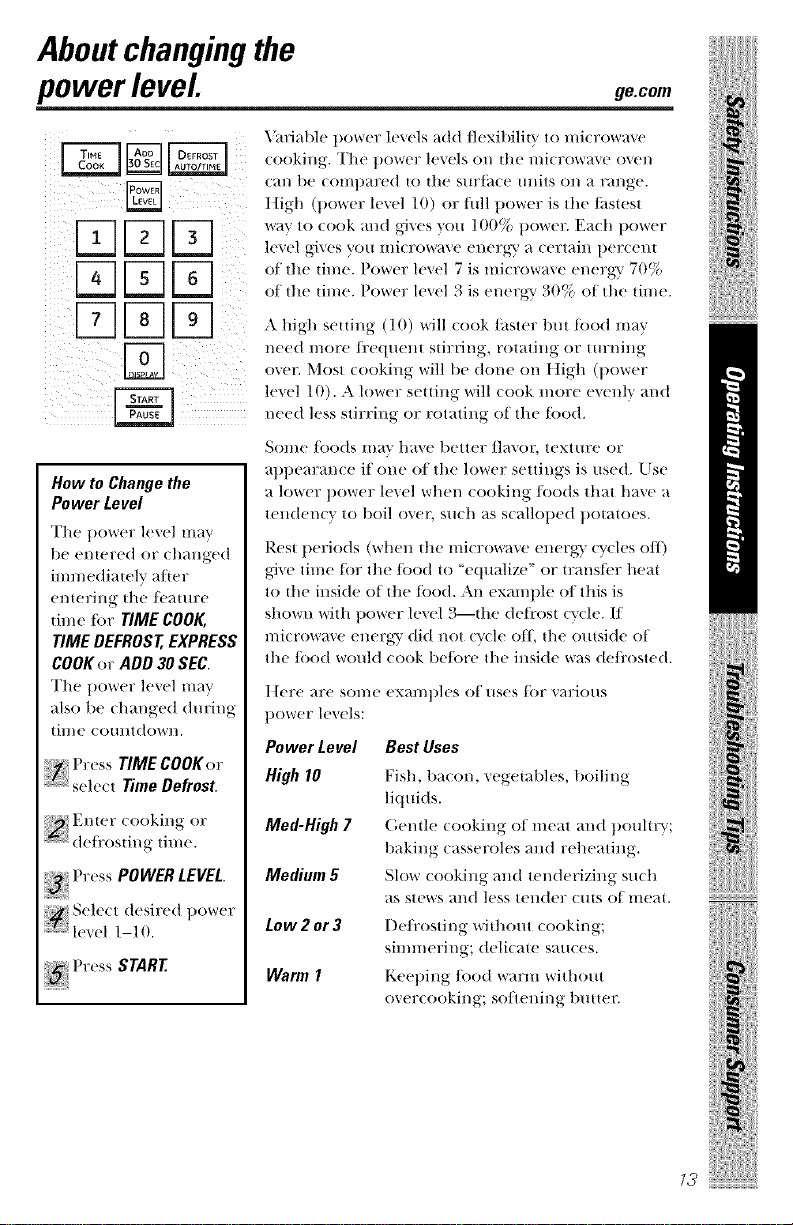
Aboutchangingthe
power level. ge.com
[]
How to Change the
Power Level
The power level may
be entered or (hanged
immediately atter
entering tile/cature
time tot TIME COOK,
TIME DEFROST, EXPRESS
COOKor ADD 30SEC.
The t)oweF hweI may
also be changed during
time comndown.
Press TIME COOKor
+++++{{}sele(t TimeDefrost.
++ P _ss POWERLEVEL
le'_el 1-10.
_,_triable t)ower lexels add flexibility to <l/i(1X)_*¢_t'_,e
cookill}g+ Wh( ])owe17 le+,els on the </li(rowa'_e oxen
C_tl/ lie coii/t)ared to tile stlrt_(e tlllitS on _t range.
Itigh (power level 10) or lull power is the/i_stest
way to cook and g{ves you 100% t)owel: Each t)ower
level gives you microwave energ T a certain percem
of the time. Power level 7 is microwave energ T 70%
of tile tin/e. Power level 3 is energy 30% of the time.
A high setting (10) will cook/aster but tood may
need nlore fl:equent stirring, rotatil_,g or tm:ning
(>vex:Most cooking will be done on l]igh (t)ower
level 10). A lower setting will cook nlore evenly and
need less stirring or rotating of the food.
Some/oods mm have better flavor, texture or
appearance if one of the lower settings is used. Use
a lower power level when cooking/oods that have a
tendency to boil <)vex-such as scalloped potatoes.
Rest lleriods (when tile microwave energ} wcles o/t)
give time R)r tile R)()(t to "equalize" or transli.T heat
to tile inside of tile tood. All example of this is
shown with power level 3--the deti'ost cycle. If
microwaxe energ-y did not cycle oil, the outside of
tile/ood would cook be/ore tile inside was de/i'osted.
Itere are some examples of uses tor various
power levels:
Power Level Best Uses
High 10 Fish, bacon, vegetables, boiling
liquids.
Med-High7 (',emle cooking of meat and poultry;
baking casseroles and reheating.
Medium 5 Slow cooking and tenderizing such
as stews and less tender cuts of meat.
Low2or3 De/i'osting without cooking;
simmering; delicate sauces.
Warm 1 Keel)ing/ood warm without
overcooking; softening 1)utter:
ii+iiiii+++++{+!iiii+++/+++/iii+
iiiiiiii!ilii+i !!iiiiiii+iiiii
73
Aboutthetimefeatures.
i ¸¸¸/D ¸¸¸¸¸/;
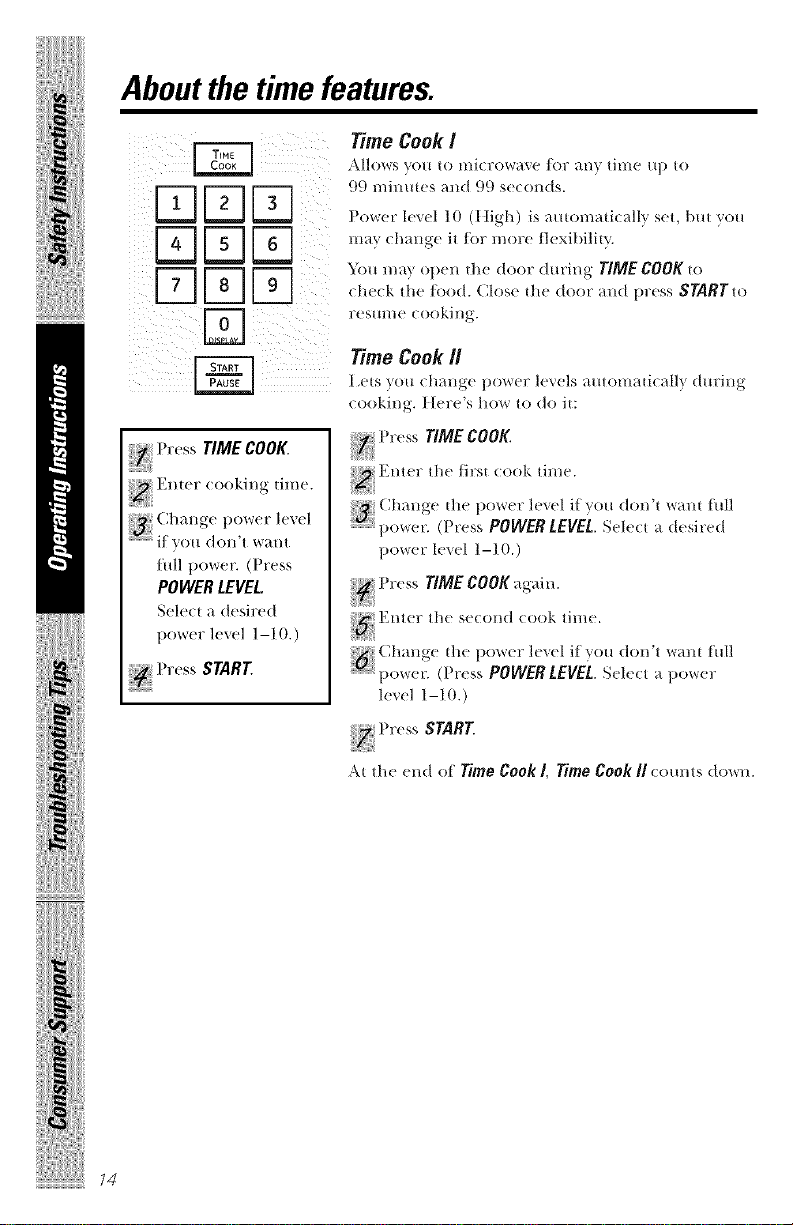
Press TIME COOK.
Enter,o,,king time.
it VOII d el l't W_tl /t
thll p()W('I\ (PI'('SS
POWER LEVEL.
Seh'(t _1desired
power level 1-10.)
Time Cook/
Allo_s \,o/_ to mi(row;_(' lOT ;mv tim(' up to
99 mim_tes and 99 s((onds.
Power level 10 ([tigh) is automati(ally seL but ?_'(m
IIIH}' chmlg(' it lOT more II(xibilit\..
Y(m m m open tile door d re:inK TIME COOKto
check the Iood. Clos( the door and pr(ss START.)
resume cooking.
Time Cook//
l,(ts ?(m change pow(r le'_els "_ o n _ ctll? din'inK
cool._ing. I Ier( 's he'% r |o do i(:
P ess TIME COOK
I
Enter _he first (ook _ime.
J
........l)o',','er.(l'r(,ss POWERLEVEL.S,.1,._c_a desired
p,.)wer lev(1 l-I 0.)
P ess TIME COOK again.
EI/|(!I" |h(! se(ol/d (ook li]//e.
!i!_,,iiil_iiiii
................pow(!r. (Press POWER LEVEL. S(lec_ a l,(,w(,r
level 1-10.)
Press START
N
,x__h,._end of TimeCookI, TimeCookII(:(mn_sdO'Wll.
ii_iiiiii!iii_i_=;:iii:!lii
ge.com
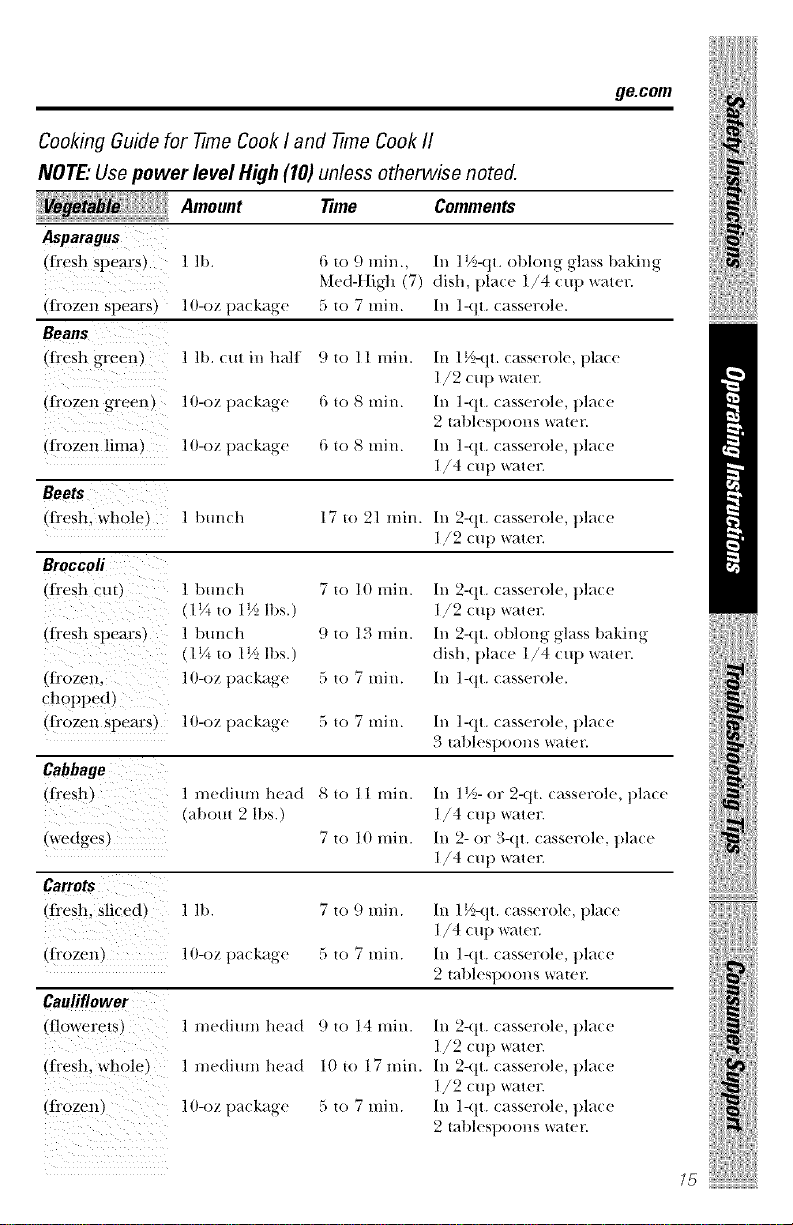
Cooking Guide for -time Cook Iand -time Cook II
NOTE."Use power level High (10) unless otherwise noted.
Amount Time Comments
6 to 9 rain.,
Med-t tigh (7)
5 to 7 min.
9 to 11 min.
6 to 8 rain.
Asparagus
(fi+esl_ spears) l lb.
(f_ozen spears) ltt-oz pa( kage
Beans
(f)cesh green ) 1 lb. (ut in hMI In 1½-qt. (asserole, pla(e
l ,/2 C[I t) vvratelT.
(l¥oze n green ) lO-oz package Ill l-qt. casserole, place
2 tal)lest)ool/s water.
(Ii+ozen lima) ltt-oz t)ackage 6 to 8 rain. Ill l-qt. casserole, place
1/4 cut> water.
(fi+esh, whole) 1 btmch 17 to 21 rain. Ill 2-qt. casserole, place
1/2 cut) water.
Ill 11/2-qt. ot)long glass baking
dish, pla(e 1/4 (tq> x_ater.
Ill 1-qt. (asserole.
ii+/ili+++++i+!iiii+++/+++/iii+
Broccoli
(fi+esh cut) l tmn(h 7 to 10 rain.
(1V_ to 1½ lbs.)
(fl+esh Spears) 1 btm(h 9 to 13 rain.
(1V+ to 1½ lbs.)
(fl+ozen, lO-oz pa( kage 5 to 7 rain.
chopped)
(fi+ozen spears) lO-oz pa(kage 5 to 7 rain.
Cabbage
(!i'esh)
(wedges)
1 me(lim_, llead 8 to 1 1 mill.
(abotn 2 lbs.)
7 to 10 mi_l.
Ill 2-qt. casserole, place
1/2 cup water.
Ill 2-qt. obhmg glass baking
dish, place 1/4 cup water.
Ill 1-qt. casserole.
h/ ]-(t t. (asserole, t)la(e
._ tFtl)lest)ool/s water.
Ill 11/2-or 2-qt. casserole, place
1/4 cup water.
Ill 2- or 3-qt. casserole, place
1/4 cup wute+_
(ffes!L sliced) 1 lb. 7 to 9 rain.
(fl+ozen) ltt-oz pa( kage 5 to 7 rain.
Caufiflower
(floiverets) 1 medium head 9 to 14 mii_,.
In 1I/2-qt.casserole, place
1/4 cup water.
Ill 1-qt. casserole, place
2 tablest)o(ms water.
Ill 2-qt. (asserole, pla(e
1/2 cup water.
Ill 2-qt. casserole, place
1/2 cup watel:
Ill 1-qt. casserole, t)lace
2 tablest)o(ms water.
(fresh, whole) 1 medimn head
(fi+0ze n) lO-oz pa(kage
lOto 17rain.
5 to 7 min.
+'
15
t
Aboutthetimefeatures.
18
( _rozell I
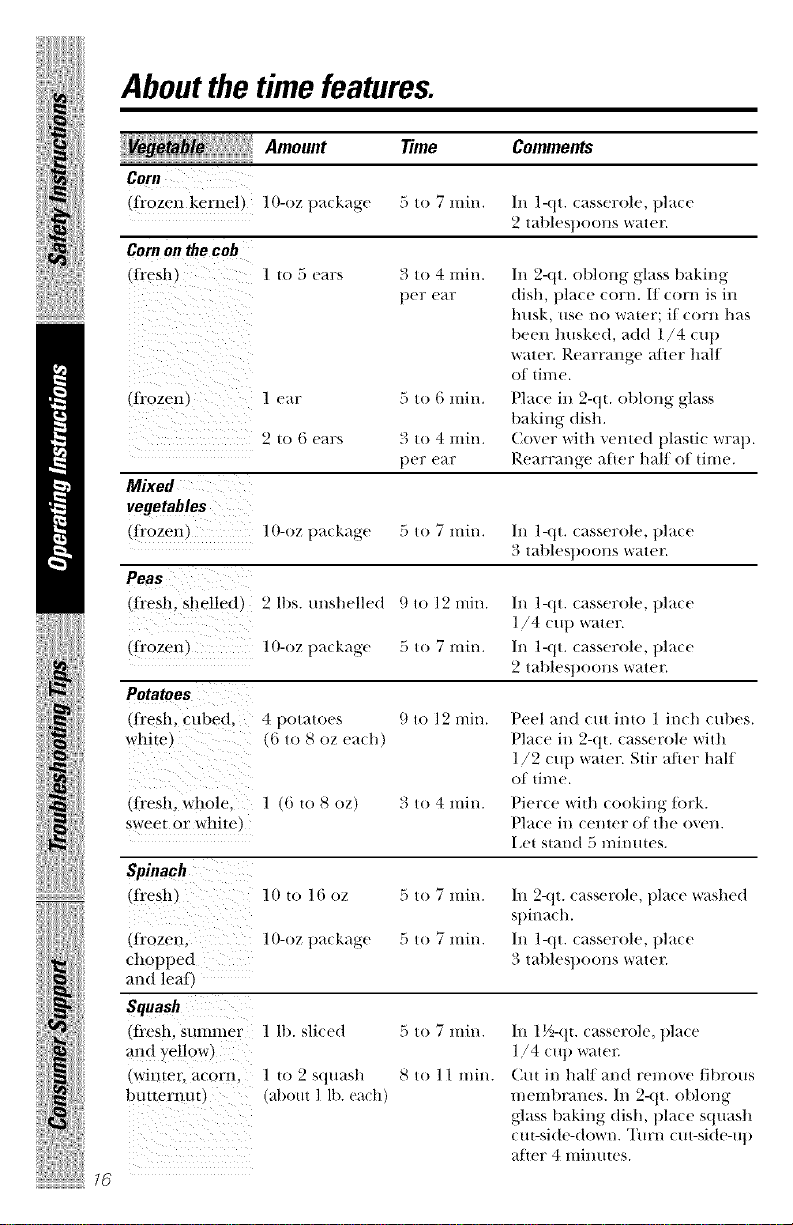
Amount Time Comments
Corn
(ii'ozeJl kernel, lO-oz t)a(kage r_tO 7 rain. /n l-qt. (assero|e. t)]a(e
,_ t_ll)lesl)OO]lS *isr_lte]_
Corn on the cob
fl'esh) ] to 5 ears 3 to 4 rain. /n 2-qt. ol)hmg glass baking
t)er ear dish, t)lace corn. l/corn is iu
hHsk, Hse Ino W_ller; if corll 1Klb
been husked, add 1/4 cup
water. Rearrauge a/ier hal/
of dine.
] ear Place in 2-q_. oblong glass
bakiug dish.
2__o 6 ears Cover wifl_ \ented plastic wrap.
Rearrange alter half of time.
5 to 6 rain.
3 to 4 rain.
t)er e_lr
Mixed
vegetables
(ii'ozen) l O-oz pa(kage 5 to 7 rain. /n l-qt. casserole, t)la(e
Peas
fl'esh, shelled' 2 |t)s. m_shc|h'd 9 tO ] 2 mill. Ill ]-(l l. (assero|e, ])la(e
1/4 cu l) water.
(ti'ozen) l O-oz package 5 to 7 rain. /n l-qt. casserole, t)lace
,_ lal)lesl)OOHS w_HeF,
Potatoes
(]resh. cubed. 4 t)(muoe. ,, 9 to 12 rain.
white, ,6 to 8 oz each)
li'esh, whole. ] _i m 8 oz) 3 to 4 rain.
sweet or while,
Spinach
(Ii'esh)
(li'ozen.
chopped
and leat
Squash
[_t'csh. _tlllillleI"
and vellow/
(winter. acorn.
btJHel'l Itt[ I
10 to 16 oz 5 to 7 rain.
lO-oz package 5 to 7 rain.
l lt). sliced 5 to 7 min.
l to 2 s(lua.q_ 8 to l 1 rain.
about ] lb. each)
Peel and cut into 1 inch cut)es.
Place in 2-qt. casserole with
1/2 cu l) water. Stir a/let half
of dine.
Pierce wid_ cooking tork.
Place in center of the oven.
I,et sland 5 miracles.
In 2-qt. casserole, t)lace washed
st)im_ch.
In 1-qt. casserole, place
3 tal)lesl)oons water.
In 1½-qt. casserole, place
1/4 cut) water.
Cut in half an(t remove fibrous
membranes. In 2-qt. oblong
glass baking dish, place squash
cut-side-down. Turn cut-side-u t)
alt(,r 4 lllill/lleS.
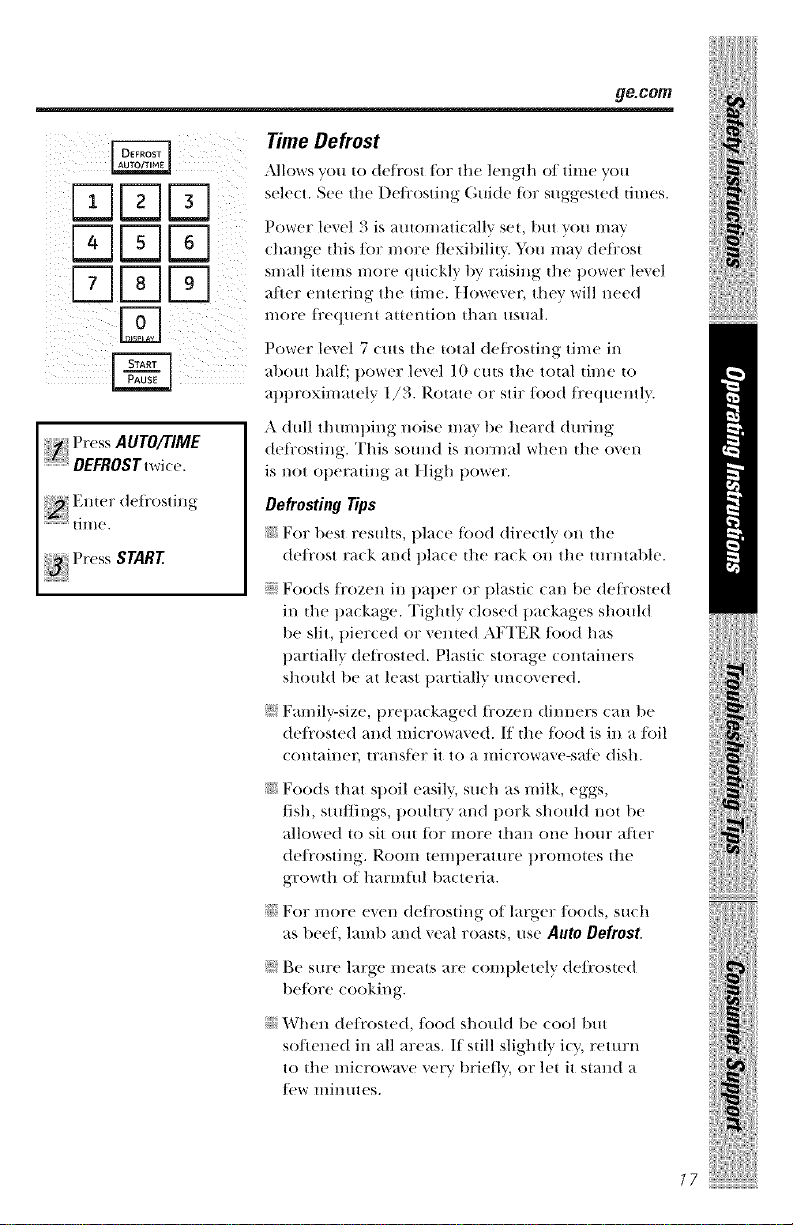
PressAUTO/TIME
DEFROST t'_vke.
Enterdeti'osting
tillle.
Press START
about half; power level 10 cms the total @he to
at)t)roximately 1/3. Rotate or stir/ood/i'equentl}.
A dull tlmmt)ing noise mm be heard d m:ing
(tel_'osling. This soml(t is normal when the ()veil
is not operating at Iligh power.
Defrosting Tips
_: For best results, place tood dire(tlv on the
(h'/i'ost rack and t)lace the rack on the lm:ntabh'.
J} Foods/i'ozen in t)at)er or plastic can be del_:osted
in the t)ackage. Tightly closed t)ackages shouM
be slit, t)ierced or vented AFTER/ood has
t)artially (tel_:osle(I. Plastic storage containers
should be at least t)artially tmcovered.
N Family-size, pret)ackaged t_'ozen (timmrs (an be
de/i'osted and microwaved. If the/ood is in a loll
container, trans/i'r it to a microwave-sa/i, dish.
_: Foods that spoil easily, such as milk, eggs,
fish, sm/lings, poultry and pork should not be
allowed to sit Oil[ t()I" IIIOFe thall Ol/e holll? a/ler
(te/i'osting. Uoolll Iel//l)el?atllre t)romotes tile
growth of harnfful bacteria.
N For more e_en de/i'osting of larger/oods, such
as beeE lamb and _eal roasts, use Auto Defrost
J} Be sure large meals are completely de/_'osted
be/ore cooking.
J) When de/i'osted,/ood should 1)e cool but
softened in all areas. If still slightly i(y, return
to tile microwa\ e vet+?+'briefly, or let it stand a
/(,w minutes.
i;lii!
77
t
ii ?iiiii!++: iii !lii
Aboutthetimefeatures.
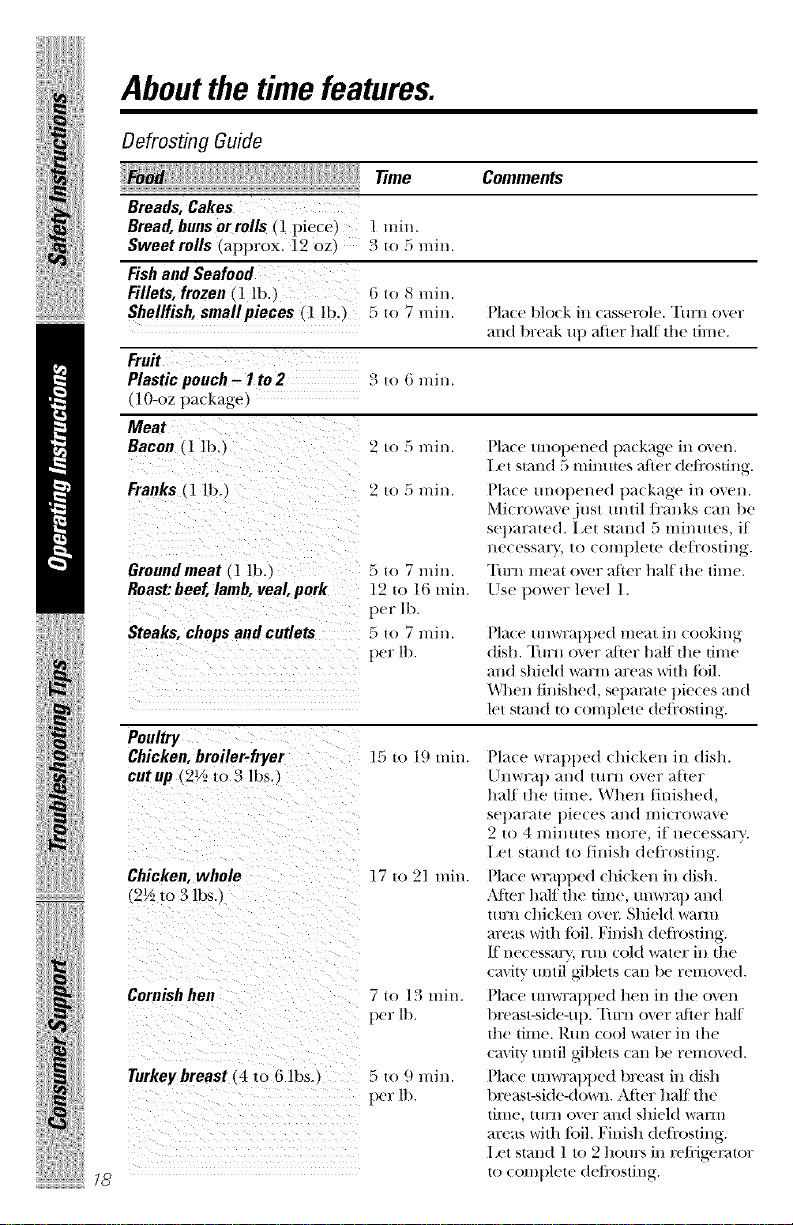
Defrosting Guide
Time Comments
Breads, Cakes
Bread, buns errors (1 piece_ 1 rain.
Sweetrolls tapprox. 12 oz. 3 t(_ 5 rain.
Fish and Seafood
Fillets, frozen (1 lb.) _ito 8 rain.
Shelffish, smallpieces (1 lb.) 5 to 7 rain. Place t)lock ill (as._erole. Turn over
mid break Ul) alier t/alF line lin/e.
Fruit
Plastic pouch- I to2 3 u) 6 rain.
lO-oz package)
Meat
Bacon (1 lb.t 2 lo 5 rain. Place mlOliened pa(kage in o_eu.
l _'t stm ld 5 milluw._ ;di('r de/m_dng.
Pla(e UUOlieued package in oven.
Micro_a_ejusl uulil Jr'talks (an be
SOI)ilF;IIe(/. Let Stall(] 5 l/Ill/tiles, J[
ll+.'CeS.%H_, 10 cO/ill)left de/l'oslJl/_.
Turn t/leilI OV(W _llieY halt' the lime.
Llse power level 1.
Franks (] lb3 10 ,'_ ]l/it/.
Groondmeat(1 lbA
Roast:beef,lamb,veal,pork
Steaks, chops and cutlets
5 to 7 miu.
12 to 16 nlin.
per lb.
5 to 7 miu.
p('r It)
Poultry
Chicken,broiler-fryer
cutup (2½ _o3 lbs.,
15 It) 19 nliu.
Chicken, whole 17 to 21 rain.
(2½ to 3 lbs.,
Cornishhen 7 to 13 m"/.
per lb
Torkeyhreast (4 _o 61 )s. 5 to 9 rain.
per ll)
7_
Place unwraplied meat ill cooking
dish. Turn liver a/ier hag tile tinle
and shield warm areas with loll.
When finished, Sel/anue tiie(es and
Metstand to (Onllilete de/i'osting.
Place wraptled chicken in dish.
Ullwra t) al/(I [tlFII OVer _lller
half tile lime. When finished,
seliaraw pieces and microwave
2 t() 4 nlinmes more, if necessary.
I,et stand to finish delix)sting.
Place wralil/ed chicken ill dish.
Alier h_flf tile time, unwrap and
turn thicken o\er. Shield warm
areas with loll. Finish (leli'osting.
[t necessarv, viii/cold v,vuer ill tile
(_l_+itX'until" giblets/an lie remove(1.
Place unwratllied hen ill the oven
breast-side-up. Turn over a/ier half
the time. Run cool _;tter ill tile
(aVil_runtil giblets (an Lieremo\ed.
Place unwral/lied lireasl ill (tish
breasl-.qde-down. Atier half the
time, turn o\er and shield warm
area_, with loll. Finish detix)sting.
I*'t stand 1 to 2 hours ill re/iigemtor
to (omtllete (te/i'osting.
ge.col_
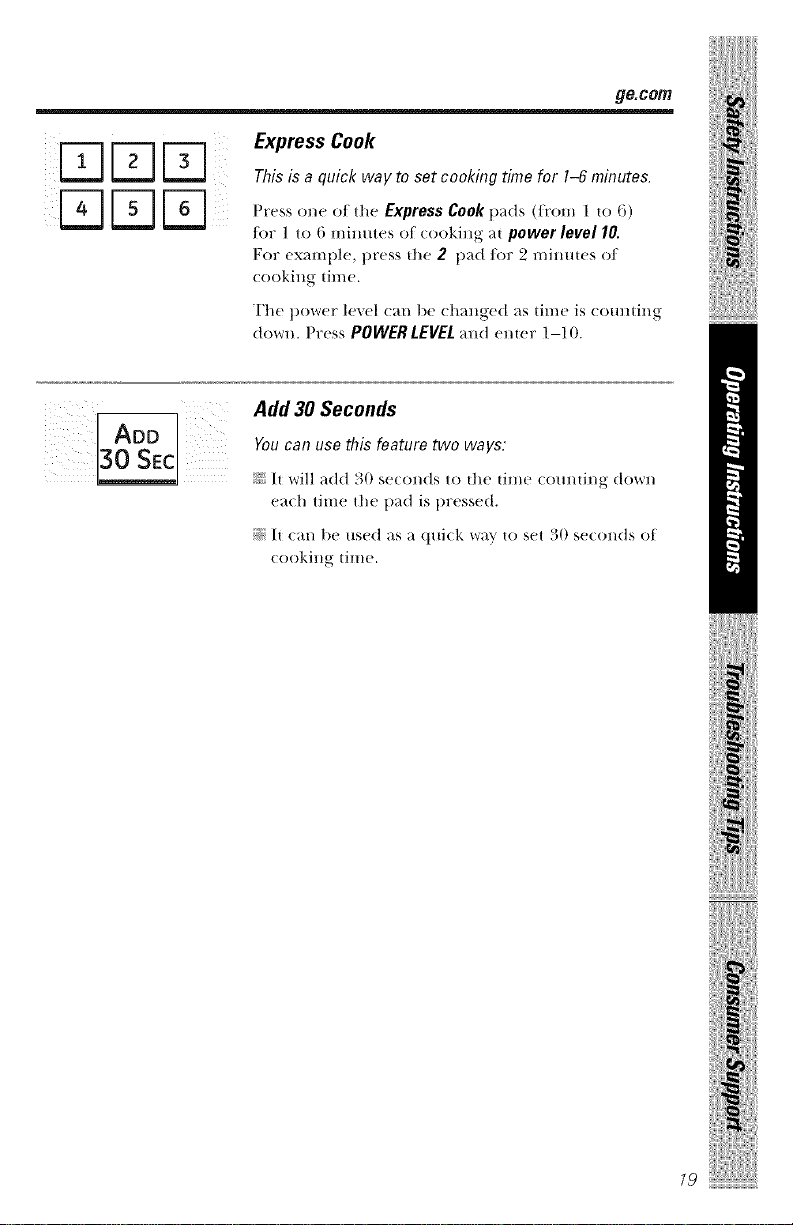
. essCook
_,,,_ L,,,_ L,,,_ This is aquick way to set cooking time for l-6 minutes.
for 1to 6 minutes of (()()king at power level 10.
• • " S
P_Ol: eX_lli/_)le, ])l'ess t]l(' 2 _)_t(t _or 2 l//llltlt(_._ o_
(ooking time.
The power le',el (an be (hmlged _s time is (ommng
down. Press POWERLEVEL _md _'nu'r 1-10.
ii_iiiiiiiiiii_!iiiiiii/iii/iiil
Add30 Seconds
You can use this feature two ways,'
_! ](t will _1(1(t30 se(on(ls to the time (ounting do_%rn
('a(h tim(' thc t)_(/is t)rcss('d.
J? It (an be used as a quick w_ly to set 30 seconds of
cooking time.
19
Aboutthe auto features.
D
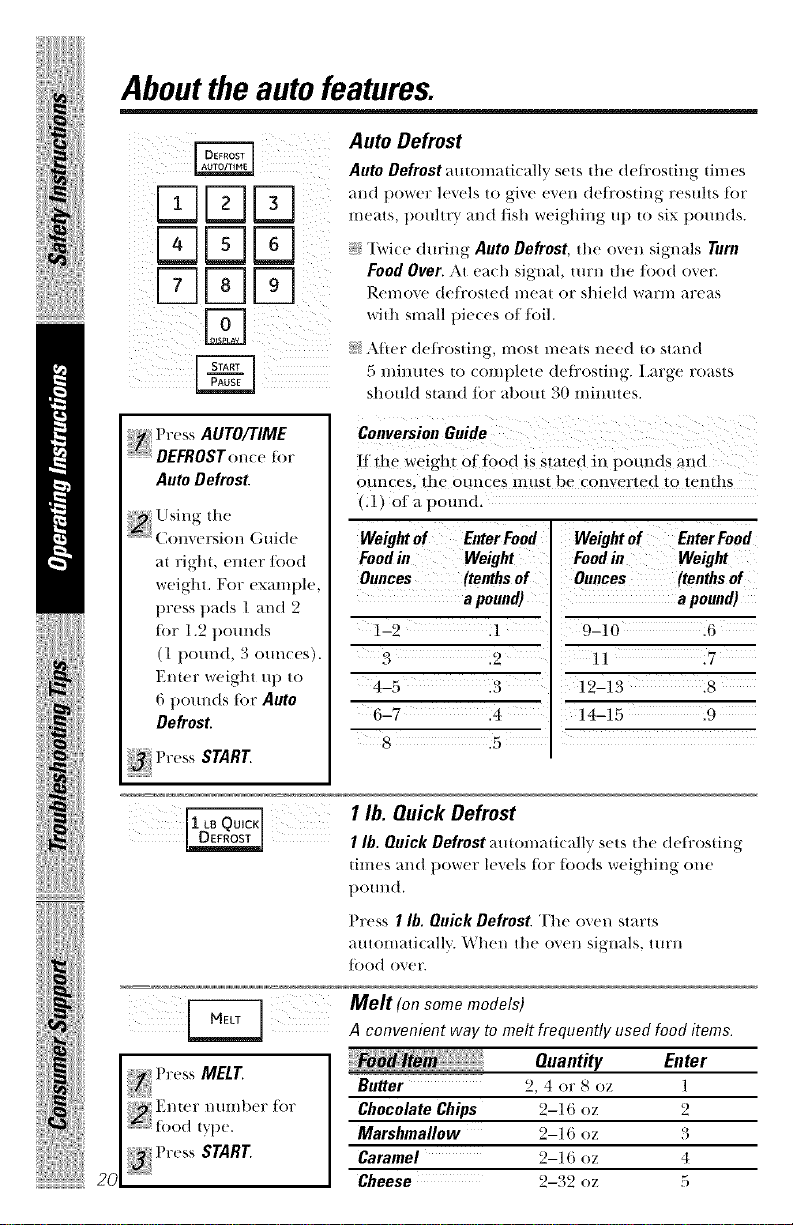
Auto Defrost
Auto Defrostautomatha]|, sets tM' (h,fi'ostiu_ times
_lll(| |)OX_tW 1('\('1S 10 _]v+, (W('ln (]('|l'oMh/_ F('MI|I_ JOT
lll('_tlS. |)O/IIIF_ _11/(| ||sin W('i_lniH_ II I) io six pOnll|ds.
"[_*'ri(t*(|urine Auto Defrost line ()',ell si_t/Kds Turn
Food Over. At cacln signal, mrn dw |ood oxen
R(q/IOVe d('Ji'oslc(| ln/('aI OF shi('ld WaFlIn algeria%
wJI]l Sl/la|] pJ(+(-cs o| |()Jl
Mtcl" d_ql'OStilta, |/lOS1 ln/C_lts ln('(+d |o M_llnd
] u_iHut(+s to ((ml|))cl_' dc[Yosti//_. ],ar_-c l'o;+slS
should stand lbr about 30 lllilltZle,s.
+1 l'res_ AUTO/TIME
DEFROSTouce tbr
Auto Defrost.
(;uidc
al right, culcr Jood
wcigln. For example.
Press Pads 1 and 2
|br 1.2 polmds
(l |)Otllnd+ _ Ollll((+s
Enter \'_eighl up It)
6pounds |br Auto
Defrost
Conversion Guide
If the weigh_ of food is stated in pounds mid
otmces, lhe ounces lnus_ be convcrwd _(_)|emhs
(,1] of a pound,
Weight of EnterFood
Foodin Weight
Ounces (tenths of
apound)
1-9 .l
3
4-5 .3
6-7 .4
8 .5
Weightof EnterFood
Foodin Weight
Ounces (tenthsof
apound)
9-10 .6
11 ,7
19-13 ,8
14-15 .u
I lb. Quick Defrost
1lb. Quick Defrost at|tomati(allv sets the dcfl_osting
tim('s and pow('r h'vcls |br |beds \v('ig-l'dl/g one
t)otmd.
Press I lb. Quick Defrost. Th(, ov(,n starts
atltOII/atJ(allv. \_'1/('1/ Ill(' ()V('ll sigllals, tilth
{ood ()vet:
Melt (onsomemodels)
A convenient way to melt frequently used food items.
Quantity Enter
Butter 2,4 or 8 oz 1
ChocolateChips 2-16 oz 2
Marshmallow 2-16 oz 3
Caramel 2-16 oz 4
Cheese 2-32 oz 5
Aboutthesensorfeatures.
ge.com
Covered
Vented
Dry off dishes so they
don't mislead the sensor.
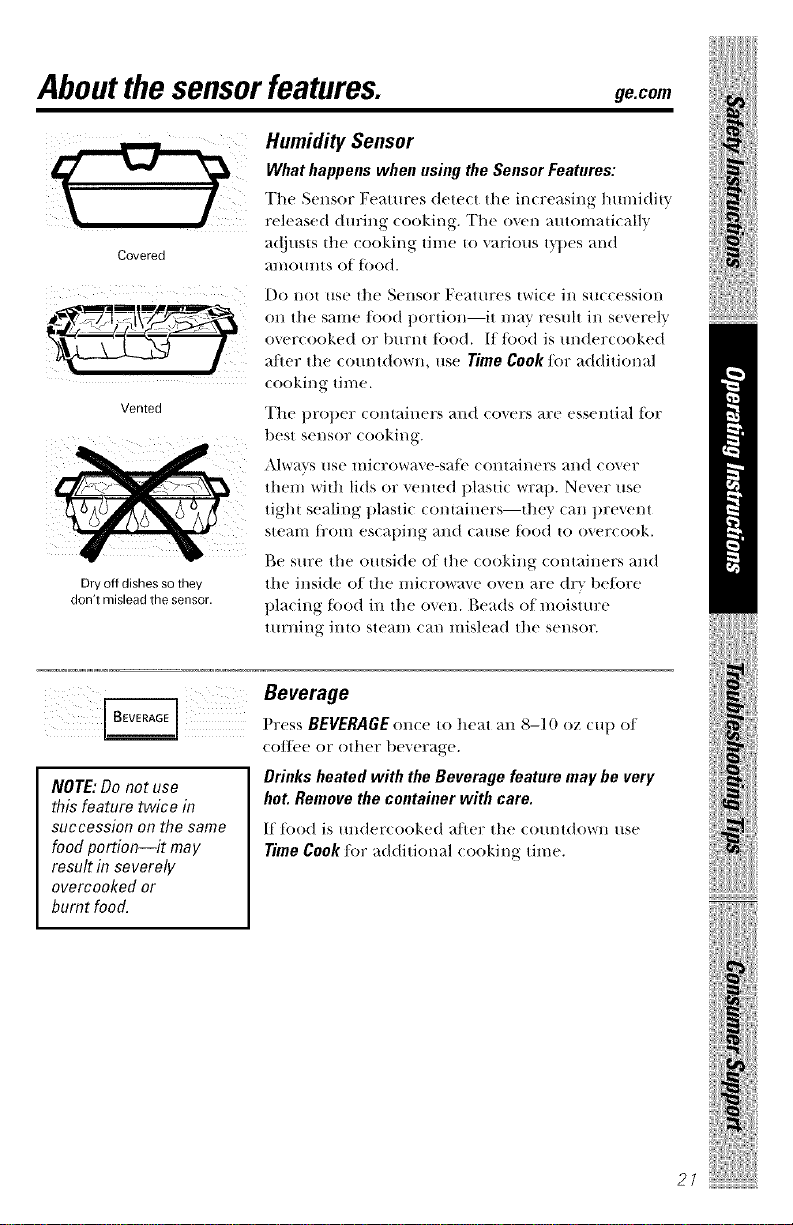
Humidity Sensor
What happens when using the Sensor Features:
The Sensor ]_'eattlres dete(t the in(re;_sing humidity'
released dm:ing (ooking. The oven automaticall_
adjusts tlle cooking time to various t}]_es and
amotmts of tood.
Do not rise the Sellsor Fe_tttlres twice ill S/ICCession
on the same/ood portion--it may resuh in severely
overcooked or bm:nt tood. If food is m_dercooked
after the (otmt(town, use Time Cook/i)r additional
cooking time.
The t)rot)er contaillers all(t covers are essential [()r
best sensor cooking.
Alwms use microwave-sale containers and cover
them witll lids or _emed plastic wrap. Never use
tight sealing plastic containers--they can prevent
steam {tom escaping and cause {i)od to overcook.
Be sure the outside of the cooking containers and
the inside o/the nli(row_+_,e oven ;_lre dr+_l)e/i)re
placing tood in the oven. Beads o/moistm:e
ttlrning illtO ste_llll ('_tl/ lIlisle_d the sensor.
ii+iiiii+++++i+!iiii+++/+++/iii+
NOTE:Do not use
this feature twice in
succession on thesame
foodportion--it may
result in severely
overcooked or
burnt foorL
Beverage
Press BEVERAGEon_e to heat ml 8-10 oz cut) o/
co/lee or other beverage.
Drinks heated with the Beverage feature maybe very
hot. Remove the container with care.
It' tood is mlder(ooked alter the (()tmtdo_,,n use
Time Cook/i)r additional (ooking time.
iiiiiiii!ilili !!iiiiiii+iiiii
21
ii iiiiii!iii iL iii !lii
Aboutthesensorfeatures.
iiii
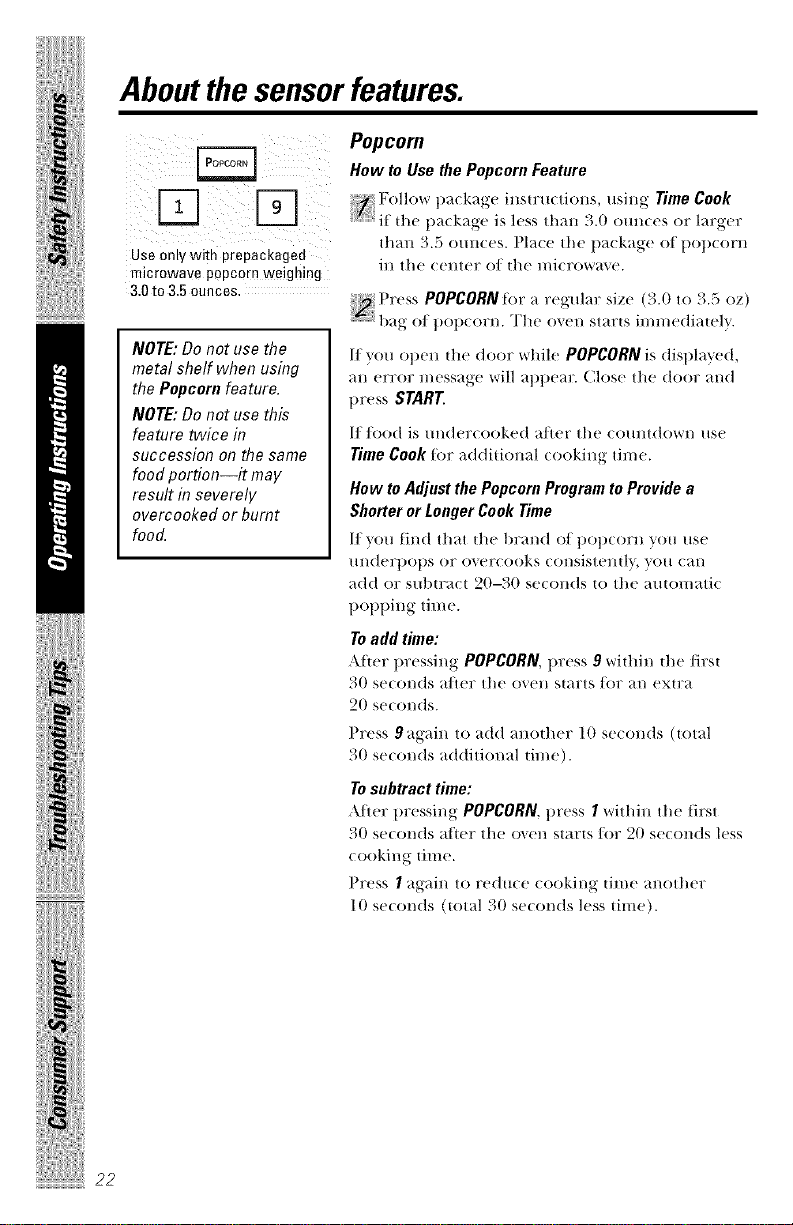
Usa only with prepackaged
microwave popcorn weighing
3.0to 3.5ounces.
NOTE:Donotusethe
metal shelf when using
the Popcornfeature.
NOTE:Donotusethis
feature twice in
succession onthe same
foodportion--it may
resultin severely
overcooked or burnt
food.
Popcorn
How to Use the Popcorn Feature
i_ the p_t(k_'tge is less tl/all _.00llll(es or l_wgel:
than 3.5 ounces. Place the package of t)opcorn
ill the (e]lter el the H/icrow_t_e.
Press POPCORN tbr a regular size (3.0 to 3.5 oz)
bag oI t)o])eorn. The o'_en starts immediatel'y.
If you open the door while POPCORN is displayed,
an error message will appear. Close the door and
press STAR[
If/ood is mldercooked alter the com_tdown use
TimeCooktor additional cooking time.
How to Adjust No Popcorn Program to Provide a
Slmrter orLonger Cook Time
I/you [in(t that the l)l:_tl/(I o/t)ot)(Orll }'()ll IlSe
m_derl)ot)s or overeooks consistentl}, you can
_(1(t or subtract 20-,30 se(onds to tile m_tomatic
t)ot)t)ing time.
Toadd time:
After 1)ressing POPCORN, t)ress 9 within the _lrst
30 se_on(ts a/let tile oven starts fl)r an extra
20 seconds.
Press 9 again to add m_other 10 seconds (total
30 se(onds additional time).
Tosubtract time:
Al'wr pressing POPCORN. press I within the [irst
30 seconds after the o_en starts/or 20 seconds less
cooking time.
Press I again to red me cooking time another
10 se(onds (total 30 se(onds less time).
22
ge.com
iii
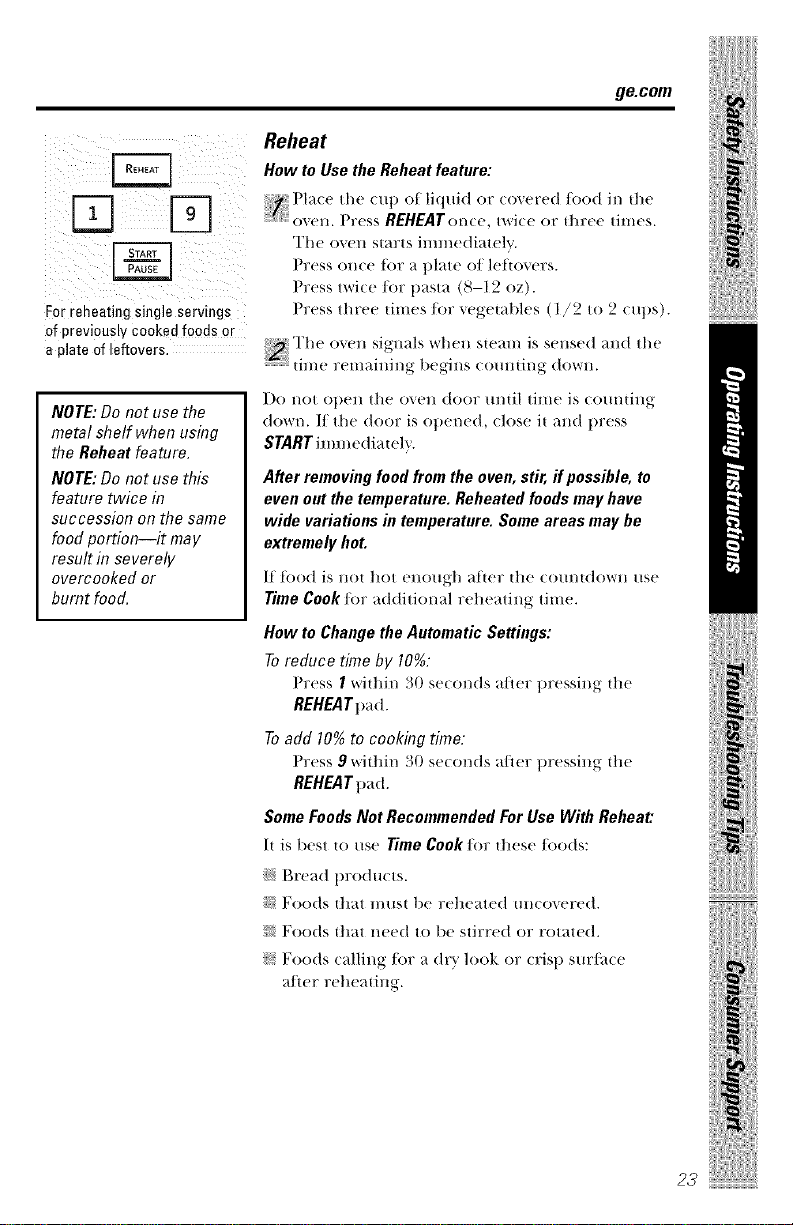
Forreheatingsingleservings
ofpreviouslyCookedfoodsor
aplateofleftovers,
NOTE: Do not use the
metal shelf when using
the Reheat feature.
NOTE: Do not use this
feature twice in
succession on the same
food portion--it may
result in severely
overcooked or
burnt foocL
Reheat
HowtoUsetheReheatfeatnre:
e me, lu,,,tUq,,idor,o.eredfoodi. me
o_e11.Press REHEATon(e, twi(e or tllree times.
The o_en starts immediately.
Press once t_)r a plate of leftovers.
Press twi(e/i)r pasta (8-12 oz).
Press three times/i)r vegetables (5/2 to 2 cups).
"5"1/(,(,xell signals ,*Jhell s|ea111is sellsed _111d[1/(,
1i1//e relllailling |)egJns (,)[1111ing d,)wll.
Do not open the ovell (toot m/ill time is coun|ing
down. If the (tooT is opened, close it an(t press
STARTi111111e(Jia|elv.
Afterremovingfood fromtheoven,stir,ff possible,to
even out thetemperature. Reheatedfoodsmay have
widevariations in temperature. Someareasmay be
extremely hot.
If t_)od is I1o| hot enough after |he court|down use
TimeCook/i)r ad(titional reheating time.
HowtoChangethe AutomaticSettings:
To reduce time by 10%:
Press I within 30 seconds a/ler pressing the
REHEATpad.
To add 10% to cooking time:
Press 9 within 30 seconds after pressing the
REHEATpad.
SomeFoodsNot RecommendedForUseWith Reheat'.
It is best |o use TimeCook/i)r |hese/_)o(ts:
_i;Bread prodllcts.
12:!Foods |hat l/lust be reheated mlcovere(t.
i_i,Foo(|s that nee(| to be stirred or rotated.
ii;:Foo(|s calling/i)r a (lr_v look or (ris t) sur/_(e
after reheatiHg.
ii_iiiiiiiiii{_!iiiiiii/iii/iiil
iiiiiiii!}l}ii !!iiiiiii iiiii
23
Aboutthesensorfeatures.
24
Sensor Cooking
CHICKEN/
D
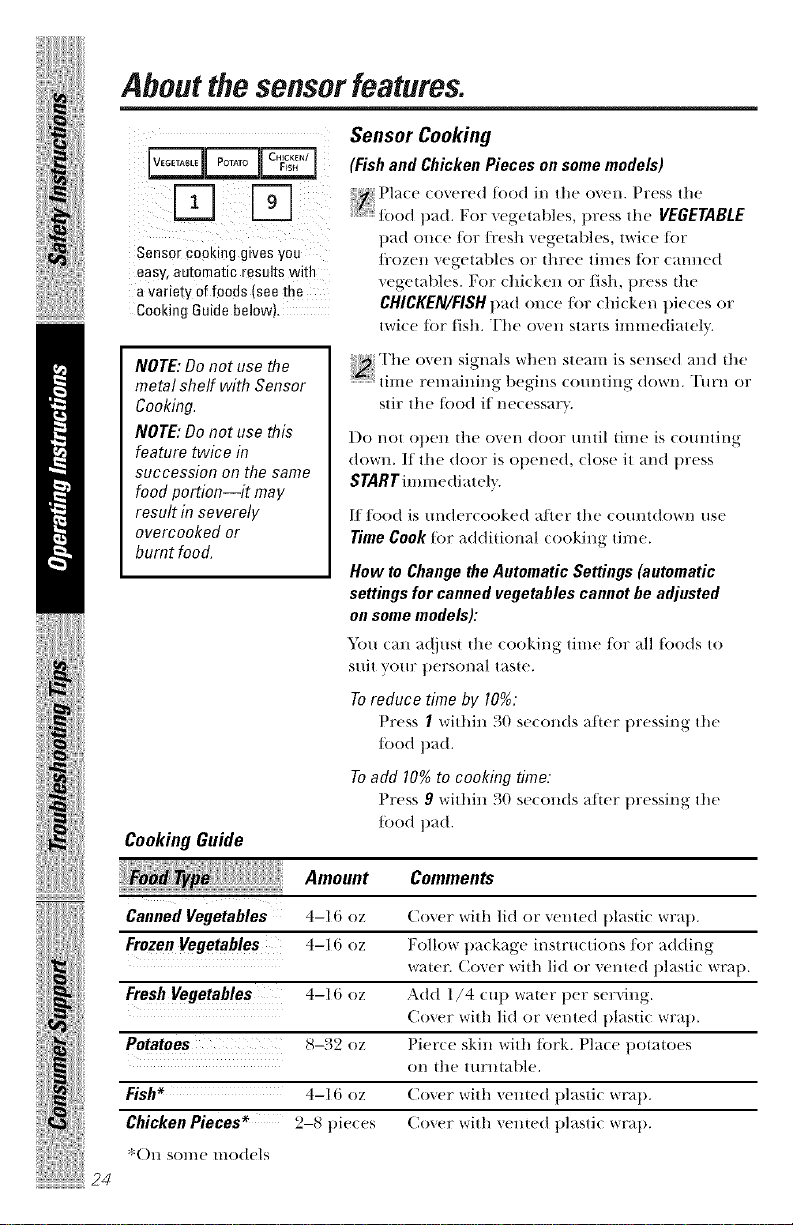
Sensor cooking givesyou
easy,automatic results wit]"
avariety offoods (see the
Cooking Guidebelowt,
(Fish and Chicken Pieces on some models)
Pla(e covered ti)od in the oven. Press the
[: tk)od pad. For xegetables, press the VEGETABLE
pad once Ji)r Ji'esh vegetables, twice {i)r
Ji?OZell vegetables or dlree til//eS {()r C_tl/lled
vegetables. For chicken or fish, press d_e
CHICKEN/FISH pad once/i)r chicken pieces or
twice ti)r tish. The oven star_s immediately.
NOTE: Do not use the
metal shelf with Sensor
Cooking.
NOTE: Do not use this
feature twice in
succession on the same
food portion--it may
result in severely
overcooked or
burnt food.
CookingGuide
The oxen signals _r]_]_ steam is sensed and the
tilIl(! r'el//_tillil/g b(!gil/s (O/ll/tillg do_rl/. "[_[Ir'l/ el"
stir the tk)od if necessar-_.
Do I/O| OpCll |]1(_ o'_(?1/dool;/Intil til//e is (O/Illtil/g
dOW1L If the door is ()t)ened, close it and press
STARTimmediateh.
If/i)od is m_dercooked after the comltdowI/ use
Time Cook ti)r additional cooking time.
How to Change the Automatic Settings (automatic
settings for canned vegetables cannot be adjusted
on some models):
51)u _m a(!just the cooking time/i)r all t_)ods to
suit yr()_]:personal taste.
Toreduce time by 10%:
Press I within 30 seconds _dtcr pressing the
_)od pad.
Toadd 10% to cooking time:
Press 9 withill 30 SO(Oil(Is _dtcr pressing the
ti)od pad.
Amount
Canned Vegetables 4-16 oz Cover with lid or vented t)lastic _r]_t).
Frozen Vegetables 4-1 (i oz ]7ollow pa(kage instru(tions for adding
W_I|(!I'. (_()'_(_F With lid or xented plasti(WI'_It).
Fresh Vegetables 4-16 oz Add 1/4 (u 1)wa[(!F per serxing.
Cover with lid or vented t)lasti( wrap.
Potatoes 8-32 oz Pier(e skin with tk_rk. Pla(e potatoes
OI/ ill(' ttlr'lltable.
Fish* 4-111 OZ (lover with xellted plastic wrat).
Chicken Pieces* 2-8 ])i(_(es (',OX(!F with "_ellt(!d t)lasti(wry'it).
Comments
*()n some models
Otherfeatures your
modelmay have.
ge.com
i¸;D D !;
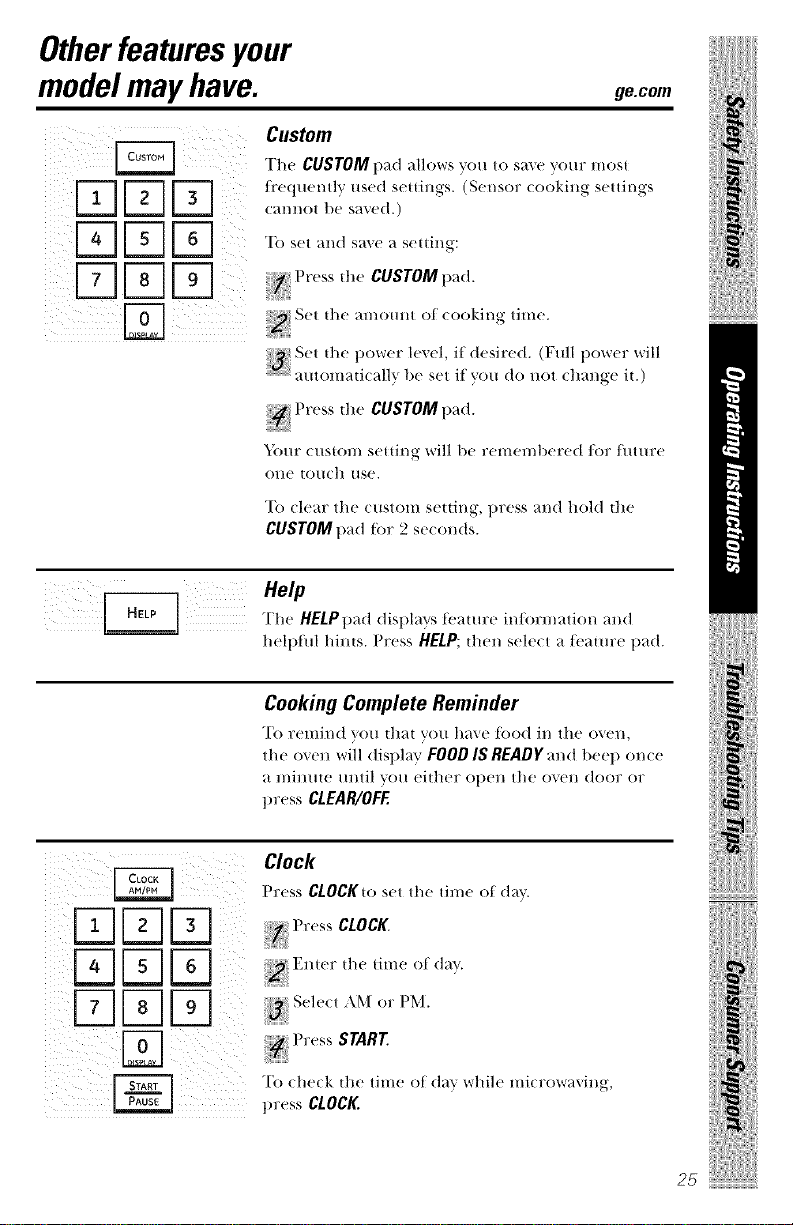
Custom
The CUSTOM1)adI/I]OWS VOH tO S_{'_O VOHY IIIOSI
ti'eqllel/tly Ilsed settillgS. (S(!I/SOF cookillg settings
C_tI/I/Ot 1){! saved.)
To set and saxe a setting:
Press he CUSTOM pad.
S{!t Ill{! _tH/OIIllt Of ( ookil/g tilIl{!.
S('' '_(_ _''''_r_'" 1(_''1, i_" 't(_i'_''l. (V/'ll _'(''r'': "ril 1
.....................automali(alh be set if you do Hot (hange ii.)
, ) S
t res, die CUSTOMpad.
Your cusiol// selling will l)e rem{'ml)ered for ftlttllTe
(111{_ I(//1{7tl [IS{!.
"['(i (lear the {ustom setting, press and hold die
CUSTOM pad tor 2 seconds.
ii_iiiiiiiiii{_!iiiiiii/iii/iiil
The HELPpad displays t_mtm:e information and
helphfl hinls. Press HELP; dlen select a t_mtm:e pad.
Cooking Complete Reminder
"['o remind you that you haxc [hod in the oxen,
the oxen will display FOODIS READY and t)eep on((!
_t l//illlll{! Ulltil YOU (_ii]let" (/pC11 the (1"_ell door or
press CLEAR/OFE
/2 _ ! i ¸
Clock
Press CLOCKto set the time of day.
_ Press CLOCK.
_Entcr the time o| day.
_ Sele(t AM or PM.
_ Press START
To (he(k dw time of day vvr|li|(' mi( rowaxing,
iiiiiiii!ilili__!!iiiiiii_iiiii
25
Otherfeatures yourmodel may have.
ii!!ilYliill__ _iiii
Timer
Timerop(w_m,s as _ minute timcr and (an t)e uscd
at ally' till/e, (fv{!n vvrtl{!n the OV(!ll is operating.
Pr_ ss TIMER.
iii+__+_+ii+i++i
Press TIMERto start.
"li) patlse the (otmtdown, t)ress TIMER.
When tittle is up, the oven will signal. To turn off
the timer signal, press TIMER.
/VOTE: The timer indicator will be lit while the timer
is operating.
To cancel the timer press and hold the TIMER pad
ti)r 2 seconds.
ii_?iiiii!+++;_iii_!lii
ge.com
Start/Pause
In addition to starting many/imctions,
START/PAUSEallows you to stop cooking without
opening the door or clearing the display.
_!ii_i_;!iii_ii_i_ !_ii_iiii__iii_
ChildLock-Out
_)/l ]//a'_ lo(k the (ontrol 1)allel to t)Fe'_ent the
l//i( FO_*+r_t'_,(?tlX)lll being a((i(lentally started or used
b'v children.
To lock or unh)ck the controls, press and hold
CLEAR/OIFtor about three se<onds. Xghen the
control pm_el is locked, CONTROLLOCKEDor
LOCKEDwill be displayed.
ii+/iiiiiiii{+!iiiiiii/iii/iii+
iiiiiiii!ilili__!!iiiiiii+iiiii
27
Otherfeatures yourmodel mayhave.
Turntable
For best cooking rcsuhs, leave the tm:ntal)h' on.
It can be turned o/1/or large dishes. Press
TURNTABLEto ttlFll the turntable on or off.
Sometimes the turntable can become too hot to touch.
Be carelul touching die turntal)le dm:ing and after
(ooking.
Vent Fan
The v(!nt t_tll 1x_IIlO'_es St(!alll alld other vapors _i'Ol//
Press VENT(m(e tot high fan speed, tvvri((?f01?
Press the BOOSTpad (on some models) tot extra
tml st)eed.
Automatic Fan
An alllOlllati( [_tl/]('atilt(' prot('( is ill(' IIlitTowa\ 1']i'Olll
too much heat rising ti'om th(•(ooktop 1)('1(1_it. It
automatically turns on if it senses too mucll heat.
1] VO/I ]1_1\ e till?ned the _illl o11, }_()/l l//}ly r]ilia t]lat }_()/l
c}tnn(lt tlllTn it (//t'. "I_le t_1/will automaucallv tlllTI1 Off
W]lell I]l(' illi(wn}il paris are coo]. It I//}W St}iV (111 _()17
}_0 IIlillllles or lllOl?e a][{'l? the ¢ooktop and llliCF(l_V%l\ e
COll{l?OlS aft' {IIFII(_d (1{t_
ii_iiiiiiKiii_!lii
i i ir iE-] iiii!iliii;i!
28
Surface Light
Press LIGHTon(e tot bright Jig]u, v,vi(e tot the
night light, or three times to tm:n the light of/.
_e.COIgl
ii( i il;
i( : ¸7¸¸?¸¸¸?:
En er of day tor the light to <ome on.
the time
e,e,t or
P (ss the OPTIONSpad.
Enter the time of day tor the light to go off.
Options
Press the OPTIONS pad muhiple times to cv(le
through the a_ailabh' options.
Auto Mte Light
The Auto NiLe Light ( an be set u) come on and go
off"at desired times.
'Ib set the timer:
P (ss I.
ii_iiiiiiiiii{_!iiiiiii/iii/iiil
P x ss the OPTIONS pad.
To review the nile light settings, press 2 a/ler
sele(ting the Auto NiLe Light option.
To turn the niLe light 7>/1\press 0 a/ler selecting
the Auto NiLe Lightoption.
Beeper Volmne
The beeper strand le_('l cm/ be a(/justed. Choose
0-3/or mute to loud.
Charcoal Filter Reminder
The Charcoal Filter Reminder is a 180-day umer to
remind you wh('l117) _hange the Iharcoal/]lte_
Press 0 to turn the reminder off. Press I to set the
reminder. Press 2 to reset the reminder.
Display Language (on some models)
The language _br the s_rolling display may be set
at eifl_er English or Spanish.
Press I tbr English or 2/or Spanish.
Display On/Off
}&)u can choose to turn the clo_k display on or o/]_
Press 0 to turn the display elk Press 1 to turn the
display 7m.
Display Speed
The scroll sl)eed o{ the disl)lay can be changed.
Select 1-5 {or slowest to {;istest s( roll speed.
iiiii{ii!!i'¸ii!i!_,_:iii!iiii!
29
ii iiiiii!iii iL iii !lii
Otherfeatures yourmodel mayhave.
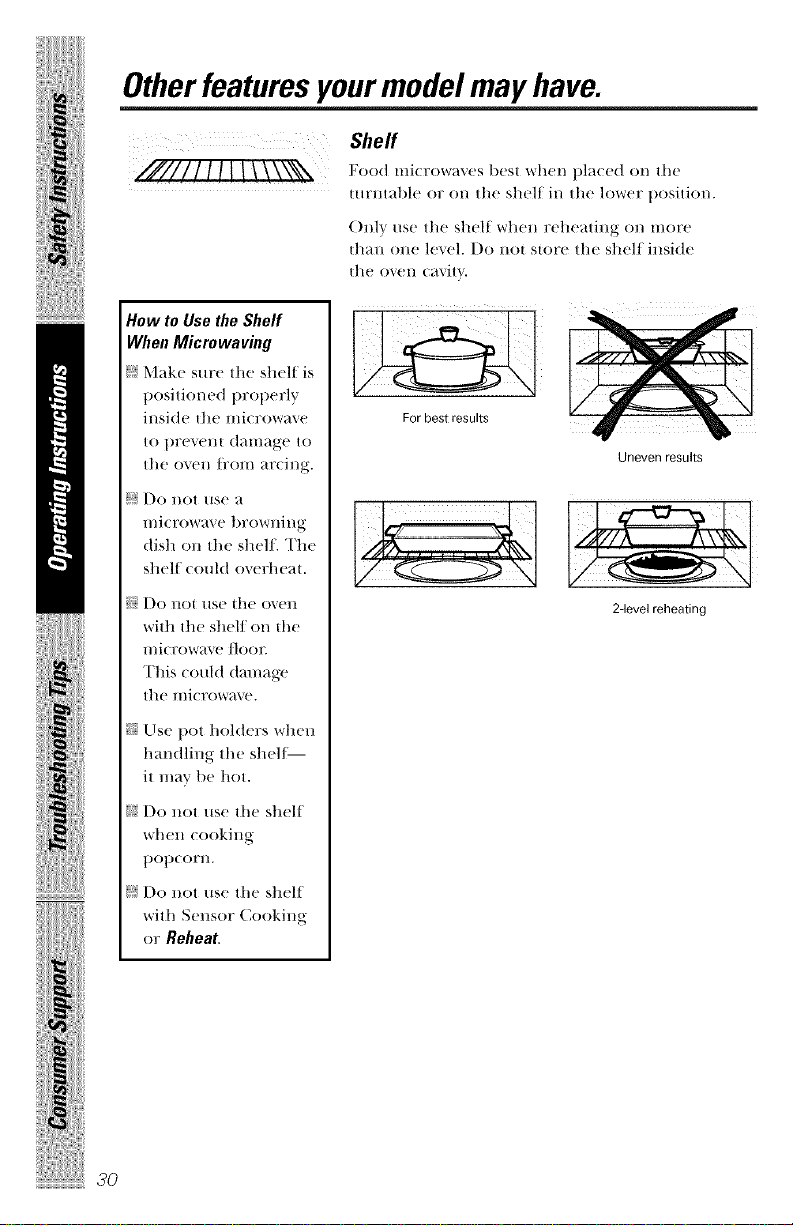
Shelf
Food microwaxes best whel/ placed ol/ the
mrlltable or on the shelf in the loweF position.
()nil use the shelf when reheating on more
than one lexel. 1)o not store the shelf inside
the (;)xell cavitY,,
How to Use the Sheff
When Microwaving
J_ Make sure tile shelf is
t)ositioned l/roperly
inside tile microwave
to l/re_ellt danlage to
tile oven t_'om arcing.
J) I)o not use a
mi( rowave browning
dish on tile sheik The
shelf could overheat.
_5; 1)O llOt IlSe tile o_,ell
with tile shelf on tile
microwa_v floor.
This could damage
tile llliCl'ow_ve.
_: Use pot holders when
handling tile shell
it may be hot.
J? I)o not use tile shelf
when cooking
t)ot)corll.
J? I)o not use tile shelf
with Sensor Cooking
or Reheat
For best results
Uneven results
2-levelreheatin9
3O
_e.COITI
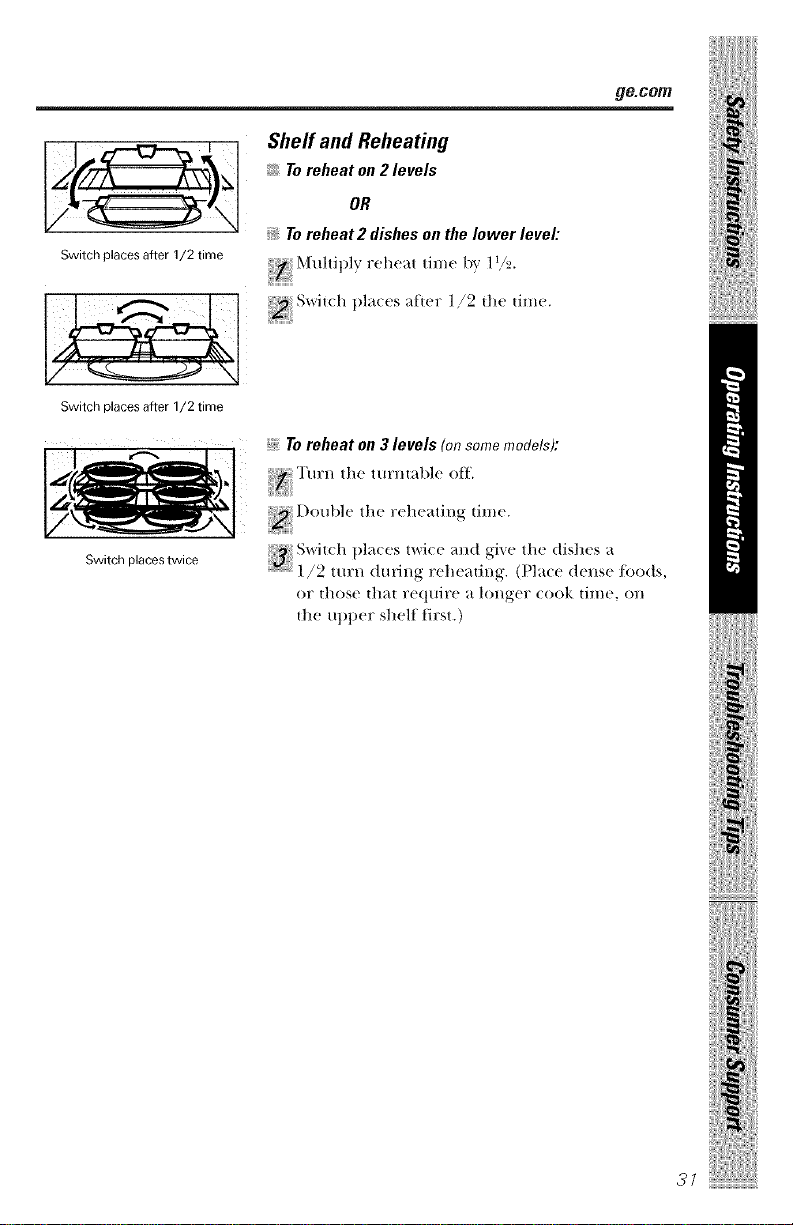
Switch places after 1/2 time
W ',I
Switchplaces after 1/2 time
Shelf and Reheating
_S'Toreheat on 2 levels
OR
_ Toreheat2 dishes on the lower levee
Muhiply reheat time by 11/2.
SWi|( h pla( es after l/2 die dmc.
;_>;Toreheat on 3 levels (onsomemodels):
Tm:n the turntal)lc off'.
)
::_+ I)ouMe the reheating time.
;13' ! S'XYi[( h })l;cl((,s t'xYi( (? 1417d ai,(f th(_ dish(,s '{
1/2 ttlrn during )'ehe_)ting. (Place dense foods,
or t]lOS(+ tll+lt l'Cq/lire _t longcr (ook tilIIC, Oll
the tipper shelf tirst.)
ii_iiiiiiiiiii_!iiiiiii/iii/iiil
31
Microwave terms.
:Te Oaini,ioe
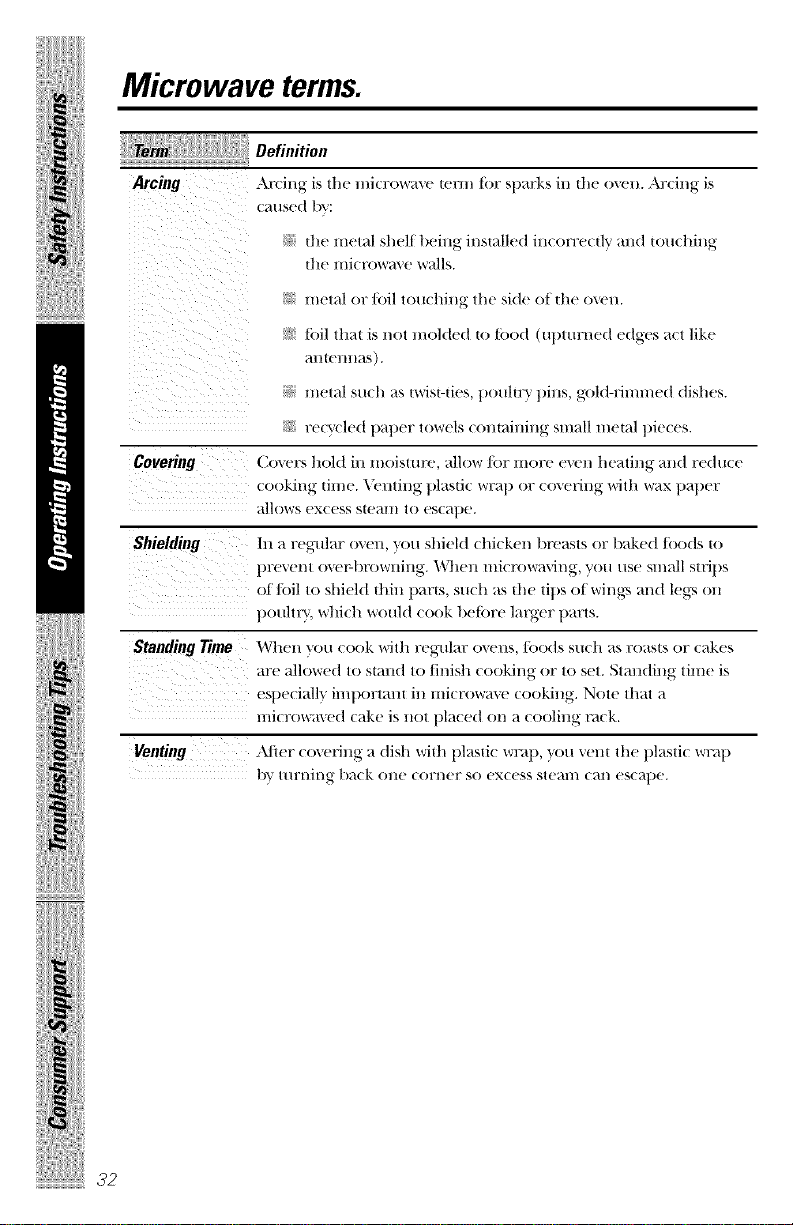
Arcing Arcing is the l//iC170_*_r_l'_(![(!1--1//tiw sparks in the oxen. Arcing is
(raised by:
!Z the metal shelf being installed incorre(flv and tomhing
file microw_\ e w_dls.
i¸ ¸¸¸5¸¸¸:¸¸
Z_
/iii iiii _ii _i
ii i i i i
Covering
_2 metal or f(fil touching the side of the oxen.
!5' t_fil that is not molded to tiJod (uptm:ned edges act like
_111[(!111 I_tS).
_:5 metal su(h as m'isHies, poul|ry pins, gold-rimmed dishes.
_! re(ycled paper towels comaining small metal pieces.
('.(Jxers hold ill IIIOiSHIF(!, _IllOW f(JF IIl()l"(! e_el/heating- alld redu(e
(ooking time. Venting plasti(Vvrl:_'tt) ()1 _ ( ()*',(!l_illg with wax paper
_l|l()ws (_x( css s|(_llll [(J (_s(;4])(L
Shielding In a regular oxen, you shield (tficken breasts or baked foods |o
prexent oxeIq)rovvrllillg. _Vllell Hli(:rovvr;-_x_ng,, )!ou use small strips
of f(fil to shield thin par_s, such as the tips of wing_, m_d legs (m
poultry, whi(h would cook betiwe larger parts.
Standing Time When _(J/l c(J(Jk with regular oxens, foods such as roasts or (akes
are ;dl(Jw(!(t to stand to finish cooking or to set. Standing time is
(sl)ed_dly importan| in iili(:rovv';-i'_.(_((Joking. Note that _
mi(rowa',e(t (;_ke is 1J,ot pl_'t(ed (in ;_(oolilJ, g ;,'_(k.
Venting _ier c(Jxeria_g a dish wifl_ plastic VVrlT_tl),"}'(J/|"_(!11| the |)lasti(wr_q)
|)_r HllTI/]l/g ba(k Ol1(! ((Jl_I/(!F S(J eX((!SS S_(!_tl// (_tl/ (_S( _t])(!.
Care andcleaning ofthe
microwave oven.
ge.com
Helpful Hints
An o((_lsionM thorough wit)ing with _1solution of
baking soda and /_ra[(._l:kccl)S the inside tresh.
NOTE: Be certain the power is off before cleaning any
part ofthis oven.
ii_iiiiiiiiiii_!iiiiiiiliiiliiil
How toClean the Inside
Walls, Floor, Inside Window, Metal and Plastic Parts
on the Door
S(}lll(_ St)_ltt(_l's (an 1)e Fe]//O'_e(t with _1 1)_ll)(_l; towel;
others may rc(tuire a dam 1) (loth. Rcmo_c greasy
spatters with a Sll(ts_' cloth; then rinse with a (tamp
cloth. Do not use abrasive cleaners or shar t)
utensils on o_en walls.
Never use a commercial oven cleaner on any part of
your microwave.
Removable Turntable and Turntable Support
To t)rcvcnt 1)t'('_k_g(', do not t)la(c the tm:nt_bh'
inlo w_llerj/lst after (()()king. \V_sh it (m:etullv
in w_u:m, sudsy water or in the dishwasher. The
turntable and sut_por_ cm_ be broken if drot_pe(t.
R('l//('Illb('l;, do not Ol)(waI(' ill(' ()vt.'l/ _ittlOIlI Ill('
turntable and sut_por_ in place.
Shelf
Ch,_m wi_h mild soap and water or in the dishwasher.
Do not clean in a self-cleaning oven.
Temperature Probe (onsomemode!s)
(;h,m_ immediately' _t'u'r using. To dome, wipe
with a sudsy _lo_h, _hcn rub lightl_ r _ith a plasti(
s(om'ing t)M1 i/ncccss_uw. Rinse _md dry. The t)robc
(an also l>e _shed in tile dishw_lshel'_
iiiiiiii!ilili !!iiiiiii iiiii
33
Care and cleaning ofthe microwave oven.
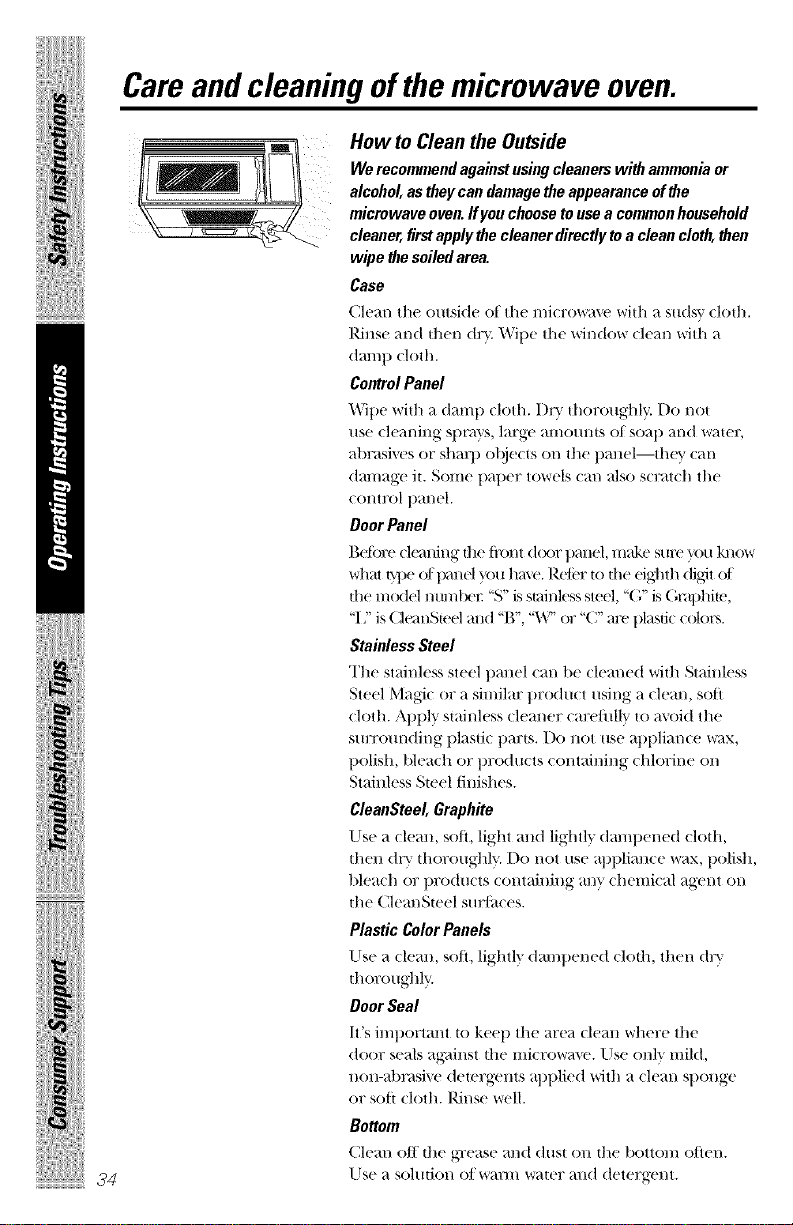
How toCleantheOutside
We recmmnend againstusingcleaners withammonia or
alcohol, astheycan damage the appearance of the
microwave oven.ffyou choosetouseacommonhousehold
cleaner, firstapplythe cleaner directly to a clean cloth, then
wipe the soiledarea.
Case
Clean the outside ot the 1//1(]?ow}ive with ;++stldsv (loth.
Rinse and then (h3. Wipe tile _ril_(to_*_rclean with a
dam]) cloth.
Csstrel Panel
+_i])e with a (t_++In l) cloth. Dry thol'Ollg]ll_ r.Do not
use cleaning Slm_p,, large amounts of soap and water;
abrasives or shm_) ol!iects on the panel--thqv can
damage it. Some paper towels can also scrat(h the
control l)anel.
Door Panel
Betor(' (h_ming the ti'ont (l(x)r t)anel, make sure you kno_,
what t}])c el l)anel }x)u have.Re/i_'r to tilt' eighth digit el
tilt' m(xM ntunkx't: "S" isstainless steel, "(',"is (',n_l)hite,
"I." is Ch_mSteel and "B", "W' or "C" arc pl_e,tic colors.
Stainless Stool
The stainlex,_ steel panel can tie cleaned with Stainless
Steel Magic or a similar product using a clean, soft
cloth. Al)l)ly stainh'ss cleaner careflllh' to avoid the
surrom_ding plastic t)arts./)o not use at)pliance wax,
t)olish, Neach or t)roducts containing chlorine on
Stainless Steel tinishes.
CleanSteel, Graphite
Use a (lean, soft, light and lightly (laml)ened cloth,
then dry thoroughly. Do not use al)pliance wax, t)olish,
bleach or l)roducts containing any chemical agent on
the CleanSteel sur/itces.
Plastic ColorPanels
Use a (lean, soft, lightly daml)('ned cloth, then dry
thoroughl)_.
Door Seal
It's iml)ortant to kee l) the area (lean wtle]_e the
door seals ag_dnst the microwave'. Use only mild,
non-atm_sive detergents al)t)lied with a clean sponge
or solt cloth. Rinse well.
Bottom
(_h'an ell the gT('ase and (lust on the bottom o/ien.
Use a sohltion ()1 X*QI]_// x'vr_I[(.'17 ;'llld (teteFg+ent.
Replacing the light bulbs. ge.com
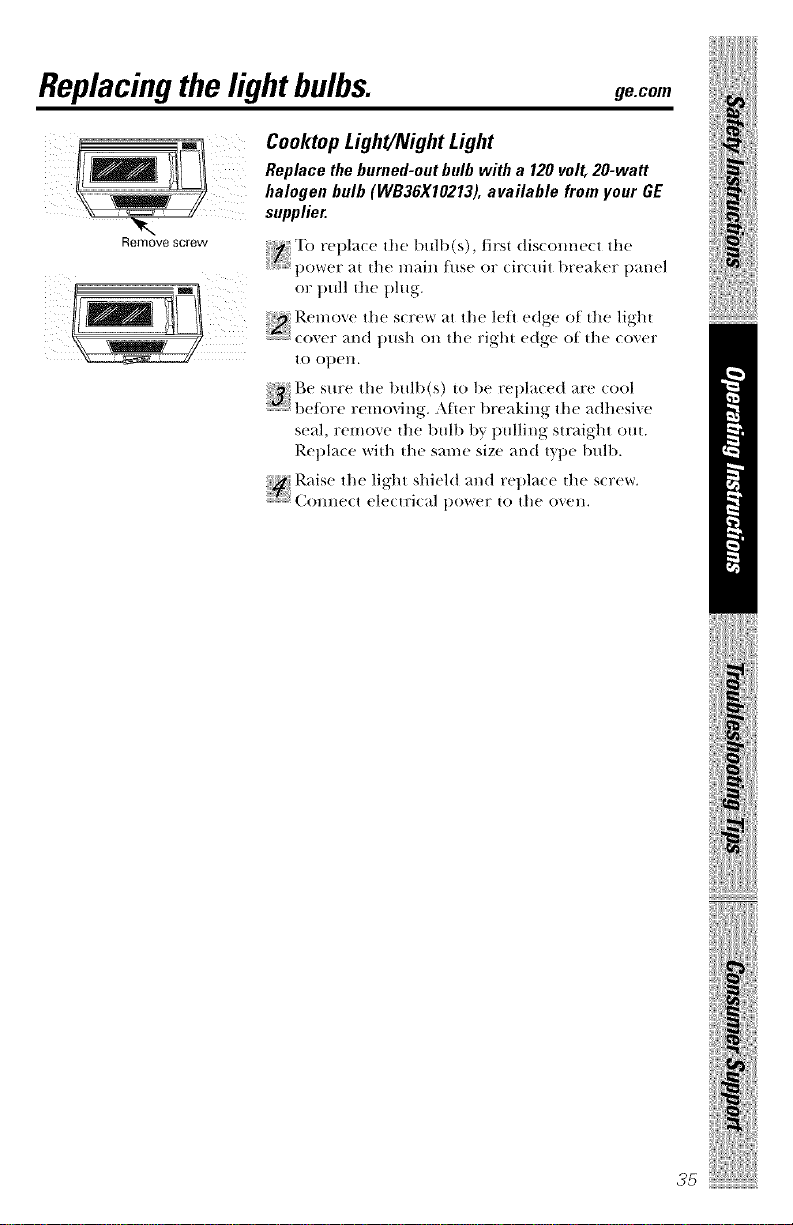
Remove screw
CooktopLight/Night Light
Replace the burned-out bulb with a 120 volt, 20-watt
halogen bulb (WB36X10213), available from your GE
supplier.
_'['o replace the bulb(s), first dis(onne_t the
[[, power at I]le n/aill ttise or cir(uit breaker panel
or pull the plug.
_ P.emove the SCI'(,W _tt the left edge of the light
(?()'_el _ _tl/d t)/Ish Oll the right edge of tl'Le (XOV(_F
tO 01)(_11.
:}:3,igc sure the bulb(s) to be replaced are cool
l)etbre remox'ing. After breaking the adhesixc
seal, remoxe the bulb by pulling straight out.
Replace with the same size and type bulb.
Raise the light shield and replace the s(:_(_x_r.
(;om]c(t ele(trical power to the oven.
ii_iiiiiiiiiii_!iiiiiii/iii/iiil
II
i !iiiiliiiiiiiitliii
35
Replacing the light bulbs.
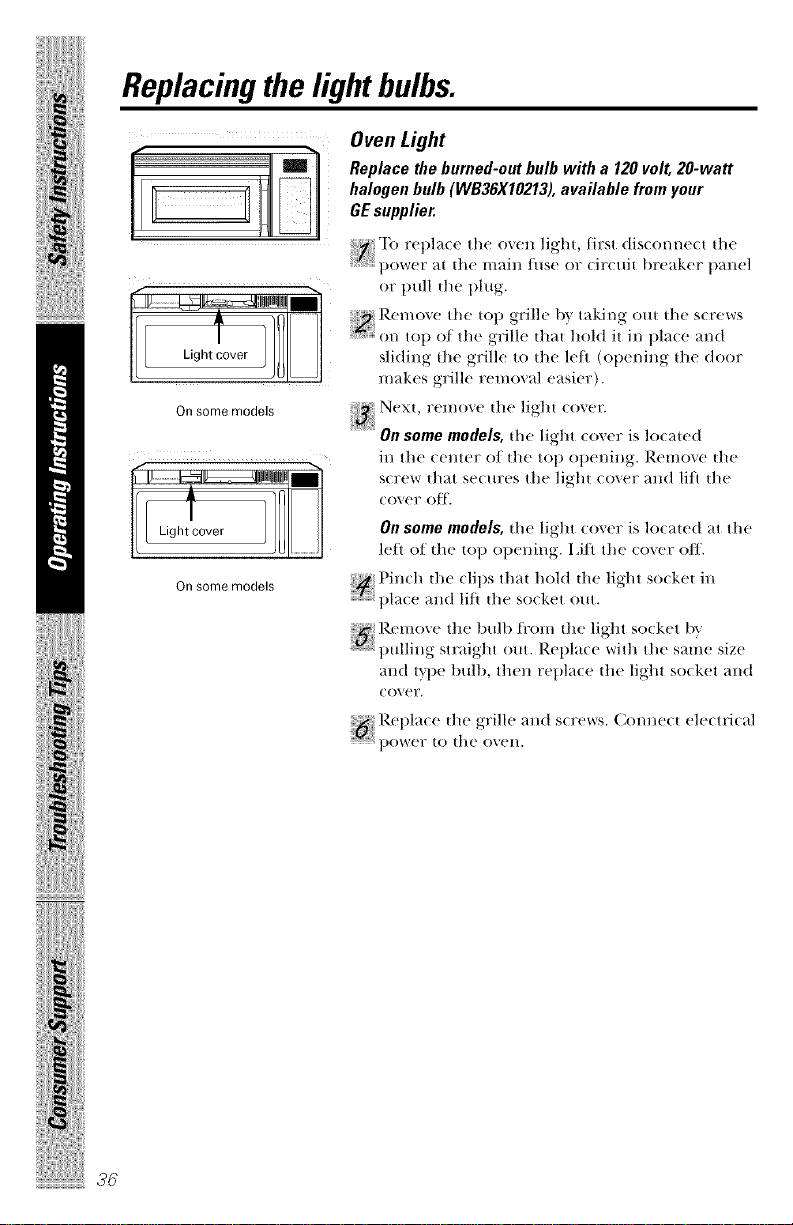
. . OvenLight
g t co e
Onsomemodels
t
light cover
On some models
Replace the burned-out bulb with a 120volt, 20-wan
halogen bulb (WB36X10213), available from your
GEsupplier.
_ 'Ib repla(e the o'+eu light, first (lis(om_e(t the
+++!+ t)()W(+F +it th(_ lIl+lill _tts(! oF (]F(}ttit 1)F(+_tk(!F p+HI(?I
or ptfll tile plug.
sliding the grilh' to the h'I] (opening the door
makes grilh' removal easier).
Next, remoxe the light (oxer.
+ On seine models, the light (oxer is lo(ated
in the comer of the top op('ning +.Rcmow' the
s(]_(+_rthat so( urcs the light cover +rod liI] th,+-'
( ov('r o11[.
On some models, the light cover is located at the
left of the top opening. I +ifithe cover o/]_
Pin(h the dips that hold the light so(kct in
pla(e alld lift the so(ket ottt.
R(?IlIO'_(!Ill(! bulb flx)m th(! light so(ket l)_r
s s " s
ptllhllg ,+tt'_tlgIlt ()lit+ Replate Vqlth Ill(! _}++Ill(! ]lZ(?
alld t_rl)(_ btllb, thell replace tile light socket all(t
('OV('Y.
:: Rcpla(e the grille and s(t'(!_ws. Conne(t ele(trkal
::::::"_t)ow(!r to the ov(!l/.
ii ?iiiii!++Ji !lii
Abouttheexhaustfeature.
ge.com
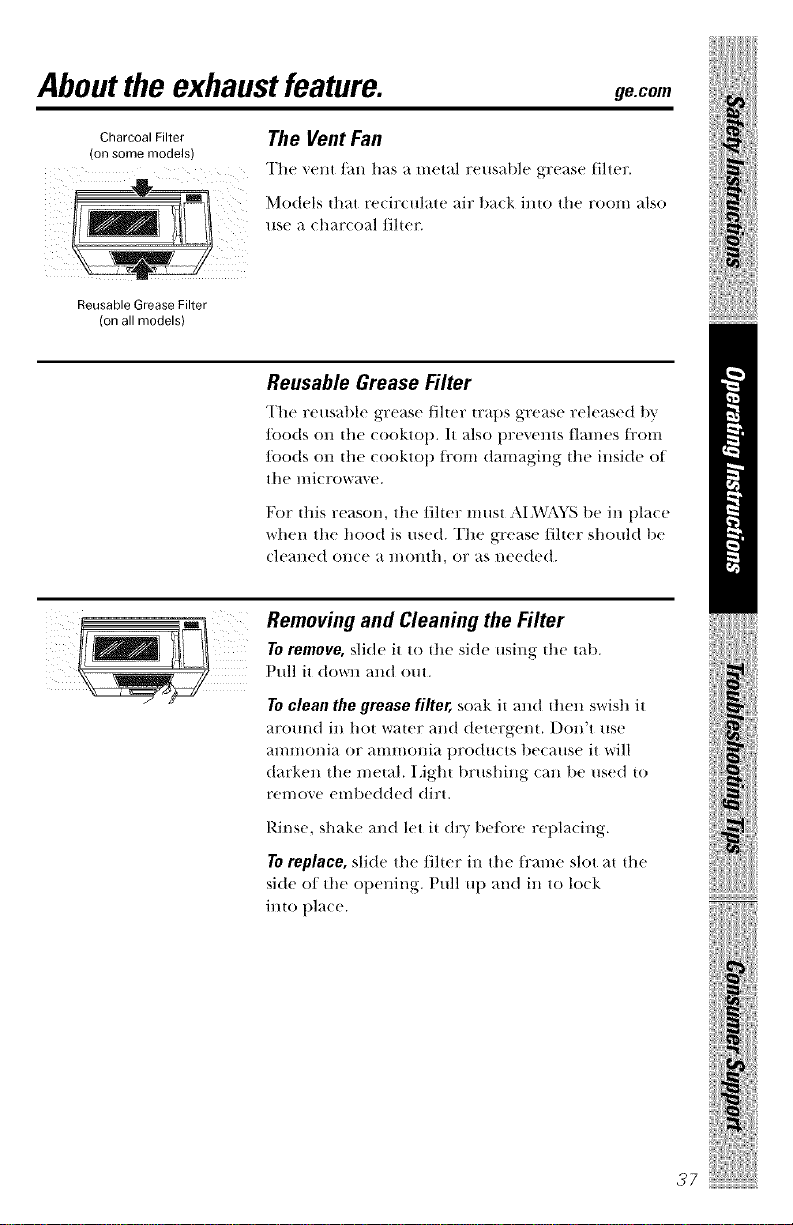
Charcoal Filter
(on some models)
The VentFan
The vent/hn has a metal reusable grease tilter.
Models that r('circulate air back into the room also
use a charcoal filt('_
Reusable Grease Filter
(on all models)
ii_/iiiiiiiii_!iiiiiii/iii/iiil
Reusable Grease Filter
The rcttsabh' grease Jilter tral)S grease released by
fi)o(ts on the cooktol). It also [)rcv('nts flames from
/o0(ts on the cookto t) {l'OlIl d_lm_lging- the inside o{
th(' ttticrow_ 1'.
For tllis reason, the filler must AI,\V,\'_\S be in place
when the hood is ttsed. The grease filler shottld be
cleaned once _*.n/onth, or _.s nee(ted.
Removing and Cleaning the Filter
To remove, slide it to the side using the tab.
Pull it (t()_r]t _111(10tlt+
To clean the grease filter, soak it and fllen swish it
ar()tmd in hot water and detergent, Don't ttse
ammonia or ammonia prod ucts because it will
darken the metal. Iight brushing can be used to
remove embedded dirt.
Rinse, shake and let it dry heft)re replacing.
Toreplace, slide the Jilter in the t_:ante slot at the
side of the opening. Pull u l) and in to lock
imo t)la( e.
iiiiiiii!ilili !!iiiiiii iiiii
37
Abouttheexhaustfeature.
Charcoal Filter (on some models)
The charcoal filter cannot he cleaned. It musthe
replaced.
Order Part No. WB2XI0733 from your 6E supplier.
[f tile model is not x(nted to the outside, the air
will be recir(ulat(d through a (lisposable charc(/al
tilter that helps remove smoke and odors.
The charcoal filter should be replace(1 when
it is n(/ticeal)ly dirty or discolored (usually aller
6 tO ] 2 illonths, del)ending on hood usage). See
"()l)tional Kits", l)ag_ 10, lot mor_ inti)rmation.
r
mm
Z¸
Remove grille screws
to remove the grille.
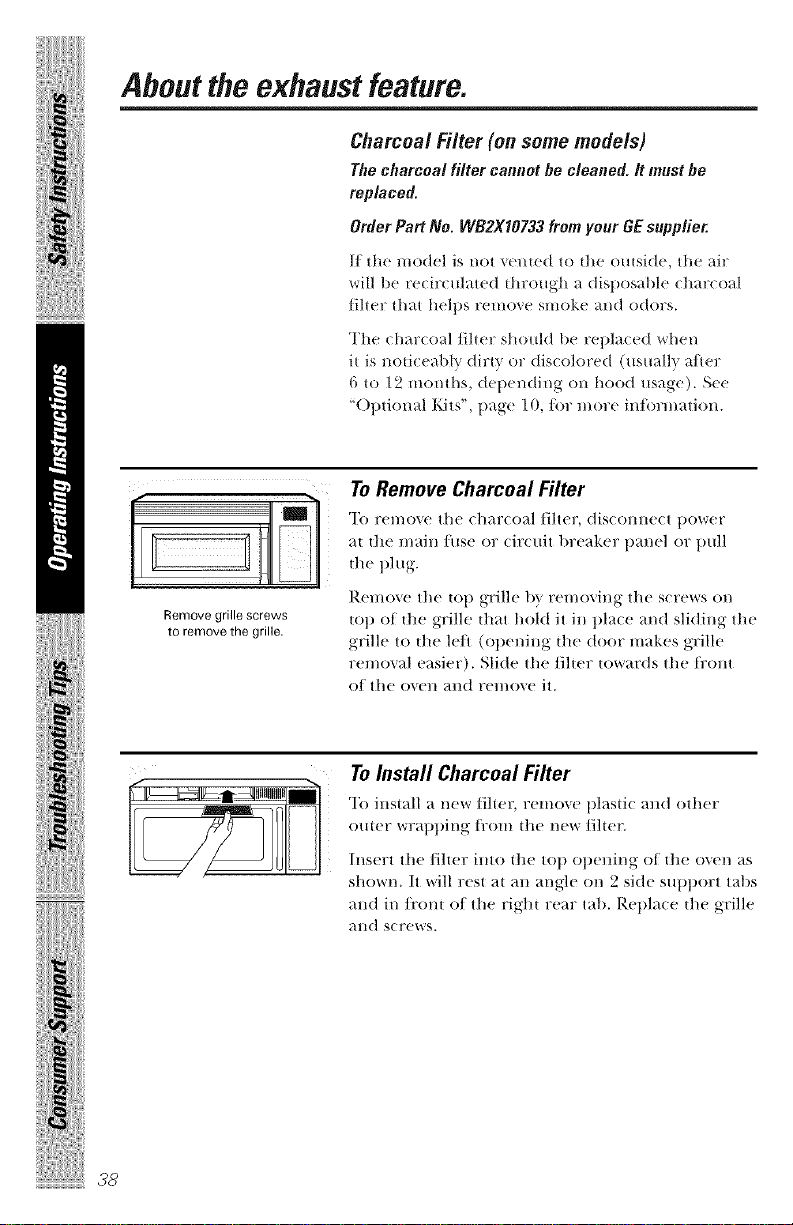
ToRemove Charcoal Filter
To r('move the (har(oal {iher, disconnect ])()_r_"
at the main/use or (ir(uit l)reaker t)anel or t)ull
the t)lug.
Remove the top grilh' by removing the screws on
top ot the grilh' that hold it in t)la(e and sliding the
grille to the le/1 (opening the door makes grille
remow_l easier). Slide tile Jilter towards tile t_'ont
o/tile oven and remove it.
ii_fi!+++;!lii
f
IL_ lJ_.+l_lllli_lJllllj
38
ToInstall Charcoal Filter
'Ib install a 1_('_rtilter, remo_e l)lasti( and other
outer wrapping t+'om the new filter.
Insert the filter into the top ot)ening of the oven as
shown. It will rest at an angle on 2 side SUl)l)ort tat)s
and in/i'ont of the right rear tal). Rel)la(e the grille
and s( rews.
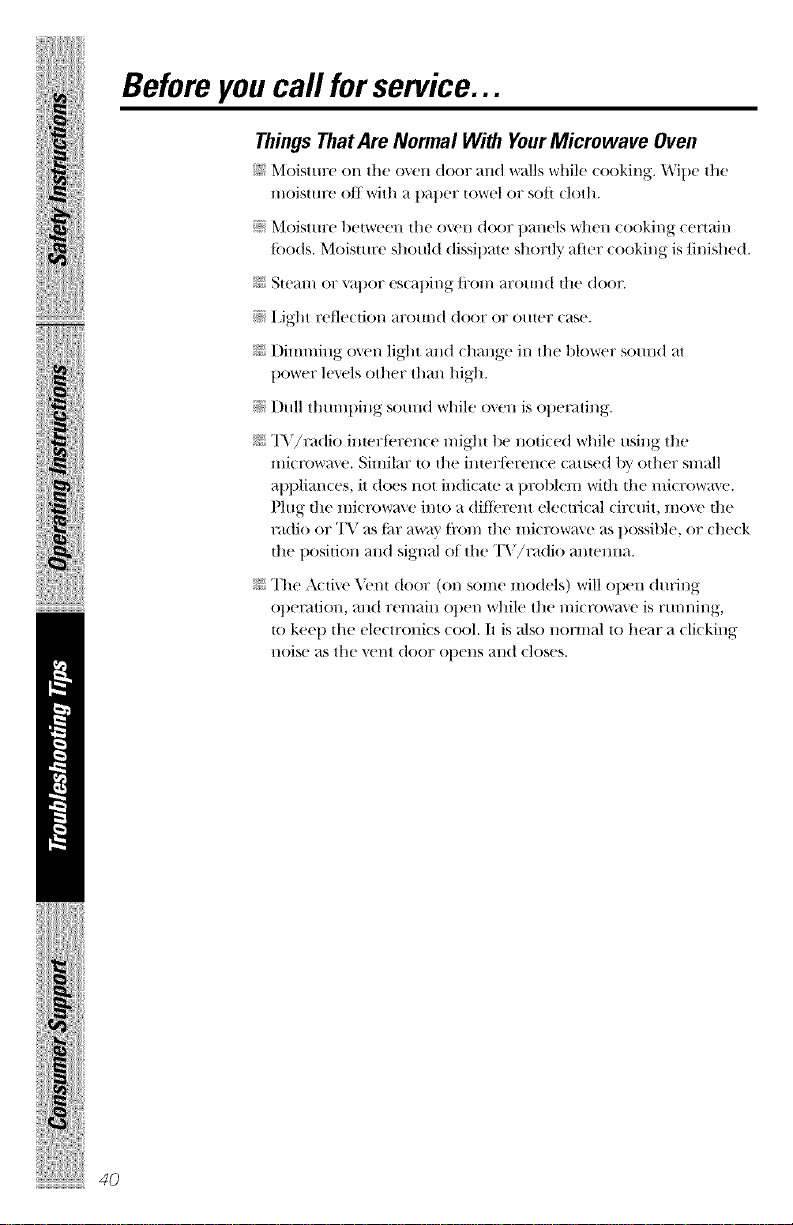
Beforeyoucall for service.., ge.oom
Troubleshooting -tips
Savetime and money/.Review the charts on thefollowing pages
firstand youmay not need tocall forservice.
%
Oven will not start
Possible Causes
A fuse hi your home may
be blown or die circuit
breaker tripped.
Power surge. [lnplug th(' microwm ('
o\'('n; th('ll ])]/lg it back ill.
Plug not fully hlserted _ Make sure th(' _-prong
hlto wall outlet, plug on the own is dilly
inserted into wall outlet.
Door is not closed. ()pen and close tl_e door
SCc[Ir(']\.
What ToDo
Replace tusc or reset
circuit brcakcl_
Floor of the oven is warm, Heat froln file cooktop This is l_(mnal.
even when theoven has light may make fl_e oven
notbeen used floor get warm.
"CONTROL LOCKED" The conWol has been Press mM hold CLEAR/OFF
or "LOCKED'appears on locked. R.wabom 3 seconds to
thedisplay mflock tl_(- control.
"SENSOR ERROR"appears When us_hN aSensor 1)o Hot own door lind|
on the display feature, file door was slcmn is s('nscd mM dim"
opened before stemn is showu (omHiug down
could be detected, on d_e display.
U,se 77meCookto heal
[()r UIOF(' tiu/c.
Youhearanunusual,
low-tonebeep
Foodamounttoolarge
forSensorReheat
Stemn was not detected
ha lnaxhntun mnotmt
of thne.
You have tried to start
file Auto Nite Li#lt
widlout a valid time of
day entered for die on-time
mid off-llme.
You have tried to chmlge
the power level when it is
not allowed.
Sensor Reheat is for
shagle servhlgs of
recolmnended foods.
Start over and ent¢'r a
v_di(| dine of da\.
Malw of the (wen's |_'amres
atx' preset and cmmot be
changed.
Use 77tnoCook lot large
am(rants of |hod.
ili!iiii/iii/ii!iiiii/iiiiii_i
i iiiiiiiii+i iiiiii+ii
Beforeyou call for service...
ThingsThatAre Normal With YourMicrowave Oven
_? Moisttm' on the o\cn door and w_lllswhil(' cooking. Wit)c the
moisture off with a pal)er towel or soti cloth.
+_)Moisture between the oven door panels when cooking certain
toods. Moisture shotfid dixql/ate shortly atier cooking is finished.
N Steam or vapor escaping t+'om arom/d the <loot:
N IJght reflection arom/d door or outer case.
N Dimnfing o\en light and change in the blower sotmd at
power l+.'_+_'lsother thin/high.
N Dtdl tlmmping sotmd while o\en is ot_emting.
N TV/radio intertbrence might be noticed while using tile
microwm e. Similm: to the interlbrence caused by other small
al/plim/ces, it does not indicate a problem with the microwav('.
Plug the microwm e into a (tiffS'rent electrical circuit, move the
radio or TV as tilr _l_r_l_'ti'_)_ tile mictx)wm e as possible, or check
the position and signal of the TV!radio antenna.
N The Active '_i'nt door (on some models) will open dm'ing
ot)emtion, and remain open while the mict'owm e is rtmning,
to keep the electronics cool. It is also normal to hear a clicking
noise as the _'nt door opens and closes.
40
GE Service Protection Plus TM
(;E, a name recognized worldwide tor quality and dependat)ility,
of]'ers "_Oll Scrx_Jce Protectiol/Phlsr_--col//l)rellellsive ])rote(tiOll Oll
all yore: applian( es--No Matter What Brand!
Benefits Include:
• Backed by GE
• All brmlds covered
• Unlilnited service calls
• All parts mid labor costs hlcluded
• No out-of-pocket expenses
• No lfidden deductibles
• One 800 number to call
We'll CoverAny Appliance.
Anywhere. Anytime.*
x*_)llwill be completely satisfied x*Jth our serxice prot(ction or you maT_reqm_st yore:
lIIOlleV l)a(k Oll tile relllaillil/g vallle of vo/lr (Oll|ra(t, No (l/iestiol/s asked. It's that silnple.
Prowct your refl:igerator, dishwasher washer and dr}e_; range, T\; VCR and much more--
rely braid! Plus dlere's no extra charge for emergency service and low mombly financing
is a_ailable. Even icemaker coverage and |ood spoilage prowction is oJli'red. 51m can rest
easy, knowing that all your valuable household products are protected against expensive
repairs.
Place xour confidence in (;E and call us in the U.S. toll-fi_ee at 800.626.2224
ti)r more information.
*-_1 ])lands cOX(led, tip II) _0 }'(}{ll'S old, in 113(! (?ontil/ental [[._.
p,_..c.:_._,:,z,.....
Please place in envelope and mail to:
General Electric Company
Warranty Registration Department
P.O. Box 32150
Louisville, KY 40232-2150
41

Consumer Product Ownership Registration
Dear Customer:
Thank v(m tor purchasing our t)rod uct and thank you for t)lacing yore: confidence in us.
_;'c arc t)rotld to l/a'_c vo/| as a (tlStOl/ler!
Follow these three steps to protect your new appliance investment:
Complete mid mail
your Constuner
Product O_mership
Registration today.
t ]axe the pc;_l(c of
mind of knowing
we can contact you
in the tmlikeh
exem of a sati?tx'
modification.
,\tier mailing
the registration
behm', store this
do( IllIlCllt ill a sati?
place. It (ontains
intbrmation you will
need should you
require service.
()ur selMcC number
is 800.(;E.C,\I(I{S
(800.432.2737).
Manual (aretulh.
It will hel l) 7mu
ot)erate VO[II _ I/(_V_'
al)l)lian( e t)rol)erl).
Model Number Serial Number
I I I I I I I I I I I I II I I I I l I
hnportant: If you did not get a registration card with your product, detach
mid return the form below to ensure that your product is
registered, or register mflhm at ge.com.
g.<:.._2,._2,._:,'..
Consumer Product Ownership Registration
Model Number Serial Number
I ........... I I,, ,,,, ,I
.Nil-.[] Ms. [] Mrs. [] Miss []
First I[as' I I
Name I I I I I I I I I Nalne I I I I I I I I I I I I I
Strect I I
\ddl'ess I I I I I I I I I I I I I I I I I I I I I I I I I I
+,l..+I , , , , , , , IE-mailAddress*.
I I I,l +it'I I
Citx I I I I I I I I I I I I I State Code I I I I
l)at( Pla(ed it] [s(
Ph(me
Mo,.t,L_J D_,L___,,._k._ _.._t,.-I,, I-I,, I-I,, , I
GEConsumer & Industrial * Please provide your e-mail address to receive,
Appliances xia e-mail, discounts, special ofh,rs and (>tiler important
General ElectricCompany communications ti-om GE Appliances (GEA).
Louisville,K¥40225 Check here ifyou do not want to receixe
gecom
communications from (;EA's carefidlv selecte(1
p_IFt lleFS.
42
GEMicrowave Oven Warranty.
AllwarrantyserviceprovidedbyourFactoryService
Centers,oranauthorizedCustomerCare®technician.
Toscheduleservice,on-line,visitusatge.com,or
call800.G£CARES(800.432.2737).Pleasehaveserial
andmodelnumbersavailablewhencallingfor
service.
Staple your receipt
here. Proof of the
original purchase date
is needed to obtain
service under the
warrant_
GE Will Replace:
ForGEandGEProfileModels:
One Year Anypartof the IIli( FOW_I_,C0_,Cl/whi(]l thils (t/l( to a (tc_( t
From the date ofthe in m_m'riMs or workmanshit). [)udng this limited one-year
originaipurchase warran_ (,E will _dsopro\'idc, free of charge, ;dl l_bor and
rclat('d scrvi((' to r('l)la((' tb(' d('l('(tiv(' [)_t't.
ForGEProfileModelsONLY'.
Fi+eYears
From the date of
original purchase
The magnetron tube, if th(' magn('tron tub(' t_,d]sdue
to a dc/('( t in materials or worklilanstlit). Diiring tiffs
five-yearlimitedwarranq,you will be rcsl)ousit)lc lot
aHv labor or in-home scr\'icc costs.
ii::Service trips to your home to teach
you how to use die product.
i_i;Improper hlstallafion, delivery or
1Ylaint enanee.
i_i;Product not accessible to provide
required service.
i_i;Failure of die product or dmnage to
die product if it is abused, misused
(for exmnple, cavity archlg from wire
rack or metal/foil), or used for oilier
dim1 die hltended purpose or used
COlmnercially.
_: Replacement of house fuses or
resetting of circuit breakers.
_: Dmnage to file product cattsed by
accident, fire, floods or acts of God.
_: hlcldental or consequential damage
caused by possible defects wifll tiffs
appliance.
J_ Dmnage caused after delivery.
EXCLUSIONOFIMPLIED WARRANTIES--Your sole and exclusive remedyis
productrepair asprovidedin this Limited Warranty. Any implied warranties,
includingtheimplied warranties of merchantability orfitnessfor a particular
purpose,are limited toone year orthe shortestperiod allowed by law.
I
Thiswarranty isextended to the origbal purchaserandanysucceedingowner forproductspurchased
for homeuse within the USA.Iftheprodnct islocated in anareawhereserviceby aGEAuthorized
Servicerisnot available, youmayberesponsiblefora tripcharge or youmaybe required toMng the
product toanAuthorized GEServiceLocationfor service,ill Alaska,the warranty excludes theservice
calls toyour home,
Somestatesdo not allow theexclusionor lirnitation of incidental orconsequential damages.This
warrantygives youspecific legal rights,and youmayalsohaveotherrights which varyfromstate to
state. Toknow what yourlegal rightsare,consultyourlocal orstate consumeraffairs office oryour
state'sAttorney General
43
Warrantor:GeneralElectric Company.Louisville,KY40225
iiiiiiiiiiiiiiliiiiiiii! !li!ii

ConsumerSupport.
GEAppliancesWebsite 9eco,,
]Ia;e a question or n_d assislan(_ _qlh your applian(e? "liy lhe (;E Applian(cs V,_bsim
_4 hol]l'S a da)/, any da)/of lhe )¢eal! FoY _lea[( Y (OllV( lli( ll(t! _lld t_s[( 1 st!IX, i( t! voll (all
1]()_ (/owllloa(/ ()wllel_S Manllals, Oldel pal/S o1 _well s(h_ (hde selvi(e oil-lille.
ScheduleService ge.com
Expert GE repair s_rvic_ is only one st_p away fiom your doon Get on-line and
s(h( (hll( volH serx, i(e 31 volli (onvelli( 1]((! 24 holws anv d;:tv of iN( vear! ( )1 _all
800.GE.('&RES (800.432.2737) during normal busin_ ss hours.
RealLifeDesignStudio
ge.com
GE supports the Ihfiversal Design <onceptmprodu< i_, ser'd< es and emironmem.,, that
(all be tlsed b)" people of all ages, sizes and capabilities. "d,\_ret ognize the need to
design tor a wide range of ph?:sical and mental abilities and impairments. For details
of GE's Ihflversal I)esign applications, including kitchen design ideas tor people with
disabilities, check out our D,bbsite toda}; For the hearing impaired, please (:all
800.TDD.GEAC (800.833.4322).
ExtendedWarranties
ge.com
Purchase a GE extended warrant_ and learn about special discounLs that are available
while vom wan-antv is still in ettbi t. 5Ira can purdmse it on-line anytime, or tall
800.626.2224 during normal business hours. GE Consumer ttome SelsJces will
still be tt_ere after your warramy expires.
PartsandAccessories
ge.com
Indixiduals qualified to ser'dce their own applian( es tan have parts or at (essories
sent directly to their homes (VI&\, MasterCard and Dis(over cards are a_(epmd).
Order on-line toda 5 24 hours eveW day or b) phone at 800.626.2002 during normal
bllsilleSS hours.
Instructionscontainedin this manual coverprocedurestobeperformedbyanyuser.Other
servicing generally should hereferred to qualified service personnel. Cautionmust he
exercised, since improper servicing may cause unsafe operation.
ContactUs go.ore
If you art not satisfied with the servk e vou r_ ceivt fiom (;E, contact us on our D,k.bsiw
with all the details including your phol{e nmnbec or write m:
Gen_ ral Manager; Customer Relations
GE Appliam es, .\pplian( e Park
Louisville, k_" 40225
RegisterYourAppliance
ge.cem
Register ),our new appfiance on-line---at your convenience! Timely product r_gistralion
will allow for enhan_ ed _ommuni_ ation and prompt servk e trader the terms of'your
warranty, should the need arise. You mm also mail in the pre-primed registration card
included in the packing material.
Puntedt}}Ma/ayst#,

