Loading ...
Loading ...
Loading ...
Kelvinator Air Conditioning installation 9
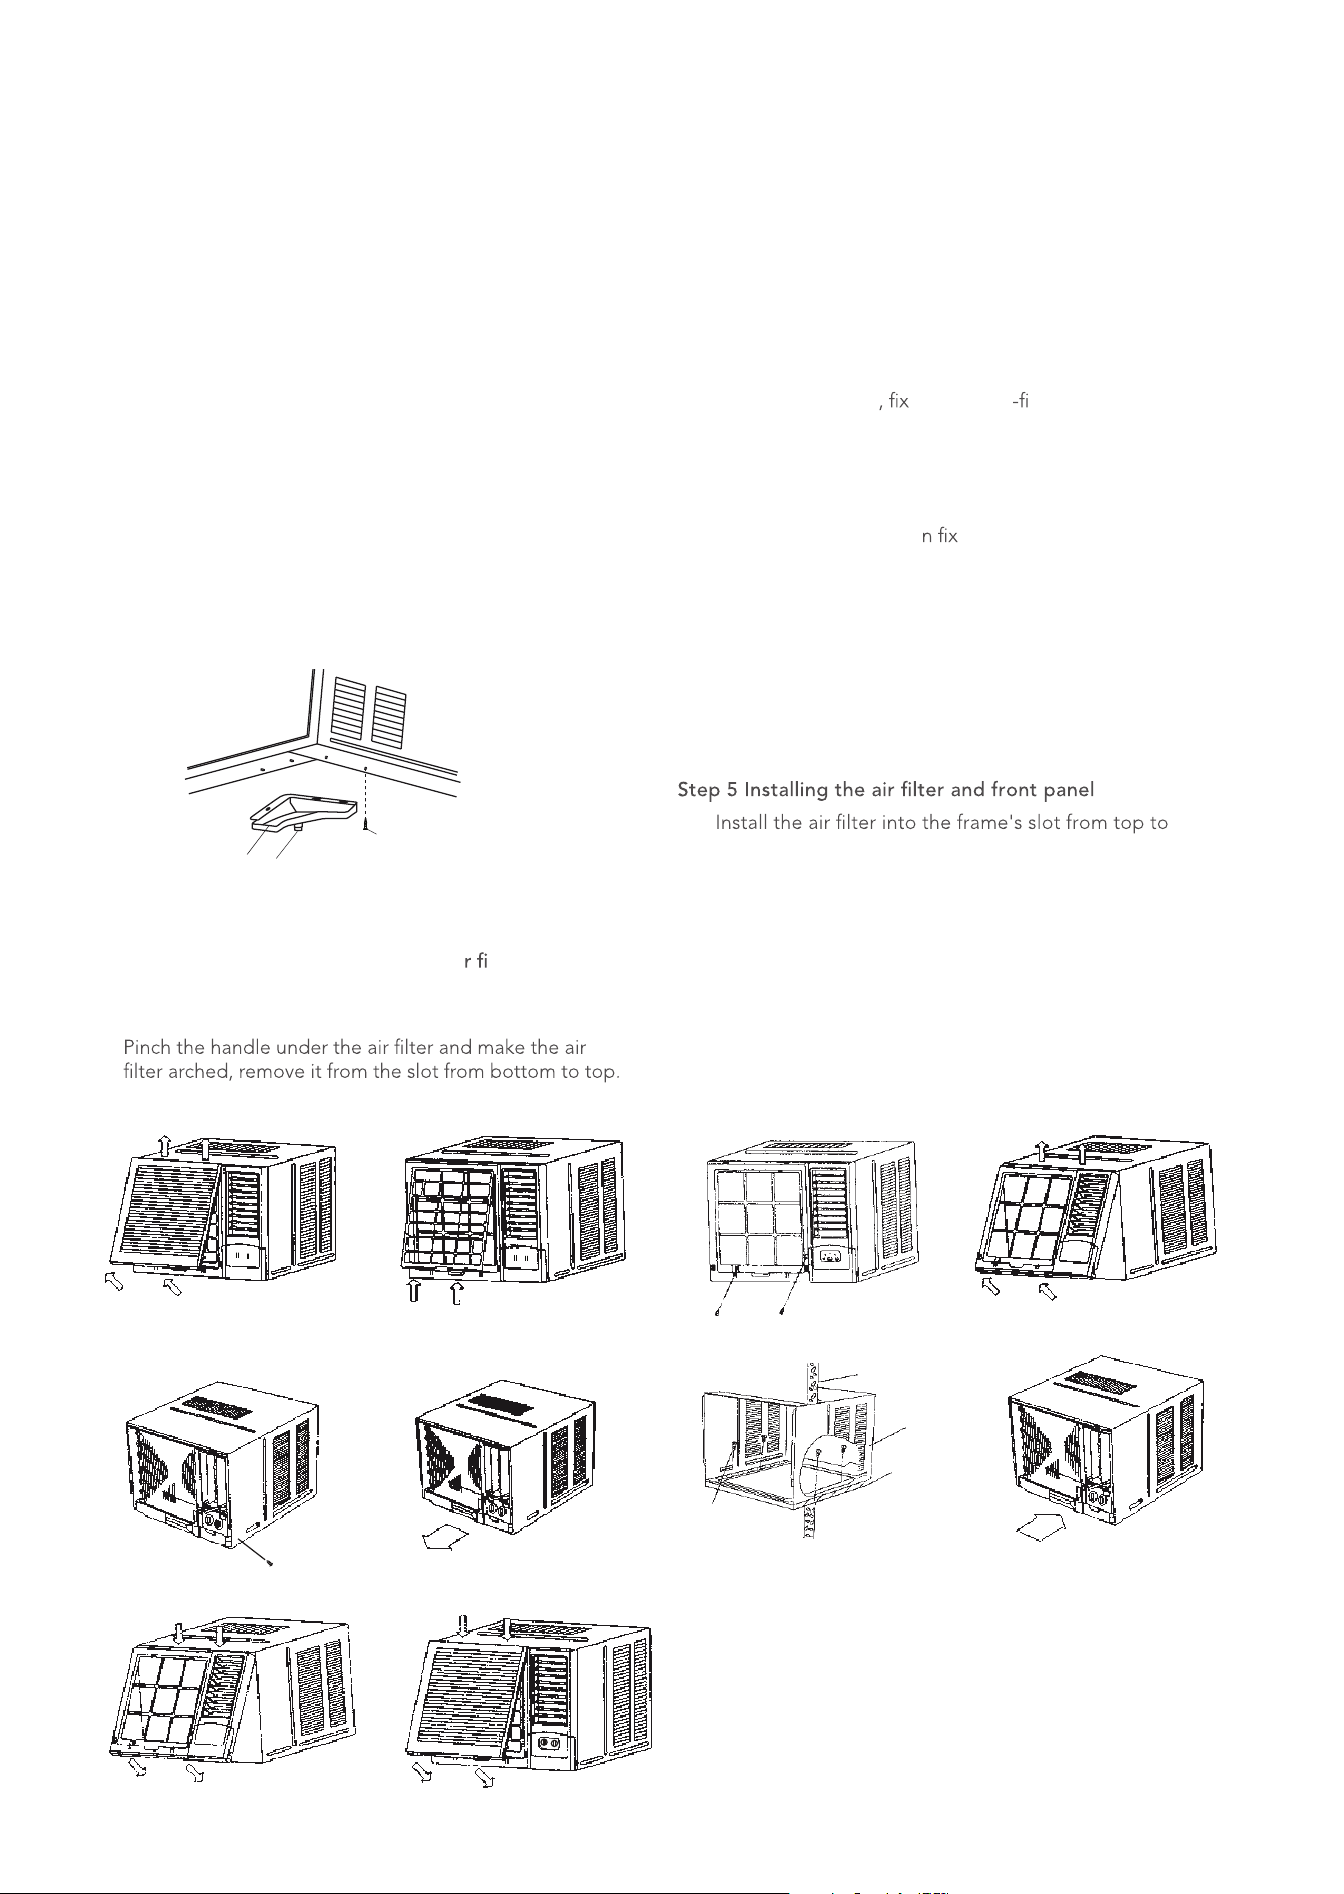
Step 2 Removing the front panel
1 Remove the screws from the frame. (see Fig.3)
2 Grasp the left corner in the frame's underside, then
loosen the frame. (see Fig.4)
Step 3 Installation
1 Remove the screw the chassis xing board and
cabinet. (see Fig.5)
2 Grasp the handle on the chassis and carefully slide the
air conditioner out of the cabinet. (see Fig.6)
3 When you need to drain off the water, install the drain
plug on the frame. The
the cabinet onto the support,
(provided by the installer unless you elect to install
yourself) (see Fig.7).
4 Push the unit chassis into the cabinet. (see Fig.8)
5 Fix the chassis and cabinet. (see Fig.5)
Step 4 Installing the frame
1 Install the frame. (see Fig.9)
2 Fix the screws on the frame. (see Fig.3)
1
2 Hang the front panel on the frame's buckle, then press
the front panel into the frame's slot until hear a click.
(see Fig.10)
The treatment of condensed water
1 Take out the drain pan and screws (provided within your
air conditioner accessories bag)
2 Install the drain pan at the bottom of the unit and secure
it with the screws provided.
3 Connect a suitable sized drain hose (not supplied) to the
drain outlet located on the underside of the drain pan
Drain plug (Cooling only models)
The drain plug is fitted from the factory to capture condensed
water to maximise the cooling efficiency of this product.
There may be some sound of splashing water under some
conditions. This configuration is used for testing the capacity
and efficiency of this product for performance rating purposes.
The drain plug can be removed to drain water to a specific
location and/or reduce noise but drain plug removal can
reduce performance.
Installation
Fig. 1
Fig. 7
Fig. 9 Fig. 10
Fig. 8
Fig. 3
Fig. 5
Fig. 2
Fig. 4
Fig. 6
wall
cabinet
supporter
screws
bottom. (see Fig. 2)
drain
pan
screw
rubber
plug
drain
outlet
Installation Steps
Step 1 Remove the front panel and the ai lter
1
2
Hold the slot under the front panel then lift it upwards
and outwards, and remove the front panel. (see Fig.1)
(see Fig.2)
Loading ...
Loading ...
Loading ...