Loading ...
Loading ...
Loading ...
Plan
Vent
System
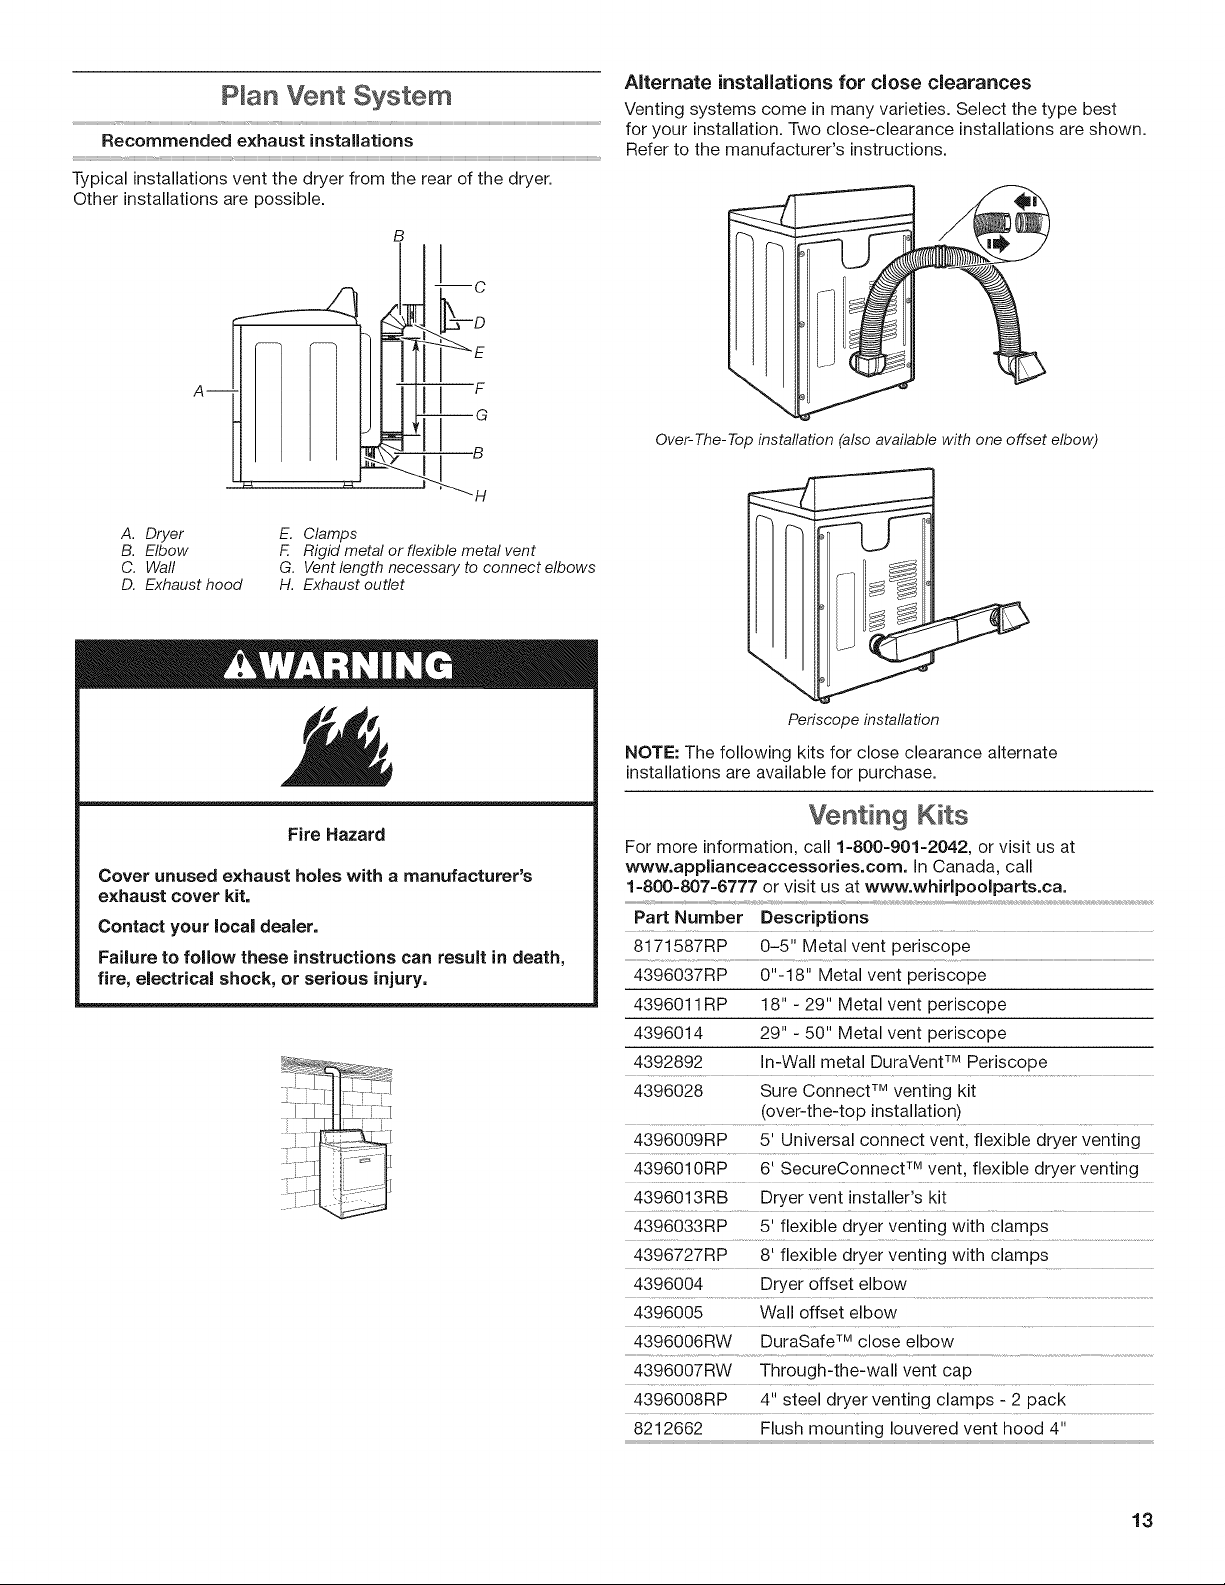
Recommended
exhaust
installations
Typical
installations
vent
the
dryer
from
the
rear
of
the
dryer.
Other
installations
are
possible.
A.
Dryer
E.
Clamps
B.
Elbow
F.
Rigid
metal
or
flexible
metal
vent
C.
Wall
G.
Vent
length
necessary
to
connect elbows
D.
Exhaust
hood
H.
Exhaust
outlet
AWARNING
Gh;
é
Fire
Hazard
Cover
unused
exhaust
holes
with
a
manufacturer’s
exhaust
cover
kit.
Contact
your
local
dealer.
Failure
to
follow
these
instructions
can
result
in
death,
fire,
electrical
shock,
or
serious
injury.
Alternate
installations
for
close
clearances
Venting
systerns
come
in
many
varieties.
Select
the
type
best
for
your
installation.
Two
close-clearance
installations
are
shown.
Refer
to
the
manufacturer’s
instructions.
Periscope
installation
NOTE:
The
following
kits
for
close
clearance
alternate
installations
are
available
for
purchase.
Venting
Kits
For
more
information,
call
1-800-901-2042,
or
visit
us
at
www.applianceaccessories.com.
In
Canada,
call
1-800-807-6777
or visit
Us
at
www.whirlpoolparts.ca.
Part
Number
Descriptions
8171587RP
0-5"
Metal
vent
periscope
4396037RP
Q"-18"
Metal
vent
periscope
4396011RP
18"
-
29"
Metal
vent
periscope
4396014
29"
-
50"
Metal
vent
periscope
4392892
In-Wall
metal
DuraVent™
Periscope
4396028
Sure
Connect™
venting
kit
(over-the-top
installation)
4396009RP
5'
Universal
connect
vent, flexible
dryer
venting
4396010RP
6'
SecureConnect™
vent,
flexible
dryer
venting
4396013RB
Dryer
vent
installer’s
kit
4396033RP
5'
flexible
dryer
venting
with
clamps
4396727RP
8'
flexible
dryer
venting
with
clamps
4396004
Dryer
offset
elbow
4396005
Wall
offset
elbow
4396006RW
DuraSafe™
close
elbow
4396007RW
~~
Through-the-wall
vent
cap
4396008RP
4"
steel
dryer
venting
clamps
-
2
pack
8212662
Flush
mounting
louvered
vent
hood
4"
13
Loading ...
Loading ...
Loading ...