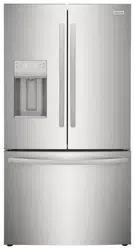
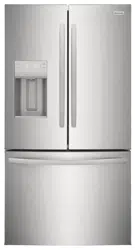
User Manual Frigidaire FRT21IL4FW7 Refrigerator
Table Of Contents
- Important Safety Instructions
- Installation
- Connecting Water Supply
- Door Removal Instructions
- Temperature Controls
- Ice Service
- Normal Operating Sounds & Sights
- Care and Cleaning
- Warranty
- Before you Call
INSTALLATION
LOCATION
- Choose a place that is near a grounded electrical outlet• Do Not use an extension cord or an adapter plug. If possible. place the refrigerator out of direct sunlight and away from the range. dishwasher or other heat sources
- The refrigerator must be installed on a floor that is level and strong enough to support a fully loaded refrigerator
- Consider water supply availability for models equipped with an automatic ice maker•
DOOR OPENING
Your refrigerator should be positioned to allow easy access to a counter when removing food. To make this possible. the direction in which the doors open can be reversed. See Door Removal & Reversal Instructions.
LEVELING
All four corners of your refrigerator must rest firmly on a solid floor• Your refrigerator is equipped with adjustable front rollers or front leveling screws to help level your unit.
To Level Your Refrigerator:
- Remove toe grille
- Use flat-blade screwdriver or 3/8" socket wrench to adjust front rollers• Use adjustable wrench to adjust leveling screws
CONNECTING HOUSEHOLD WATER SUPPLY TO REFRIGERATOR
To Connect Water Supply LineTo ice Maker Inlet Valve
1. Disconnect refrigerator from electric power source.
2. Place end of water supply line into sink or bucket. Turn ON water supply and flush supply line until water is clear. Turn OFF water supply at shutoff valve.
3. Unscrew plastic cap from water valve inlet and discard cap.
4. Slide brass compression nut. then ferrule (sleeve) onto water supply line. as shown.
5. Push water supply line into water valve inlet as far as it will go (¼ inch). Slide ferrule (sleeve) into valve inlet and finger tighten compression nut onto valve. Tighten another half turn with a wrench; DO NOT over tighten.
6. With steel clamp and screw. secure water supply line to rear panel of refrigerator as shown.
7. Coil excess water supply line (about 2V2 turns) behind refrigerator as shown and arrange coils so they do not vibrate or wear against any other surface.
8. Turn ON water supply at shutoff valve and tighten any connections that leak.
9. Reconnect refrigerator to electrical power source.
10. To turn ice maker on. lower wire signal arm (see ice maker front cover for ON/OFF position of arm).
Before Installing The Water Supply Line, You Will Need
- Basic Tools: adjustable wrench. flat-blade screwdriver. and Phillips TM screwdriver
- Access to a household cold water line with water pressure between 30 and 100 psi.
- A water supply line made of ¼ inch (6.4 mm) OD. copper tubing. To determine the length of copper tubing needed. you will need to measure the distance from the ice maker inlet valve at the back of the refrigerator to your cold water pipe. Then add approximately 7 feet (2.1 meters). so the refrigerator can be moved out for cleaning (as shown).
- A shutoff valve to connect the water supply line to your household water system. DO NOT use a self-piercing type shutoff valve.
- A compression nut and ferrule (sleeve) for connecting the water supply line to the ice maker inlet valve.
DOOR REMOVAL/ REVERSAL INSTRUCTION
DOOR REMOVAL AND REVERSAL INSTRUCTION:
1. Remove toe grille.
2. Remove top hinge cover. Trace around the hinge with a soft lead pencil. This makes reinstallation easier. Remove top hinge and lift door off center hinge pin. Set door aside.
3. Unscrew center hinge pin using adjustable wrench and save for reassembly. Ensure plastic washer stays on hinge pin.
4. Lift refrigerator door off of bottom hinge and set aside.
5. Remove center hinge and shim by removing inside screw and loosening two outside screws enough to allow hinge and shim to slide out. Tighten screws.
6. Loosen two outside screws on opposite side of refrigerator. remove inside screw and install center hinge.
7. Remove two screws on bottom hinge with 3/8" socket wrench.
8. Install bottom hinge on opposite side with the two screws removed from step 7.
9. Unscrew bottom hinge pin using adjustable wrench. Move hinge pin to other hole in hinge and tighten with adjustable wrench.
10. Reverse door handles (see instructions on next page).
11. Move freezer and refrigerator door stops to opposite side. Before starting screws. use an awl to puncture the foam.
12. Position refrigerator door onto bottom hinge pin and screw center hinge pin through center hinge into top of door. Close refrigerator door to help align hinge hole.
13. Tighten center hinge pin with adjustable wrench.
14. Remove cabinet and hinge hole plugs and move to opposite side.
15. Lower freezer door onto center hinge pin.
16. Close freezer door. Have an assistant lift up on opposite side of door while tightening screws to install top hinge.
17. Flip toe grille and reinstall.
18. Plug in electrical power cord and turn refrigerator temperature control to center position. Adjust setting as necessary.
TO REMOVE FREEZER HANDLE: (Handles may be easier to reverse wMe doors are off)
- Remove two screws attaching qandle to bottom of freezer door.
- Remove short trim piece by sliding tnm straight up and off of handle bracket.
- Remove screw attaching top of handle to door
- Self-Adhesive Nameplate Models: Gently peel off nameplate from door and reapply over old handle holes.
TO ATTACH FREEZER HANDLE:
- Reinstall handle on opposite side. using same hole as nameplate.
- Attach handle to bottom of door.
- Slide trim piece straight down onto handle bracket.
TO ATTACH FREEZER HANDLE:
- Secure side of handle to door and replace button plug.
- Secure handle to bottom of door.
TRIM REMOVAL (FULL-LENGTHTRIM MODELS ONLY)
In some models. the refrigerator door has a full length trim piece which continues from the bottom of the handle to the bottom of the door. The top of the trim attaches to the handle bracket (Figure 1) or fits around the base of the handle (Figure 2). An adhesive "trim lock" is positioned about halfway down. The bottom of the trim is held in place by either an adhesive trim lock. or a trim lock with two prongs inserted into a hole on the face of the door.
TO REMOVETRIM:
- Remove trim by gently pulling trim lock areas out and away from door.
- When trim is free from door, slide the trim straight down and away from base of handle.
TO REMOVE REFRIGERATOR HANDLE: (Handles may be easier to reverse while doors are off.)
Figure 1 Style Handles
- Remove two screws attaching handle to top of refrigerator door.
- Remove screw attaching bottom of handle to door.
- Remove two hole plugs and hinge pin plug on top of door and install on opposite side. Use Phillips head screwdriver to remove plastic screw plug from front of door and install on opposite side
Figure 2 Style Handles
- Remove two screws attaching handle to top of refrigerator door.
- Swing top of handle away from door and slide handle down and off of dovetail button.
- Removes crew and dovetail button and install on other side, moving hole plugs from corresponding holes to opposite side.
TO ATTACH REFRIGERATOR HANDLE:
Figure 1 Style Handles
- Secure bottom of handle with screws.
- Secure top of handle with screws.
Figure 2 Style Handles
- Start with handle offset away from door. Place bottom of handle over dovetail button. swing handle into an upright position and pull upward. locking it into place.
- Secure top of handle with screws.
TO ATTACHTRIM:
- Slide both trim locks out of trim.
- Insert new adhesive trim locks contained in your literature pack.
- Install trim to handle by sliding under base of handle. Carefully align trim and press down at trim lock locations.
- Use rubbing alcohol to remove any adhesive residue from old trim lock locations.
TO REMOVE REFRIGERATOR HANDLE: (Handles may be easier to reverse while doors are off.)
- Remove two screws attaching handle to top of refrigerator door.
- Remove button plug using edge of putty knife.
- Remove screw on side of
- Reverse freezer and refrigerator handles as shown in figure 3.
TO ATTACH REFRIGERATOR HANDLE:
- Secure side of handle to door and replace plug button. tie
- Secure handle to top of door.
REMOVING STAINLESS STELL DOORS AND HANDLES
To Remove Doors
Stainless steel doors are not reversible. Follow these steps to remove doors.
1. Remove toe grille and top hinge cover.
2. Remove top hinge and lift freezer door off of center hinge pin. Set door aside.
3. Unscrew center hinge bin using adjustable wrench and save for reassembly. Ensure plastic washer stays on hinge pin.
4. Lift refrigerator door off of bottom hinge and set aside.
5. Remove center hinge Shoulder and shim by removing inside screw and loosening two outside screws enough to allow hinge to slide out.
6. Remove bottom hinge. Reinsert two outside
7. Reverse steps 1 - 6to reinstall doors
To Remove Handles
1. Firmly hold freezer handle while loosening set screws with 3/32" allen wrench. Remove freezer handle.
3. Repeat step 1 for refrigerator door.
TEMPERATURE CONTROLS
COOL DOWN PERIOD
To ensure safe food storage. allow the refrigerator to operate with the doors closed for at least 8 to 12 hours before loading it with food.
TEMPERATURE ADJUSTMENT
- Adjust temperature gradually: move the knob in small increments. allowing the temperature to stabilize.
- For colder temperatures. turn the knob towards Colder.
- For warmer temperatures. turn the knob towards Cold.
Turning the refrigerator control will change temperatures in both compartments. For example. if the refrigerator control is turned to a colder setting. the freezer control may have to be adjusted to a warmer setting. Turning the freezer control will change only the freezer temperature.
To maintain temperatures. a fan circulates air in the refrigerator and freezer compartments. For good circulation. do not block cold air vents with food items.
ICE SERVICE
TURNINGYOUR iCE MAKER ON
After the plumbing connections have been completed, the water supply valve must be opened. Place the ice container under the ice maker, pushing it as far back as possible. Lower the wire signal arm to its "down" or ON position.
TURNING YOUR ICE MAKER OFF
To stop the ice maker. lift the wire signal arm until it clicks and locks in the "up" or OFF position. The ice maker also turns off automatically when the ice container is full. If your model has an adjustable freezer shelf. place the shelf in the lower position. so that the wire signal arm will hit the ice when the container is full.If your model
has an adjustable freezer shelf, place the shelf in the lower position, so that the wire signal arm will hit the ice when the container is full.
ICE PRODUCTION: WHAT TO EXPECT
The ice maker will produce 2.5 to 3 pounds of ice every 24 hours depending on usage conditions. Ice is produced at a rate of 8 cubes every 80 to 160 minutes.
NORMAL OPERATING SOUND & SIGHTS
UNDERSTANDINGTHE SOUNDSYOU MAY HEAR
Your new high-efficiency refrigerator may make unfamiliar sounds. These are all normal sounds and soon will become familiar to you. They also indicate your refrigerator is operating as designed. Hard surfaces. such as vinyl or wood floors. walls. and kitchen cabinets may make sounds more noticeable. Listed below are descriptions of some of the most common sounds you may hear. and what is causing them.
A. Evaporator
The flow of refrigerant through the evaporator may create a boiling or gurgling sound.
B. Evaporator Fan
You may hear air being forced through the refrigerator by the evaporator fan.
C. Defrost Neater
During defrost cycles, water dripping onto the defrost heater may cause a hissing or sizzling sound. After defrosting, a popping sound may occur.
D. Automatic Ice Maker
If your refrigerator is equipped with an automatic ice maker, you will hear ice cubes falling into the ice bin.
E. Cold Control & Defrost Timer or Automatic Defrost Control
These parts can produce a snapping or clicking sound
F. Condenser Fan
If condenser coils are located underneath your refrigerator as shown in the drawing at the left. you have a condenser fan. You may hear air being forced through the condenser by the condenser fan.
G. Compressor
Modern. high-efficiency compressors operate much faster than older models. The compressor may have a high-pitched hum or pulsating sound.
H. Water Valve
If your refrigerator is equipped with an automatic ice maker. you will hear a buzzing sound as the water valve opens to fill the ice maker during each cycle.
L Drain Pan (Nonremovable)
You may hear water running into the drain pan during the defrost cycle. The drain pan will be located on top of the compressor for air-cooled condensers (black coils on back of refrigerator).
J. Condenser Coils (Fan-cooled models only)
CARE AND CLEANING
REPLACINGTHE FREEZER LIGHT BULB (SOME MODELS)
- Unplug refrigerator.
- Wear gloves as protection against possible broken glass.
- Unsnap light shield as shown.
- Unscrew and replace old bulb with an appliance bulb of the same wattage.
- Replace light shield.
- Remember to plug the refrigerator back in.
NEVER CLEAN CONDENSER (SOME MODELS)
If your refrigerator is equipped with a Never Clean condenser, there's no need to clean the condenser under normal operating conditions. If the refrigerator is operated under particularly dusty or greasy conditions, or if there is significant pet traffic in your home, it may be necessary to periodically clean the condenser for maximum efficiency.