Loading ...
Loading ...
Loading ...
Save These Instructions
Appliances with the (_) symbol on the data plate
have been listed with Underwriters' Laboratories,
Inc. Those with a CSA Monogram on the data
plate have been certified by the CSA Testing
Laboratories as complying with Canadian
Standards Association requirements. Gas dryers
with an AGA symbol on the data plate have been
design certified with the American Gas
Association; those with a CGA symbol on the
data plate have been approved by the Canadian
Gas Association. Nevertheless, as with any
equipment using electricity and having moving
parts, there are potential hazards. To use this
appliance safely, the operator should become
familiar with the instructions for operation of the
Appliance and always exercise care when
using it.
EXHAUSTING THE DRYER
A proper exhaust system iscritical for good
drying results. Restrictedairflow affects dryer
performance and results in longer drying times.
Exhaustductwork guidelines:
• Use 4" diameter rigid metal exhaust duct. Do
not use smaller duct. Minimize the length of
duct and the number of elbows. Secure joints
with duct tape. Do not use screws.
• Never use plastic or nonmetal flexible duct. This
can kink, cause lint buildup and reduce airflow
which creates service problems.
• If flexible duct must be used, use only the type
with a stiff sheet metal wall. Do not kink or
crush the duct. Do not use flexible duct with a
thin foil wall.
• Clean out previously used exhaust duct.
Replace kinked or crushed sections. Be sure
exhaust vent hood flap opens and closes freely.
* Refer to the installation instructions for
additional dryer exhaust information.
ENERGY SAVING TIPS
• Clean the lint filter after each cycle for greater
efficiency and performance.
• Avoid overloading the dryer. A proper wash
load is a proper dryer load. Do not combine
loads. Avoid drying very small loads or mixed
loads of heavy, hard-to-dry items with
lightweight ones.
• Properly select and check exhaust venting. Four
inch rigid metal ducting is recommended to
prevent lint collection and improve dryer
operation. Periodically check the ductwork for
any obstructions that could reduce the airflow
and efficiency.
• Remove items from the dryer as soon as
tumbling stops for best results and efficiency.
This reduces wrinkling and ironing.
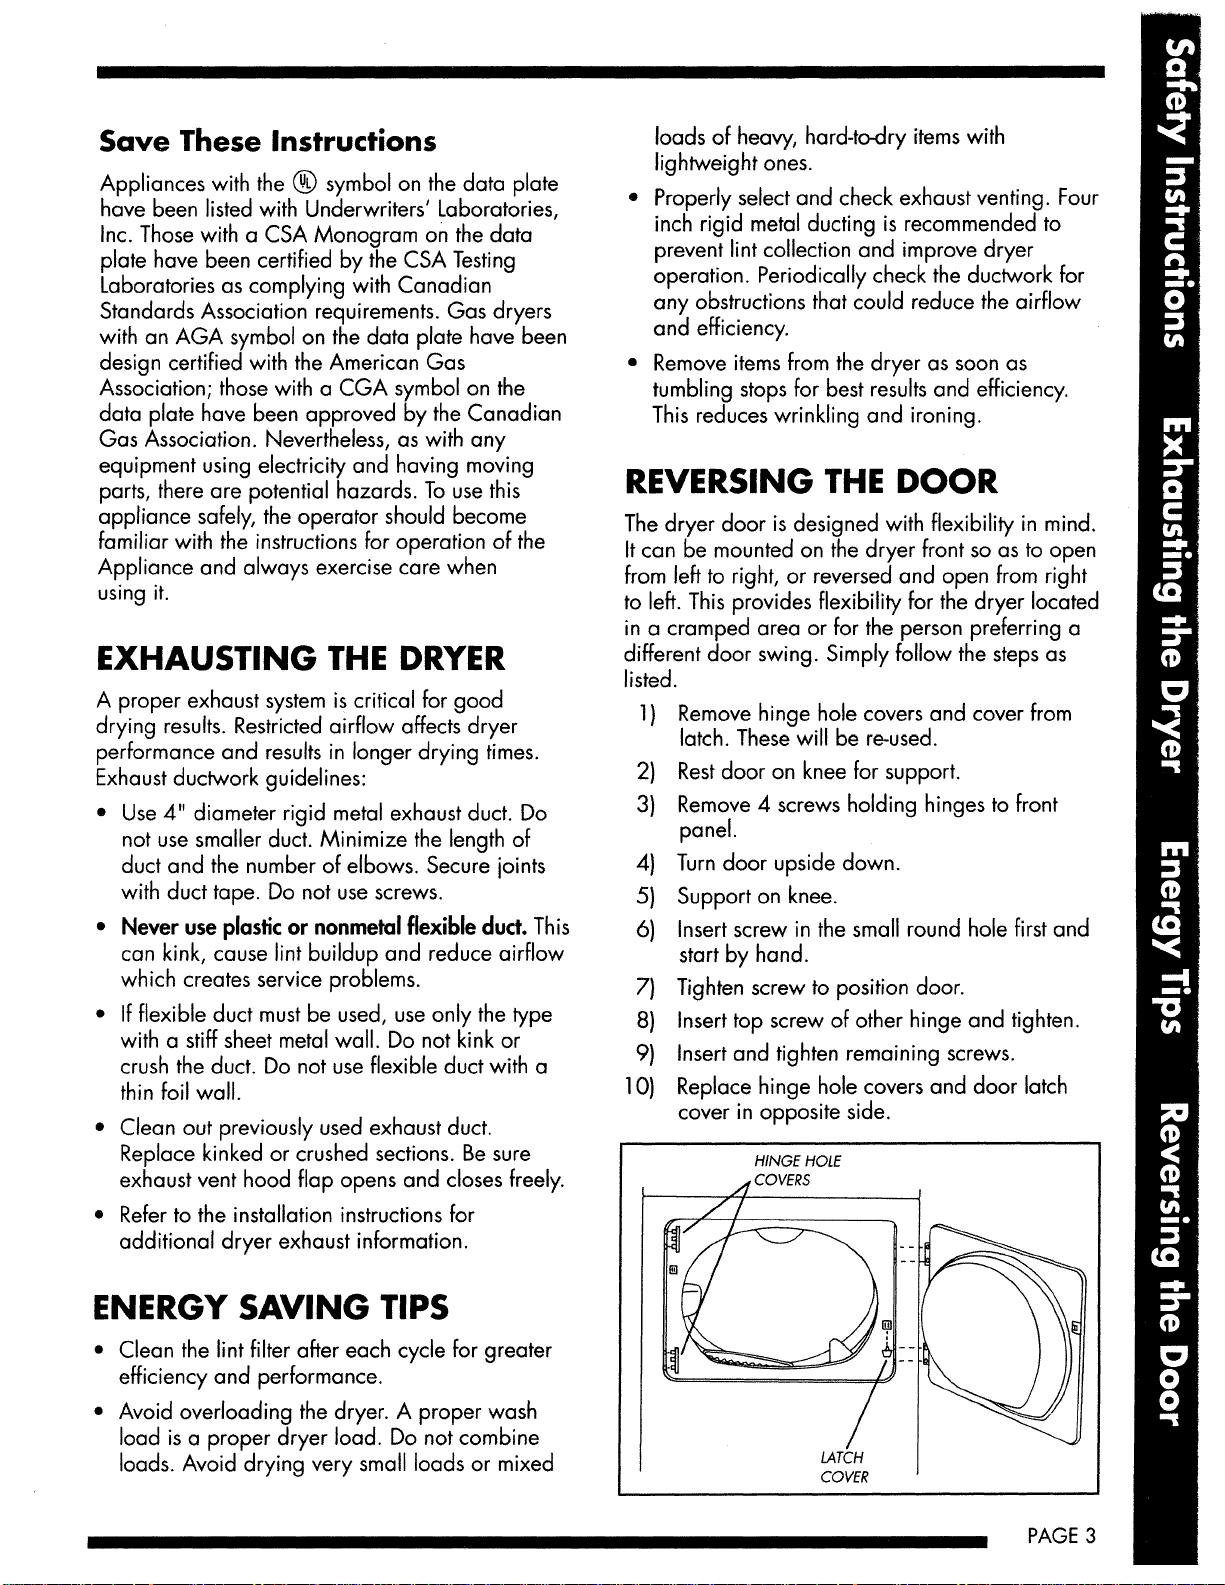
REVERSING THE DOOR
The dryer door is designed with flexibility in mind.
It can be mounted on the dryer front so as to open
from left to right, or reversed and open from right
to left. This provides flexibility for the dryer located
in a cramped area or for the person preferring a
different door swing. Simply follow the steps as
listed.
1) Remove hinge hole covers and cover from
latch. These will be re-used.
2) Rest door on knee for support.
3) Remove 4 screws holding hinges to front
panel.
4) Turn door upside down.
5) Support on knee.
6) Insert screw in the small round hole first and
start by hand.
7) Tighten screw to position door.
8) Insert top screw of other hinge and tighten.
9) Insert and tighten remaining screws.
10) Replace hinge hole covers and door latch
cover in opposite side.
HINGE HOLE
LATCH
COVER
PAGE 3
Loading ...
Loading ...
Loading ...