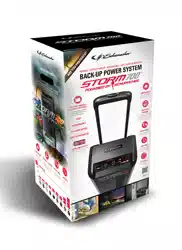
User Manual Schumacher SBP1 Backup Power System
IMPORTANT SAFETY INSTRUCTIONS
SAVE THESE INSTRUCTIONS.
- SAVE THESE INSTRUCTIONS – This manual contains important safety and operating instructions.
- This product is not intended for use by children.
- Do not expose the unit to rain or snow.
- If someone else uses the unit, ensure they are well informed on how to use it safely, and have read and understood the operating instructions. WARNING! RISK OF EXPLOSION.
- Do not use near flammable fumes or gases, such as in the bilge of a gasolinepowered boat or near propane tanks.
- Do not use in an enclosure containing automotive-type lead-acid batteries.
- Do not expose the unit to temperatures 104 * F (40°C). WARNING! RISK OF ELECTRIC SHOCK OR FIRE.
- Use of an attachment not recommended Schumacher® Electric Corporation may result in a risk of fire, electric shock or injury to persons.
- Do not operate the unit with damaged cord or plug – replace the cord or plug immediately.
- Do not recharge the unit with a damaged extension cord.
- Do not operate the unit if it has received a sharp blow, been dropped, or otherwise damaged in any way; take it to a qualified service person.
- Do not disassemble the unit. Take it to a qualified service professional if service or Incorrect assembly may result in fire or electrical shock.
- To reduce risk of electric shock, unplug the unit from the outlet before attempting Turning off controls will not reduce this risk.
- The unit gets hot during use and must Ensure at least in. (7.5 cm) air space is maintained on all sides of the unit.
- Do not set the unit on flammable materials, such as carpeting, upholstery, paper, During operation, keep unit away from materials that can that can be affected by high temperatures, such as blankets, pillows and sleeping bags.
PERSONAL SAFETY PRECAUTIONS
WARNING! RESTRICTIONS ON USE.
- This unit may not be used with life support devices or systems. Failure of this device can reasonably be expected to cause failure of that life support device or system, or to affect the safety or effectiveness of that device or system.
- When working on electrical equipment, always ensure someone is nearby to aid you in case of an emergency
- The unit is very heavy; do not lift by the handle. When stored or in use, prevent unit from falling over.
- WARNING: This product contains one or more chemicals known to the State of California to cause cancer and birth defects or other reproductive harm.
ASSEMBLY INSTRUCTIONS
- Remove all cord wraps and uncoil the cables prior to using the unit.
- To retract or extend the handle, push in the button on the top of the handle. Do not lift the unit by the handle.
FEATURES
- 12V DC accessory port
- 120V AC household power outlets (2)
- Power port for external battery (on back)
- Retractable handle
- AC power cord (not visible)
- AC output ON/OFF button
- Display/Battery % button
- AC Output/USB/Error LEDs
- Digital display
- USB ports (2)
- USB ON/OFF button
- Wheels (not visible)
CONTROL PANEL
LED INDICATORS
- AC Output – Green, when AC output function is activated.
- USB – Green, when USB function is activated.
- Error – Red, when unit is shut down (in additi on to audible alarm), due to low battery voltage or converter overload. See scrolling display message for more information.
ON/OFF FUNCTION BUTTONS
- AC output – Turns AC output on or off
- Display/Battery % – Turns on the digital display and show’s the internal battery’s percentage of charge
- USB – Turns USB function on or off. NOTE: The USB will turn off after a period of time if no current is being drawn.
DIGITAL DISPLAY
Press the DISPLAY button to turn on the display. The digital display will show the battery’s percent of charge. Charge the internal battery whenever the unit is not in use and the display read less than 100% See Display Messages for a complete list of messages.
OPERATING INSTRUCTIONS
IMPORTANT! CHARGE IMMEDIATELY AFTER PURCHASE, AFTER EACH USE AND EVERY 30 DAYS, TO KEEP THE INTERNAL BATTERY FULLY CHARGED AND PROLONG BATTERY LIFE.
CHECKING THE LEVEL OF THE INTERNAL BATTERY
Press the DISPLAY button to turn on the display. The digital display will show the battery’s percent of charge. Charge the internal battery if the display shows it is under 100%.
NOTE: The internal battery’s percent of charge is most accurate when the unit has been disconnected from all devices
CHARGING THE INTERNAL BATTERY
- Make sure to turn off the 120V AC output before charging.
- Plug the power cord directly into a live grounded 120V outlet (not into a surge protector, power strip, or power bar). Charging will start automatically.
- While the unit is charging, the digital display will show . When the internal battery is fully charged, the display will show a smaller, pulsingioo, for energy efficiency. Complete charging may take up to 20 hours.
- Unplug the unit from the 120V outlet.
SOLAR CHARGING
Solar charging of the Storm unit can be accomplished by plugging in a solar panel with a charge controller into the 12V accessory port.
NOTE: A charge controller must be used to keep from overcharging the battery
CONNECTING TO AN EXTERNAL BATTERY
To extend operating time, you may connect to an additional external battery (55Ah deep-cycle battery with threaded posts). Use accessory cable 94500800 (not included). See instructions included with the cable.
POWERING A 12V DC DEVICE
NOTE: Do not power a 12V device while charging the internal battery.
- Make sure the device to be powered is OFF before inserting the 12V DC accessory plug into the 12V DC accessory port.
- Open the protective cover of the DC accessory port on the unit.
- Plug the 12V DC device into the DC accessory port and turn on the 12V DC device (if required).
- When finished, turn off the DC device (if required) and unplug from the DC accessory port.
- Recharge the unit immediately after unplugging the 12V DC device.
USING THE USB PORTS
The USB ports provide up to 2.1A at 5V DC.
- Plug the device into one of the two USB ports on the front panel.
- Press the USB port ON/OFF button. The green USB LED confirms that the USB power is ON.
- Turn on the USB device, if necessary.
- Turn on the USB device, if necessary. 4. When you are finished using the USB port, press the USB port ON/OFF button, to turn off.
- Charge the unit as soon as possible after using the USB port.
USING THE CONVERTER
It is important to know the continuous wattage of the device you plan to use with the converter. The unit must be used with devices drawing 700 watts or less. If the wattage is not marked on the device, use only devices with total AC current of less than 5.75A.
Devices such as TVs, fans or electric motors require additional power to start (commonly known as the “starting” or “peak” power). The Backup Power can supply a momentary surge in wattage; however even devices rated less than the maximum 700 watts can exceed the converter’s surge capability and cause an automatic overload shutdown.
Do not use the converter with a product that draws a higher wattage than the converter can provide, as this may cause erratic operation.
CAUTION: Always run a test to establish whether the converter will operate a particular piece of equipment or device. In the event of a power overload (noted with RED Error LED, an audible alarm and a scrolling display message), the converter is designed to automatically shut down. This safety feature prevents damaging the converter while testing devices and equipment within the 700-watt range. If powering more than one device, start one device at a time to avoid a power surge and/or converter overload. The surge load of each device should not exceed the converter’s Continuous Operation wattage rate.
You can use an extension cord from the converter to the device without significantly decreasing the power being generated by the converter. For best operating results, the extension cord should be 16 AWG (1.31 mm2 ) or larger and no longer than 50 feet.
WARNING! RISK OF ELECTRIC SHOCK
Incorrect operation of your converter may result in damage and personal injury. The converter output is 120V AC and can shock or electrocute the same as any ordinary household AC wall outlet.
NOTE:
The maximum continuous load is 700 watts. Do not use the converter with a product that draws more than 700 watts, as this may cause erratic operation.
USING THE AC POWER OUTLETS CAUTION:
- Do not plug surge-protected power bars into the unit’s 120V AC outlets
- Do not connect an AC power source to the 120V AC outlets.
- Do not connect the unit’s AC power cord to its 120V AC outlets.
NOTE: Do not power an AC device while charging the internal battery.
1. Connect your AC-powered devices or small household appliances to one or more of the two AC outlets of the Backup Power System.
NOTE: Make sure the device to be powered is OFF before inserting the plug into the AC power outlet.
2. Press the AC Output ON/OFF button. The green AC power LED confirms that the backup power system is ON and ready to provide backup power.
NOTE: Extended operation of an AC device may result in excessive battery drain.
3. Recharge the unit immediately after unplugging the AC device.
NOTE: Actual time may vary. Times are based on the internal battery being fully charged.
DISPLAY MESSAGES
AC 120V OFF – The converter is off.
AC 120V OFF - USB ON – The converter is off; the USB is on.
AC 120V ON - USB OFF – The converter is on; the USB is off.
AC 120V ON - USB ON – The converter and USB are on.
AC 120V ON - USB ON and LED line races around display – The converter and USB are on, while the internal battery is charging.
AC 120V ON – The converter is on. AC 120V ON and the LED line races around the display – The converter is on, while the internal battery is charging.
BATTERY XX% CHARGED – Indicates the battery’s charge level.
SYSTEM FAULT - HIGH LOAD - PRESS AC ON/OFF TO RESET – The converter and USB have shut down.
SYSTEM FAULT - LOW INPUT VOLTAGE - PRESS AC ON/OFF TO RESET (in addition to audible alarm) – The converter and USB have shut down, due to low input voltage.
USB OFF – The USB power is turned off. USB ON – The USB power is turned on.
USB ON and the LED line races around the display – The USB is on, while the internal battery is charging.
WARNING - LOW VOLTAGE - CHARGE SOON (in addition to audible alarm) – The converter and/or USB is in use; the unit needs charging.
HIGH LOAD (in addition to audible alarm) – The converter is drawing too much power.
LOW INPUT VOLTAGE – The battery is fully discharged; the unit needs charging. The LED line races around the display – The internal battery is charging. Small, pulsing– The unit is fully charged
MAINTENANCE AND CARE
- Recharge the unit once a month when not in use.
- Never completely discharge the internal battery
TROUBLESHOOTING
Unit is not functioning -> Battery is discharged or internal fuse is blown. -> Recharge the battery, if necessary. Check the fuse and replace, if bad.
Display scrolls: LOW INPUT VOLTAGE -> The battery is fully discharged. -> Recharge the battery.
Display scrolls: HIGH LOAD. -> The converter is drawing too much power -> Reduce the amount of power drawn from the unit.
REPLACEMENT PARTS
Battery : 5799000039Z
Power cord : .90026202Z
Fuse : 3999002160Z
ACCESSORIES
Accessory cable (for use with an external battery) : 94500800
SPECIFICATIONS
AC (Converter) : 110-120VAC
Output voltage (nominal) : 700W
Rated AC output power 1400W
Rated maximum AC surge power (10 milliseconds) 60 Hz ± 4 Hz
AC output frequency : Pure sine wave
AC output waveform < 0.5A
Pure sine wave 32˚-104˚F (0˚-40˚C)
Battery drain with no loads/outlets on 10.5V
Operating storage temperature
Low battery shutdown
DC (12V)
Internal battery type : Sealed lead-acid, AGM
Internal battery voltage (nominal).12V DC
Internal battery capacity 55Ah (x1)
Maximum load current through 12V accessory port (continuous) 15A
DC accessory port circuit breaker rating (internal, auto reset) 15A
Charging system
Internal AC charger/maintain current (max.) 6A
Intelligent built-in : Automatic
California Energy Efficiency Compliance : Yes
Safety built in : Yes
Mechanical
System dimensions (H x W x D – handle folded) 24.7˝ x 13.4˝ x 11.1˝
Handle extension length : Level 1: 7˝ / Level 2: 11˝
Weight 55.6 lbs
LIMITED WARRANTY
WARRANTY NOT VALID IN MEXICO.
SCHUMACHER ELECTRIC CORPORATION, 801 BUSINESS CENTER DRIVE, MOUNT PROSPECT, IL 60056-2179, MAKES THIS LIMITED WARRANTY TO THE ORIGINAL RETAIL PURCHASER OF THIS PRODUCT. THIS LIMITED WARRANTY IS NOT TRANSFERABLE OR ASSIGNABLE.
Schumacher Electric Corporation (the “Manufacturer”) warrants this Backup Power System for one (1) year and the internal battery for ninety (90) days from the date of purchase at retail against defective material or workmanship that may occur under normal use and care. If your unit is not free from defective material or workmanship, Manufacturer’s obligation under this warranty is solely to repair or replace your product, with a new or reconditioned unit, at the option of the Manufacturer. It is the obligation of the purchaser to forward the unit, along with proof of purchase and mailing charges prepaid to the Manufacturer or its authorized representatives in order for repair or replacement to occur. Manufacturer does not provide any warranty for any accessories used with this product that are not manufactured by Schumacher Electric Corporation and approved for use with this product. This Limited Warranty is void if the product is misused, subjected to careless handling, repaired, or modified by anyone other than Manufacturer or if this unit is resold through an unauthorized retailer.
Manufacturer makes no other warranties, including, but not limited to, express, implied or statutory warranties, including without limitation, any implied warranty of merchantability or implied warranty of fitness for a particular purpose. Further, Manufacturer shall not be liable for any incidental, special or consequential damage claims incurred by purchasers, users or others associated with this product, including, but not limited to, lost profits, revenues, anticipated sales, business opportunities, goodwill, business interruption and any other injury or damage. Any and all such warranties, other than the limited warranty included herein, are hereby expressly disclaimed and excluded. Some states do not allow the exclusion or limitation of incidental or consequential damages or length of implied warranty, so the above limitations or exclusions may not apply to you. This warranty gives you specific legal rights and it is possible you may have other rights which vary from this warranty.
THIS LIMITED WARRANTY IS THE ONLY EXPRESS LIMITED WARRANTY AND THE MANUFACTURER NEITHER ASSUMES OR AUTHORIZES ANYONE TO ASSUME OR MAKE ANY OTHER OBLIGATION TOWARDS THE PRODUCT OTHER THAN THIS WARRANTY.