Loading ...
Loading ...
Loading ...
CARTONCONTENTS
Checkcartoncontentsagainstthefol-
lowinglist.
Model 358,794763
• Blower
• Upper blower tube
• Lower blower tube
• High velocity nozzle
• Elbow tube
• Vacuum bag
• Upper vacuum tube
• Lower vacuum tube
• 2-Cycle engine oil
NOTE: It is normal for the fuel filter to
rattle in the empty fuel tank.
ASSEMBLY
_ILWARNING: Stop engine and be
sure the impeller blades have stopped
turning before opening the vacuum in-
let door or attempting to insert or re-
move the vacuum tubes. The rotating
blades can cause serious injury.
WARNING: If you receive your
unit assembled, repeat all steps to en-
sure your unit is properly assembled
and all fasteners are secure.
• A standard screwdriver is required
for assembly.
BLOWER ASSEMBLY
BLOWER TUBE ASSEMBLY
If you have already assembled your
unit for use as a vacuum, remove the
vacuum tubes and collection bag.
1. Align the rib on the upper blower
tube with the groove in the blower
outlet; slide the tube into place.
NOTE: Knob must be loose enough to
allow blower tube to be inserted in
blower outlet. Loosen knob by turning
counterclockwise.
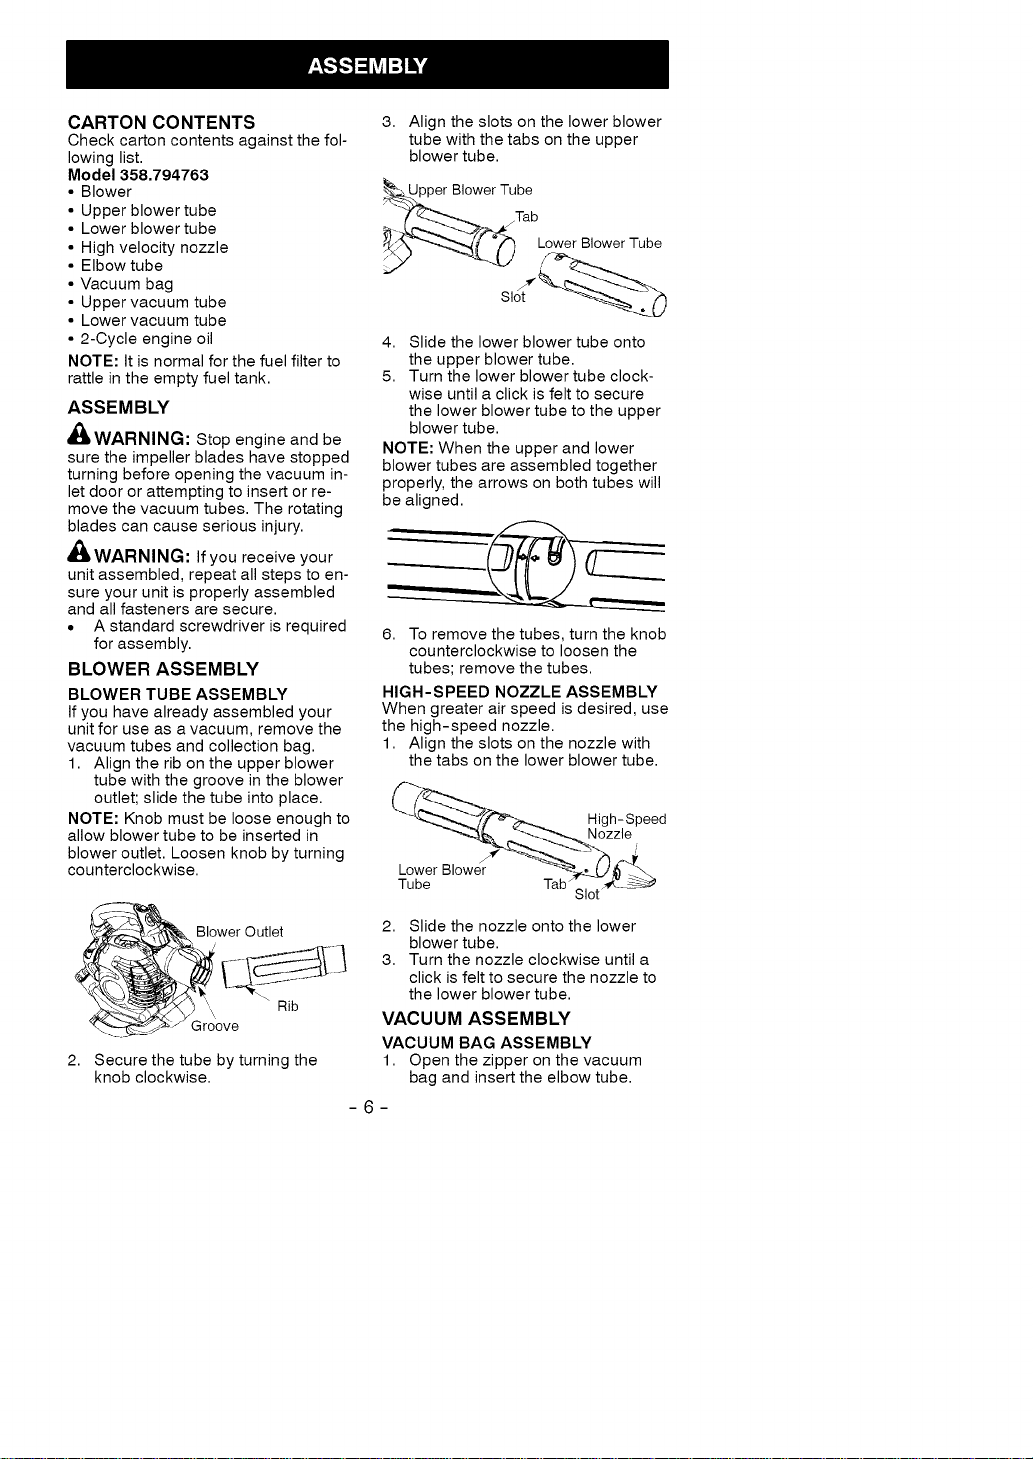
3. Align the slots on the lower blower
tube with the tabs on the upper
blower tube.
er BIow.,_er TUbTeb
_-__ Lower Blower Tube
4. Slide the lower blower tube onto
the upper blower tube.
5. Turn the lower blower tube clock-
wise until a click is felt to secure
the lower blower tube to the upper
blower tube.
NOTE: When the upper and lower
blower tubes are assembled together
properly, the arrows on both tubes will
be aligned.
6. To remove the tubes, turn the knob
counterclockwise to loosen the
tubes; remove the tubes.
HIGH-SPEED NOZZLE ASSEMBLY
When greater air speed is desired, use
the high-speed nozzle.
1. Align the slots on the nozzle with
the tabs on the lower blower tube.
Lower Blower
Tube Tab
High-Speed
Nozzle
/
2,
Blower Outlet
Rib
Groove
Secure the tube by turning the
knob clockwise.
2. Slide the nozzle onto the lower
blower tube.
3. Turn the nozzle clockwise until a
click is felt to secure the nozzle to
the lower blower tube.
VACUUM ASSEMBLY
VACUUM BAG ASSEMBLY
1. Open the zipper on the vacuum
bag and insert the elbow tube.
-6-
Loading ...
Loading ...
Loading ...