
Loading ...
Loading ...
Loading ...
10
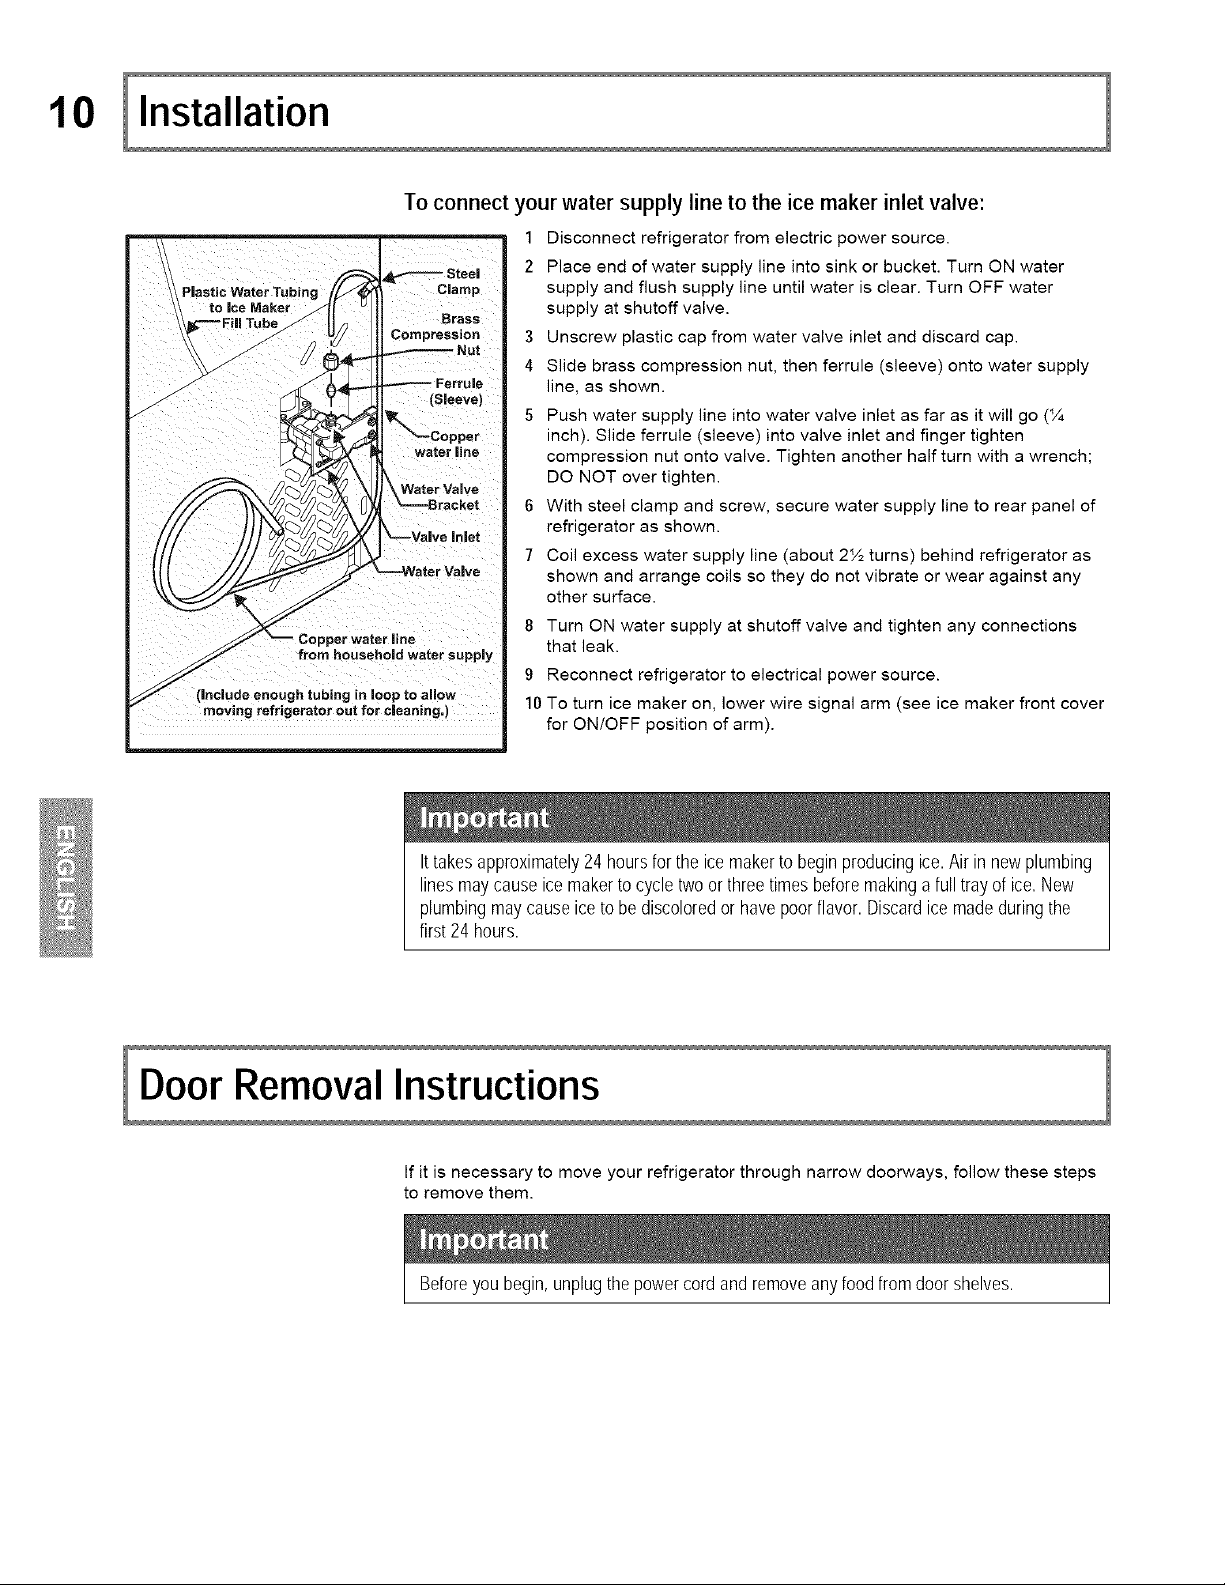
To connect your water supply line to the ice maker inlet valve:
1 Disconnect refrigerator from electric power source.
2 Place end of water supply line into sink or bucket. Turn ON water
supply and flush supply line until water is clear. Turn OFF water
supply at shutoff valve.
3 Unscrew plastic cap from water valve inlet and discard cap.
4 Slide brass compression nut, then ferrule (sleeve) onto water supply
line, as shown.
5 Push water supply line into water valve inlet as far as it will go (%
inch). Slide ferrule (sleeve) into valve inlet and finger tighten
compression nut onto valve. Tighten another half turn with a wrench;
DO NOT over tighten.
6 With steel clamp and screw, secure water supply line to rear panel of
refrigerator as shown.
7 Coil excess water supply line (about 2½ turns) behind refrigerator as
shown and arrange coils so they do not vibrate or wear against any
other surface.
8 Turn ON water supply at shutoff valve and tighten any connections
that leak.
9 Reconnect refrigerator to electrical power source.
10 To turn ice maker on, lower wire signal arm (see ice maker front cover
for ON/OFF position of arm).
Ittakesapproximately24hoursfortheicemakertobeginproducingice.Airin newplumbing
linesmaycauseicemakertocycletwoor threetimesbeforemakinga fulltrayof ice,New
plumbingmaycauseicetobediscoloredorhavepoorflavor.Discardicemadeduringthe
first24 hours.
If it is necessary to move your refrigerator through narrow doorways, follow these steps
to remove them.
Beforeyoubegin,unplugthepowercordandremoveanyfoodfromdoorshelves.
Loading ...
Loading ...
Loading ...