©2018 Hestan Commercial Corporation
1
SIDE BURNER
CART MOUNT KIT
AGBPK
IMPORTANT - READ ALL INSTRUCTIONS BEFORE YOU BEGIN
THE INSTRUCTIONS HEREIN SHOULD BE PERFORMED BY A QUALIFIED SERVICE TECHNICIAN.
THE APPLIANCE MUST BE COMPLETELY COOL AND THE PREVIOUS GAS SOURCE MUST BE SHUT
OFF OR REMOVED BEFORE ATTEMPTING INSTALLATION.
Some parts inside your grill or side burner have sharp edges. Care must be taken when handling the
various components to avoid personal injury. Wear gloves when handling.
TOOLS REQUIRED:
Work gloves
Safety glasses
Phillips screwdriver
Pipe wrench or large slip-joint pliers
Adjustable Wrenches (2)
Thread sealant
INSTALLATION OF DOUBLE SIDE BURNER ONTO GRILL CART
(MODEL AGB122 ONLY)
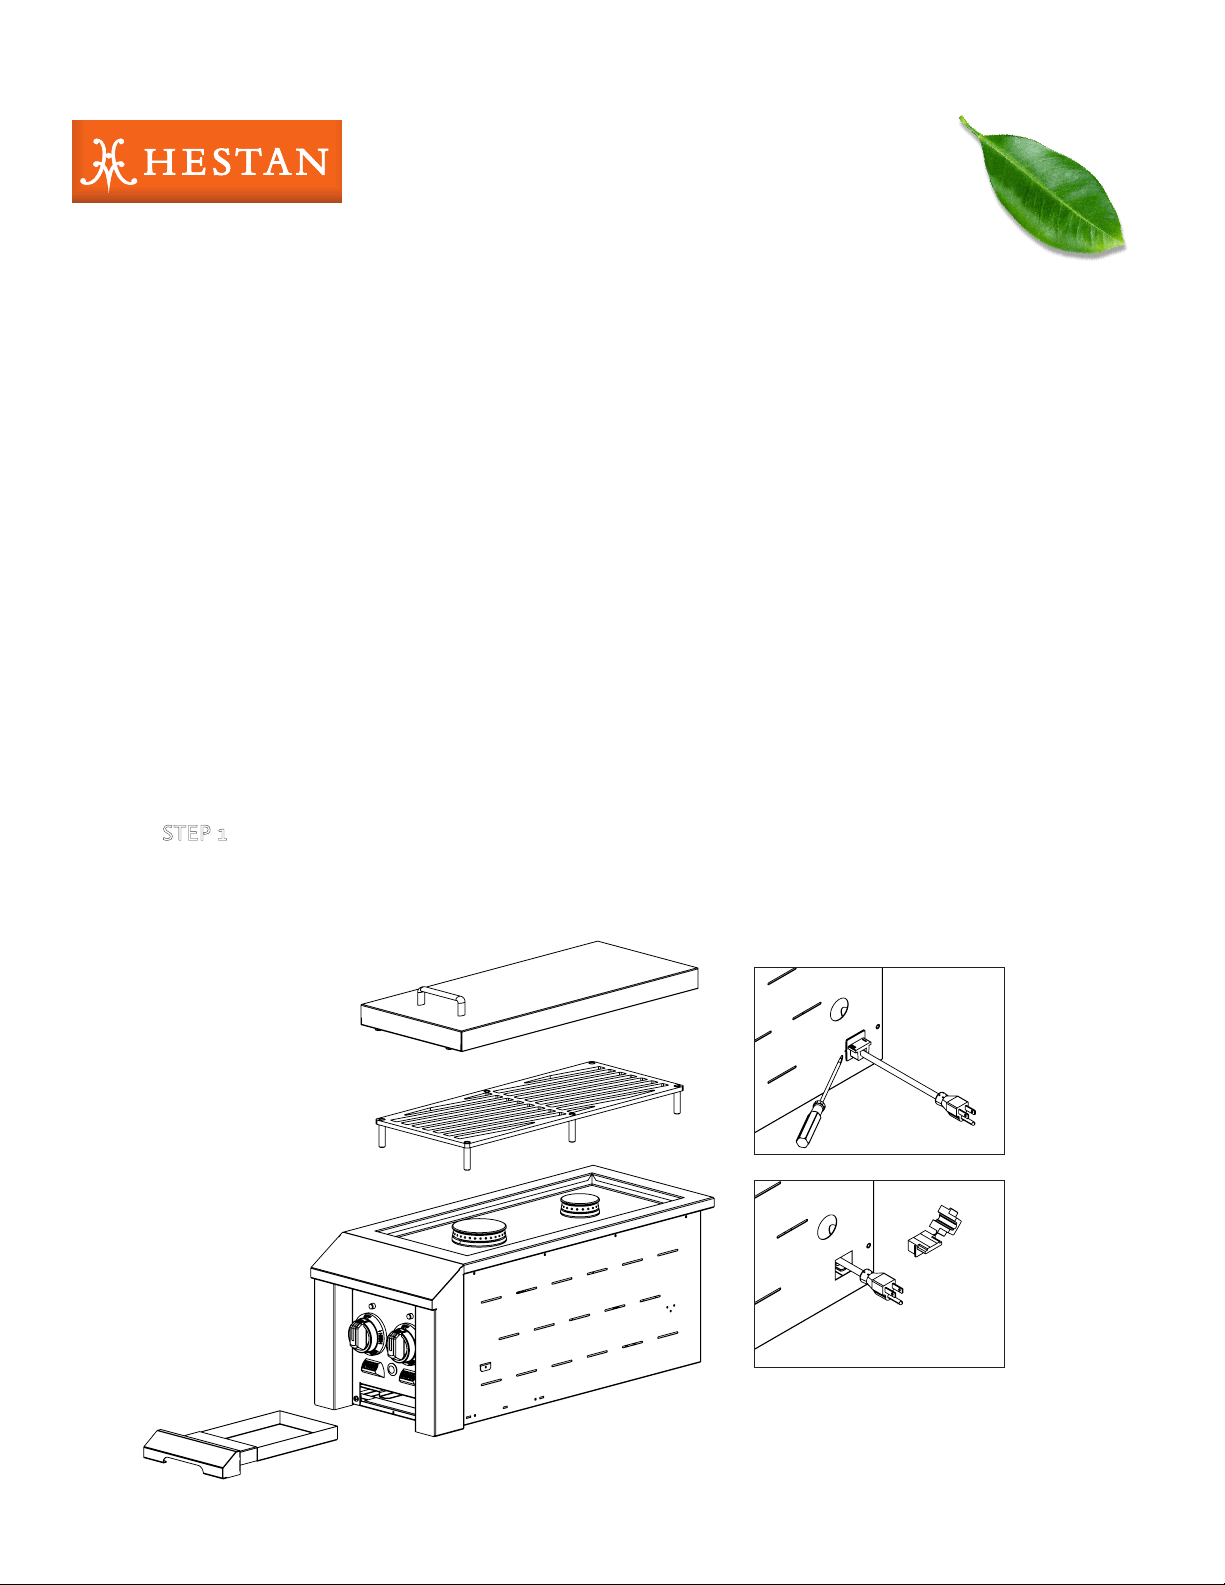
STEP 1
Remove the grate cover, grate, drip pan, and the electrical cord strain relief from the rear of
the unit. You will need a flat-blade screwdriver to remove the strain relief, then push the cord
through the opening.
©2018 Hestan Commercial Corporation
2
CART INSTALLATION
(continued)
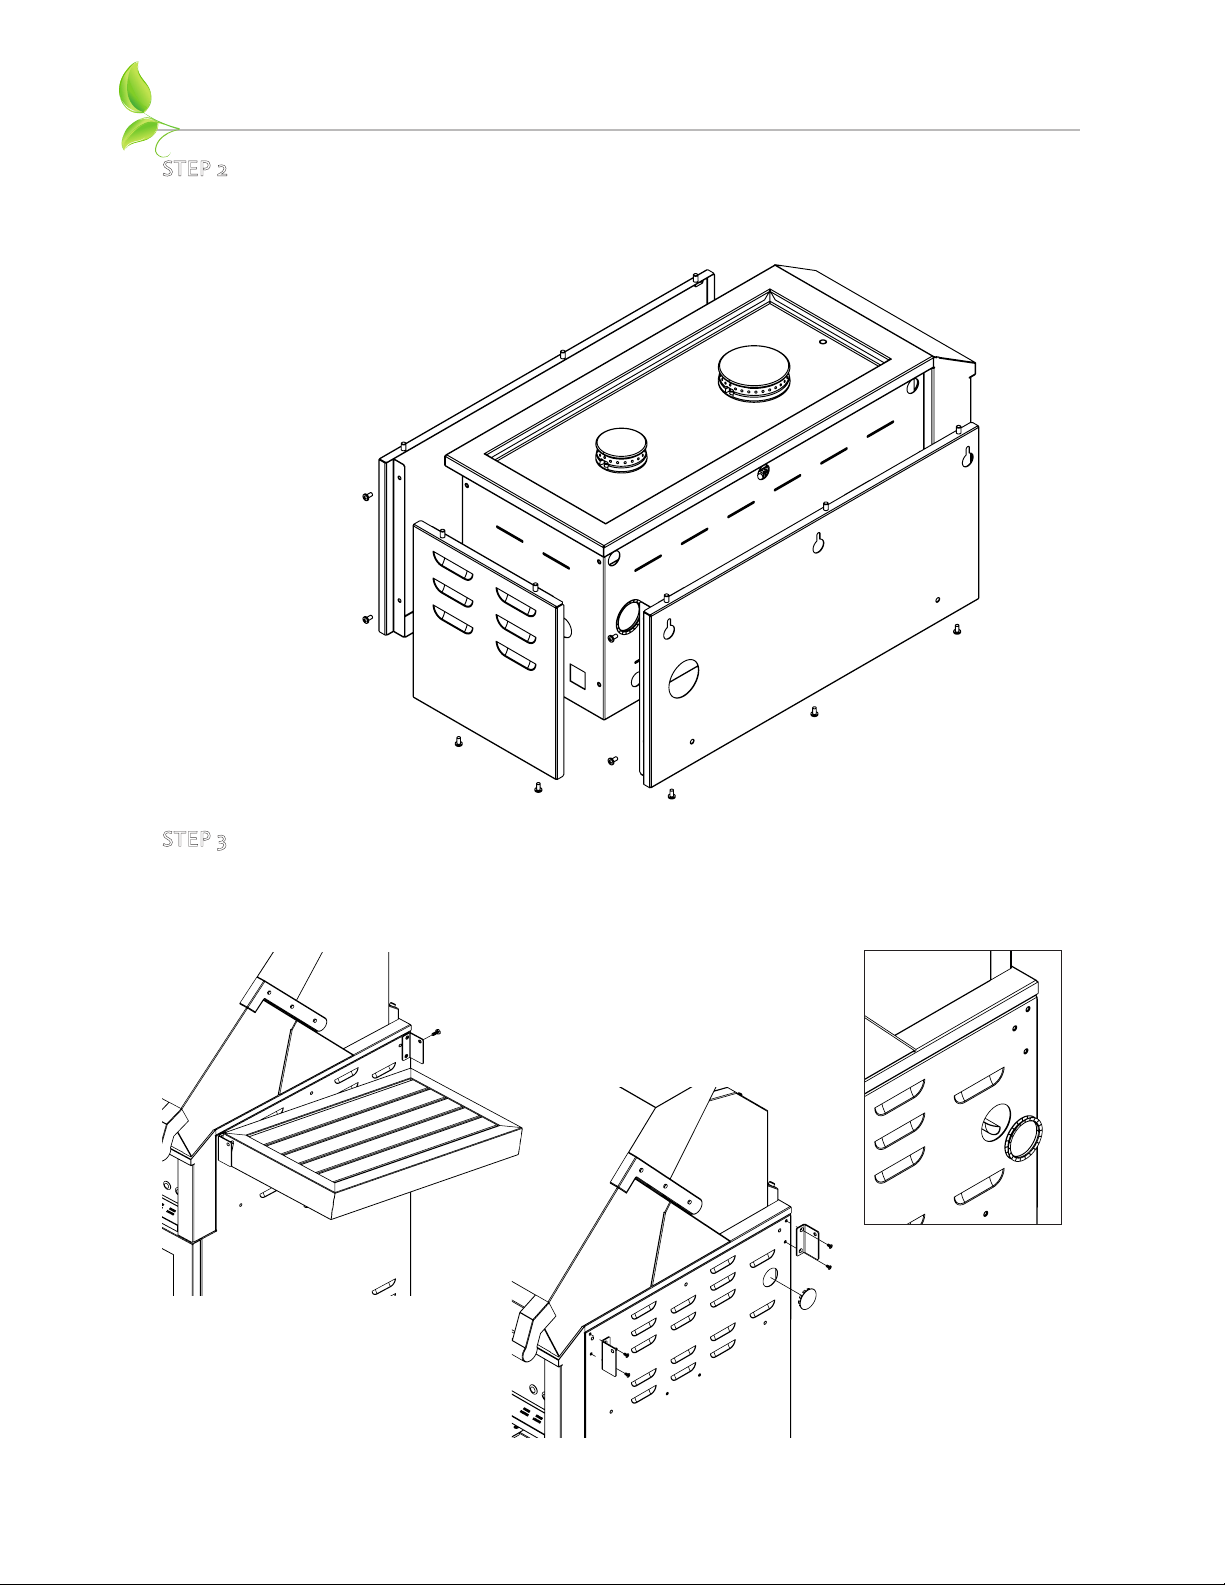
STEP 2
Locate the panels included with your kit. Mount all panels to the side burner using the provided
Phillips screws. Install the sides first, then the rear panel.
STEP 3
Remove the side shelf by removing the bolt at the rear bracket, and then removing the shelf.
Now you can remove both side shelf brackets from the cart. Replace the large plug with the
grommet as shown.

©2018 Hestan Commercial Corporation
3
CART INSTALLATION
(continued)
STEP 4
Remove the rear panel on the cart to access the grill’s gas manifold inlet. Disconnect the
regulator and all fittings from the inlet (LP shown).
STEP 5
Install the interplumbing fittings as shown below (LP shown). Use appropriate thread sealant on
all threaded pipe fittings. Compression fittings do not require thread sealant. Route the stainless
steel flex hose as shown. You will notice the Side Burner regulator has been removed.
1/2” NPT-FEMALE
ADAPTER
1/2” NPT-MALE
ADAPTER
1/2” NPT-FEMALE X
FLARE ADAPTER
REGULATOR
MANIFOLD
FROM GRILL
TEE
NIPPLE
FLEX
HOSE
©2018 Hestan Commercial Corporation
4
CART INSTALLATION
(continued)
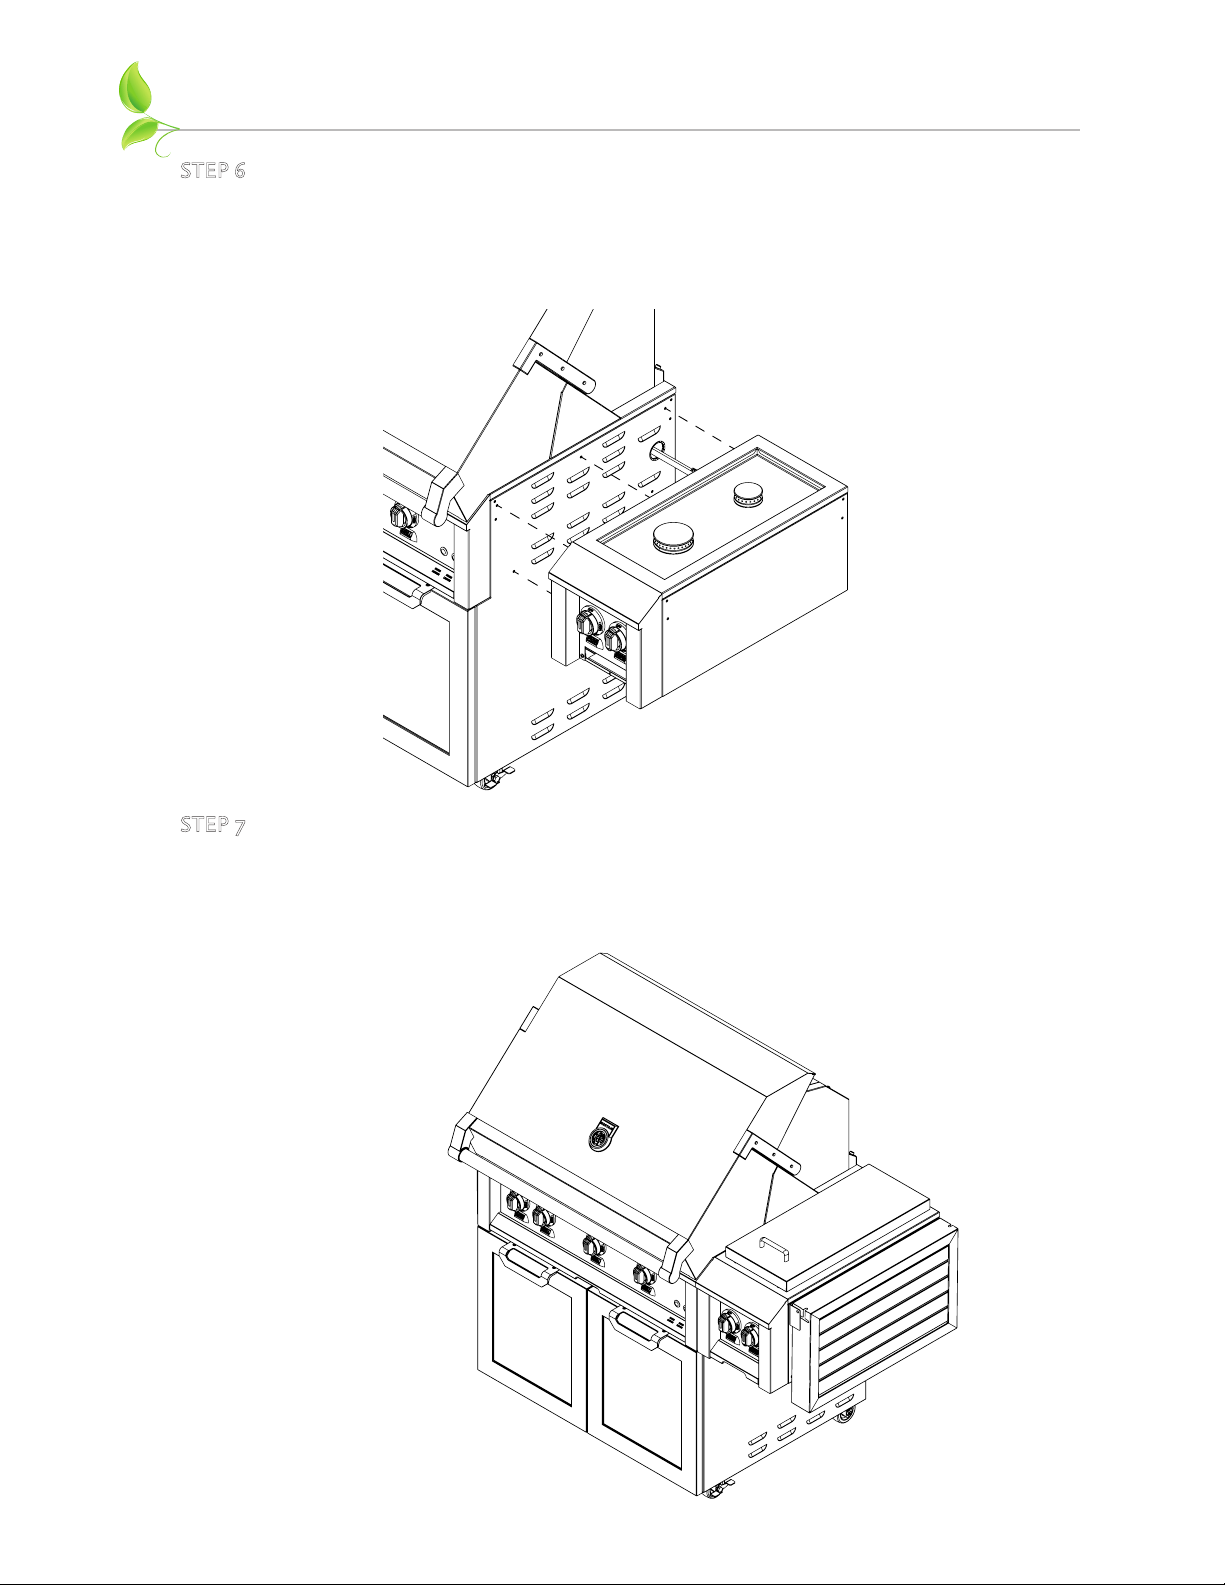
STEP 7
Reinstall the grate cover, grate, and drip pan onto the side burner. Mount the side shelf brackets
and side shelf onto the side burner (if desired). Continue with other gas connections as necessary
and be sure to check for gas leaks as per instructions in the manuals supplied with those appliances.
Reinstall the rear cover onto the grill cart when done.
STEP 6
Mount the side burner to the right side of the cart using the 5 provided 1/4-20 hex bolts. Route
the 3/8” diameter stainless-steel flex hose through the grommet hole to the side burner manifold
inlet. Route the power cable from the side burner’s electrical box, through the grommet hole,
and plug into to the grill’s electrical box (located on inside rear wall of cart).

Hestan Commercial Corporation
3375 E. La Palma Ave.
Anaheim, CA 92806
(888) 905-7463
RETAIN THIS MANUAL FOR FUTURE REFERENCE
©2018 Hestan Commercial Corporation P/N 012590 REV B