ge.com
©
©
©
>
©
Safety Information
Arcing ..................... 3
Extension Cords ............. 7
Foods ...................... 4
Grounding Instructions ....... 6
Important Safety
Instructions ............... 9-7
MicrowaxeNafe Cookwa_e ..... 5
Precautions m Avoid Possible
Exposure m Excessix>
Microwm> Energy . .......... 2
Operating Imtr_¢ion,
Best Method of
Cooking Chart .............. 90
Changing Power Lex>l ....... 13
Oombination Featules .. 10, 18, 19
Comecfion Features... l0, 17, 19
Cooking Options ............ 10
Oookware Tips .............. 19
Features of Your Oven ..... 8, 9
Microwme Terms ........... 93
Other Features ........... 91,92
Beeper Volume ............ 92
Child i,ock-Out ............ 91
Clock .................... 91
Cooking Complete
Reminder . ............... 91
Display ON/OFF . ......... 22
Display Speed ............. 22
OI_T/CLEAR .............. 21
START/PAUSE ............ 21
Timer ................... 21
Sensor Microwm_
Features ................ 14-16
Time and Aura
Microwm> Features .... 9, 11, 19
Write the model and serial
numbers here:
#
#
You can find them on a label
when the door is open.
Care and Cleaning
Inside ..................... 24
Outside .................... 24
Stainless Steel ............... 25
Troubleshooting Tips
Before You Call For Service . . . 26
Things That Are Nomml
With Your Microwme O\en . . . 27
Consumer Support
Product Registration ..... 29, 30
Consumer Support .. Back Coxer
V_,mantv .................. 31
MFL38277602 49-405d9
I>EB l 5 90
03-07JR
IMPORTANTSAFETYINSTRUCTIONS.
READALLINSTRUCTIONSBEFOREUSING.
A WARNING!
For your safe_ the information in this manual must be followed to minimize the risk of fire, explosion, electric shock,
exposure to excessive microwave energy, or to prevent property damage, personal injury, or loss of life.
PRECAUTIONSTOAVOIDPOSSIBLEEXPOSURE
TOEXCESSIVEMICROWAVEENERGY
(a) DoNotAttemptto operate this oven with tile door
open since open-door operation can result in ham_flll
exposure to nlicrowave energ}': It is important not to
(lefeat or tamper with tile safety interlocks.
(h) Do NotPlace any object between tile oven fl'ont tilce
and tile door or allow soil or cleaner residue to
acculn ulate on sealing surti_ces.
(c) Do Not Operate tile oven if it is danmged. It is
particularly important that tile oven door close
properly and that there is no dalnage to tile:
(l) door (bent)
(2) hinges and latches (broken or loosened)
(3) door seals and sealing surfi_ces.
(d) The Oven Should Not be ac!justed or repaired by
anyone except properl) qualified service pei_onnel.
IMPORTANTSAFETYINSTRUCTIONS.
When using electrical appliances basic safe_yprecautions should be followed, including the following:
Use this appliance only for its intended purpose as described in this Owner's Manual.
iJi::Read and follow tile specific precautions ill tile
PRECAUTIONS TOAVOID POSSIBLEEXPOSURETO
EXCESSIVEMICROWAVE ENERGY section above.
::Ji::This appliance must be grounded. Connect only
to a properly grounded outlet. See tile GROUNDING
INSTRUCTIONS section on page 6.
_: ]nst;fll or locate this appliance only in accordance with
tile provided Installation Instructions.
::Ji::This product is to be used 3' above floor level.
::Ji::Be certain to place tile fl'ont s/irlilce of tile door 3" or
mole back fl'oln tile countertop edge to avoid accidental
tipping of tile appliance ill normal usage.
_: Do not operate this appliance if it has a dalnaged power
cord or plug, if it is not working properly or if it has
been damaged or dropped.
::Ji::Do not cover or block any openings on the appliance.
::Ji::Lrse this appliance only fin" its intended use as described
ill this inanual. Do not use corrosive chenficals or wq)ols
ill this appliance. This microwave oven is specifically
designed to heat, di T or cook food, and is not intended
fi)r laboratory or industlJal use.
!i_ This lnicrowave oven is not approved or tested fi)I"
I/la IJne rise.
iJi::To reduce tile risk of fire ill tile oven cavity:
-- Do not overcook fix)& Careflllly attend appliance
when papei; plastic or other combustible materials are
placed inside the oven while cooking.
-- ]_elnove wire twist-ties and metal handles fl'oln paper or
plastic containei_ befin'e placing them ill tile oven.
-- Do not use tile oven for storage pull)oses. Do not leave
paper products, cooking utensils or food ill the oven
when not ill use.
-- Do not pop popcorn ill wmr microwave oven unless ill
a special llli('I'Ol_;Ive pop('oYn a('cessoI'}' or [lnless VO/1 [1se
popcorn labeled fin" use ill microwave ovens.
-- If materials inside tile oven ignite, keep tile oven door
closed, turn tile oven off and disconnect tile power
cord, or shut off power at tile fllse or circuit breaker
panel. If the door is opened, the fire may spread.
-- Do not use tile Sensor Features twice ill succession
on the same todd portion. If toDd is undercooked after
the fii_t countdown, use//]life COOKtor additional
cooking time.
SAVETHESEINSTRUCTIONS
2
ge.com
IMPORTANTSAFETYINSTRUCTIONS.
_: _4]_en using the convection or c()mbination cooking
fimcdons, both the outside and inside of the oven will
become hot. _M\va)_s use hot pads to remove containei_
ot fl)od and accessories such as the oven shelf.
_: ThermometerIDo not use regular cooking or oven
theY/lloi/leteiN when cooking bv illicrowave or
combination. The metal and mercury in these
thei_nometei_ could cause arcing and possible damage
to the ()veil. Do not tlse a [heY/lloil/eter in [0od VO/l ai'e
microwaving unless the theimometer is designed or
i'ecoi/lillended [k)i" tlse in the ii/icrowave ()veil.
::Ji::Do not clean with metal scouting pads. Pieces can burn
off the pad and touch electrical parts invoMng risk oI
electric shock,
::_i::Do not store }lIIV IllateIJals, other [h}ln o/II" i'ecoi//illended
accessoiJes, in this ()veil when not in/ise.
N
_: Do not store this appliance outdooi_. Do not use this
product near watei_fi)r example, in a wet basement,
near a swimming pool, near a sink or in similar locations.
::Ji::Kee I) power cord away ti'om heated surti_ces.
::J?::Do not ilnmei_e power cord or plug in water
_: Do not let power cord hang over edge of table or
Co/InteI;
Do not mount this appliance over a sink.
Do not I//o/Int the inicrowa\'e ()veil over or near any
portion of a heating or cooking appliance.
Do not store anything directly on top of tile microwave
()veil s/irtilce when tile microwave ()veil is in operation.
Do not operate any heating or cooking appliance
beneath this microwave oven.
See door surti_ce cleaning instructions in tile Care and
cleaningofthemicrowave ovensection of this manual.
This appliance must only be serviced b)' qualified service
pei_onnel. Contact nearest authorized seiMce ti_cilitv fi)r
examination, repair or ac!jusnnent.
_s with any appliance, close supervision is necessary
when used by children.
Some products such as whole eggs and sealed containei_--
fi)r example, closed jinx--are able to explode and should
not be heated in this m icr()wave oven. Such use (ff tile
microgroove oven (_)uld Iesult in iqjm v
SAVETHESEINSTRUCTIONS
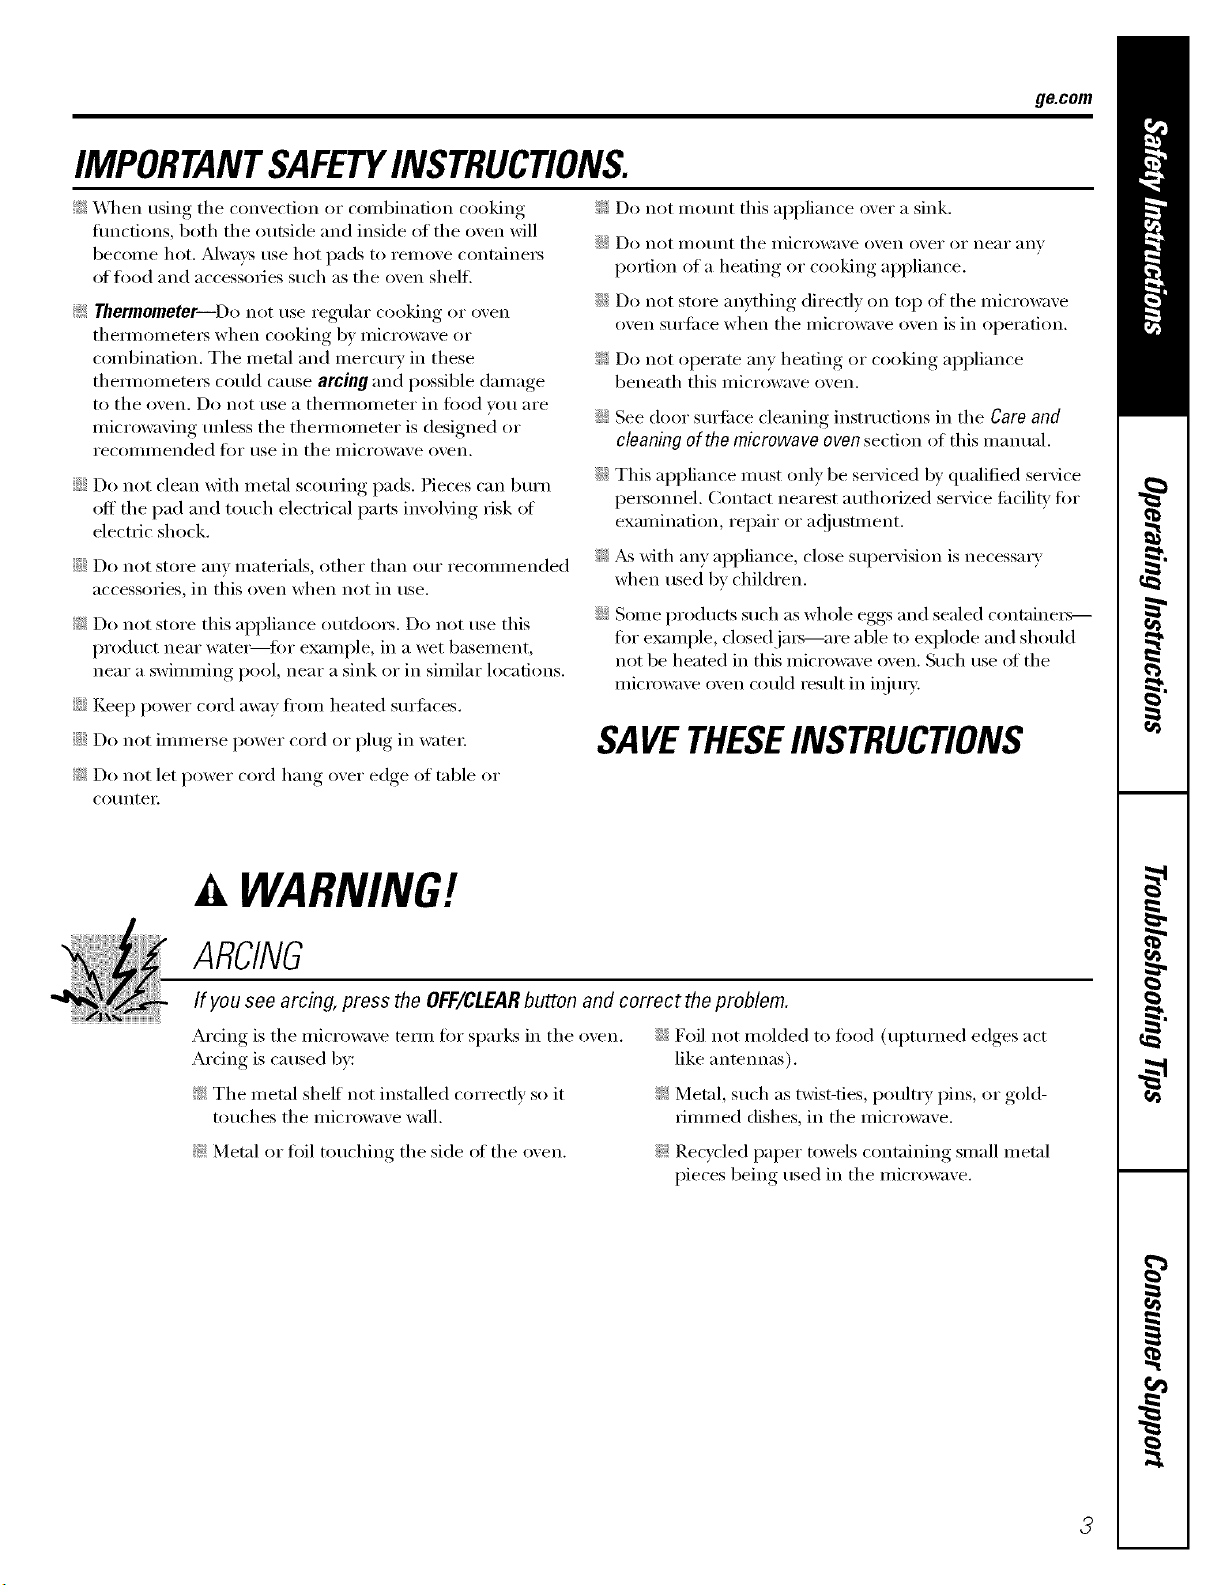
WARNING!
ARCING
If you see arcing press the OFF/CLEARbutton and correct the problem.
Arcing is tile microwave tem_ for sparks in tile oven. ::Ji::Foil not molded to fi)od (upturned edges act
Arcing is caused by: like anmnnas).
_: The metal shelf not installed correctly so it _: Metal, such as twist-ties, poulti T pins, or gold-
touches tile microwave wall. rimmed dishes, in tile microwave.
_: Metal or fi)il touching tile side ot tile (wen. _: Rec)'cled paper towels containing small metal
pieces being used in tile microwave.
IMPORTANTSAFETYINSTRUCTIONS.
READALLINSTRUCTIONSBEFOREUSING.
[, WARNING!
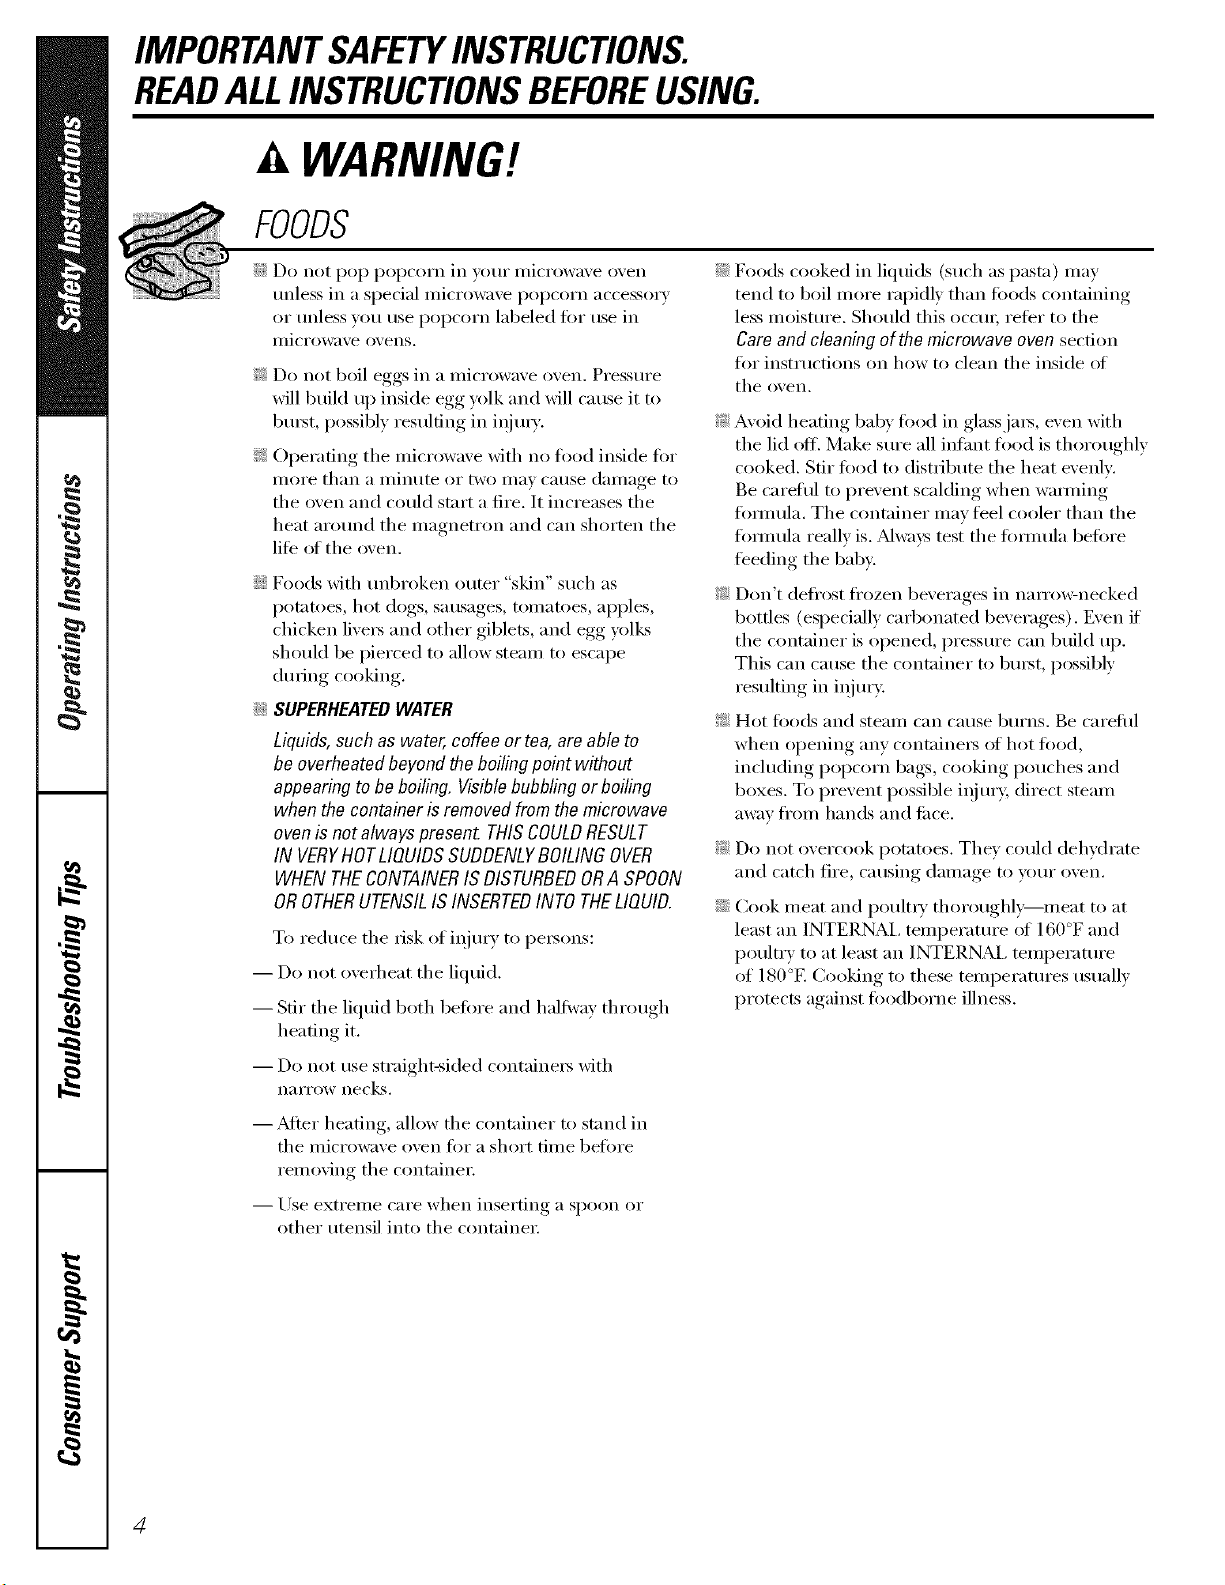
FOODS
Do Ilot pop l)Ol)COI'II iIl v()/lI" i//ici'owave oveil
unless in a special mi(Towave i)op('orn accessory
or unless you use I)op('orI_ labeled fi)r use in
illici'ow;ive oveiis.
_: Do not boil eggs in a nficrowave oven. Pressure
will build tlI) inside egg yolk and will cause it t()
bm_t, possibly resulting in iqimy.
_: Operating tile microwave with no fl)od inside for
IIlOI'e thai1 a II/illtlte oi" two II/aV Catlse clai/lage to
tile oven and could start a fire. It increases tile
heat around tile magnetron and can shorten tile
life ot the oven.
Foods with unbroken outer "skin" such as
potatoes, hot clogs, sausages, tomatoes, apples,
chicken livex_ and other giblets, and egg )_l!<s
should be pierced to allow steam to escape
(hli'illg cookillg.
SUPERHEATEDWATER
Liquids, such as water, coffee ortea, are able to
be overheated beyond the boiling point without
appearing to be boiling. Visible bubbling or boiling
when the container is removed from the microwave
oven is not always present THIS COULDRESULT
IN VERYHOT LIQUIDS SUDDENLYBOILING OVER
WHEN THECONTAINER IS DISTURBED ORA SPOON
OROTHERUTENSIL IS INSERTED INTO THELIQUID.
To reduce tile risk of iqjm T to pe_ons:
-- Do not overheat tile liquid.
-- Stir tile liquid both befi)re and halfway through
heating it.
-- Do not use straight-sided ('ontaine_ with
II_l IT( )W ilecks.
::Ji::Foods cooked in liquids (such as pasta) may
tend to boil more rapidly than fi)ods containing
less moisture. Should this occm; reter to the
Care and cleaning of the microwave oven section
fi)r instructions on how to clean tile inside of
tile oven.
_: Avoid heating baby tood in glassja_s, even with
the lid ott Make sure all infimt tood is thoroughly
cooked. Stir tood to distribute the heat evenly:
Be careflfl to prevent scalding when wamfing
fi)mmla. Tile container may feel cooler than the
fi)mmla really is. _Mwavs test tile fi)mmla befl)re
feeding tile baby.
_: Don't defl'ost fl'ozen beverages in nan'o_mecked
bottles (especially carbonated beverages). Even if
the container is opened, pressure can build ill).
This can cause the container to built, possibly
resulting in iqjm T
_: Hot fi)ods and steam can cause burns. Be careful
when opening any containe_ (ff hot fi)od,
including popcorn bags, cooking pouches and
boxes. To prevent possible iqil-> direct steam
away fl'om hands and tilce.
_: Do not overcook potatoes. Tile)' could dehydrate
and catch fire, causing damage to u)ur oven.
::Ji::Cook meat and poult_ T thoroughl}_meat to at
least an INTERNAl, mmperamre of 160°F and
poultry to at least an INTERNAl, temperature
of 180°E Cooking to these temperatures usually
protects against fi)odborne illness.
--_Mter heating, allow tile container to stand in
the microwave oven fin _a short time befin'e
removing the container.
-- Use extreme care when inserting a spoon or
other utensil into tile containe_:
4
g_com
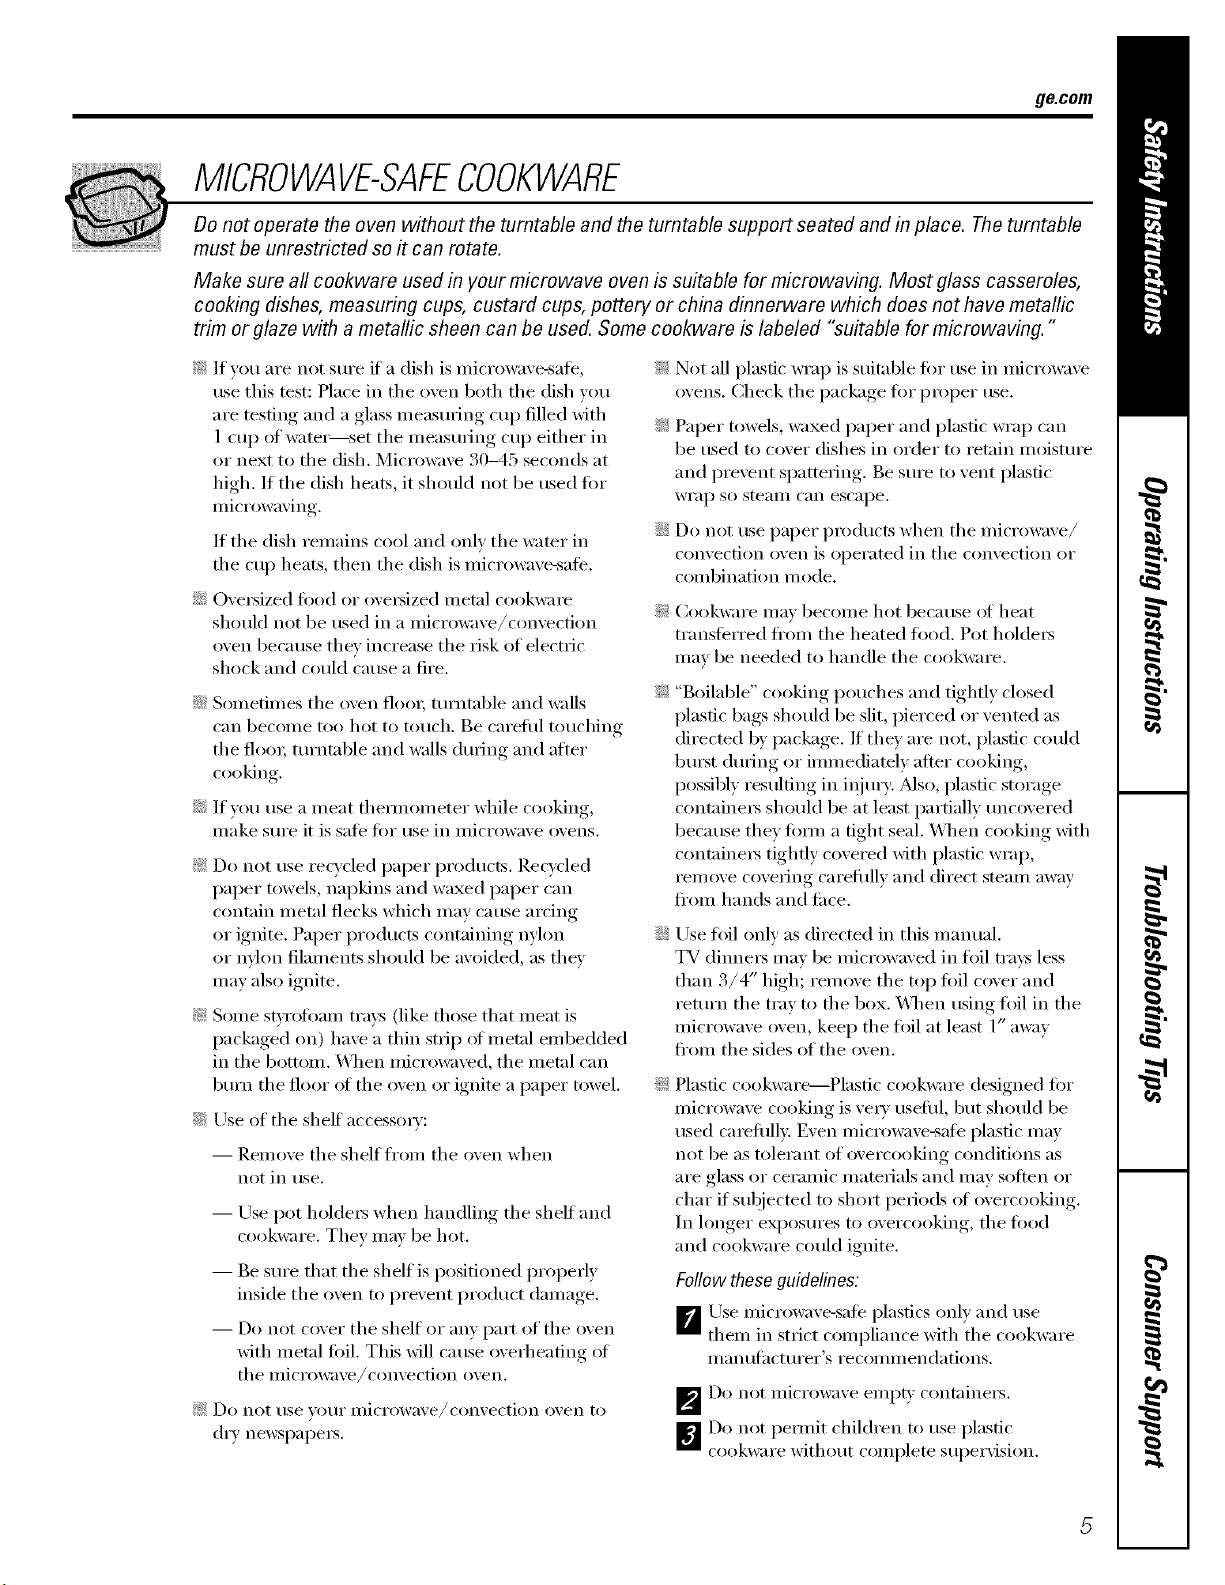
MICROWAVE-SAFECOOKWARE
Do not operate the oven without the turntable and the turntable support seated and in place. The turntable
must be unrestricted so it can rotate.
Make sure all cookware used in your microwave oven is suitable for microwaving. Most glass casseroles,
cooking dishes, measuring cups, custard cups, pottery or china dinnerware which does not have metallic
trim or glaze with a metallic sheen can be used. Some cookware is labeled "suitable for microwaving."
_: If you are not sure if a dish is microwave-sate,
use this test: Place ill tile oven both tile dish you
are testing and a glass ineasulJng cup filled with
1 cup of watei_set tile measuring cup either ill
or next to the dish. Microwave 30-45 seconds at
high. If the dish heats, it should not be used tor
micr()waving.
If tile dish remains cool and only tile water ill
tile cup heats, then tile dish is microwave-sale.
::Ji::OveI_ized lend or o\'ei_ized metal cookwam
should not be used ill a micro_m'e/convection
oven because they increase tile risk of electiic
shock and could cause a fire.
::Ji::Sometimes tile oven flooi; turntable and _:dls
can become too hot to touch. Be careful touching
tile flora; turntable and _:dls during and alter
cooking.
::Ji::If you use a m eat themlom eter while cooking,
Ill_lke S/lI'e it is S_l][_ l()I" rise in illici'owave ovens.
_: Do not use recycled paper products. Recvcled
paper towels, napkins and waxed paper can
contain metal flecks which may cause arcing
or ignite. Paper products containing nylon ::Ji::
or nylon filalnents should be avoided, as they
Inay also ignite,
_: Seine stvrofinun ti'm:s (like those that ineat is
packaged on) have a thin strip of metal embedded
ill tile bottom. _4]len microwaved, tile metal can
burn tile floor of tile oven or ignim a paper towel. _:
::Ji::Use of the shelf accessmw:
-- Remove tile shelf fl'om tile oven when
not ill use.
-- Use pot holdeI_ when handling tile shelf and
cookware. They lll}lV be hot.
-- Be sure that tile shelf is positioned properly
inside tile oven to prevent product dmnage.
-- Do not cover tile shelf Ill"any part of tile oven
with metal foil. This will cause overheating of
tile illiCi'Oi_;ive/convection oven.
_; Do not rise VOtlr illiCi'Owave/convection oven to
dry newspapeI_.
_: Not all plastic wrap is suitable fin" use ill micrm_:lve
()\'ells. Check tile package tor proper use.
_: Paper towels, waxed paper and plastic wrap can
be used to cover dishes ill order to retain moisture
and prevent spattering. Be sure to vent plastic
WI'}l I) SO steaIll can escape.
::J?::Do not use paper products when tile microwave/
convection oven is operated ill tile convection or
COillbination i//()de.
Cookware may become hot because (ff heat
transti_rred fl'on/the heated toed. Pot holdeis
may be needed to handle the cookware.
"Boilable" cooking pouches and tightly closed
plastic bags should be slit, pierced or vented as
directed by package. If tile)' are not, plastic could
bm_t during or immediamly alter cooking,
possibly resulting ill illjury: Also, plastic storage
containei_ should be at least partially uncovered
because they titan a fight seal. _._]/en cooking with
containeis tightly covered with plastic wrap,
remove covering carefully and direct steam away
fi'onl hands and tilce.
Use fllil only as directed ill this manual.
TV (linneI_ may be microwaved ill toil trays less
than 3/4" high; remove tile top toil cover and
return tile tray to tile box. _._]/en using foil ill tile
microwave oven, keep the toil at least 1" away
from tile sides of tile oven.
Plastic cookware--Plasfic cookware designed for
microwave cooking is ve U useflll, but should be
used camfllll> Even microwave-sate plastic may
not be as tolerant of overcooking conditions as
aI'e glass or ceI'allliC IllatelJals and Ill}IV solten or
char if subjected to short periods of overcooking.
Ill longer exposures to overcooking, tile fi)od
and cookware could ignite.
Follow these guidelines:
_Use microwave-sate plastics only and use
them ill strict compliance with tile cookware
Ill a n [/[;I ct [II'eI"S i'e COll/illen datio ns.
_Do not illici'owa;e ei/lpt}, cont_linei3.
_Do not peru/it children to use plastic
cookware without complete supervision.
IMPORTANTSAFETYINFORMATION.
READALLINSTRUCTIONSBEFOREUSING.
WARNING!
GROUNDINGINSTRUCTIONS
WARNING:1,,properuseofthegroundingplugcanresultinariskofelectricshock.
This appliance must be grounded. In tile event (ff an
electrical short circuit, grounding reduces tile risk _ff
electric shock by providing an escape wire fbr tile
electric current,
This appliance is equipped Mth a power cord having
a grounding wire Mth a grounding plug. Tile plug
must be plugged into an outlet that is properly
installed and grounded.
Consult a qualified electrician or service technician
if tile grounding instructions are not completely
trade,stood, or if doubt exists as to whether tile
appliance is properly grounded.
If tile outlet is a standard 2-prong wall outlet, it is
your personal responsibility and obligation to
have it replaced with a properly grounded 9_-prong
wall outlet.
Do not tinder _lliV cii'C/llilStnnces cut or i'eillove tile
third (ground) prong from tile power cord.
We do not recommend using an extension cord
with this appliance. If tile power cord is too short,
have a qualNed electrician or service technician
inst;fll an Otlflet neai" tile appliance. (See EXTENSION
CORDSsection.)
For best operation, plug this appliance into its
own electrical outlet to prevent flickering of lights,
bl_wing of fllse or tripping of circuit breaker:
NOTE"Do not use an adapter plug with this
appliance.
ge.com
EXTENSIONCORDS
A short power supply cord is provided to reduce the risks resulting fl'om becoming entangled in or
tripping over a longer cord.
Extension cords may be used if w)u are careflfl in using them.
If an extensioncordis used--
_The marked electrical rating of the extension cord should be at least as great as the electrical rating
of the appliance;
_The extension cord ii/t/st be a grotmding-la )e 3-wi_e c(nd and it ii/t/st be plugged into a 3-slot outlet
, , ,'1
_The extension cord should be arranged so that it will not drape over the cotmtertop or tabletop
where it can be pulled on b) children or tripped oxer mfintenfionally,
lf)ou use an extension cord, the interior light may flicker and the blower sotmd may vary when the
microwaxe oxen is on. Cooking times may be longe_; too.
READANDFOLLOWTHISSAFETYINFORMAtiONCAREFULLY.
SAVETHESEINSTRUCTIONS
7
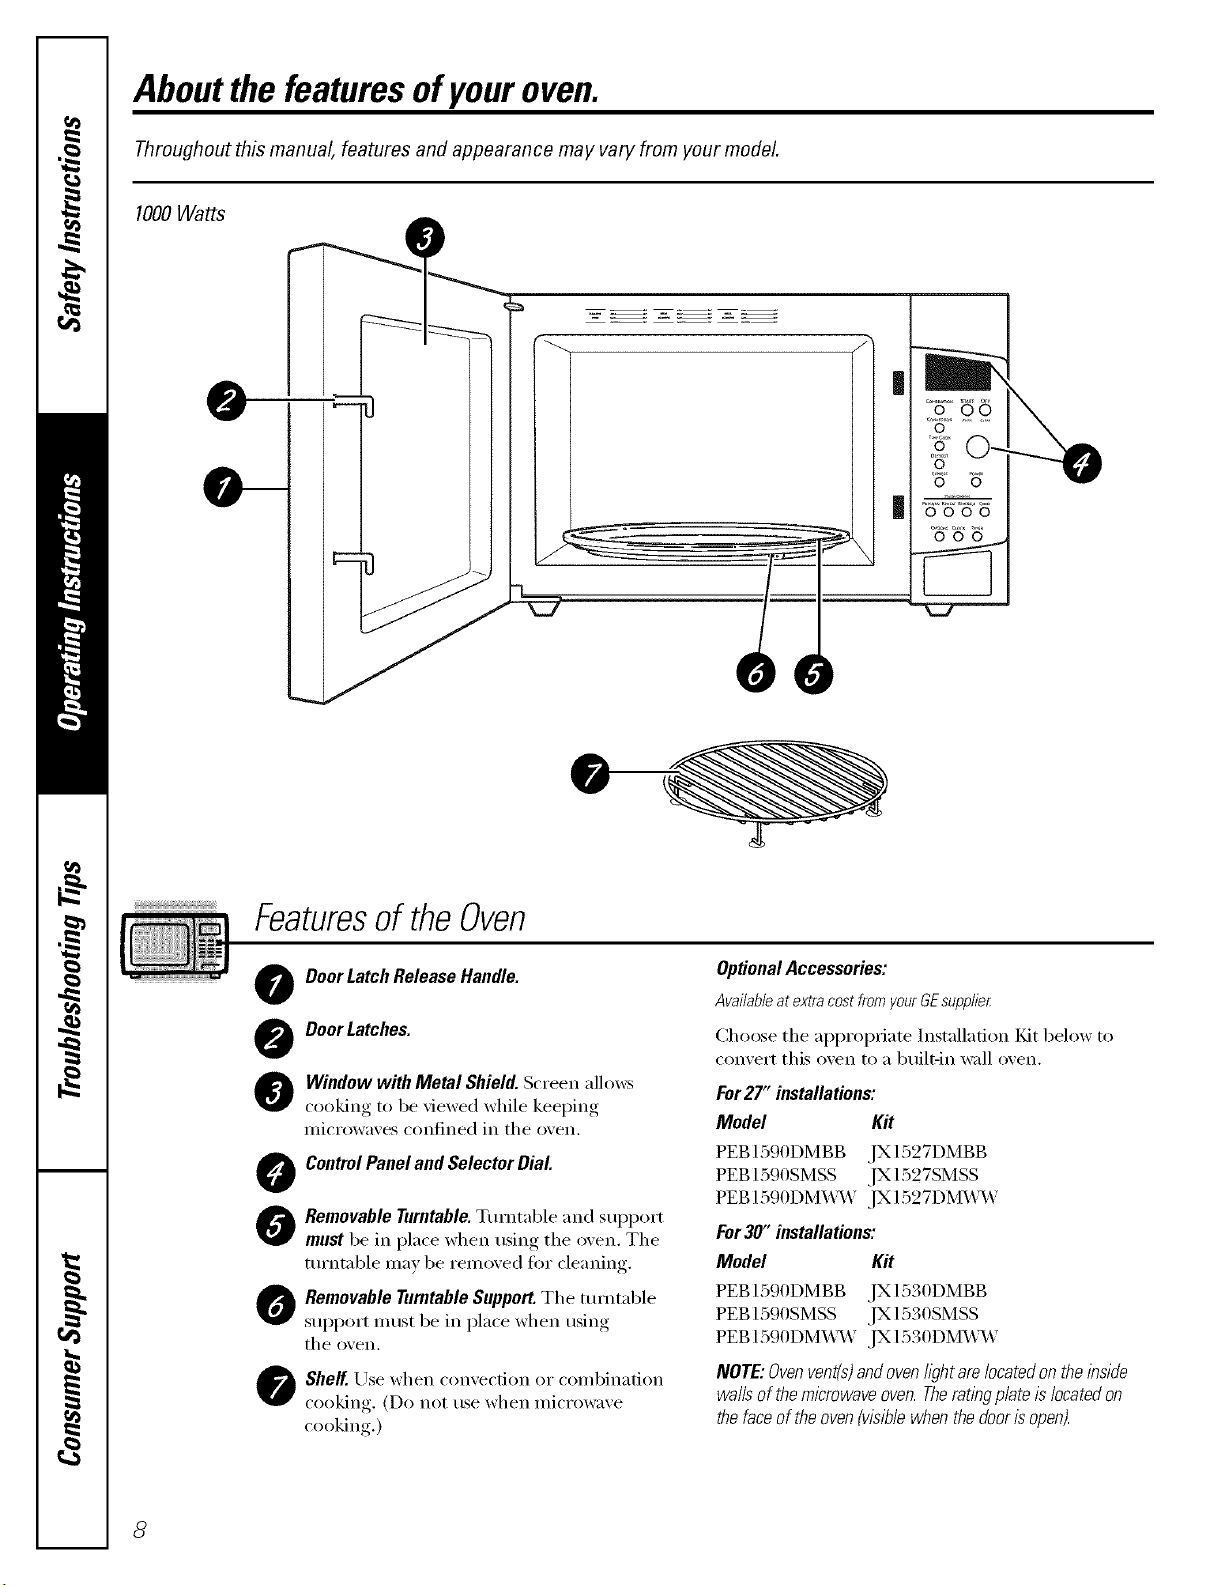
Aboutthe featuresofyouroven.
Throughout this manual, features and appearance may vary from your model.
1000Watts
0
0 0
Featuresof theOven
0
0
@
O
0
0
0
Door Latch Release Handle.
DoorLatches.
Window with Metal Shield. Screen allows
cooking to be viewed while keeping
microwaves confined in tile oven.
ControlPanel and Selector Dial
Removable Turntable.Turntable and support
must be in place when using the oven. Tile
ttu'ntable may be removed for cleaning.
Removable Turntable Support.Tile turntable
support must be in place when using
tile o'¢en.
Shelf. Use when convection or combination
cooking (Do not use when micmwaxe
cooking.)
OptionalAccessories:
Availableatextracostfrom_/ourGEsupplier
Choose tile appropriate Installation Fdt below to
convert this oven to a built-in wall oven.
For27" installations:
Model Kit
PEB1590DMBB ,IX1527DMBB
PEB 1390SMSS JX 1327SMSS
PEB 1590DM_M' JX 1527DM_M'
For30" installations:
Model Kit
PEB1590DMBB ,IX1530DMBB
PEB 1590SMSS ,IX 1530SMSS
PEB 1590DM_M' ,IX 1530DM_4M'
NOTE: Ovenvent(s)andoven l/_?htarelocated on the inside
waftsof the microwave oven.Therating plateis locatedon
the faceof the ovenMsib/e when the dooris open).
8
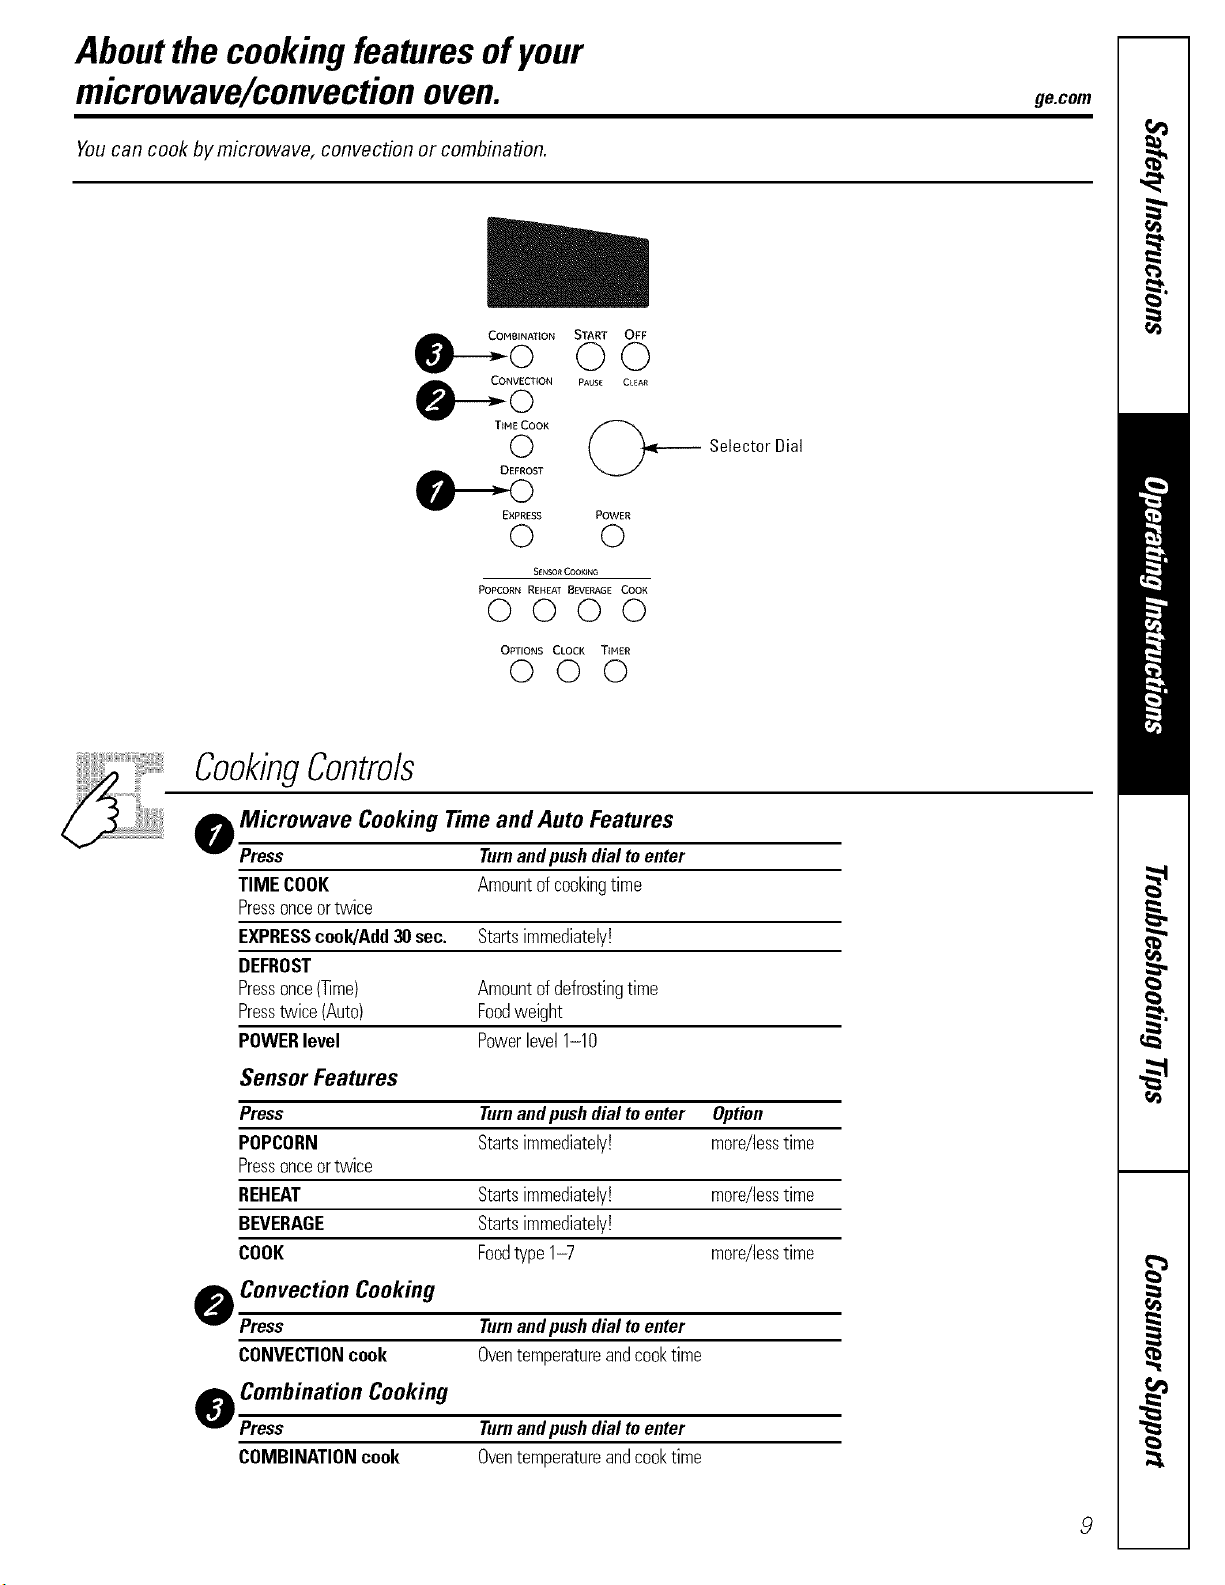
Aboutthe cookingfeaturesofyour
microwave/convectionoven. gecom
Youcan cook by microwave, convection or combination.
m
COIqBINAT{ON START OFF
©©
CONVECTION PAUSE Ct._AR
T_HECOOK
©
DEFROST
,_Selector Dial
EXPRESS POWER
© ©
SENSO_CO0_ING
POPCORN REHEAT B_VERAGE COOK
0000
OPTIONS CLOCK TINER
©©©
CookingControls
o Microwave Cooking Time and Auto Features
Press Turnandpushdialtoenter
TIMECOOK
Pressonceortwice
EXPRESScook/Add30see.
DEFROST
Pressonce(]]me)
Presstwice(Auto)
POWERlevel
Sensor Features
Press
POPCORN
Pressonceortwice
REHEAT
BEVERAGE
COOK
o Convection Cooking
Press
CONVECTIONcook
o Combination Cooking
Press
COMBINATIONcook
Amountofcookingtime
Startsimmediately!
Amountofdefrostingtime
Foodweight
Powerlevel1-10
Turnandpushdialtoenter Option
Startsimmediately! more/lesstime
Startsimmediately! more/lesstime
Startsimmediately!
Foodtype1-7 more/lesstime
Turnandpushdialtoenter
Oventemperatureandcooktime
Turnandpushdialtoenter
Oventemperatureandcooktime
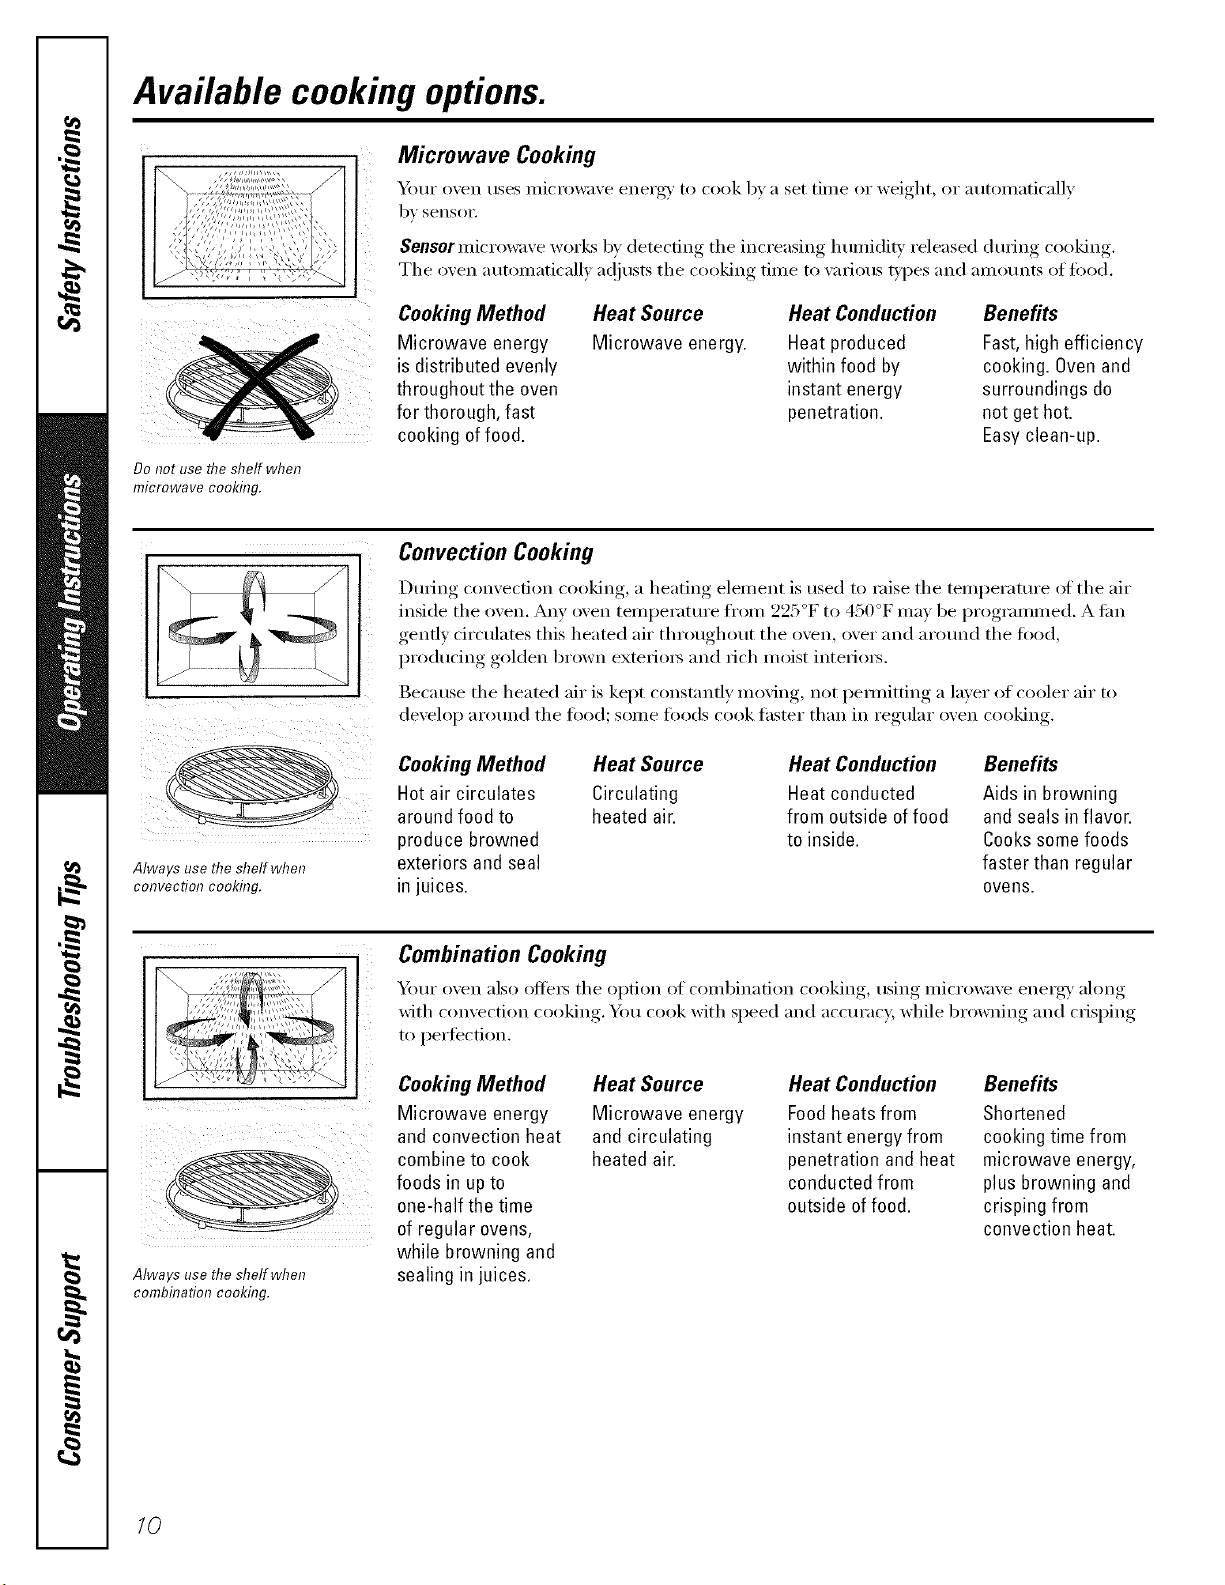
Available cooking options.
Microwave Cooking
_)[lI" oven rises illi('rowave eilei'g_' 1o (-ook bva set [illle or weight, or autoxnaticallv
by sensoi:
Sensor microwave works by detecting the increasing lmmiditv released during cooking.
The oven automatically a(!iusts the cooking time to various types and amounts of toed.
Cooking Method
Microwave energy
is distributed evenly
throughout the oven
for thorough, fast
cooking of food.
Heat Source
Microwave energy.
Heat Conduction
Heat produced
within food by
instant energy
penetration.
Benefits
Fast,high efficiency
cooking. Ovenand
surroundings do
not get hot.
Easyclean-up.
Do not use the shelf when
microwave cooking.
Always use the shelf when
convection cooking.
Convection Cooking
LIm_ing, come(-tion cooking,, a heating, element....... is used to raise the temi)eratm'e of the air
inside the oxen. Any oxen temperatm'e from 225°F to 450°F me) be programmed. Atim
genfl) circulates this heated air throughout the o_,en o_,er and around the food
producing golden brown exterio_ and rich moist interio_.
Because......... the heated air is keI)t constnnfl_, mo_,ing, not I)emfitting, a liner, of cooler air to
develop around the toocl; some toocls cook thsmr than in regular oven cooking.
Cooking Method Heat Source
Hotair circulates Circulating
around food to heated air.
produce browned
exteriors and seal
in juices.
Heat Conduction
Heat conducted
from outside offood
to inside.
Benefits
Aids in browning
and seals in flavor.
Cookssomefoods
faster than regular
ovens.
ill! i
Always use the shelf when
combhTation cooking.
Combination Cooking
Yimr o_en also ofle_ the option of combination cooking using mi(rowa_e energ_ along
with comection cooking., Y(m cook with speed and accm'acy, while 1)rowning, and cris,l)im,
to pertection.
Cooking Method Heat Source Heat Conduction Benefits
Microwave energy
and convection heat
combine to cook
foods in upto
one-half the time
of regular ovens,
while browning and
sealing in juices.
Microwave energy
and circulating
heated air.
Foodheats from
instant energy from
penetration and heat
conducted from
outside of food.
Shortened
cooking time from
microwave energy,
plus browning and
crisping from
convection heat.
/0
Aboutthe timeandautomicrowave features, gecom
TiME COOK
©
TURN TOSELECT
PUSH TO ENTER
(3
Time Cook
Time Cook I
_kdl()ws VOEI to IIIiCI'OW;IVe tk)I" anv tilIle
between 15 seconds and 95 minutes.
Power level 10 (High) is autonmficall) set,
but you may change it fin" more flexibility.
_ Press the FIME COOKbutton.
_'_ Turn the dial to set the cook time and
press the dial to entex:
[]Change power lexel ifyotl don't want
flfll I)owex; (Press POWER.Turn the dial
to select, Press the dial to entex;)
_] Press the START/PAUSEbutton to start
cooking,
You may open the door (hwJng Time cook
to check the food. Close the door and press
START/PAUSEto restnn e c(>(>king
Time Cook fl
I,ets v(m change power levels automatically
during cooking. Here's how to do it:
D'_ Press the TIME COOKbutton.
_'_ Turn the dial to set the fixst cook time
and press the dial to entex:
Chan(*e the lower level if',otl don't
E] want fill] l)O_,ieI: (Press POWER. Turn tile
dial to select. Press the dial to enter:)
D Press the TIME COOKbtKton again.
B Turn the dial to set the second cook
time and press the dial to entex:
ClEan(*e the lower level if_ou don't
want filll l)O_',ieI: (Press POWER. Turn tile
dial to select. Press the dial to enter:)
_"_ Press the START/PAUSEbutton to start
cooking
At the end ot Time Cook I, Time Cook II
COtEriEs down,
EXPRESS
©
TURN TO SELECT
PUSH TO ENTER
(3
Express Cook
Thisis a quick way toset and startcookingin 30secondblocks eachtimetheEXPRESSbutton
is pressed.
The power level will automatically be set at lO and the oven will start immediately,
The power level can be changed as time is cotmfing down. Press the POWERbtltton,
tm'n the dial and press to enter.
EXPRESS
©
Add 30 Seconds
!;> Each time the EXPRESS butt(m is p_ essed, it will add 30 seconds t(> any c(>(>king time
cotmting down, tmtil the maximtm cooking time is reached.
11
Aboutthe timeandautomicrowave features.
DEFROST
©
TURN TO SELECT
PUSH TO ENTER
C>
time Defrost
Use Time Defrost to defrost fin"a selected
length of time.
_r_ Press the DEFROSTbEKton.
_'_ Turn the dial to select the time )ou
want. Press the dial to enter:
[]Press the START,/PAUSEbEKtonto start
defrosting,
D Turn the todd oxer if the oxen signals
TURN FOODOVER.
Power level is automatically set at 3, but can
be changed. You can defl'ost small items
Eluickly by raising the power level after
entering the time. Power level 7 cuts the
total deti'osting time in about halt:, power
level 10 cuts the total time to approximately
1/3. Howe;'e_; fi)od will need more
fl'eEluent attention than usual.
A dull tlEumping noise Inav be heard
dm_ing defrosting. This is nomml when
oven is not operating at High poweI;
Defrosting Tips
::Ji::Foods fl'ozen in paper or plastic can be
defrosted in the package. Closed packages
shotfld be slit, i)ie_ved or vented AFTER
tood has partially defrosted. Plastic storage
containers shotEld be i)artially tmcovered.
::Ji::Family-size, prepackaged ti'ozen (limm_
can be deti'osted and microwaved. If the
fl)od is in a fi)il containe_; transti_r it to a
microwave-sale (lislE.
_: Foods that spoil easily shotfld not be
allowed to sit otEt fi)r more than one IEOEU"
atter defl'osting. Room temperature
promotes the gr(m_h of hamEfifl bacteria.
_: For inore e;'en defl'osfing of linger fi)ods,
such as roasts, use Auto Defrost Be stEre
lmge meats are completely deti'osted
befl)re cooking.
::Ji::When defl'osted, tood shotfld be cool
but softened in all areas. If still slightly icy,
return to the microwave ve_y briefly, or
let it stand a tew minutes.
DEFROST
O
TURN TO SELECT
PUSH TO ENTER
O
Auto Defrost
Use Auto Defrost for meat, potfltr)and fish.
Use TimeDefrost fi)r I/lOSt other frozen li)ods.
Auto Defrost automatically sets the
deli'osting times and power levels to give
even defl'osfing restflts fin" meats, potflt_ y
and fish.
iJi::Remove meat fl'om package and place
on microwaxe-satb (lislE.
D'_ Press the DEFROSTbutton twice.
_'_ Turn the dial to the tood weight,
using the Comex_ion Gtfide at right.
For exaEnple, dial 1.2 fin" 1.2 potmds
(l potmd, 3 oz.). Press the dial to enter:
B Press the START/PAUSEbutton to start
defl'osfing.
D Turn the fi)od oxer if the oxen signals
TURN FOODOVER.
_: Remove defl'osted meat or shield wam_
areas with small pieces (ff fl)il.
::Ji::_Mter defl'osting, most meats need to
stand 5 minutes to complete deli'osting.
I,mge roasts shotfld stand fin" about
30 minutes.
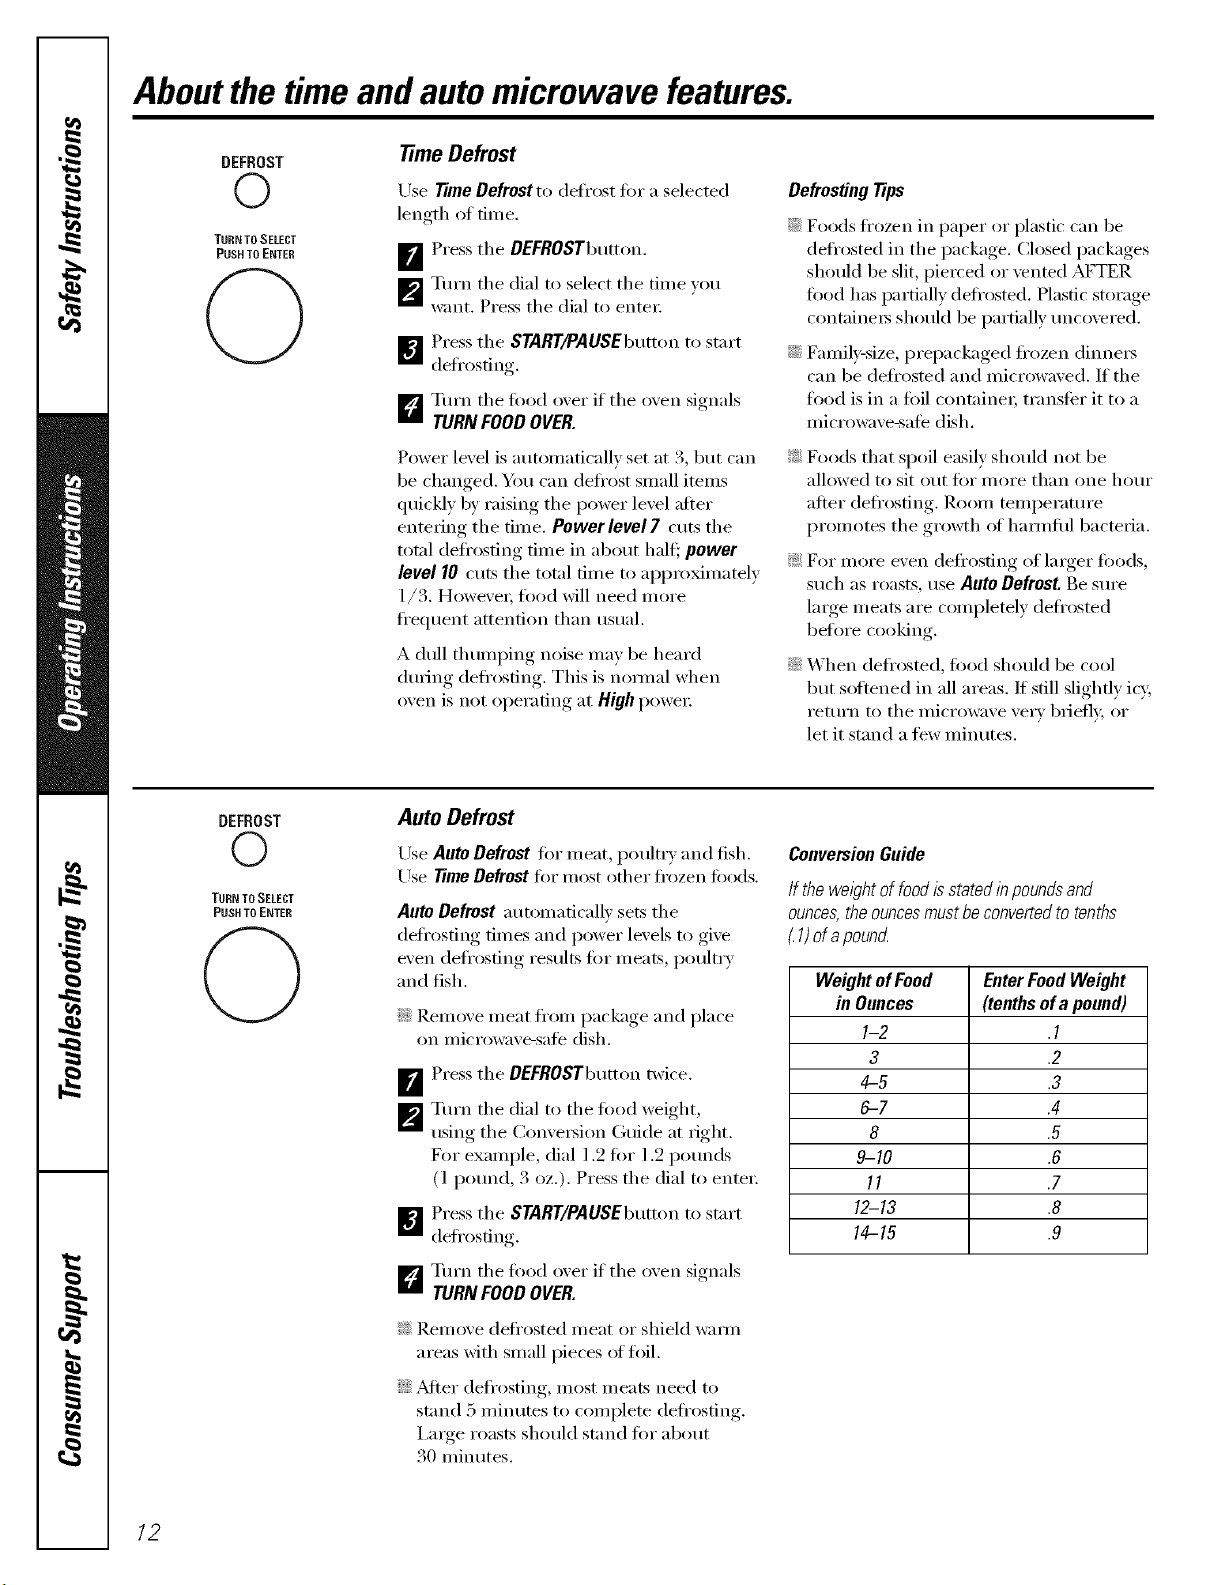
ConversionGuide
If thewel)htoffoodisstatedinpoundsand
ounces,theouncesmustbeconvertedtotenths
1)ofapound
WeightofFood EnterFoodWeight
in Ounces (tenthsofa pound)
1-2 .1
3 .2
4-5 .3
6-7 .4
8 .5
9-10 .6
11 .7
12-13 .8
14-15 .9
12
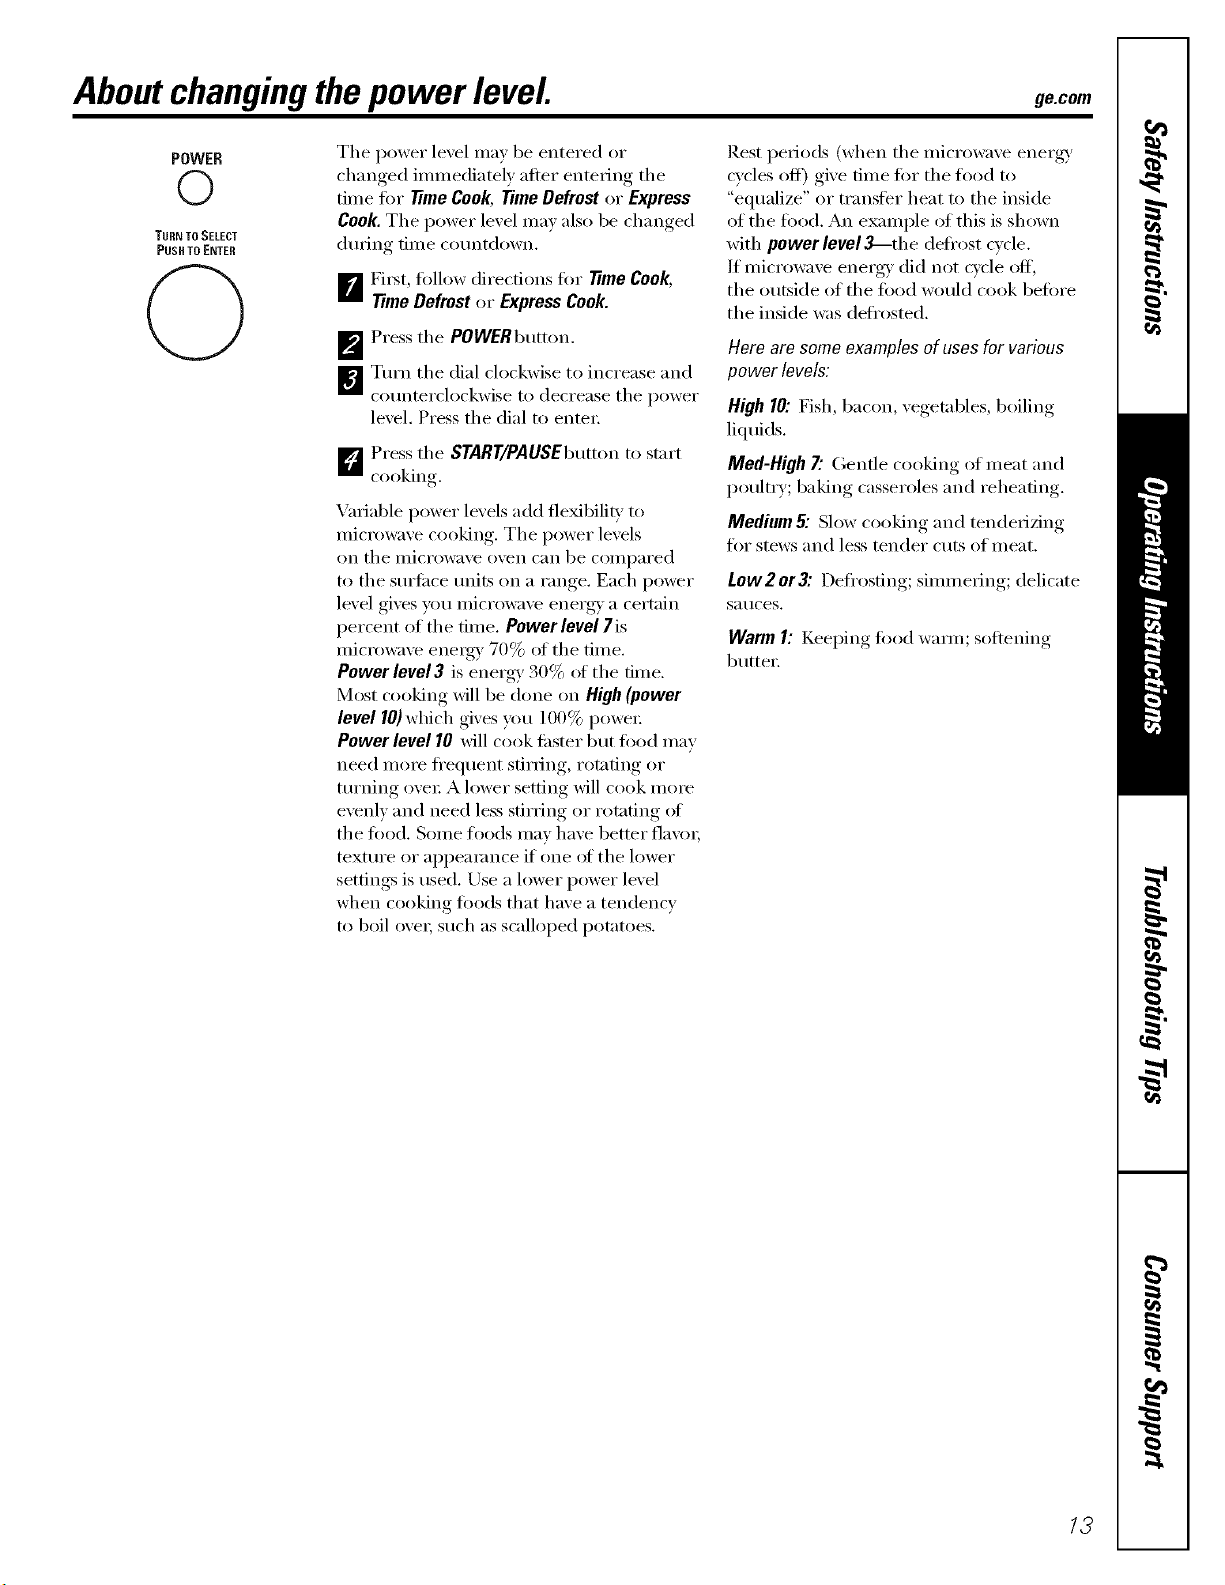
Aboutchangingthepower level ge.com
POWER
©
TURN TO SELECT
PUSH TO ENTER
C)
The power level may be entered or
changed immediately after entering the
time fiw time Cook, Time Defrost or Express
Cook.The power level may also be changed
dtEring time CoEmtdown.
_r_ Fi_t, fi_llow directions fiw Time Cook,
TimeDefrost or Express Cook.
_'_ Press the POWERbutton.
W]Turn the dial clockwise to increase and
coEmterclockwise to decrease the power
level, Press the dial to enter;
D Press the START/PAUSEbutton to start
cooking
Variable power levels add tie'bill U to
micrm_m'e cooking. The power levels
on tile IllicI'O%_l\,'e ()\/ell C[lll be COilll/ared
to the stErfi_ce milts on a range. Each power
level gives you micro_\/e energy a certain
i/ercent of the time. Power level 7is
micro_lve eneigy 70% of tile time.
Power level 3 is energy 30% ot the time.
Most cooking will be done on High (power
level 10) which gives you 100% power
Power level 10 will cook fi_ster but fi_od may
need more fl'eEluent stirring, rotating or
turning over A lower setting will cook more
evenly and need less stirring or rotating ot
the fi_od. Some toods may have better fla\'m;
textm'e or appearance if one ot the lower
settings is used. Use a lower power level
when cooking fi)ods that have a tendency
to boil o\'ei; such as scalloped potatoes.
Rest periods (when the microwave energy'
cycles off) give time tot the toed to
"eElualize" or transter heat to the inside
of the t0od. An example of this is shown
with power level _--tlEe defl'ost cycle.
If microwave ener_' did not cvcle off,
the outside of the t0od would cook befiwe
the inside was deti'osted.
Hero am some examples of uses forvarious
power levels:
High 10: Fish, bacon, vegetables, boiling
liEltEids.
Med-High7."Gentle cooking of meat and
poultry; baking casseroles and reheating.
Medium& Slow cooking and tenderizing
fiw stews and less tender cuts of meat.
Low2 or3: Defrosting; simmering; delicate
Sat/ces.
Warm I: KeeI)ing, fi_od warn/; softening
butte_:
13
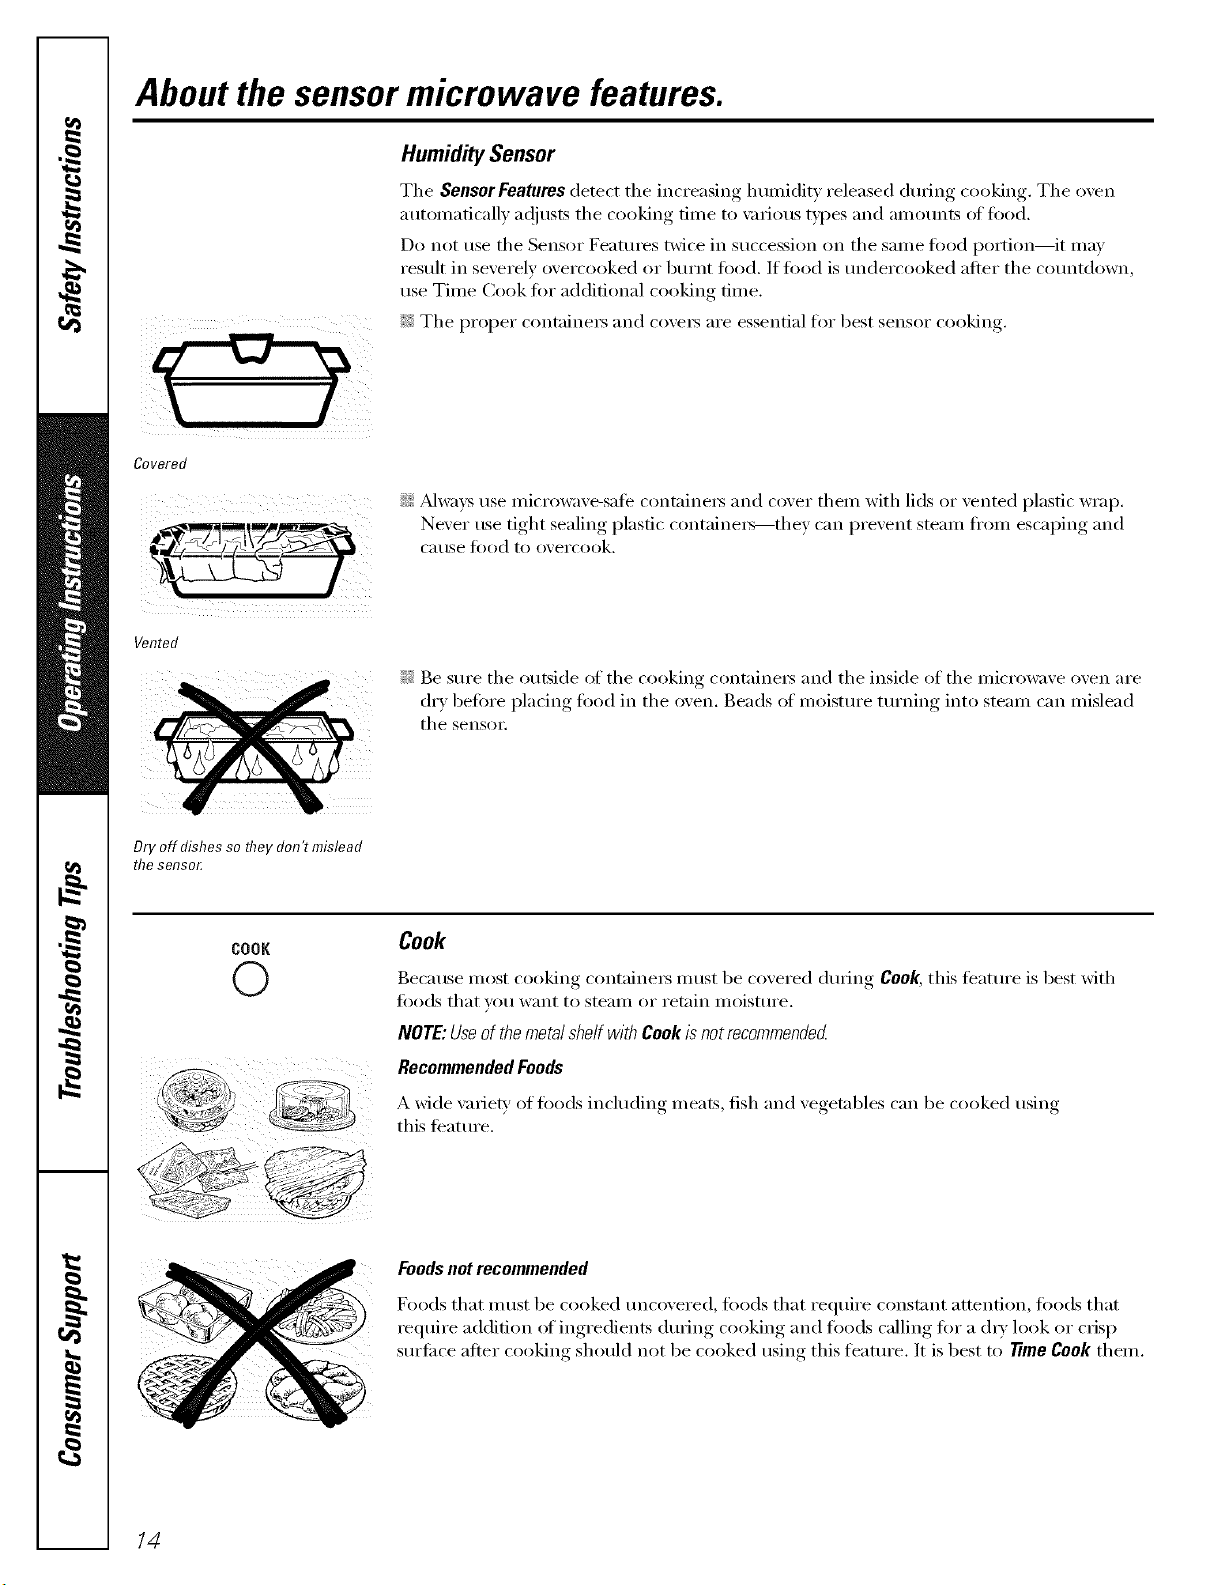
About the sensor microwave features.
Covered
HumiditySensor
Tile Sensor Features detect the increasing lmmiditv released during cooking. Tile oven
automatically a(!justs tile cooking time to \m_ious t)l)es and amounts at fi)od.
Do not use tile Sensor Features twice in succession on tile same food portion--it may
result in severely overcooked or burnt food. If toed is tmdercooked after tile co/mtdown,
use Time Cook for additional cooking time.
_;_Tile proper containe_ and cove_ are essential for best sensor cooking.
',_!'!_Mwaxs use microwaxe-sate containex_ and coxer them with lids or xented plastic wrap.
Nexer rise tight, sealino,_i)lasfic containe_--the_ can prexent steam fl'om esca, I)im"_ and
C_ltlSe _k)od to oxercook.
Vented
Dry off dishes so they don't mislead
the selTsor,
!)i: Be sure tile outside of tile cooking container5 and tile inside of tile microwaxe oxen are
drx, befiwe I)lacing, toed in tile .....oxen Beads of moistm'e tm'ning, into steam can mislead
tile sensoi i
COOK
O
Cook
Because most cooking containe_ must be covered dm_ing Cook, this teatm'e is best with
fi)ods that you want to steam or retain moistm'e.
NOTE:UseofthemetalshelfwithCookisnotrecommended
RecommendedFoods
A wide varie b' of foods including meats, fish and vegetables can be cooked using
this teature.
Foodsnotrecommended
Foods that m ust be cooked tm('_were(1, fi)ods that require constant attention, leo(Is that
require addition (ff ingredients during cooking and loads calling for a (hT look or crisp
sm'fi_ce after cooking should not be cooked using this flmture. It is best to time Cook them.
14
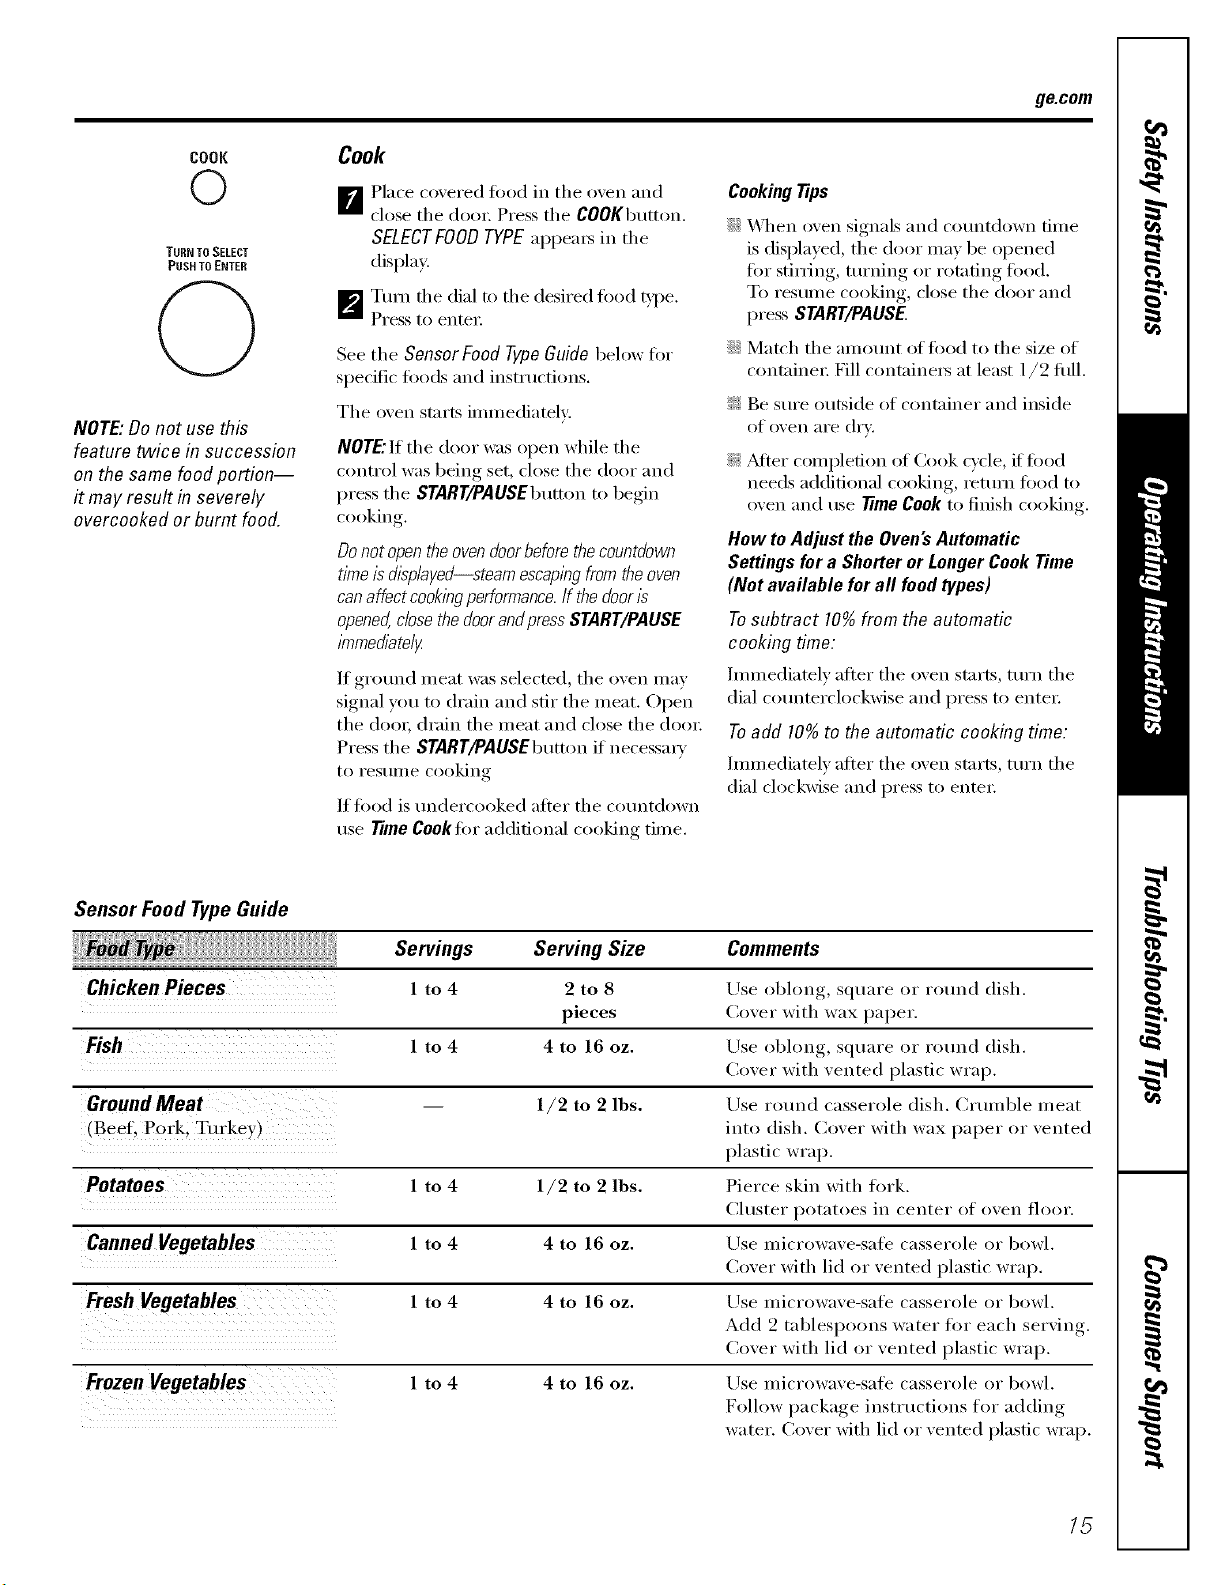
g_com
COOK
©
TURN TOSELECT
PUSH TO ENTER
NOTE: Do not use this
feature twice in succession
on the same food portion--
it may result in severely
overcooked or burnt food.
Cook
B Place co_ered fi)od in the o_en and
close the dora; Press the C00KbEKton.
SELECTFOODTYPEappeai_ in the
display.
_I_'11Turn flEe dial to the desired fi)od t}.l_e.
Press to entei;
See the Sensor Food TvPe Guide below fi)r
specific fi)ods and instructions.
The oven starts immediately:
NOTE"If the door _z_s open while the
control was being set, close the door and
press the START/PAUSEbEmon to begin
cooking.
Do not open the oven door before the countdown
time ls displayed--steam escaping from the oven
can affect cookingperformance.If the door Is
opened, close the doorandpressSTART/PAUSE
lmmedlate/g
If ground meat was selected, the oven may
signal you to drain and stir the meat. Open
the dora; drain the meat and close the dora:
Press the START/PAUSEbEmon if necessm T
1o I'eSllIlle cooking
If food is tEndercooked alier the countdown
use TimeCooktor additional cooking time.
CookingTiOs
::J)::_,_]len oven signals and cotmtdown time
is displayed, the door may be opened
for stining, tEEming or rotating food.
To restune cooking, close the door and
press START/PAUSE
::Ji::MatE'h the amotmt of fi)od to the size of
containei; Fill containei5 at least 1/2 dill.
_: Be sure outside of container and inside
of oven aI'e dI'v.
?_:f_dier compledon of Cook c)'cle, if food
needs additional cooking, rettEm food to
oven and Else TimeCookto finish cooking.
How to Adjust the Oven's Automatic
Settings for a Shorter or Longer Cook Time
(Not available for all food types)
To subtract 10% from the automatic
cooking time:
hmnediately after the oven starts, turn the
dial cotmterclockwise and press to entei:
Toadd 10% to the automatic cooking time:
hmnediatelv after the oven starts, turn the
dial clockwise and press to entei:
Sensor Food Type Guide
Servings Serving Size
Chicken Pieces 1 to 4 2 to 8
pieces
Fish 1 to 4 4 to 16 oz.
GroundMeat 1/2 to 2 lbs.
,Beef. Pork. Tul"kev )
Potatoes 1 to 4 1/2 to 2 lbs.
Canned Vegetables 1 to 4 4 to 16 oz.
Fresh Vegetables 1 to 4 4 to 16 oz.
Frozen Vegetables 1 to 4 4 to 16 oz.
Comments
Use oblong, square or round (lislE.
Cover with wax paper.
Lrse obhmg, sqtlaFe or rollnd (lislE.
Cover with vented plastic wrap.
Use rotuM casserole (lislE. Clumble ineat
into (lislE. Cover with wax paper or vented
plastic wrap.
Pierce skin with fi)rk.
Chlster potatoes in center of oven floor.
Use microwave-sati _ casserole or bowl.
Cover with lid or vented plastic wrap.
Use Inicrowave-safe casserole or bowl.
Add 9 tablespoons water fi)r each serving.
Cover with lid or vented plastic wrap.
Use microwave-sale casserole or bowl.
Follow package insti uctions for adding
wa tel'. Cover with lid or vented plastic wrap.
15
About the sensor microwave features.
POPCORN
O
Use only with prepackaged
microwave popcorn weighing
1.5to 15 ounces.
NOTE:Donot use this
feature twice in succession
on the same food portion--
it may result in severely
overcooked or burnt food.
REHEAT
O
Popcorn
To use tile Popcorn teature:
B Follow )ackaoe instructions, using
Time Cookit tile )a(kaoe is less than
1.5 ounces or larger than 3.5 ounces.
Place tile package of popcorn in tile
center of tile microwave.
_'_ Press the POPCORNbutton once or
twice. Tile oxen starts immediately.
Press once tOT a regular size (3.0 to 3.5 oz.)
bag of popcorn.
Press twice tOT a snack size (1.5 to 1.75 oz.)
bag of popcorn.
If w_u open the door while POPCORN is
displayed, an error message will appeai:
Close tile (looi; press OFF/CLEARand
begin again.
If fi)od is undercooked after tile
countdown, use Time Cook tOT additional
c()oking time.
Reheat
Hew to Adjust the Automatic Popcorn Setting
to Provide a Shorter or Longer Cook Time
If vet1 find that tile brand el popcorn you
use undeq)ops oi" oveq)ops consismnfl>
vou can add or subtract 90-30 seconds to
tile automatic popping time.
Tosubtract time:
Immediately after tile oven starts, ttli'ii tile
dial counterclockwise ti)r 20 seconds (-) less
cooking time. Press to entei: Turn again to
reduce cooking time another 10 seconds
(- -) total 30 seconds less time. Press to
enter.
Toadd time:
]illil/ediatelv alter tile oven stnrts, ttli'n tile
dial clockwise for an extra 90 seconds (+)
cooking time. Press menmi: Turn again to
add another 10 seconds (++) total 30
seconds additional time. Press to enmi:
NOTE:Donot use this
feature twice & succession
on the same food portion--
it may result in severely
overcooked or burnt food.
Tile Reheat feature reheats servings of
previously cooked toods or a plate of
lefloveI_.
B Place tile cup of liquid or coxered
fi)od in the oven, Press REHEATonce,
twice or three times, The oven starts
immediately,
Press once fi)r 1/2 to 1 fllll cup.
Press twice tOT 1 to 9 filll cups.
Press three times tOT a plate of lefloveis.
_'_ The oven signals when steam is
sensed and tile time remaining
begins counting down.
Do not open tile oven door until time is
counting down. If tile door is opened,
close it and press STARTimmediateh:
After removingfoodfrom the oven,stir,if possible,
to evenout the temperature.Reheatedfoodsmay
have wide variationsin temperature.Someareas
of foodmaybe extreme/}/ho£
If fi)od is not hot enough after tile
countdown, use Time Cookfi)r additional
reheating time.
Some FoodsNot Recommended for Use
With Reheat
It is best to use Time Cook for these foods:
_: Bread products.
::Ji::Foods that must be reheated uncovered.
}_,2Foods that need to be stirred or rotated.
_: Foods calling for a (h?' look or crisp
StlIb[ilce after reheating.
How to Adjust the Oven's Automatic
Settings for a Shorter or Longer Time
Tosubtract 10%from the automatic
cooking time:
]illmediatelv alter tile oven stnrts, ttlrn tile
dial counmrclockwise and press to entei:
Toadd 10%to the automatic cooking time:
Immediately after tile oven starts, turn tile
dial clockwise and press to enteI:
BEVERAGE
O
NOTE: Do not use this
feature twice in succession
on the same food portion--
it may result in severely
overcooked or burnt food.
18
Beverage
Press tile BEVERAGEbumm to heat an
8-10 oz. cup ot coffee or other beverage.
Tile oven starts immediately:
Drinksheatedwith the Beverage featuremay be
veryhot Removethecontainer with care.
If fi)od is undercooked after tile
countdown, use Time Cooklor additional
cooking time.
About the convection features, gecom
Convection cooking uses a heating element to raise the temperature of the air inside the
oven. Any oven temperature fl'(nn 925°F to 450°F may be set. A tim gently circtflates this
heated air tlErotlglEotlt the oven, over and arotmd the tood, producing golden brown
exterio_ and rich, moist interio_.
Because the heated air is kept constantly moving, not pemfitting a layer ot cooler air
to develop around the fi)od, some fi)ods cook tipster than in regtflar oven cooking.
See the Cookware Tips section for information on suggested cookware.
For Best Results...
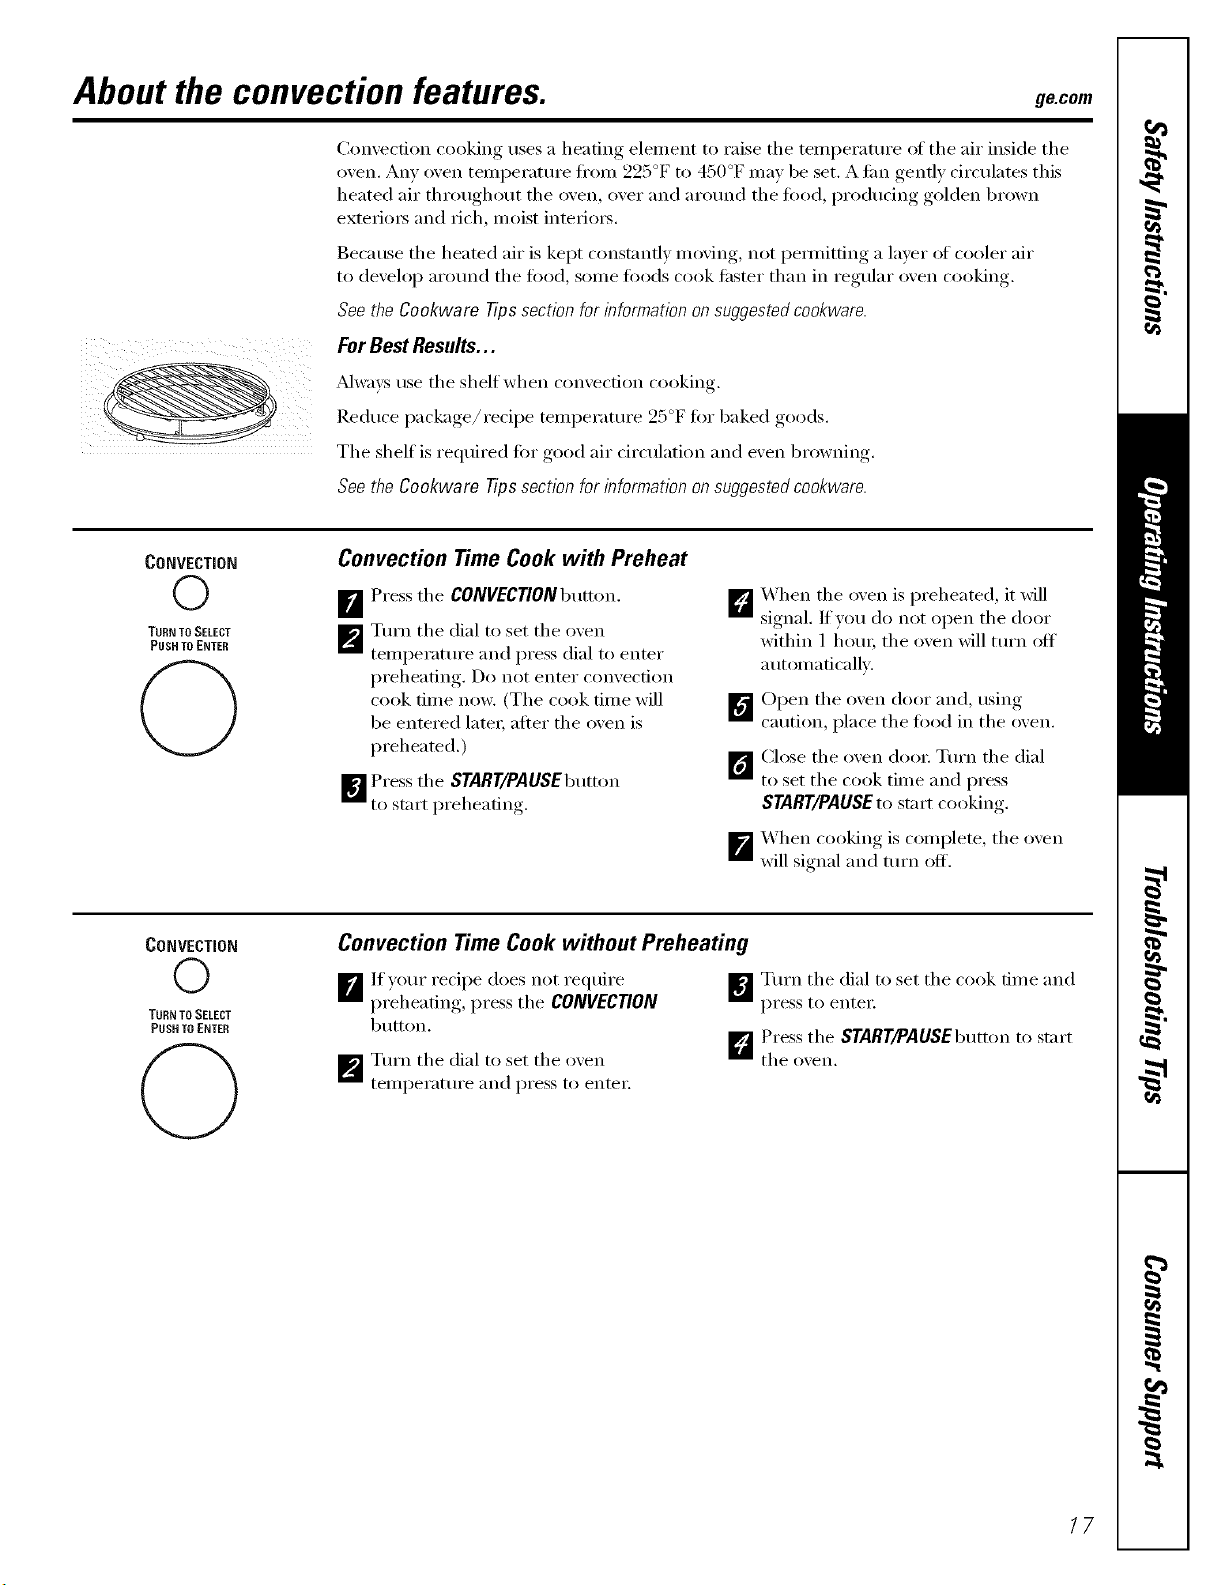
Mways use the shelf when convection cooking.
Reduce package/recipe temlEerature 25°F for baked goods.
The shelf is reEluired fin" good air circtflation and exert browning.
See the Cookware Tips section for information on suggested cookware.
CONVECTION
O
TURN TO SELECT
PUSH TO ENTER
Convection Time Cook with Preheat
B Press the CONVECTlONbutton.
_P_ Turn the dial to set the o_en
temperature and press dial to enter
preheating. Do not enter convection
cook time now. (The cook time will
be entered latex; after the oven is
preheated.)
_'] Press the START/PAUSEbutton
to start preheating.
D X_qEen the oven is preheated, it will
signal. If you do not open the door
within 1 IEOEU;the oxen will ttlI'n off
automatically.
DOpen the oven door and, usino
caution, place the food in the oxen.
1_ Close the oxen doo_: Turn the dial
to set the cook time and press
START/PAUSE to start cooking.
X_hen cooking, is comi)lete, the oven
_'_will signal and turn off.
CONVECTION
O
TURNTO SELECT
PUSH TO ENTER
C)
Convection Time Cook without Preheating
B lf)our recipe does not require
I)reheating,, press the CONVECTION
button.
_p_ Turn the dial to set the oven
telnl)erature and press to entei:
_Turn the dial to set the cook time and
pI'ess to enter
D Press the START/PAUSEbutton to start
the o_,eil,
17
About the combination features.
Combination Cooking oflbx_ the best fbamres of micro_;t\v energy axEd convection cooldxlg.
Microwaves cook fi)od fi_st aEEd convection dreulatiOEl of heated air browns fi_ods
beautiflEll> Any _wexEtemperature from 225°F to 450°F may be set.
ForBest Results...
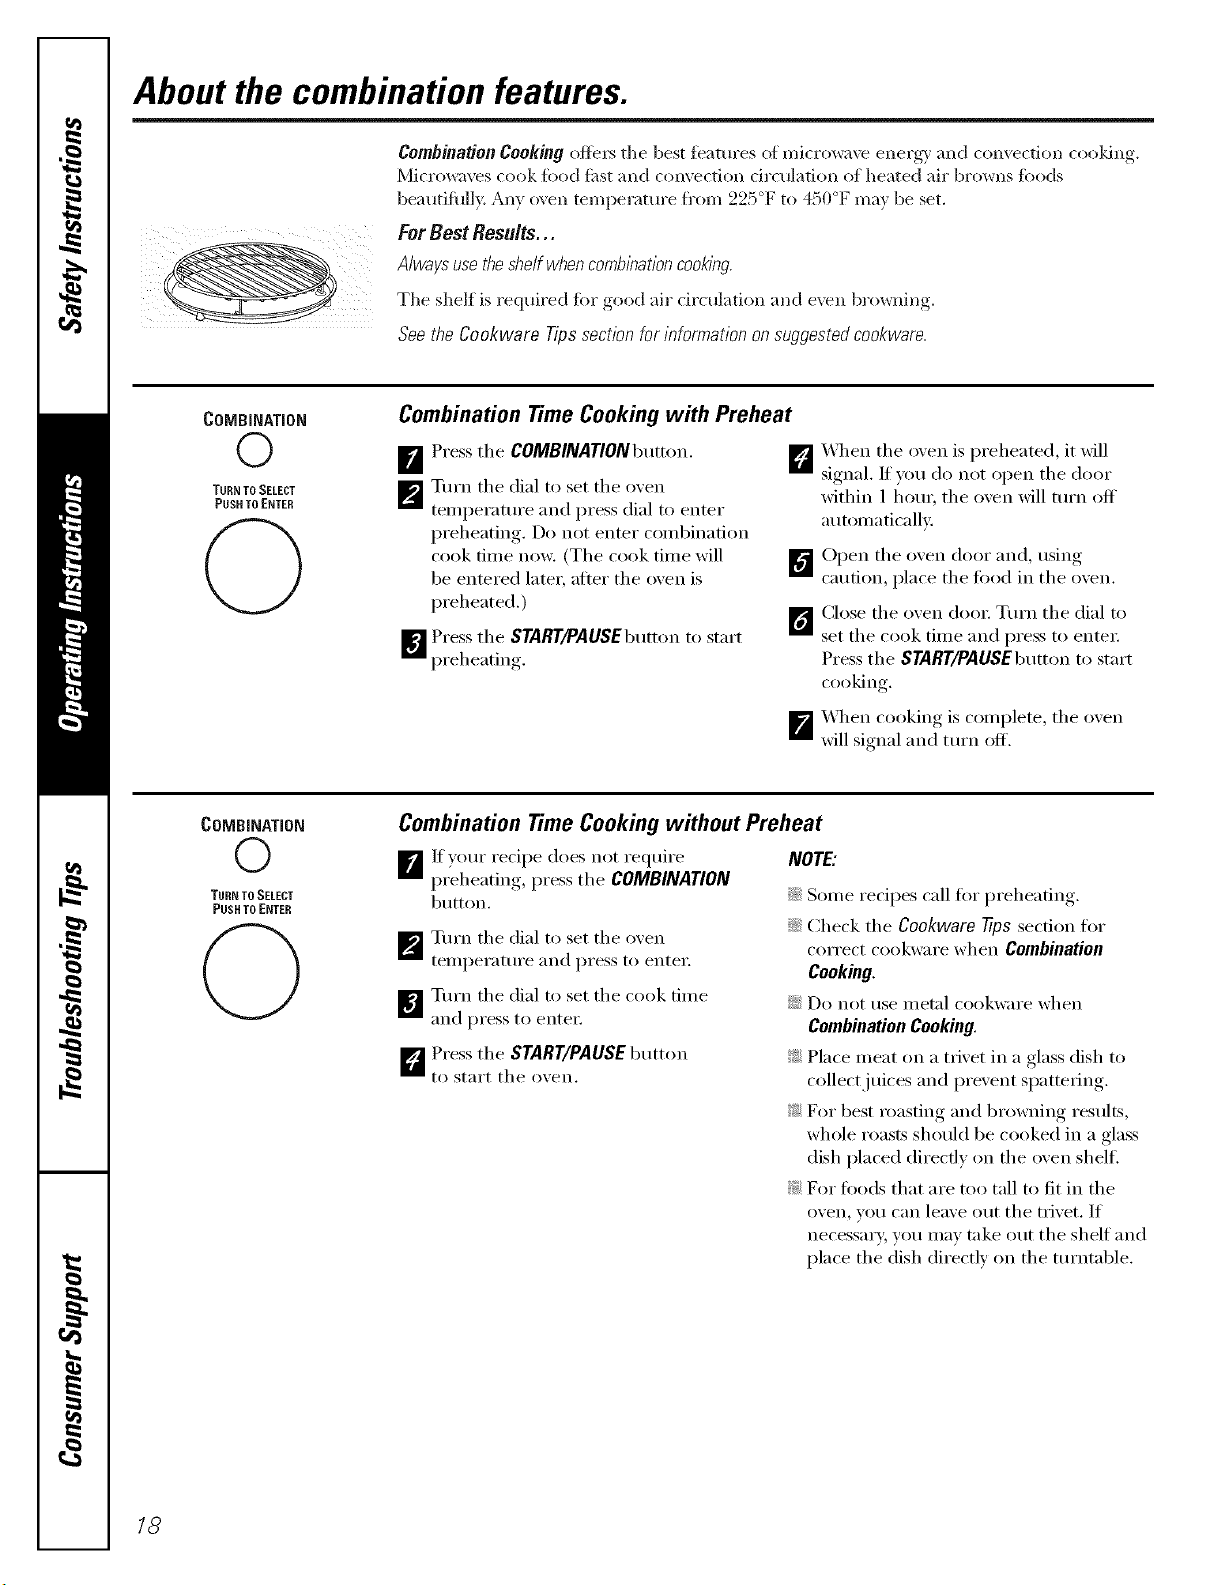
Always use theshe/f when comb/hationcooklhg
The shelf is required fin" good air circulation and exert bro_ning.
&o the Oookware Tips section for it_formatiot_on suggested cookwaro.
COMBINATION
©
TURN TO SELECT
PUSH TO ENTER
@
Combination TimeCooking with Preheat
[] Press the COMBINATIONbutton. []
_'_ Turn the dial to set the oven
temperattu'e and press dial to enter
I)reheating,. Do not enter combii_afion
cook tilne now. (The cook tilne will _'_
be entered later, after the oxen is
preheated.)
[]
[]Press the START/PAUSEbEmon to start
preheating.
1
X_qEen the oxen is preheated, it will
S'_" " " (
.aM_al. If v )u do not open the door
within 1 hotm the oxen will turn off
auton_aticalh _.
Open the oxen door and, usilw.,.,
caution, place the fbod in the o_en.
Close the oxen dooi: Turn the dial to
set the cook tilne and press to entei:
Press the SYARY/PAUSEbtltton to start
cooking,
X._q_encooking is complete, the oxen
will signal aim turn off.
COMBINATION
©
TURN TO SELECT
PUSH TO ENTER
0
Combination TimeCooking without Preheat
If your recipe does not reEluire
preheating, press the COMBINATION
btKton.
_'_ Turn the dial to set the oven
teiilpei'attli'e and pi'ess to entei:
_Turn the dial to set the cook tilne
and press to entei;
]Press the START/PAUSEbtaton
to start the oxen,
NOTE:
::Ji::Sonle recipes call fi:,r preheating.
::Ji::Check the Cookware Tips section for
correct cookware when Combination
Cooking.
::_)::Do not use inetnl Eookware when
Combination Cooking.
_: PlaEe meat on a trivet in a glass (lislE to
collect juices and prevent spattering.
_: For best roasting aim browlfing resEnts,
whole roasts shotdd be cooked in a glass
(lislE placed directly on the oven shelf.
?_:D_I" foods that are too tall to fit in the
oven, you can leave out the trivet. If
necessary, you inav take out the shelf aim
place the (lislE directh' on the turntable.
18
Cookware tips. ge.com
Convection Cooking
Metal Pans are re('onm/ended for all types of baked products, but especially where
browning or crusting is important.
Dark or dull finish metal pans are best tin" breads and pies because they absm]) heat
and produce crisper crest.
Shiny almninmn pans are better ti>r cakes, cookies or muffins because these pans
reflect heat and help produce a light tender c_ust.
Glass or Glass-Ceramic casserole or baking dishes are best suited tin +egg and cheese
recipes due to the cleanability of glass.
CombinationCooking
Glass or Glass-Ceramic baking containers are recommended. Be sure not to use
items with metal trim as it may cause arcing (sparking) with oven wall or oven shelf,
damaging the cookware, the shelf or the oven.
Heat-Resistmlt Plastic microwave cookware (sate to 450°F) may be used, but it is not
recommended for ti>o(ls requiring c_usting or all-arotmd browning, because the
plastic is a poor conductor of heat.
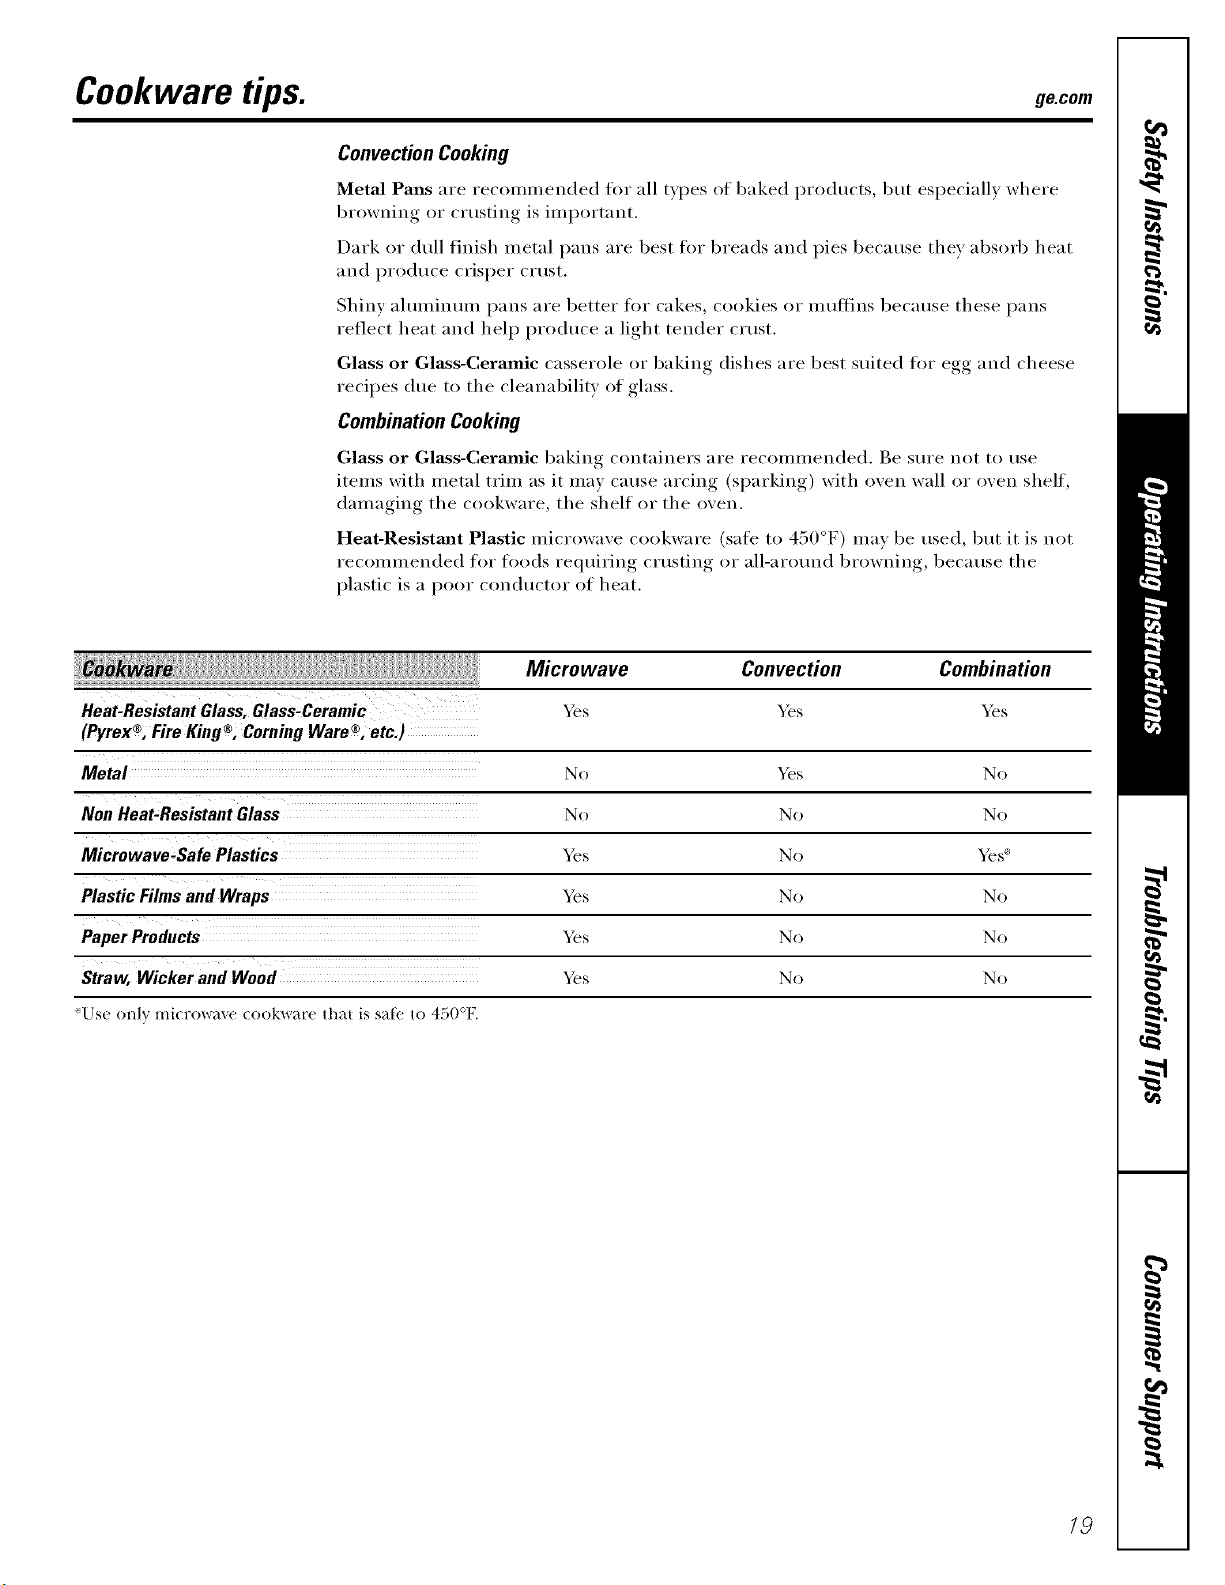
Heat,Resistant Glass, Glass,Ceramic }_s
® ® ®
(Pyrex , Fire King , Coming Ware , etc.)
Metal No _s No
No No No
Microwave-Safe Plastics _s No _s _'
Plastic Films and Wraps _s No No
_s No No
Straw, Wicker and Wood _s No No
'Use only mi(rowaxe (ookware that is sat_ to 450°F.
Microwave Convection Combination
_s _s
/9
Select the best method of cooking.
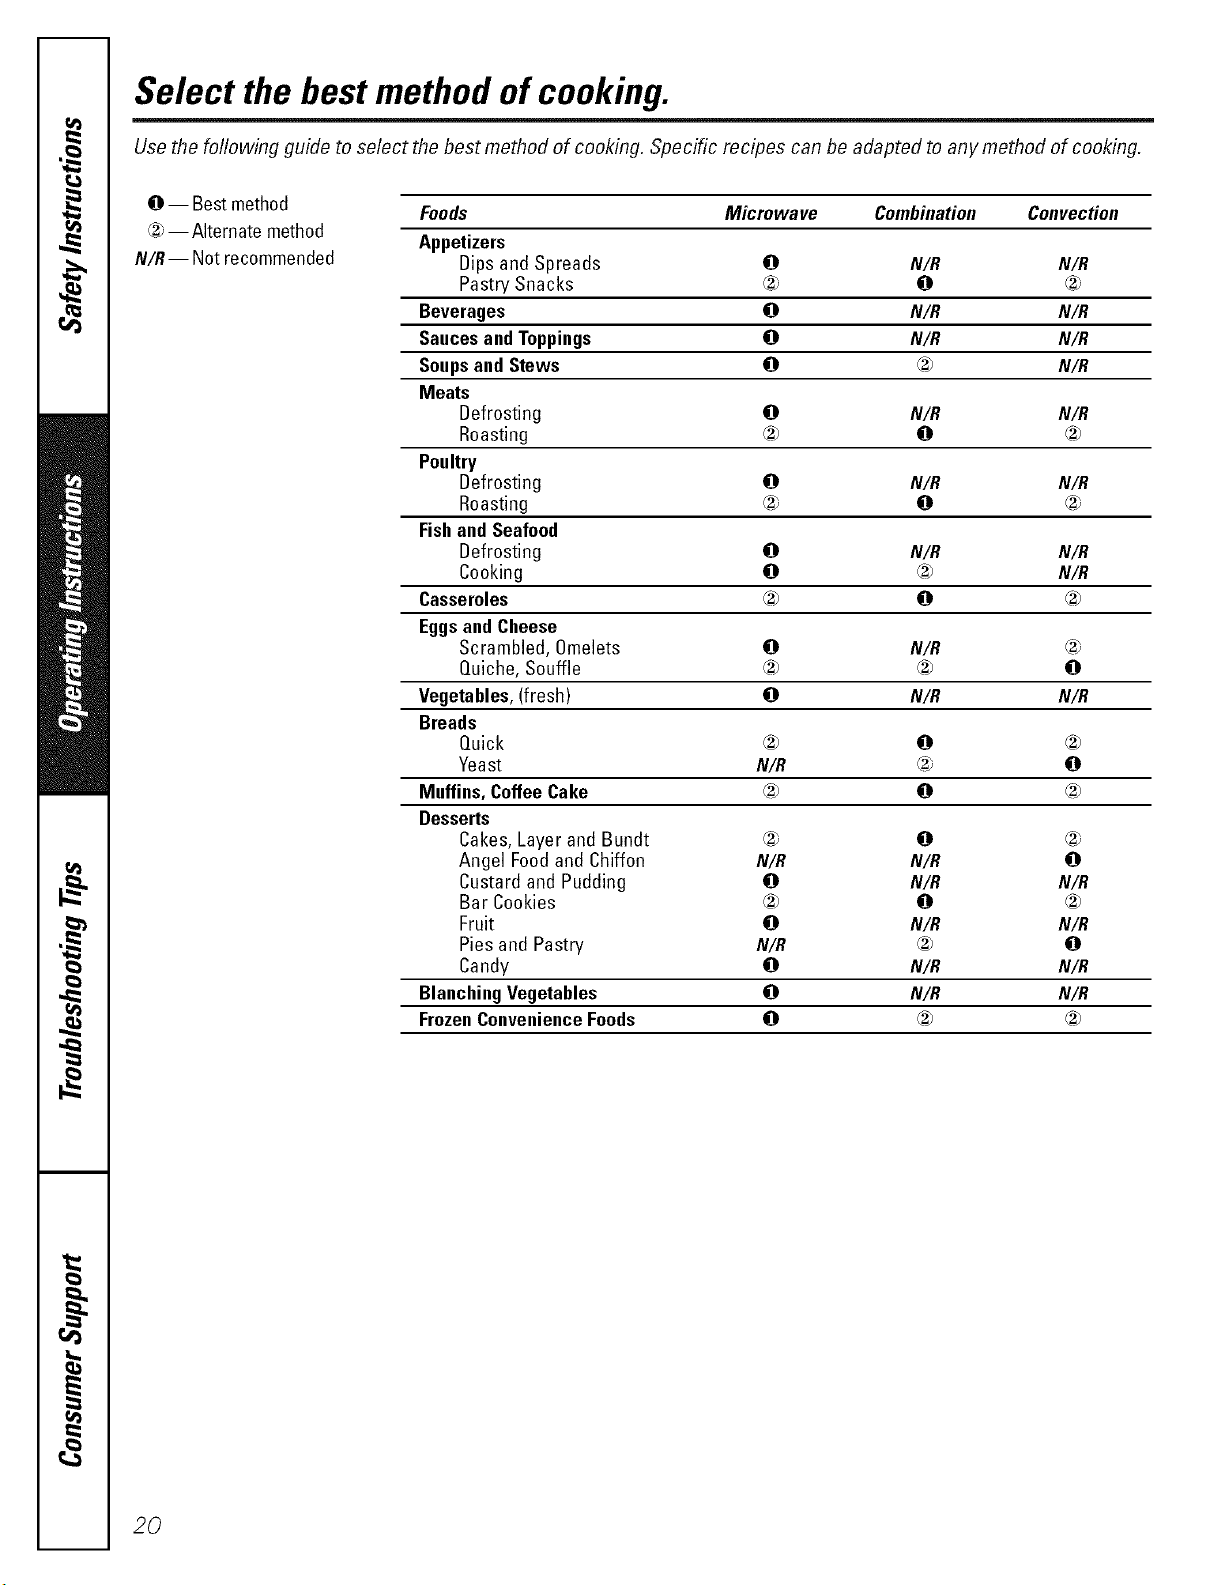
Use the following guide to select the best method of cooking. Specific recipes can be adapted to any method of cooking.
@ -- Bestmethod
®--Alternate method
N/R-- Not recommended
Foods Microwave Combination Convection
Appetizers
Dips and Spreads 0 N/R N/R
Pastry Snacks ® 0 ®
Beverages 0 N/R N/R
SaucesandToppings 0 N/R N/R
Soupsand Stews 0 _ N/R
Meats
Defrosting 0 N/R N/R
Roasting ® 0 ®
Poultry
Defrosting 0 N/R N/R
Roasting ® 0 ®
Fishand Seafood
Defrosting 0 N/R N/R
Cooking 0 _ N/R
Casseroles ® 0 ®
EggsandCheese
Scrambled, Omelets 0 N/R
Quiche, Souffle ® ® 0
Vegetables,(fresh) 0 N/R N/R
Breads
Quick ® 0 ®
Yeast N/R _ 0
Muffins,CoffeeCake ® 0 ®
Desserts
Cakes,Layerand Bundt ® 0 ®
Angel Foodand Chiffon N/R N/R 0
Custard and Pudding 0 N/R N/R
Bar Cookies ® 0 ®
Fruit O N/R N/R
Pies and Pastry N/R ® 0
Candy 0 N/R N/R
BlanchingVegetables 0 N/R N/R
FrozenConvenienceFoods 0 _ ®
20
About the other features, gecom
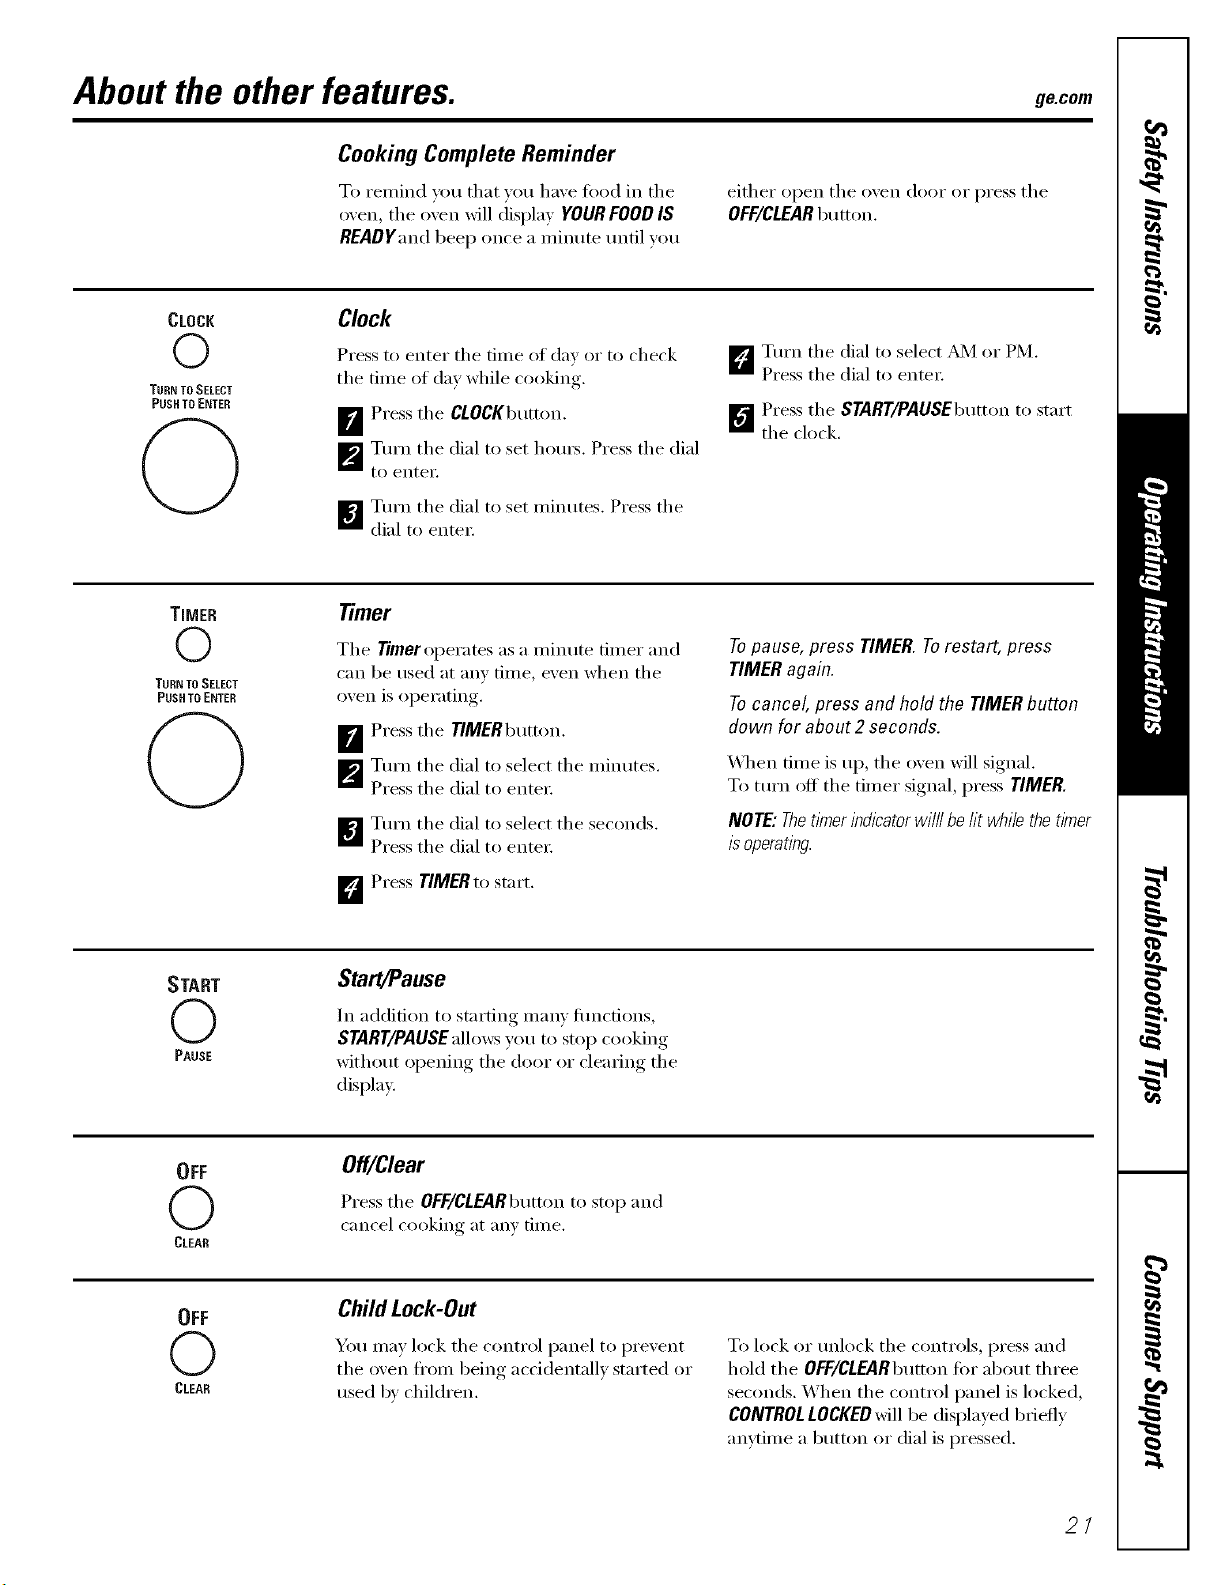
Cooking Complete Reminder
To ren/ind roE1 that _LLELlEaxe fiLod in the
o;en, tile ()veil will displa) YOURFOOD IS
READYandbeep once a n/inute until roE1
either open the oxen door or press the
OFF/CLEARbELtton.
CLOCK
©
TUHN TOSELECT
PUSH TO ENTER
Clock
Press to enter the tiine ILl (lay or to check
the tiIne of day while cooking.
[]Press the CLOCKbELtton.
[]Turn the dial to set hOELI_. Press the dial
[o entei',
B TtLrn the dial to set niintLtes. Press the
dial to entei;
_5"_ Turn the dial to select _4 or PM.
Press the dial to entei;
_"_ PI'ess tile START/PAUSEbELmmto start
the clock.
TIMER
©
TURN TOSELECT
PUSH TO ENTEH
q)
Timer
Tile Timer operates as a nEinute flirter and
can be used at any tiIne, e_en when the
oxen is oi)erating,.
B Press the TIMERbELtton.
_'J Turn the dial to select the ininutes.
Press the dial to entei:
B Turn the dial to select the seconds.
Press the dial to entei;
D Press TIMERtostart.
Topause, press TIMER.Torestart, press
TIMERagain.
Tocancel, press and hold the TIMERbutton
down for about 2 seconds.
X_qEen fiIne is ILl),the oxen will signal.
To ttLrn off the tiiner signal, press TIMER.
NOTE:Thetimerindicatorwilllbelit whiiethetimer
isoperating.
START
(2)
PAUSE
Start/Pause
In addition to starting inany flLncfions,
START/PAUSEallows you to stop cooking
witlEotLt opening the door or cleaiing the
display.
OFF
(2)
(_LEAR
Off/Clear
Pressthe OFF/CLEARbELmmto stop and
cancel cooking at am tiine.
OFF
(2)
(_LEAR
ChildLock-Out
YOEL nEay lock the control panel to prexent
the oxen fl'/LIn being accidentall) started or
ILsed b', children.
To lock or unlock the controls, press and
hold the OFF/CLEARbELtton fin" abotLt three
seconds. When the E/LntI'ol panel is hLcked,
CONTROLLOCKEDwill be displayed bIieflv
anvtinie a button or dial is pressed.
2/
About the other features.
OPTIONS
©
THEN TO SELECT
PUSH TO ENTER
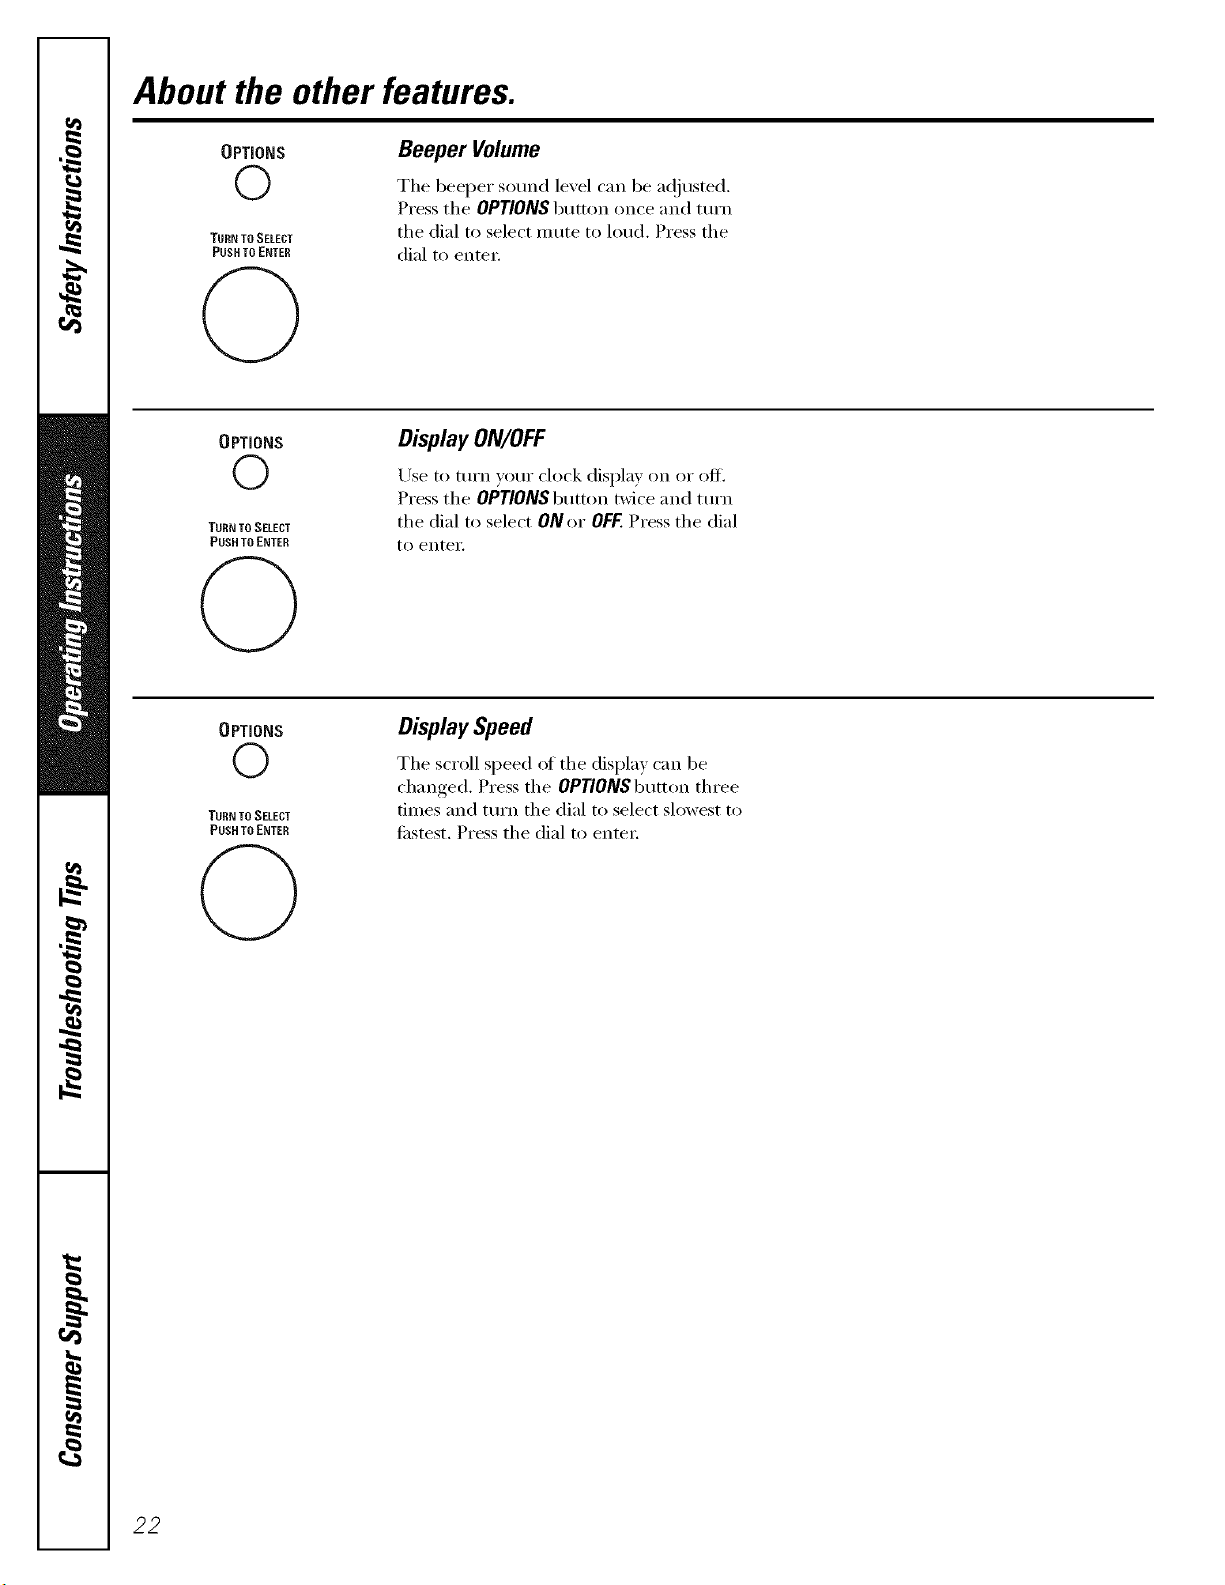
Beeper Volume
The beeper sound level can be a(!justed.
Press the OPTIONS button once and mrn
the dial to select m ute to loud. Press the
dial to enter:
OPTIONS
0
TURN TO SELECT
PUSH TO ENTER
DisplayON/OFF
Use to mrn yotn" clock display on or off.
Press the OPTIONS btltton twice and mrn
tile dial to select ON or OFF.Press tile dial
to enteY.
OPTIONS
©
TURN TO SELECT
PUSH TO ENTER
DisplaySpeed
The SETOII speed ot the display can be
changed. Press the OPTIONS button three
times and tm'n the dial to select slowest to
fi_stest. Press the dial to enter:
22
Microwave terms, gecem
!!!U !!!!!!!!iiii
Arcing
ii ii _i
i !iiiiii!ii
Definition
Arcing is the microwave tern/tor sparks in the oven. Arcing is caused by:
_5 the metal shelf being installed incorrectly and touching the microwave walls.
i__ metal or fi)il touching the side of the oven.
!_' fi)il that is not molded to tood (upturned edges act like antennas).
i_i: metal such as twist-ties, poult_ T pins, gold-rimmed dishes.
?_: recycled paper towels containing small metal pieces.
Covering (k)xexs hold in moisture, allow fiw more exert heafino_ and reduce cooking, time. Venting, plastic wrap or
coxering with wax paper allows excess steam to escape.
Shielding In a regular, oxen, you shield chicken breasts or baked fl)ods to I)re"ent oxexq)rowning,. _,\ hen microwaving,,
}'ou use small strips offifil to shield thin parts, such as the tips of wings and legs on poult_ T, which would
cook before larger l)_li'ts.
Standing 77me _,\_en you cook with regular o',ens, foods such as roasts or cakes are allowed to st;rod to finish cooking or
to set. Standing time is especiall) important in microwave cooking Note that a microwaxed cake is not
placed on [I coolin, rack
Venting ,_dter co',e_ing a dish with plastic wrap, you ",ent the )lastic wra ) by turning back one corner so
, , I I , , excess
ste_lII/ C_III escape.
23
Careand cleaningofthe oven.
Helpful Hints
An occasional thorough wiping with a solution oI baking soda and water keeps
the inside fl'esh.
Unplug the cord before cleaning any part of this oven.
How to Cleanthe Inside
Walls, Floor,Inside Window, Metal and Plastic Parts on the Door
Some spatte_ can be removed with a paper towel, othe_ may require a damp cloth.
Remove greasy spatte_ with a sudsy cloth, then rinse with a damp cloth. Do not use
abrasive cleane_ or shaq) utensils on oven walls.
Toclean the surface of the door and the surface of the oven that come together upon
closing, use only mild, non-abrasive soaps or detergents using a sponge or soft cloth.
Rinse with a damp cloth and dry.
Never use a commercial oven cleaner on any part of your microwave.
Removable Turntable and Turntable Support
To prexent breakage, do not place the tm'ntable into water just after cooking. V_sh it
carefifllv in warn/ suds_ water or in the dishwasher The tm'ntable and support can be
broken if dropped. Remember, do not operate the oxen xdthout the tm'ntable and
support in place.
How to Cleanthe Outside
Do not use cleaners containing ammonia or alcohol on the microwave oven. Ammonia or
alcohol can damage the appearance of the microwave.
Case
Clean the outside _ff the microwave with a sudsy doth. Rinse with a damp cloth and then
dry: _._]pe the window clean with a damp cloth.
ControlPanel andDoor
X._]pe with a damp cloth. D_y thoroughly. Do not use cleaning sprays, lmge amtmnts _ff
soap and water; abrasives or sharp objects on the panel--they can damage it. Some paper
towels can also scratch the control panel,
Door Surface
It is important to kee I) the area clean where the door seals against the microwave. Use only
mild, non-abrasive detergents applied with a clean sponge or soft cloth. Rinse well.
Power Cord
If the cord becomes soiled, m_plug and wash Mth a damp cloth. For stubborn spots, sudsv
water may be used, but be certain to rinse with a damp cloth and dry thoroughly befln'e
plugging cord into Otlflet.
24
g_com
Stainless Steel
Donotusea steel-woolpad;it willscratch
thesurface.
To clean stainless steel surthces, use a hot,
dami_ cloth with a mild detergent suitable
fin" stainless steel surfi_ces. Use a clean, hot,
damp cloth to reinove soap. Dry with a ch T,
clean cloth.
If tood soil remains, t_T a general kitchen
cleane_; such as Fantastik _'),Simple (;teen t_
or Fommla 40ff'_
For hard-to-clean soil, use a standard
sminles_steel cleane_; such as gon-MnF
or Cameo 'i
Apply cleaner with a damp sponge. Use a
clean, hot, damp cloth to remove cleane_:
Dry, with a dry, clean cloth. Alwa):s scrub
lightly in the direction of the grain.
Mter cleaning, use a stainless-steel polish,
such as Stainless Steel Magic<_ Revere
(_opper and Stainless Steel Cleane_or
_'enol M1 Ptupose Metal Polish _Follow the
product instructions fin" cleaning the
stainless-steel stu_i_ce.
25
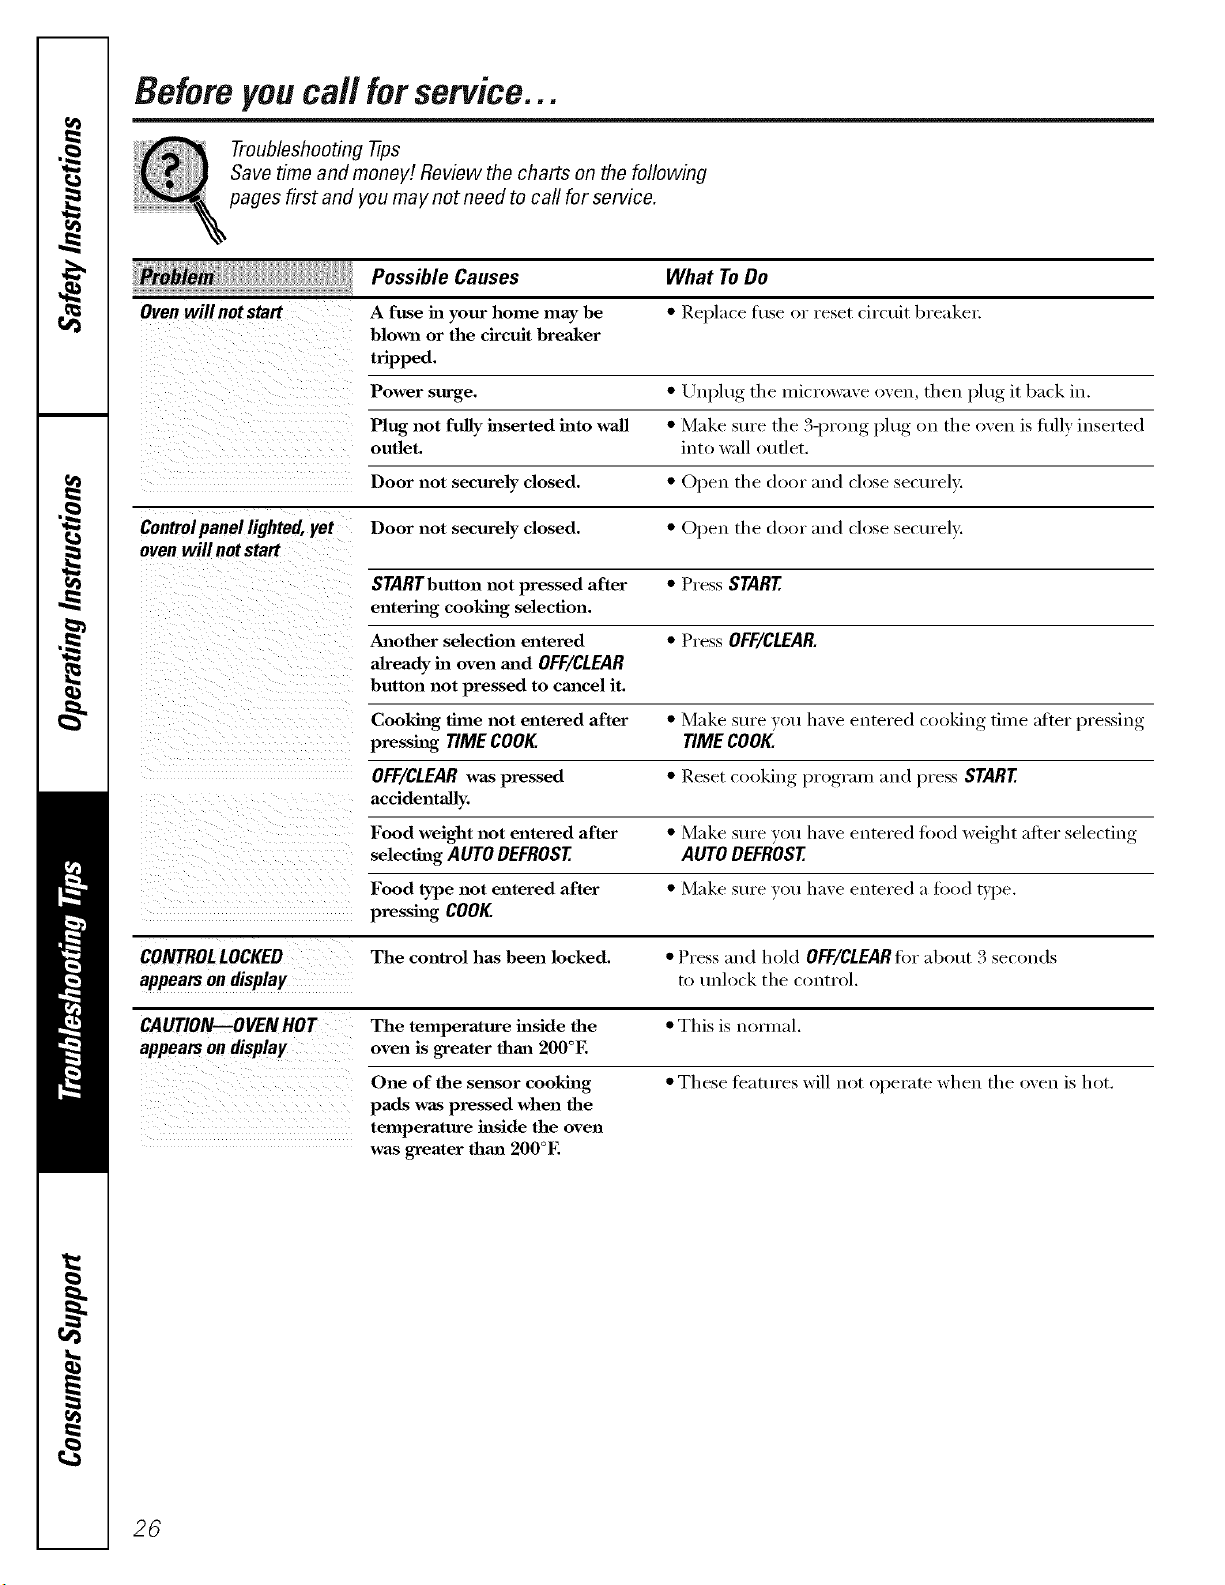
Beforeyou call forservice...
Troubleshooting -tips
Save time and money/.Review the charts on the following
pages first and you may not need to call for service.
Oven will not start
What ToDo
• Replace tuse or reset circuit breaker:
Possible Causes
A fuse in your home may be
blown or the circuit breaker
tripped.
Power surge. • Un.I)lug, tile microwave oven, then plug it back in.
Plug not fully inserted into wall • Make stlre the 3-prong plug on the oven is fldlv inserted
outlet, iut_ wall (_uflet.
Door not securely closed. • Opeu the door aud close securely.
Controlpanel lighted, yet Door not securely closed. • Open the door and close sectu'elv.
oven will not start
STARTbutton not pressed after • Press START
entering cooking selection.
Another selection entered • Press OFF/CLEAR.
already in oven mad OFF/CLEAR
button not pressed to cancel it.
Cooking time not entered after • Make sure vot/have entered cooking, time alter l)ressiug,
pressing TIME COOK tiME COOK
OFF/CLEARwas pressed • Reset cooking program and press START
accidentally.
Food weight not entered after • Make sure you have entered tood weight after .selectiu,_
selecting AUTO DEFROST AUTO DEFROST
Food type not entered after • Make sure you have entered a tood _'pe.
pressing COOK
CONTROL LOCKED The con_col has been locked. • Press and hold OFF/CLEARfi)r about 3 seconds
appears ondisplay to tmhwk the c(mtrol.
CAUTION--OVEN HOT The temperature inside the • This is uomial.
appears ondisplay oven is greater than 200°E
One of the se_lsor cooking • These teattu'es will not operate when the oven is hot.
pads was pressed when the
temperature inside the oven
was greater than 200°E
26
ge.com
Things That Are Normal With YourMicrowave Oven
9_:Steam or vapor escaping fl'om around
tile dooF.
::Ji::i_ight reflection around door or outer case.
::Ji::Dimming oven light and change in
tile blo_vr so/rod at power levels other
than high.
9_:Dull thumping so/rod while oven is
operating.
_: TV/radio interierence might be nofced
while using tile microwave. Similar to
tile interference caused by other small
appliances, it does not indicate a
problem with tile microwave. Plug tile
microwave into a different electrical
circuit, move the radio or TV as tar away
from the microwave as possible, or check
the position and signal of the TV/radio
antenna,
27
IVoles.
r_
r_
Q_
m
_°
Q_
28
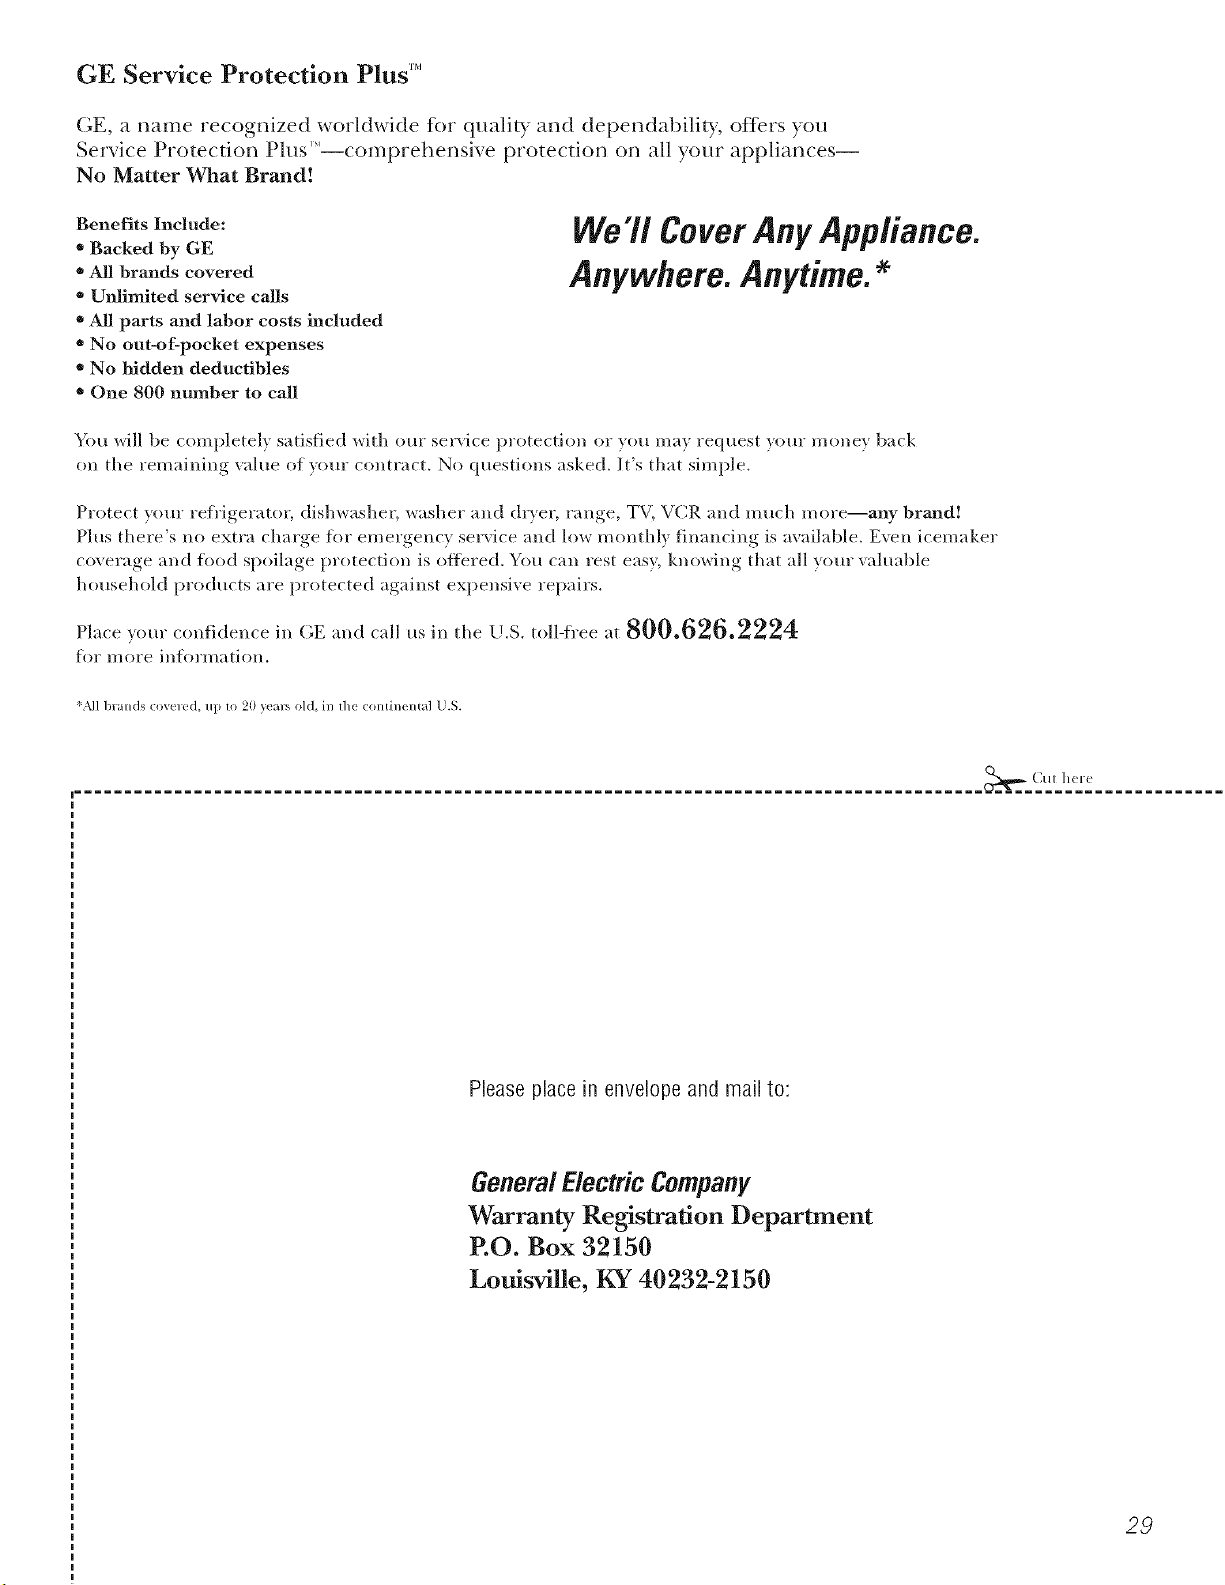
GE Service Protection Plus rM
GE, a name recognized _x<wldwide fbr quality and dependability, of;_ers you
Service Protection Plus '"--comprehensive protection on all your appliances--
No Matter What Brand!
Benefits Include:
• Backed by GE
• All brands covered
• Unlimited service calls
• All parts and labor costs included
• No out-of-pocket expenses
• No hidden deductibles
• One 800 nmnber to call
We'll CoverAny Appliance.
Anywhere. Anytime.
You _ill be complete b s_tisfied x_ith ore" service protection or }on m_} request }our mone} lx_ck
on the remaining value of yore" contn_ct. No questions asked. It's that simple.
Protect your refl'igerator, dishwasher, washer and d_Ter, range, TV, VCR and much more--any brand!
Plus there's no extra charge fk)r emergency service and low monthly financing is available. Even icemaker
coverage and _k_od spoilage protection is o_tbred. You can rest easy, knowing that all your valuable
household products are protected against expensive repairs.
Place ,otlr confidence in (;E and r;dl us in the U.S. toll-free at _UU.DZD.ZZZzt:
for I/lore illforI//a[iOll.
*MI lmlnds <:ov_ led, up m 20 }'_ar_ old, in Ih_ cominemal U.S.
,_ (Jill hel-e
Please place in envelope and mail to:
General Electric Company
Warranty Registration Department
EO. Box 32150
Louisville, KY 40232-2150
29
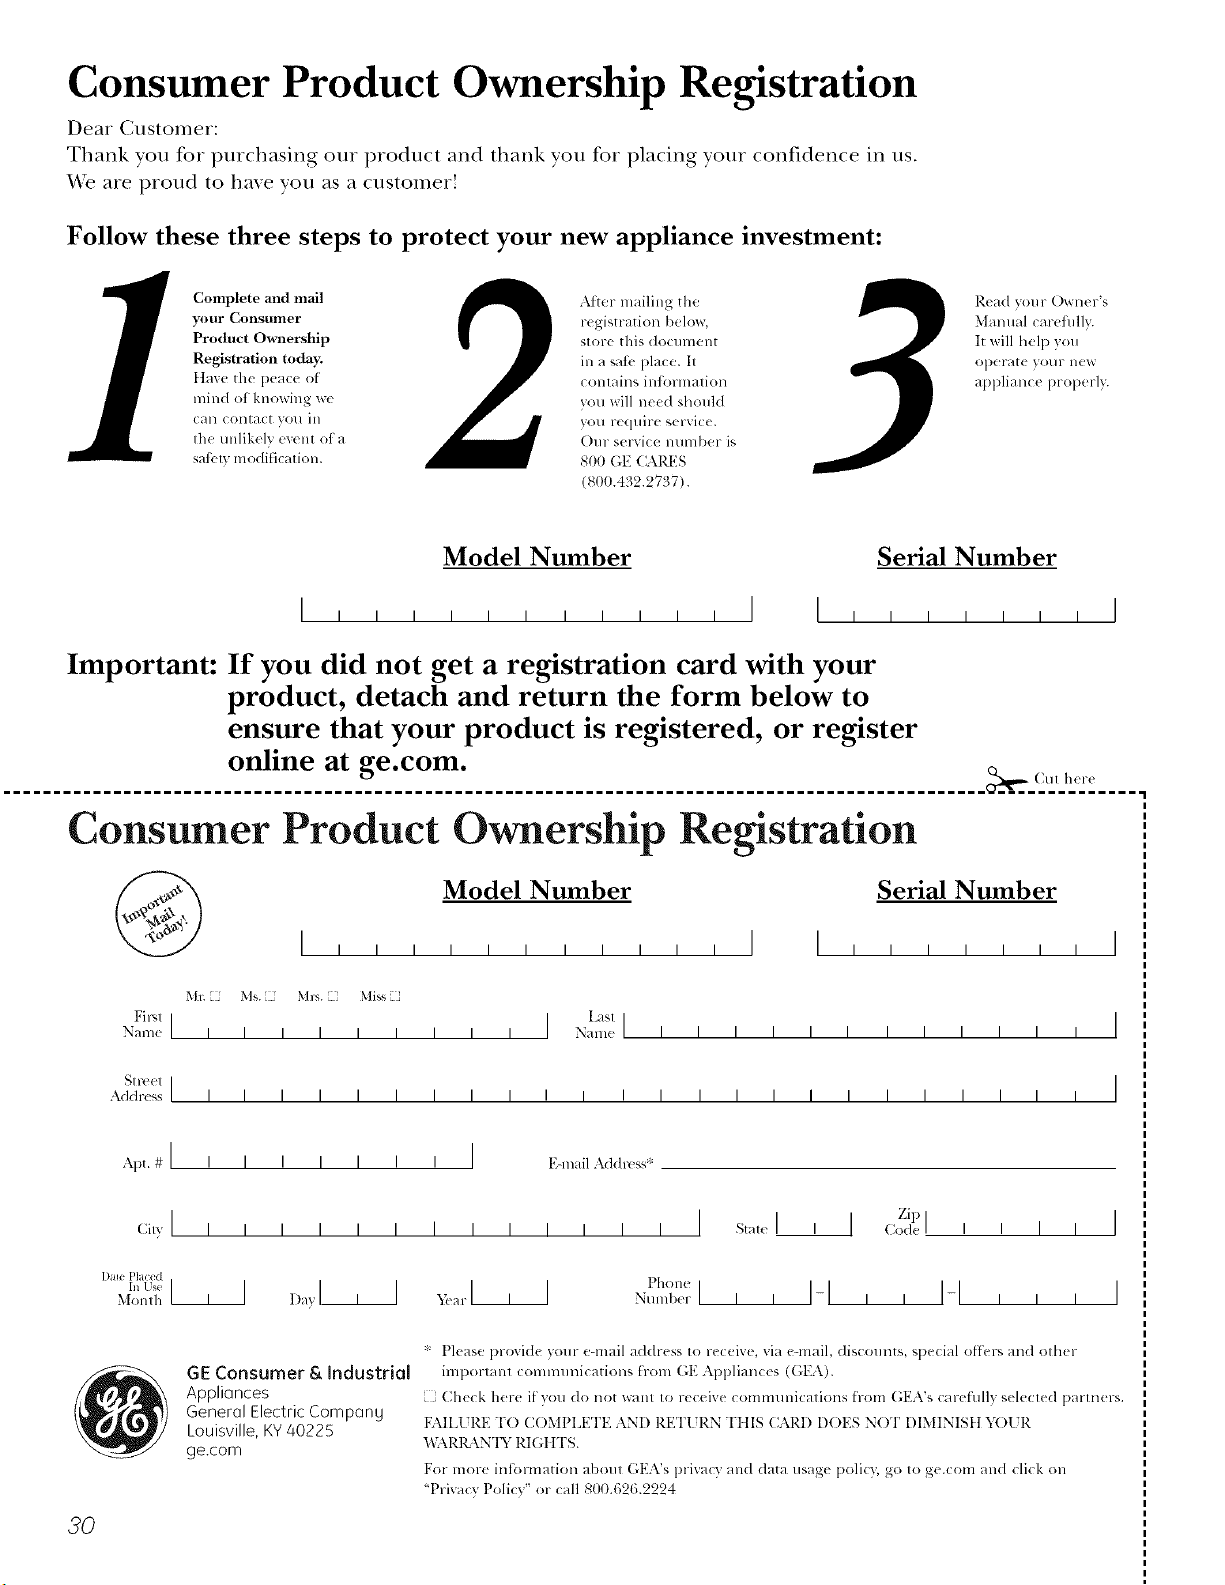
Consumer Product Ownership Registration
Deal Customer:
Thank you for purchasing our product and thank you for placing your confidence in us.
'_'e are proud to ha_e you as a customer!
Follow these three steps to protect your new appliance investment:
Complete and mail
your Consumer
Product Ownership
Registration today.
ttave tile peace of
mind of knowing wc
CHII COlltact VOI/ ill
the tmlikely event of a
satbly modification.
After mailing tile
registration below,
store this document
ill a sati' place. It
contains inlormation
you will need should
you require service.
Our selwice number is
800 GE CARES
(800.432.2737).
Read your Owner's
Malmal carefilllv.
It will help you
operate your lle'*_
appliance properly.
Model Number Serial Number
, , , , , , I I , , , , , , , I
Important: If you did not get a registration card with your
product, detach and return the form below to
ensure that your product is registered, or register
online at ge.com.
.................................................................................................. _(Mt h(r_
Consumer Product Ownership Registration
Model Number
Serial Number
I I I I I I I
Ms. M*>,. Mixs
Fir,,l ] I Last]
Nanle I I I I I I I I I Nanl(! I I I I I I I I I I I I
_1 r( (!1 ]
Addr(ss I I I I I I I I I I I I I I I I I I I I I I I I
Apt. # ] I I
CiB' ] I I
1)me Placed
In Use III
Month
I I I I I I E-lnailAddl_!_ss*
I I I I I I I I st_,t,I
_,iar I I I Phon(
Nunll)(!r I I I
Zip I
I ] Code I I I I
I-I,, 14 , , ,
I
I
20
GE Consumer & Industrial
Applionces
General Electric CompQng
Louisville, KY 40225
ge.com
* Please provide your e-mail address to receive, via e-mail, discounts, special o[tLr', and ()tiler
important communications from GE Appliances (GEA).
[ Check here if you do not want to receive commmlications from (;EA's carefiflly selected partners.
FAILI JRE T() COMPIA_TI'E AN[) RETI JRN TIIIS CARD DOES NOT DIMINISt t Y( )l JR
BL\RIL \N'IY RIGt tTS.
For more intormation about (',EA's prixacy and data usage polic); go to ge.com and click on
"Priw_cy Policy" or call 800.62&2224
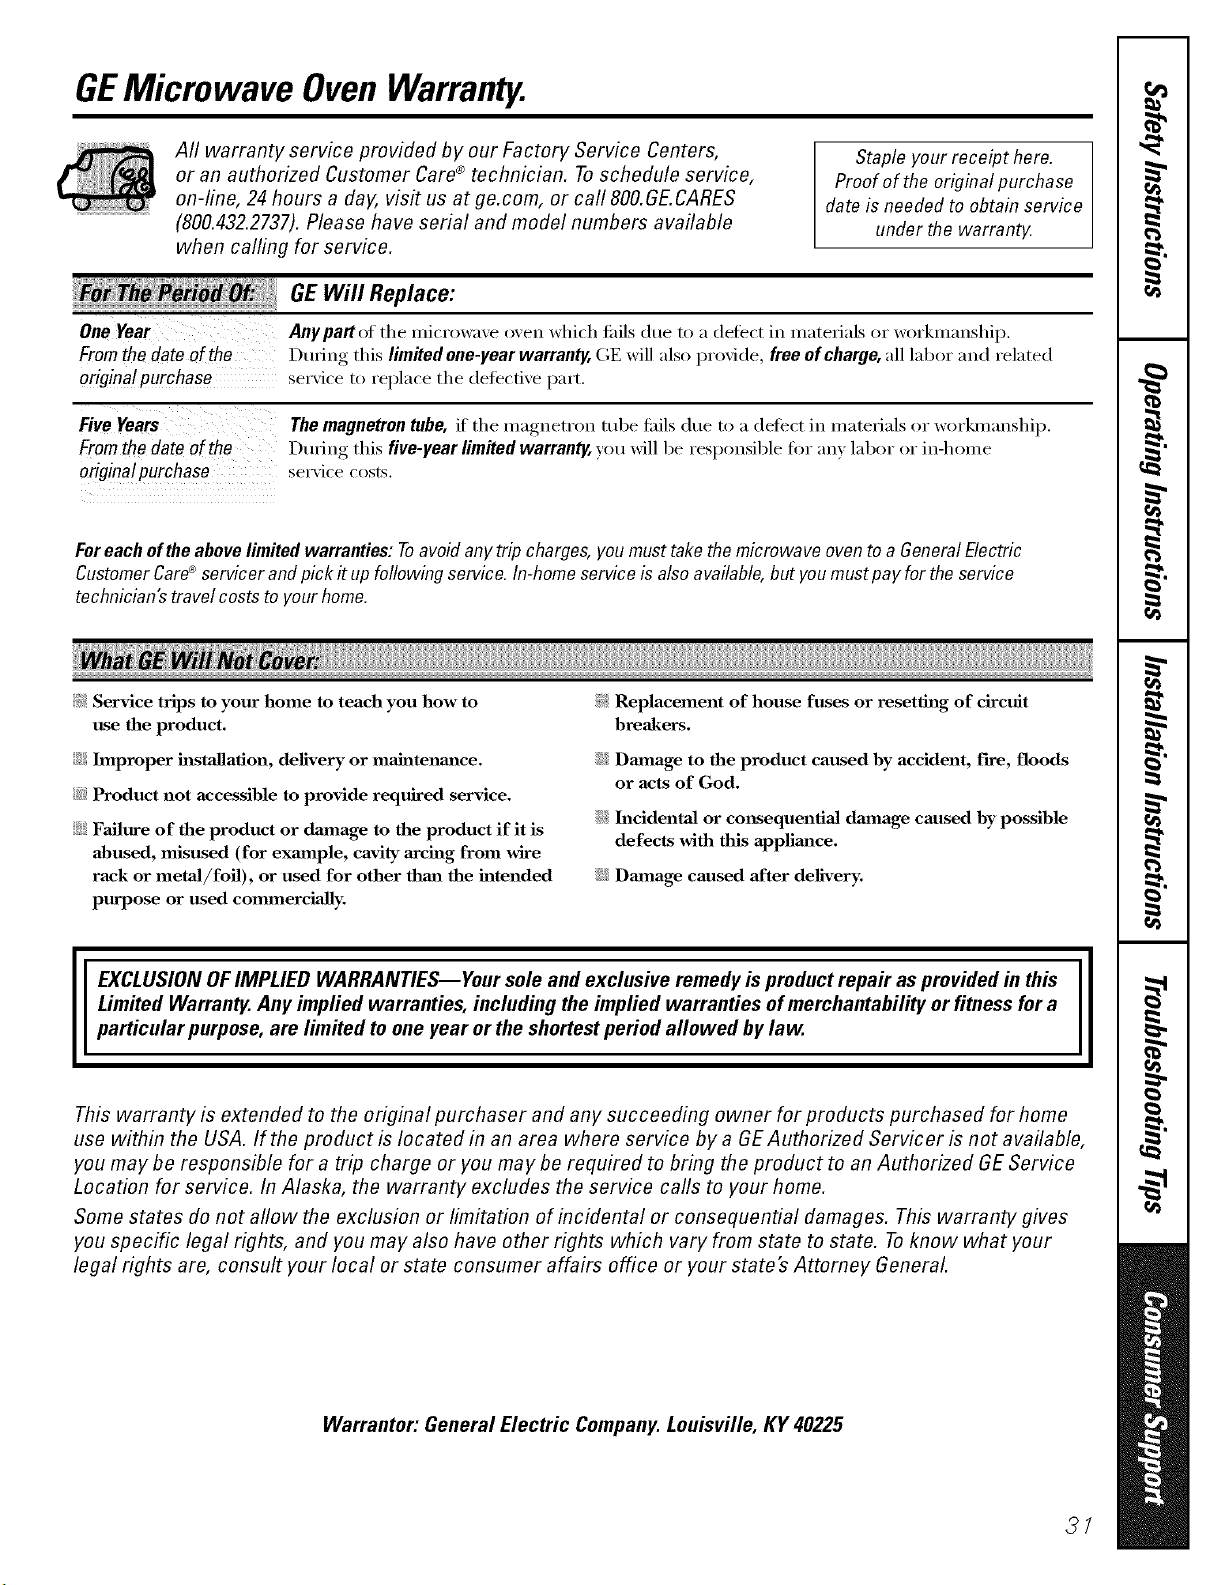
GEMicrowave OvenWarranty.
Aft warranty service provided by our Factory Service Centers,
or an authorized Customer Care®technician. Toschedule service,
on-line, 24 hours a day, vis# us at ge.com, or call 800.GE.CARES
(800.432.2737).Please have serial and model numbers available
when calling for service.
Staple your receipt here.
Proofof the original purchase
date is needed to obtain service
under the warrantt<
!_ _ _ GE Will Replace:
::::::::::::::::::::::_;_ _
One Year Any part of the microwaxe oven which tifils due to a detect in materials or workmanship.
Fromthe dateof the Dtwing this limRed one-year warranty,(;E will also provide, freeofcharqe,all labor and related
origina!purchase serviceto replace the detecti, e part.
Five Years
Fromthedateof the
originatpurchase
The magnetron tube, if the magnetron robe tifils due to a deti_ct in materials or workmanship.
Dtwing this five-year limRed warranty, you will be responsible for an) labor or in-home
ser\ ice costs.
Foreachoftheabovelimited warranties: Toavoidanytrip charges,youmusttake themicrowave oventoa GeneralElectric
CustomerCare_'servicerand pick it upfollowing service. In-homeserviceis alsoavailable,but youmustpayfor theservice
technician'stravelcoststo yourhome.
)_: Service trips to your home to teach you how to
use the product.
::Ji_Improper installation, delivery or maJnteum_ce.
_:_Product not accessible to provide required service.
::Ji::Failure of the product or dmuage to the product if it is
abused, misused (for exmnple, cavity arcing from wire
rack or metaJ/foil), or used for other thm_ the intended
purpose or used commercially.
!i_:Replacement of house fuses or resetting of circuit
breakers.
iJi::Dmnage to the product caused by accident, fire, floods
or acts of God.
iJi::h_cidenta] or cm_sequentia] dmnage caused by possible
defects with this appliance.
iJi::Damage caused after delivery.
EXCLUSION OFIMPLIED WARRANTIES--Your sole and exclusive remedy is product repa# as provided in this
Limited Warranty. Any implied warranties, including the implied warranties of merchantability or fitness for a
particular purpose, are limited to one year or the shortest period allowed bylaw.
This warranty is extended to the original purchaser and any succeeding owner for products purchased for home
use within the USA. If the product is located in an area where service by a GE Authorized Servicer is not available,
you may be responsible for a trip charge or you may be required to bring the product to an Authorized GEService
Location for service. In Alaska, the warranty excludes the service calls to your home.
Some states do not allow the exclusion or limitation of incidental or consequential damages. This warranty gives
you specific legal rights, and you may also have other rights which vary from state to state. Toknow what your
legal rights are, consult your local or state consumer affairs office or your state's Attorney General
Warrantor: General Electric Company. Louisville, KY 40225
3/

ConsumerSupport.
q gEAppliancesWebsite ge.com
Haxe a question or need assistance with your appliance? Try tile (;E Appliances _4'ebsite 24 hours a day
' any day of tile xear'. For greater comenience and taster service, you can now download Owner's Manuals,
order parts or exert schedule set\ice on-line.
ScheduleService
Expert (;E repair setsice is only one step awax fl'om your do(n: Get on-line and schedule your serxice at
your, comenience 24 hours any day of tile year! Or call 800.(;E.CARES (800.432.2737) dining normal
business hours.
ge.com
RealLifeDesignStudio ge.com
GE supports tile Universal Design concept--l)roducts, services and environments that can be used by
people of all ages, sizes and capabilities. We recognize tile need to design fin" a wide range of physical and
mental abilities and impaim/ents. For details of GE's Universal Design applications, including kitchen
design ideas fi)r people with disabilities, check out our X._bbsite to&w: For the hearing impaired, please call
800.TDD.GEAC (800.833.4322).
ExtendedWarranties ge.com
Purchase a (;E extended warrant_ and learn about special discounts that are axailable while _our, warrant_
is still in effect. You C_llll)urchase it on-line amfime or call 800.626.2224 during n(mnal business hours.
GE (_onsun/er Home Serxices will still be there after )our warrant}, expires.
PartsandAccessories
ge.com
Individuals qualified to se_'ice their own appliances can have parts or accessories sent directly to their
homes (VISA, MasterCard and Discover cards are accepted). Order on-line today, 24 hours eveta' day or
by phone at 800.626.2002 during nomml business hours.
Instructions contained in this manual cover procedures to be performed by any user. Other servicing generally
should be referred to qualified service personnel. Cautionmust be exercised, since improper servicing may cause
unsafe operation.
ContactUs
ge.com
If you are not safistied with tile service w)u receive fl'om GE, contact us on our X*Vebsitewith all tile details
including your phone IltllllbeI'_ oi" wlJte to: (;eneral Manager; C/lStOlllei" ]{elations
GE Appliances, Appliance Park
I,ouisville, KY 40225
l RegisterYourApplbnce
Register your new applimlce on-line---at your convenience! Timelx, l)r°(hlct re_isti'ati(, m will allow fin.
' enhanced communication and prompt service under tile terms of)our warrant); should tile need arise.
You may also mail in tile pre-pfinted registration card included in tile packing material.
ge.com
Printed in Korea

