Loading ...
Loading ...
Loading ...
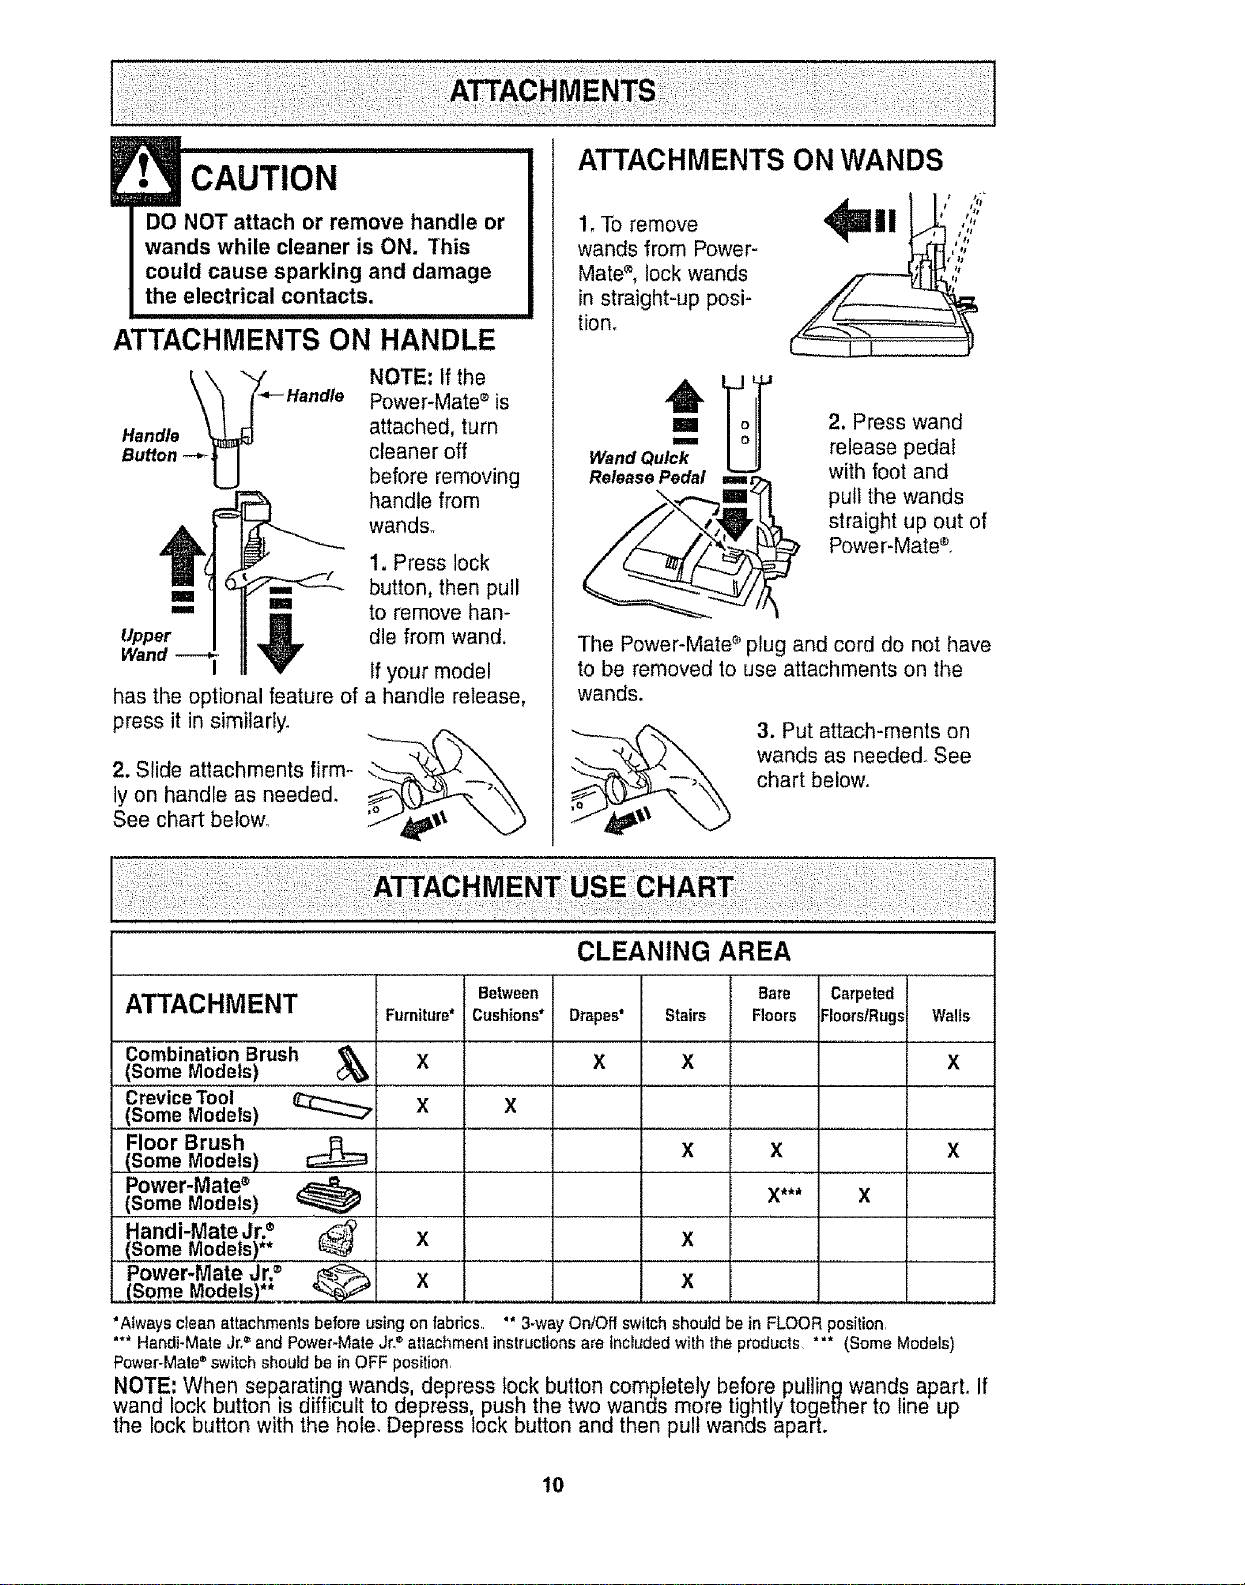
ATTACHMENTS ON HANDLE
Handle
Button -_ U
NOTE: If the
Power-Mate ®is
attached, turn
cleaner off
before removing
handle from
wands.,
1. Press lock
button, then pul!
B=== to remove han-
Upper _ die from wand,
Wand V If your model
has the optional feature of a handle release,
press it in similarly.
2. Slide attachments firm-
ly on handle as needed.
See chart below°
ATTACHMENTS ON WANDS
1, To remove
wands from Power-
Mate ®, lock wands
in straight-up posi-
tion_
m
Wand Quick
Release Pedal am
ill
2. Press wand
release pedal
with foot and
pull the wands
straight up out of
Power-Mate ®,
The Power-Mate _'plug and cord do not have
to be removed to use attachments on the
wands.
3. Put attach-ments on
wands as needed. See
chart below.
CLEANING AREA
ATTACHMENT
Furniture*
Combination Brush
X
(Some Models)
Crevice Tool
(Some Models) X
Floor Brush
(Some Models)
Power-Mate •
(Some Models)
Handi-Mate Jr.®
x
(Some Models)**
Power-Mate Jr,® X
(Some Models)**
Between
Cushions*
Drapes*
X
Stairs
X
X
Bare Carpeted
Floors FloorstRugs
Walls
X
X
X*** x
X
X
x
*Always clean attachments before using on fabrics,. '" 3-way On!Off switch should be in FLOOR position
'** HandFMate Jr,®and Power-Mate Jr._attachment instructions are tnciuded with the products *** (Some Models)
Power-Mate switch should be in OFF position
NOTE= When separating wands, depress lqck button completely before pullin_wands apart. If
wand lock button is difficult to depress push the two wanas more lightly [ogmner to _ine up
the ock button w th the hoe. Depress ock button and then pull wands apart.
10
Loading ...
Loading ...
Loading ...