Loading ...
Loading ...
Loading ...
Maintenance (continued)
Installing & Cleaning the Supplied Cartridge Filter
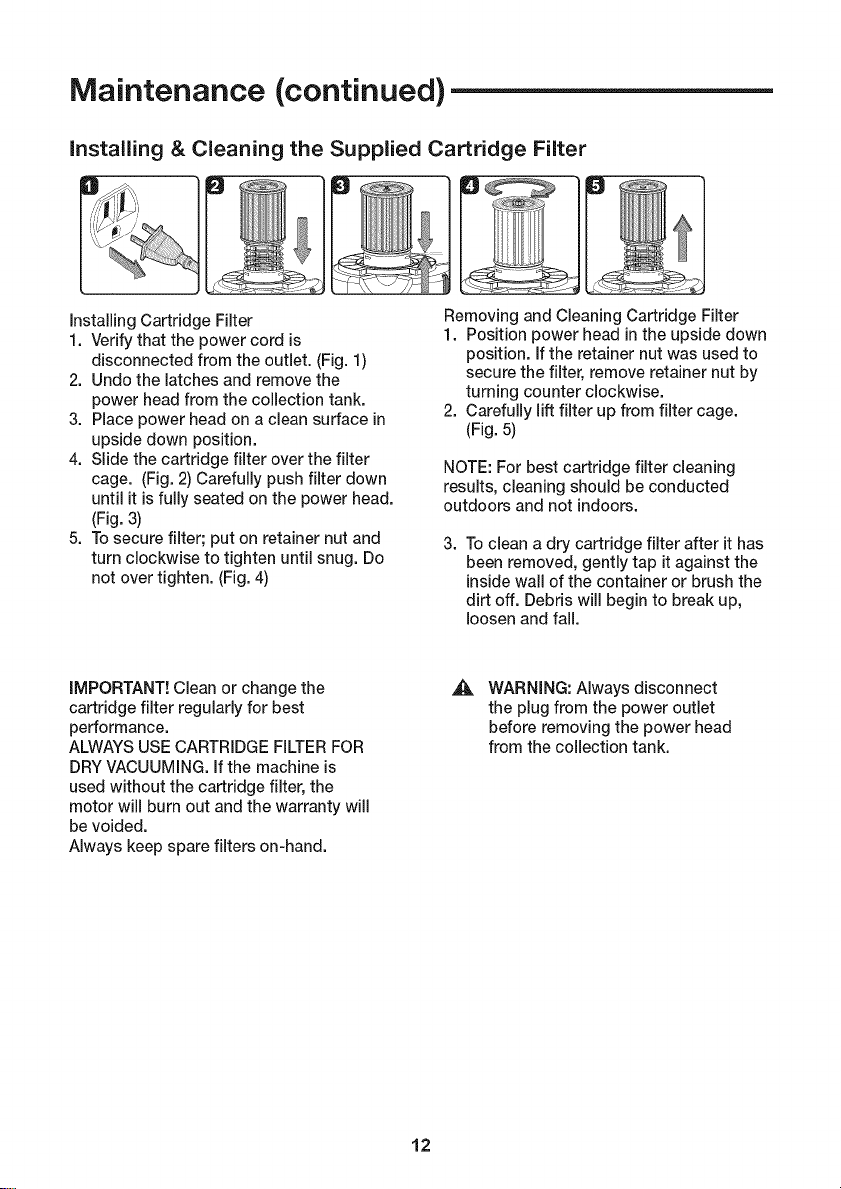
installing Cartridge Filter
1. Verify that the power cord is
disconnected from the outlet. (Fig. 1)
2. Undo the latches and remove the
power head from the collection tank.
3. Place power head on a clean surface in
upside down position.
4. Slide the cartridge filter over the filter
cage. (Fig. 2) Carefully push filter down
until it is fully seated on the power head.
(Fig. 3)
5. To secure filter; put on retainer nut and
turn clockwise to tighten until snug. Do
not over tighten. (Fig. 4)
Removing and Cleaning Cartridge Filter
1. Position power head in the upside down
position, if the retainer nut was used to
secure the filter, remove retainer nut by
turning counter clockwise.
2. Carefully lift filter up from filter cage.
(Fig. 5)
NOTE: For best cartridge filter cleaning
results, cleaning should be conducted
outdoors and not indoors.
3. Toclean adry cartridge filter after it has
been removed, gently tap it against the
insidewall of the container or brush the
dirt off. Debris will begin to break up,
loosen and fall.
iMPORTANT! Clean or change the
cartridge filter regularly for best
performance.
ALWAYS USE CARTRIDGE FILTER FOR
DRY VACUUMING. if the machine is
used without the cartridge filter, the
motor will burn out and the warranty will
be voided.
Always keep spare filters on-hand.
A
WARNING: Always disconnect
the plug from the power outlet
before removing the power head
from the collection tank.
12
Loading ...
Loading ...
Loading ...