Loading ...
Loading ...
Loading ...
M.A_LN T A_LN._Y.O..U..R.._.U_N..L.T_
PROPERLY
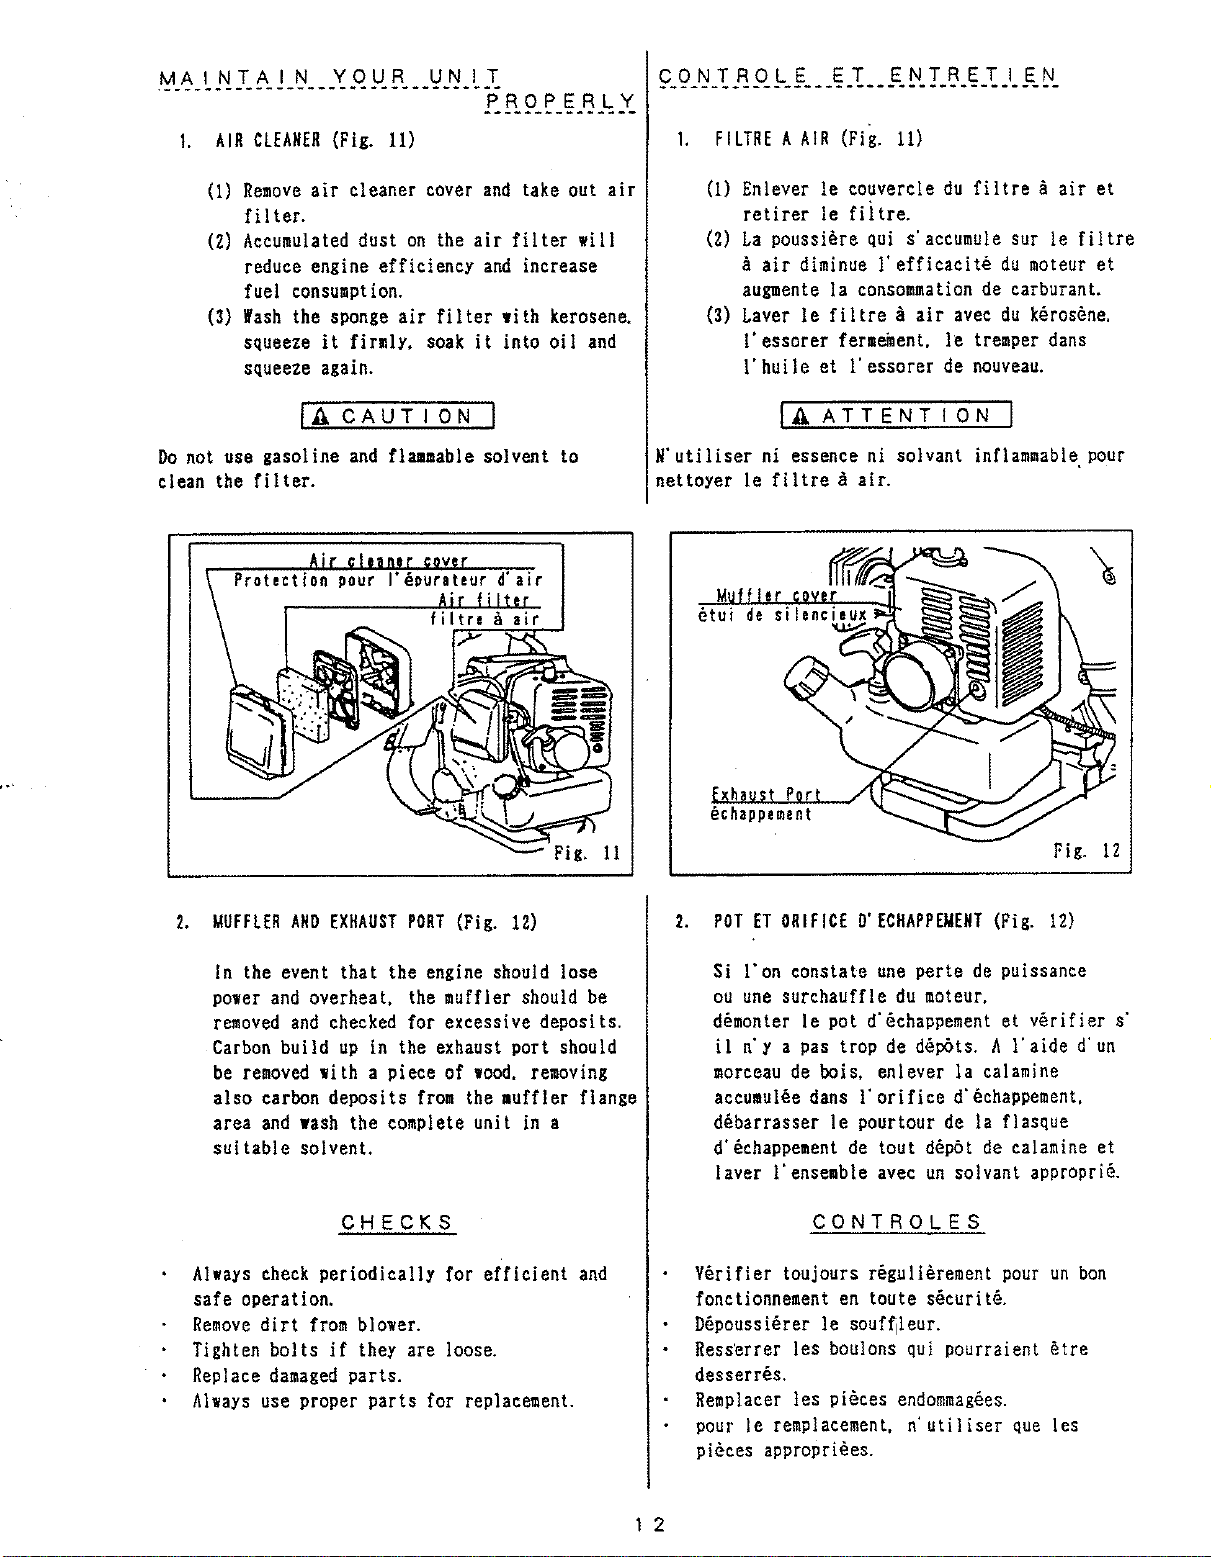
1. AIR CLEANER(Fig. 11)
(l) Remove air cleaner cover and take out air
filter.
(2) Accumulated dust on the air filter will
reduceengine efficiencyand increase
fuel consumption.
(3) _ash the sponge air filterwith kerosene.
squeezeit firmly,soak it intooil and
squeeze again.
[_t C AUT I ON ]
Do not use gasolineand flammablesolventto
clean the filter.
c.O_N__T.a__O_k .E...E..T....E.N.T.R.E__T..L_E_.N_
L FILTREA AtR (Fig.11)
(i) Enleverle couvereledu filtre& air et
retirerle fiitre.
(2) La poussi_requi s'accumulesur le filtre
& air diminue l'efficacit_du moteuret
augmente la consummationde carburant.
(3)Laver le filtre& air avee du k6ros_ne,
l'essorerferm_ent, le tremperdans
l'huileet l'essorerde nouveau.
l_, ATTENT ION J
N'utiliserni essenceni solvantinflammablepour
nettoyer le filtre_ air.
AIr sllaRsr COVer
ProtectiOn pour I'_,ur;_;u;i_i;_r
filtre & air
_tui de si
_chappement
Fig. 12
2. MUFFLERARDEXHAUSTPORT(Fig. 12)
In the event that the engineshould lose
power and overheat,the mufflershouldbe
removed and checked for excessive deposits.
Carbon build up in the exhaust port should
be removed with a piece of wood. removing
also carbondepositsfrom the muffler flange
area and wash the complete unit in a
suitable solvent.
CHECKS
Always checkperiodicallyfor efficientand
safe operation.
Removedirt from blower.
Tighten bolts if they are loose.
Replace damaged parts.
Always use proper parts for replacement.
2. POTET ORIFICE D'ECHAPPEMERT(Fig. 12)
Si l'oneonstateune perle de puissance
ou une surchauffledu moteur.
d6monter le pot d'6chappementet v6rifiers'
ii n'y a pas trop de d6p6ts.A l'aided'un
morceaude bois, enlever la calamine
accumul6edarts l' orifice d'_chappement.
d6barrasser le pourtour de la flasque
d'6chappement de toutd6pOt de calamine at
laver l'ensemble avec un solvant appropri6.
CONTROLES
V6rifier toujours r6guli_rement pour un bon
fonetionnement en toute s6curit&
D6poussi_rer le souffileur.
Ress_rrer les boulons qui pourraient _tre
desserr6s.
Remplacer les pi6ces endommag6es.
pour le remplacement,n'utiliser que lee
pi_ces appropri_es.
12
Loading ...
Loading ...
Loading ...