Loading ...
Loading ...
Loading ...
Connect the Ice and Water'
System to Cold Water
Supply.
Refer to the instructions on the back of
the cabinet.
, CAUTION:
Toavoid cross threading and
water ieaks, you must start alt the
water tube fittings several turns by
hand before tightening with
wrenches. DO NOT OVER-
TIGHTEN. Also be sure to double
check for water leaks after turning
on the water pressure to the
refrigerator.
Pilacement and Leveling
i,i i I,IIH
Placement
On some counter tops there is a 1"
overhang If this is the case, the front
corners of the counter top must be
trimmed off at a 45° angle for the refrig-
erator and freezer doorclearance (see
Figure 15) To build in your refrigerator a
Perimeter Trim Kit isavailable at an
additional cost.
A recessed electrical outlet installedon
the back kitchen wallatfows for a built-in
installation of your refrigerator.
Tobuild in your refrigerator with other
options, such as wood or laminate con-
sult with a local kitchen designer.
).......... ,,!,..ll!,............I
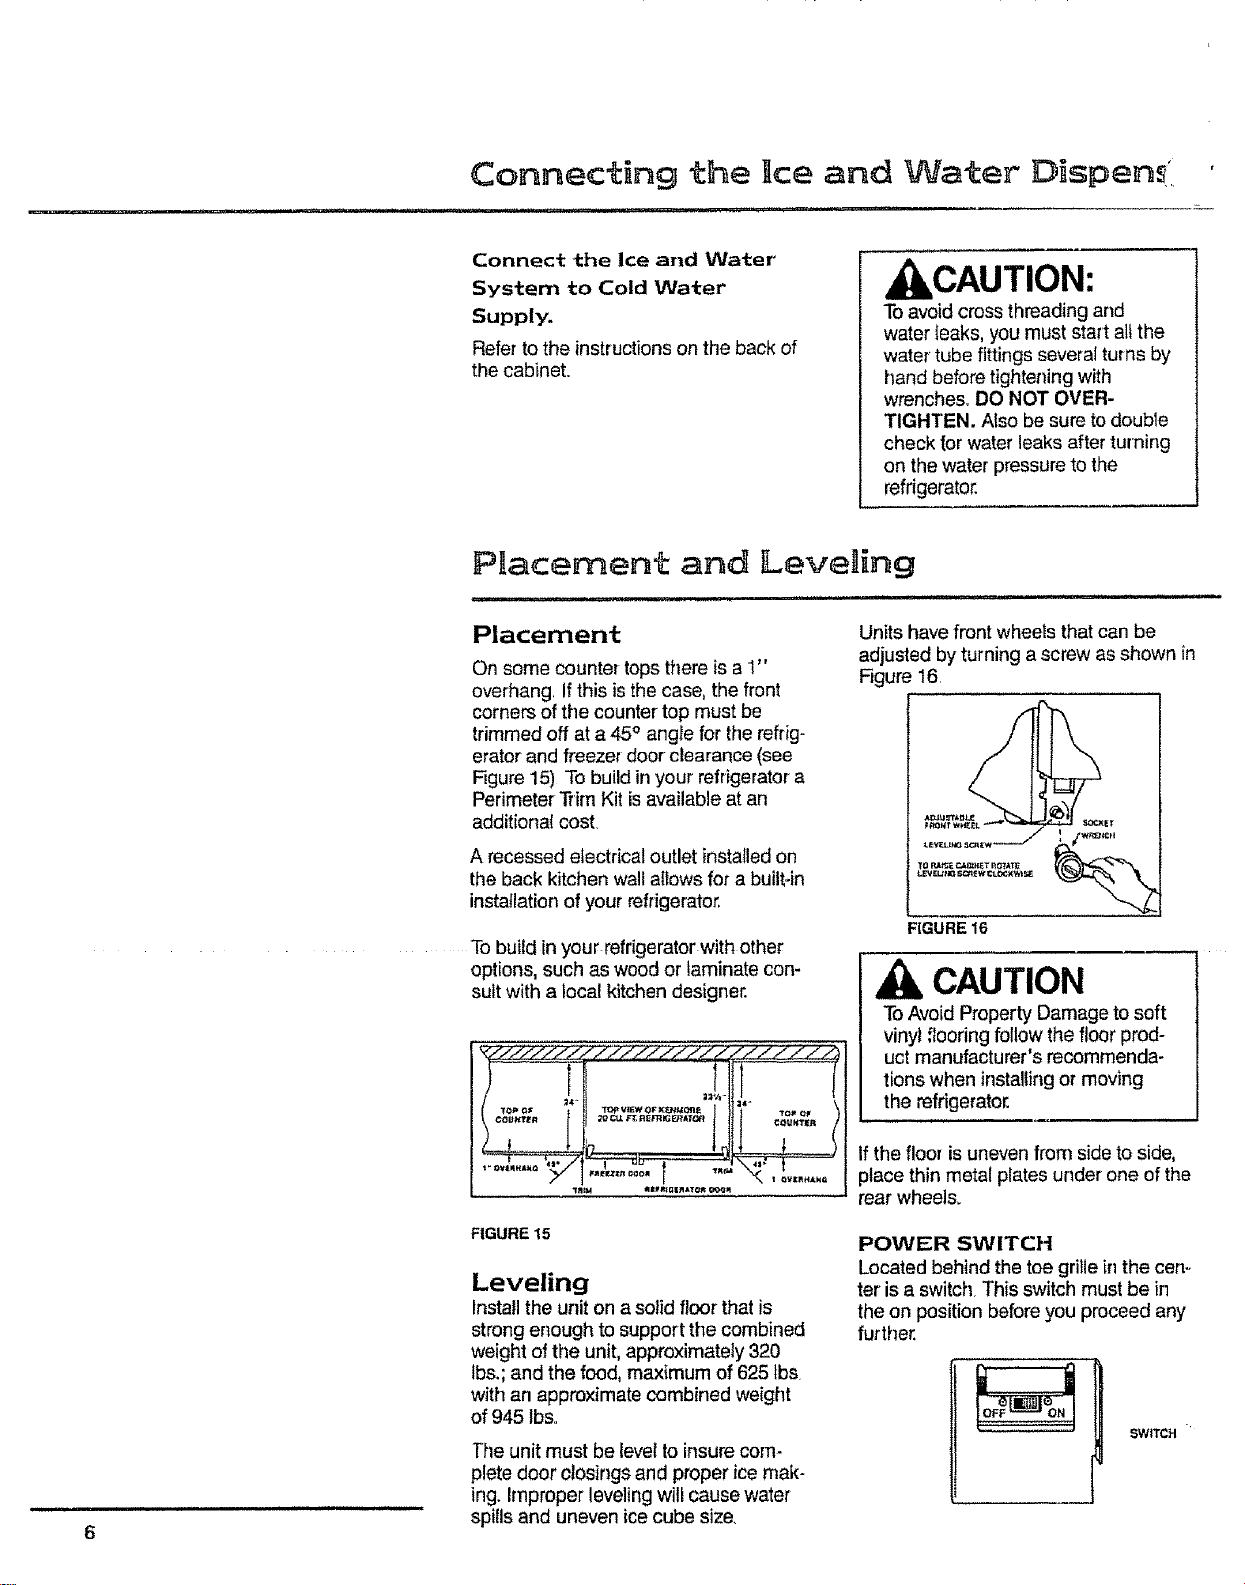
Units have front wheets that can be
adjusted by turning a screw as shown in
Figure 16.
CAUTION
ToAvoid Property Damage to soft
vinyl floodng follow the floor prod-
uct manufacturer's recommenda-
tions when installingor moving
the refrigerator.
If the floor is uneven from side to side,
place thin metal plates under one of the
rear wheels.
FIGURE 15
Leveling
Installthe uniton a solid floor that is
strong enough to support the combined
weight of the unit, approximately 320
tbs.; and the food, maximum of 625 ibs
with an approximate combined weight
of 945 tbs.
]'he unit must be level to insurecorn-
plete door closingsand properice mak-
ing. Improper leveling will cause water
spills and uneven ice cube size.
POWER SWITCH
Located behind the toe grille in the cen-
ter is a switch. This switch must be in
the on position before you proceed any
further.
SWITCH
Loading ...
Loading ...
Loading ...