ge.com
Safety Instructions ........ 214
Operating Instructions
Control Panels ................ 5, 7
Control Settings ............... 6, 8
Dryer Features .................. 9
Loading and Using the Dryer .... 11
Reversing the Door ............. 10
Venting the Dryer .............. 12
Troubleshooting Tips ... 13, 14
Consumer Support
Consumer Support ............. 16
Warranty ..................... 15
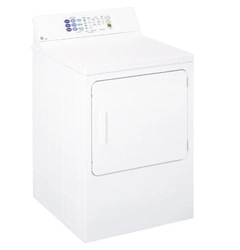
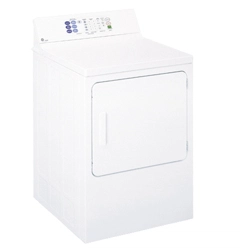
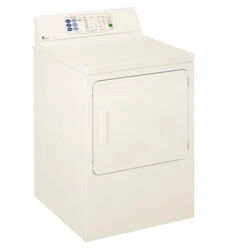
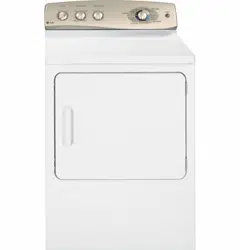
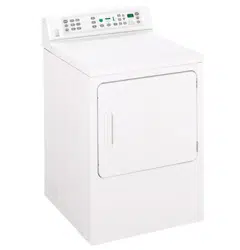
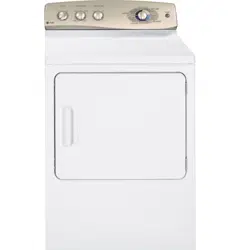
DPSE810
DPSR610
Write the model and serial
number here:
Model #
Serial #
You can find them on u label
on the front of the drger
behind the door.
175D1807P558 49-90290-1 09-06 JR
IMPORTANT SAFETY INFORMATION.
READ ALL INSTRUCTIONS BEFORE USING.
.4,WARNING!
For your safety, the information in this manual must be followed to minimize the
risk of fire or explosion, electric shock, or to prevent property damage, personal
injury, or death.
• Do not store or use gasoline or other
flammable vapors and liquids in the
vicinity of this or any other appliance.
• Installation and service must be
performed by a qualified installer,
service agency or the gas supplier.
WHAT TO DO IF YOU SMELL GAS:
[_ Do not try to light a match, or cigarette,
or turn on any gas or electrical
appliance.
F2]Do not touch any electrical switch; do
not use any phone in your building.
_] lmmediately call your gas supplier from
a neighbor's phone. Follow the gas
supplier's instructions carefully.
]If you cannot reach your gas supplier,
call the fire department.
r-_lClear the room, building or area of
all occupants.
California Safe Drinking Water and Toxic Enforcement Act
Thisact requiresthe governorof Californiato publisha list of substancesknown to the stateto causecancer,birth
defects or other reproductive harm and requiresbusinessesto warn customers of potential exposure to such
substances.
Gasappliances can cause minor exposure to four of these substances, namely benzene,carbon monoxide,
formaldehyde and soot,caused primarily by the incomplete combustion of natural gas or LPfuels.
Properlyadjusted dryers will minimize incomplete combustion. Exposureto these substances can be minimized
further by properly venting the dryer to the outdoors.
PROPERINSTALLATION
This dryer must be properly installed and located in accordance with the Installation Instructions
before it is used. If you did not receive an Installation Instructions sheet, you con receive one by
visiting ge.com or by coiling 800.GECARES (800.432.2737).
• Properlyground dryer to conform with all
governing codesand ordinances. Followdetails
in Installation Instructions.
• Installor store where it will not be exposedto
temperatures below freezing or exposed to
the weather.
• Connectto a properly rated, protected and sized
power supply circuit to avoid electricaloverload.
• Removeall sharp packing itemsand dispose of
all shipping materials properly.
Exhaust/Oucting:
r_l Alldryers MUSTbe exhausted to the outside.
r_-i use only rigid metal 4" diameter ductwork
insidethe dryer cabinet. Useonly rigid metal
or flexible metal 4" diameter ductwork for
exhausting to the outside.USEOFPLASTICOR
OTHERCOMBUSTIBLEDUCTWORKCANCAUSE
A FIRE.PUNCTUREDDUCTWORKCAN CAUSEA
FIREIF ITCOLLAPSESORBECOMESOTHERWISE
RESTRICTEDIN USEORDURINGINSTALLATION.
Forcomplete details,follow the Installation
Instructions.
ge.com
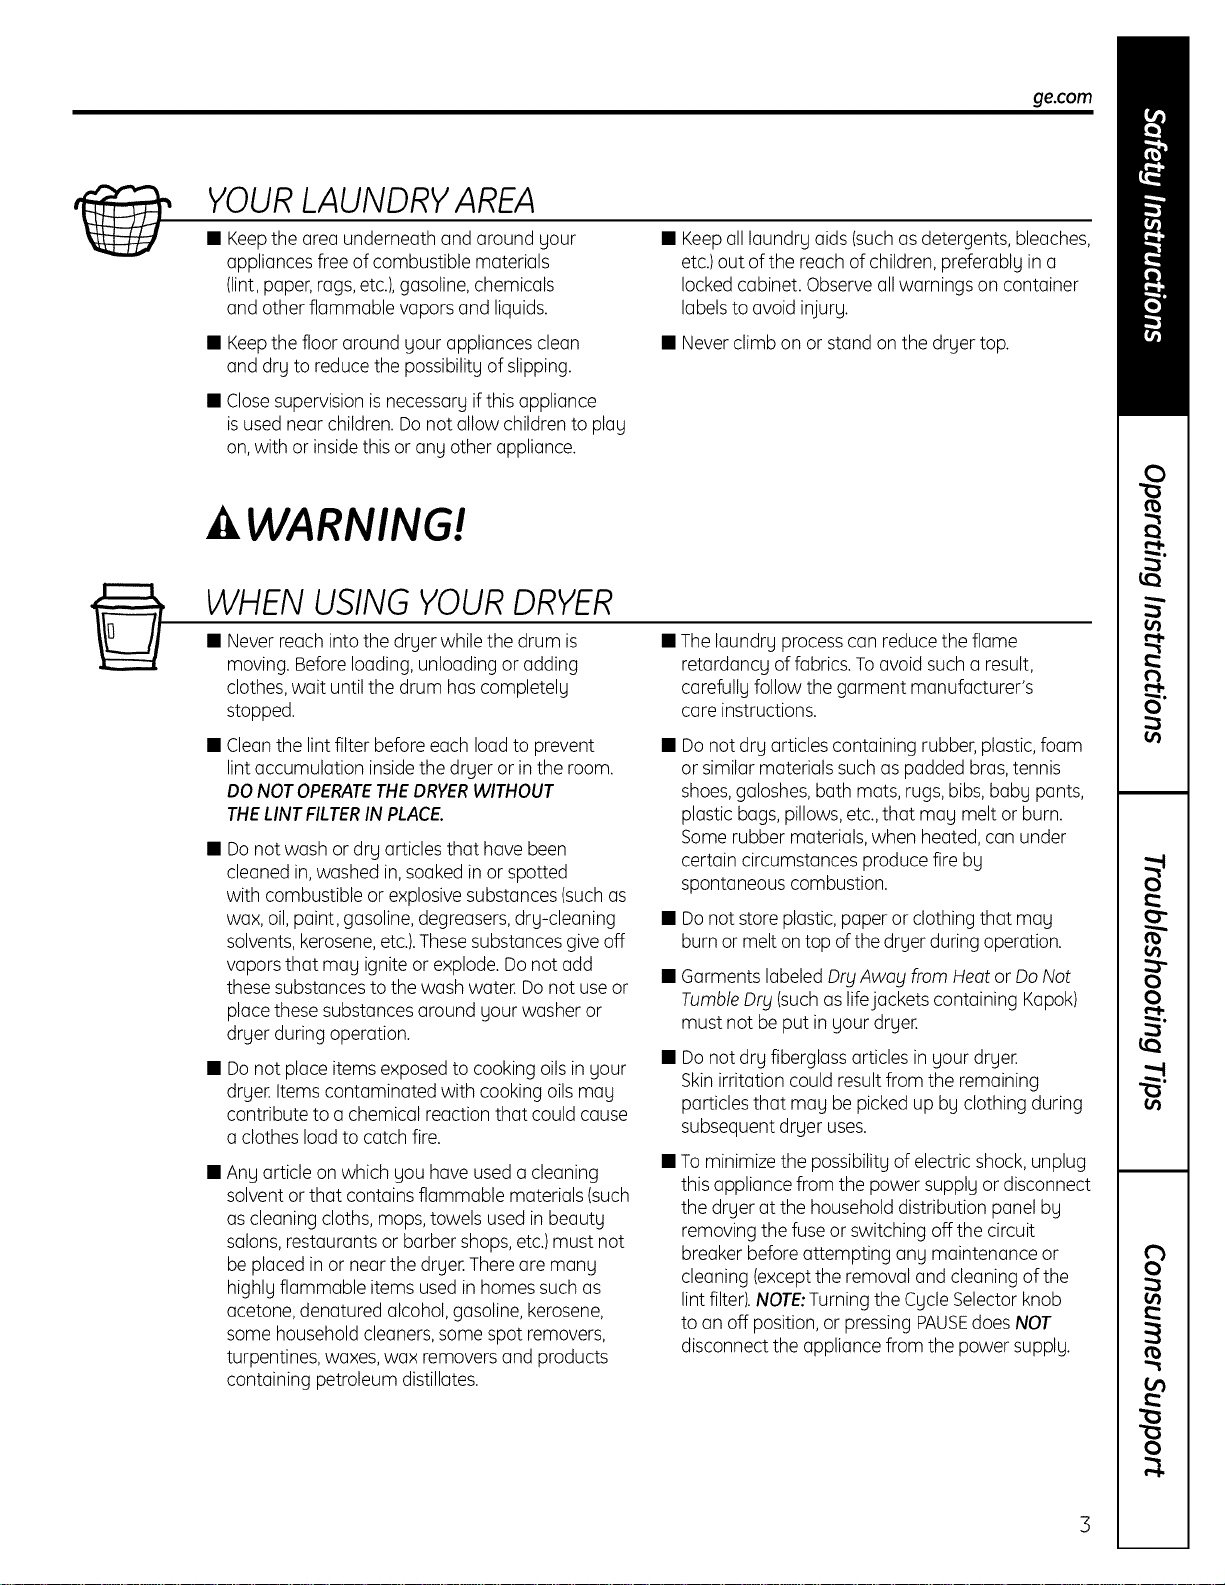
YOURLAUNDRY AREA
Keepthe area underneath and around your
appliances free of combustible materials
(lint, paper,rags, etc.),gasoline,chemicals
and other flammable vapors and liquids.
• Keepalllaundry aids (suchasdetergents, bleaches,
etc.)out of the reach of children, preferably in a
locked cabinet. Observeall warnings on container
labelsto avoid injury.
• Keepthe floor around your appliances clean
and dry to reducethe possibility of slipping.
• Neverclimb on or stand on the dryer top.
• Closesupervisionis necessaryifthis appliance
isused near children. Do not allow children to play
on,with or insidethis or any other appliance.
WARNING!
WHEN USING YOURDRYER
Neverreach into the dryer while the drum is
moving. Beforeloading, unloading or adding
clothes,wait until the drum has completely
stopped.
Thelaundry processcan reducethe flame
retardancy offabrics. Toavoid such a result,
carefully follow the garment manufacturer's
care instructions.
Cleanthe lint filter before each load to prevent
lint accumulation insidethe dryer or in the room.
DONOTOPERATETHEDRYERWITHOUT
THELINTFILTERINPLACE.
Donot wash or dry articles that have been
cleaned in,washed in,soaked in or spotted
with combustible or explosivesubstances(such as
wax, oil,paint, gasoline, degreasers,dry-cleaning
solvents,kerosene,etc.).Thesesubstances giveoff
vapors that may ignite or explode. Donot add
these substances to the wash water. Donot use or
place these substances around your washer or
dryer during operation.
Donot place items exposed to cooking oilsin your
dryer. Items contaminated with cooking oils may
contribute to a chemical reaction that could cause
a clothes load to catch fire.
Any article on which you haveused a cleaning
solvent or that contains flammable materials (such
as cleaning cloths, mops,towels used in beauty
salons,restaurants or barber shops,etc.)must not
be placed in or near the dryer.Thereare many
highly flammable items used in homes such as
acetone, denatured alcohol, gasoline, kerosene,
some householdcleaners,some spot removers,
turpentines, waxes, wax removers and products
containing petroleum distillates.
Donot dry articles containing rubber,plastic,foam
or similar materials such aspadded bras,tennis
shoes,galoshes,bath mats, rugs, bibs,baby pants,
plastic bags, pillows,etc.,that may melt or burn.
Some rubber materials,when heated, can under
certain circumstances produce fire by
spontaneous combustion.
Donot store plastic,paper or clothing that may
burn or melt on top ofthe dryer during operation.
Garments labeled Dry Awablfrom Heat or Do Not
TumbleDry (suchas lifejackets containing Kapok)
must not be put in your dryer.
Donot dry fiberglassarticles in your dryer.
Skinirritation could result from the remaining
particles that may be picked up by clothing during
subsequent dryer uses.
Tominimize the possibility of electric shock, unplug
this appliance from the power supply or disconnect
the dryer at the household distribution panel by
removing the fuse or switching off the circuit
breaker before attempting any maintenance or
cleaning (exceptthe removal and cleaning of the
lint filter).NOTE:Turningthe CycleSelectorknob
to an off position,or pressing PAUSEdoes NOT
disconnect the appliance from the power supply.
IMPORTANTSAFETYINFORMATION.
READALL INSTRUCTIONSBEFOREUSING.
WARNING!
WHEN USINGYOURDRYER(cont.)
• Neverattempt to operate this appliance •
if it isdamaged, malfunctioning, partially
disassembled,or has missingor broken parts,
including a damaged cord or plug.
Theinterior of the machine and the exhaust duct
connection insidethe dryer should be cleaned at
least once a year by a qualified technician. Seethe
Loading and Usingthe Dryer section.
Ifyours isa gas dryer,it isequipped with an
automatic electric ignition and does not have a
pilot light. DONOTATTEMPTTOLIGHTWITHA
MATCH.Burnsmay result from having your hand
in the vicinity ofthe burner when the automatic
ignition turns on.
You may wish to soften your laundered fabrics
or reduce the static electricity inthem by using
a dryer-applied fabric softener or an anti-static
conditioner.We recommend you useeither a fabric
softener in the wash cycle, according to the
manufacturer's instructions for those products,
or try a dryer-added product for which the
manufacturer giveswritten assuranceon the
package that their product can be safely used
in your dryer.Serviceor performance problems
caused by useof these products are the
responsibility of the manufacturers of those
products and are not covered under the warranty
to this appliance.
WHEN NOT USING YOUR DRYER
Graspthe plug firmly when disconnecting this
appliance to avoiddamage to the cord while
pulling. Placethe cord away from traffic areas
so itwill not be stepped on,tripped over or
subjected to damage.
• Beforediscardinga dryer,or removing it from
service,remove the dryer door to prevent children
from hiding inside.
• Do not tamper with controls.
Donot attempt to repair or replaceany part of
this applianceor attempt any servicingunless
specificallyrecommended in this Owner's Manual
or in publisheduser-repairinstructionsthat you
understand and havethe skillsto carry out.
READAND FOLLOWTHISSAFETYINFORMATIONCAREFULLY.
SAVETHESEINSTRUCTIONS
/4
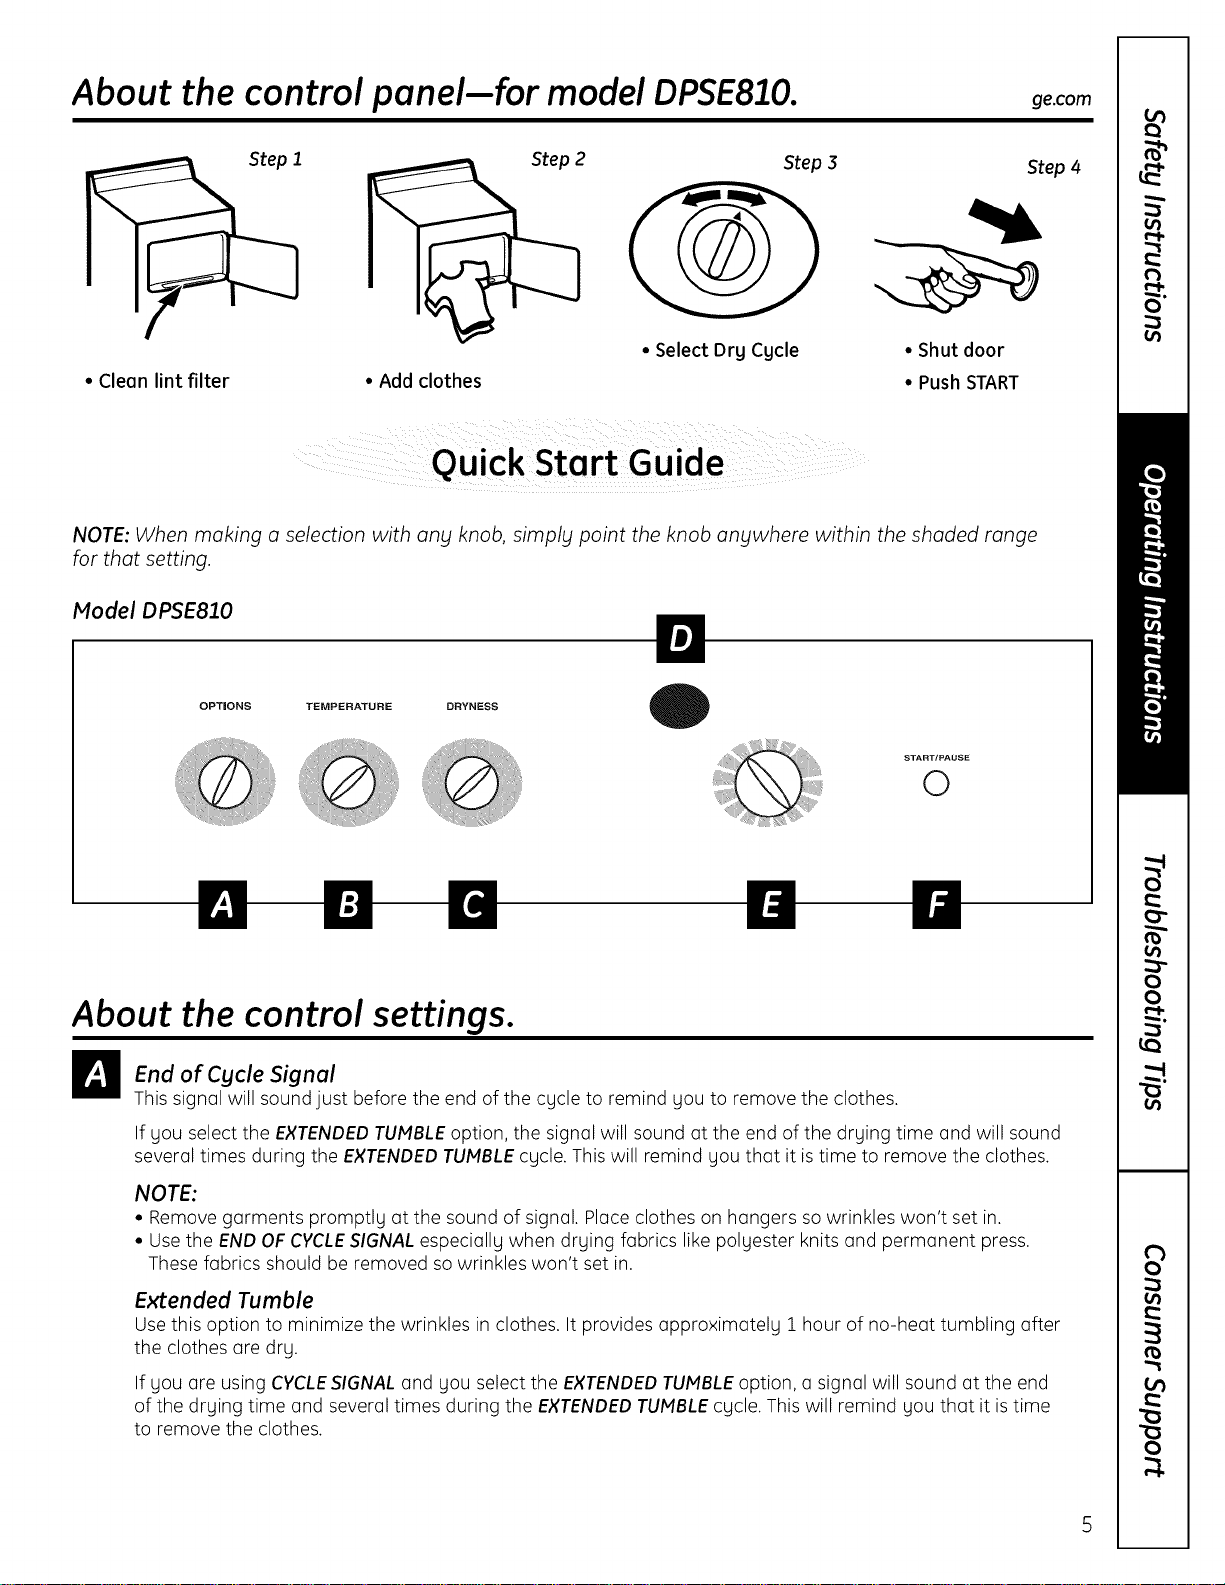
About the control panel-for model DPSE810. ge.com
• Clean lint filter • Add clothes
Step 2 Step 3
• Select Dry Cycle
Step/4
• Shut door
• Push START
NOTE: When making a selection with any knob, simply point the knob anywhere within the shaded range
for that setting.
Model DPSE810
OPTIONS TEMPERATURE DRYNESS
START/PAUSE
0
About the control settings.
End of Cycle Signal
This signal will sound just before the end of the cycle to remind you to remove the clothes.
If you select the EXTENDEDTUMBLEoption, the signal will sound at the end of the drying time and will sound
several times during the EXTENDEDTUMBLEcycle. This will remind gou that it is time to remove the clothes.
NOTE:
• Remove garments promptly at the sound of signal. Place clothes on hangers so wrinkles won't set in.
• Usethe ENDOF CVCLESIGNALespecially when drying fabrics like polyester knits and permanent press.
These fabrics should be removed so wrinkles won't set in.
Extended Tumble
Use this option to minimize the wrinkles in clothes. It provides approximately 1 hour of no-heat tumbling after
the clothes are dry.
If you are using CVCLESIGNAL and you select the EXTENDEDTUMBLEoption, a signal will sound at the end
of the drying time and several times during the EXTENDEDTUMBLEcycle. This will remind you that it is time
to remove the clothes.
About the control settings.
Temperature
HIGH Forregular to heavy cottons.
MEDIUM Forsynthetics, blends,delicates and items labeledpermanent press.
LOW Fordelicates,synthetics and items labeled tumble dry low.
EXTRALOW Fordelicates,synthetics and items labeled tumble dry low.
NO HEAT Forfluffing itemswithout heat. Foruse only with the TIMEDDRVcycles.
_I_ usedfor SENSOR Timed for the selectedtime the selected
Dryness--Selection only cycles. Cycles
run at
temperatures.
MOREDRY Usefor heavy-duty fabrics.
DRY Usefor a normal dryness levelsuitable for most loads.Thisisthe preferred cycle for energy savings.
LESSDRY Usefor lighter fabrics.
DAMP Forleaving items partially damp.
ii1
Estimated Time Remaining Display
• Displaysthe approximate time remaining until the end of the cycle.
• If the estimated time remaining is60 minutes or more,"IH" will flash inthe display,followed by the additional
remaining minutes.When the time remaining islessthan 60 minutes, the timer will count down.
!t
i1
6
Drying Cycles--Sensor cycles automatically determine fabric dryness. Timed cycles run for the selected time.
COTTONS Forcottons and most linens.
EASYCARE Forwrinkle-free, permanent press and delicate items,and knits.
DELICATES Fordelicate items,special-care fabrics and knits.
MIXEDLOAD Forloads consisting of cottons and poly-blends.
TIMED DRY Setthe CycleSelector at the desireddrying time.
DAMPDRY Forleaving items partially damp.
DEWRINKLE Forremoving wrinkles from items that are clean and dry or that are very lightly damp.
QUICKFLUFF Forfreshening or fluffing up already dry clothing,fabric, linensand pillows.Usewith NOHEAT.
Provides10 minutes of no-heat tumbling.
DRYEL Designedfor usewith DRYEL®"dry-clean only" fabric care system. Seeproduct package
for directions. Forquestions or issuesrelatedto the use and performance of DRYEL,call
1.800.214.891], or visitthe DRYELWebsite at www.drgel.com
ANTI-BACTERIAL Thisoption reducescertain types of bacteria by 99.9%,including:Staphylococcusoureus,
I NSFProtocol P154 I Pseudomonosaeruginoso andKlebsiellopneumoniae*.Theanti-bacterial processoccurs
_NSF'_
I
Sonitizetion Performance of
,...... ResidentiaICIothesDryers when high heat isusedduring a portion ofthe drying cycle.
NOTE:Donot usethis cycle on delicate fabrics.
*TheAnti-Bacterial Cycle isCertified by NSFInternational (formerly National Sanitation
Foundation)to NSFProtocolP154Sanitization Performance of ResidentialClothesDryers.
KNITS Forknits with fabric care labelsthat say "Machine Dry".
TOWELS Formost towels and linens.
START--Close the dryer door, PressSTART.Opening the door during operation will stop the dryer, To restart the
dryer, close the door and press STARTto complete the cycle. If the dryer is running, press once to pause the cycle;
press again to continue the cycle. If the dryer is paused for more than 24 hours, the cycle will be cancelled.
Tostop the cycle, hold the button for :3seconds.
NOTE:Drying times will vary according to the type of heat used (Electric, Natural or LPgas), size of load, types
of fabrics, wetness of clothes and condition of exhaust ducts.
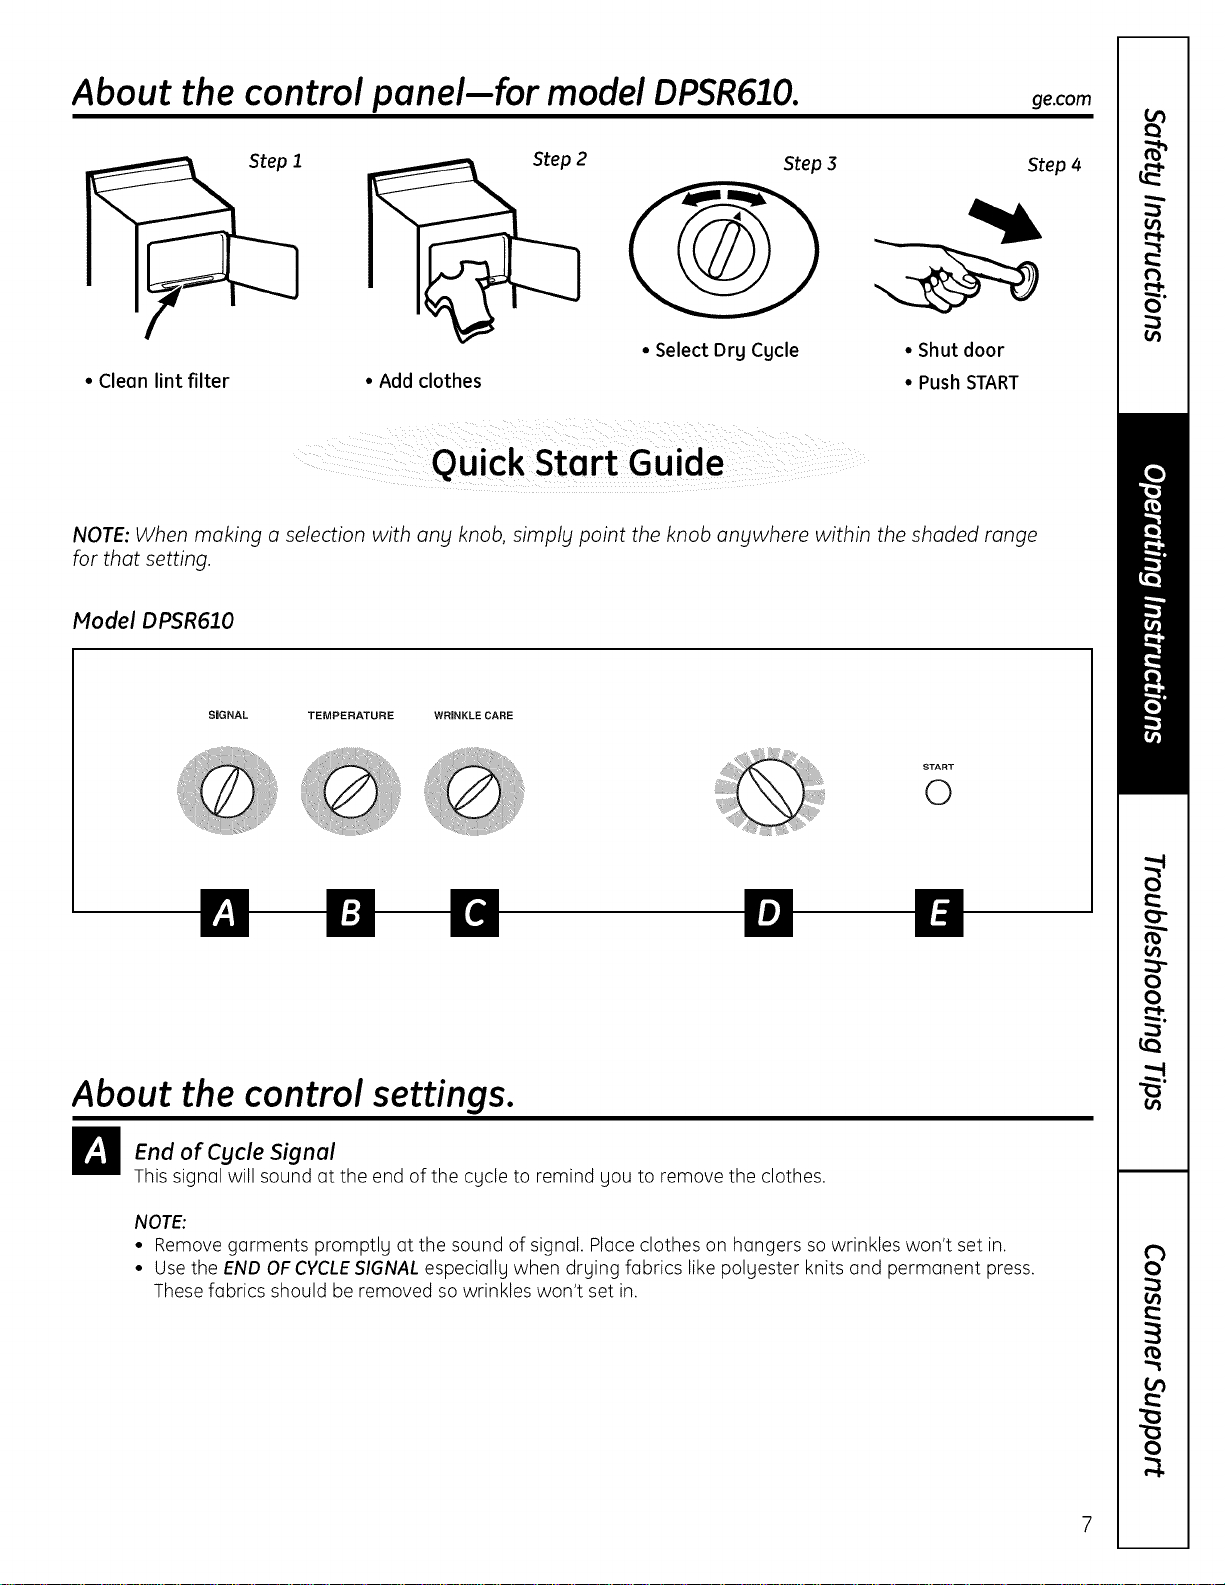
About the control panel-for model DPSR610. ge.com
• Clean lint filter • Add clothes
Step 2 Step 3 Step 4
• Select Dry Cycle
• Shut door
• Push START
NOTE: When making a selection with any knob, simpl_l point the knob an_lwhere within the shaded range
for that setting.
Model DPSR6]O
SIGNAL TEMPERATURE WRINKLE CARE
START
0
About the control settings.
End of Cycle Signal
This signal will sound at the end of the cycle to remind Uouto remove the clothes.
NOTE:
• Remove garments promptly at the sound of signal. Placeclothes on hangers so wrinkles won't set in.
• Usethe END OFCYCLESIGNAL especially when drying fabrics like pol_jester knits and permanent press.
These fabrics should be removed so wrinkles won't set in.
About the control settings.
IMPORTANT: Clean the lint filter each time gou use the drger.
Temperature
HIGHHEAT Forregular to heavy cottons.
MEDIUMHEAT Forsynthetics, blends,delicates and items labeledpermanent press.
NO HEAT Forfluffing itemswithout heat. Foruse only with the TIMEDDRYcycles.
LOW HEAT Fordelicates,synthetics and items labeled tumble dry low.
r_ wrinkle care
Usethis option to minimizethe wrinkles in clothes. It providesapproximately 15 minutes of no-heat tumbling after the
clothes are dry.
This option can only be usedwith the COTTONS,EASYCAREand DELICATEScycles.If you are using CYCLESIGNAL
and you select the WRINKLECAREoption, a signal will sound at the end ofthe drying time and several times during
the WRINKLECAREcycle.Thiswill remind you that it istime to remove the clothes.
If WRINKLECAREisnot ON,the dryer will stop oncethe timer reaches the WRINKLECAREmark on the cycle dial.
lil
Drying Cycles--Automatic cycles automatically determine fabric dryness. Select LESSDRYif you want your
clothes slightly damp at the end of the drying cycle. Select MORE DRYif you want them to feel drier.Timed cycles
run for the selected time.
COTTONS
EASYCARE
DELICATES
TIMED DRY
DAMP DRY
DEWRINKLE
QUICK FLUFF
Forcottons and most linens.Formost loads, selectOPTIMUMDRY.
Forwrinkle-free, permanent press and delicate items,and knits.
Fordelicate items,special-care fabrics and knits.
Setthe CycleSelector at the desireddrying time.
Forleaving items partially damp.
Forremoving wrinkles from items that are clean and dry or that are very lightly damp.
Forfreshening or fluffing up already dry clothing,fabric, linensand pillows.Usewith NOHEAT.
Provides10 minutes of no-heet tumbling.
It
START--Close the dryer door. PressSTART.Opening the door during operation will stop the dryer. To restart the
dryer, close the door and press STARTto complete the cycle.
NOTE:Drying times will vary according to the type of heat used (Electric, Natural or LPgas), size of load, types
of fabrics, wetness of clothes and condition of exhaust ducts.
8
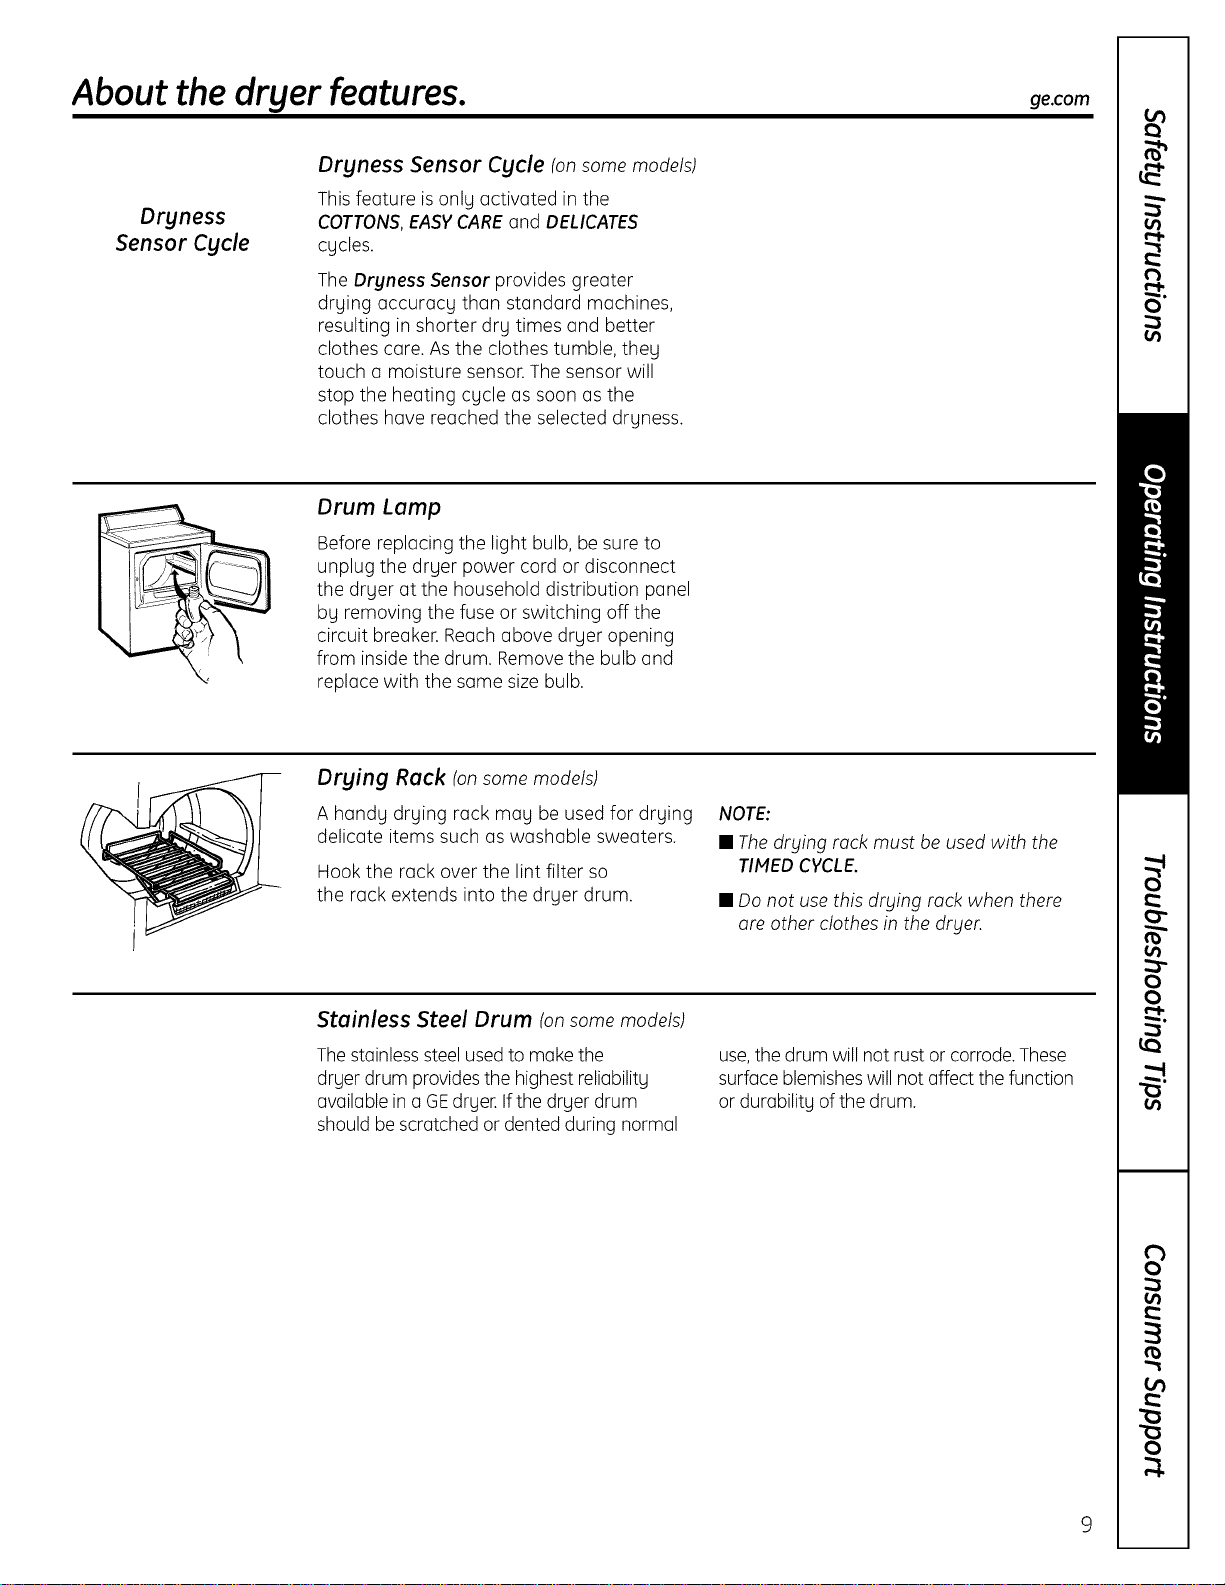
About the dryer features, ge.com
Dryness
Sensor Cycle
Dryness Sensor Cujcle (on some models)
This feature is only activated in the
COTTONS,EASYCAREand DELICATES
cucles.
The Dryness Sensor provides greater
drying accuracy than standard machines,
resulting in shorter dry times and better
clothes care. As the clothes tumble, they
touch a moisture sensor.The sensor will
stop the heating cycle as soon as the
clothes have reached the selected dryness.
Drum Lamp
Before replacing the light bulb, be sure to
unplug the dryer power cord or disconnect
the dryer at the household distribution panel
by removing the fuse or switching off the
circuit breaker. Reach above dryer opening
from inside the drum. Removethe bulb and
replace with the same size bulb.
Drying Rack tonsomemodels)
A handy drying rack may be used for drying
delicate items such as washable sweaters.
Hook the rack over the lint filter so
the rack extends into the dryer drum.
NOTE:
• The drying rack must be used with the
TIMED CYCLE.
• Do not use this drging rack when there
are other clothes in the drger.
Stainless Steel Drum tonsomemodels)
Thestainlesssteel usedto make the
dryer drum providesthe highest reliability
available in a GEdryer. If the dryer drum
should be scratched or dented during normal
use,the drum will not rust or corrode. These
surface blemisheswill not affect the function
or durability of the drum.
About reversing the door.
Reversing the Door
Tools needed:
• Stondord #2
Phillips screwdriver
• Tope-tipped
puttg knife
I-_ Open the door and remove the filler plugs opposite the hinges. With the door
completely open, remove the bottom screw from each hinge on the dryer face.
Insert these screws about half way into the TOPholes, for each hinge, on the
opposite side (where you removed the filler plugs). Apply firm pressure to get
the screw started in new holes.
I-_ Loosen top screw from each hinge on the dryer face half way. With one hand
holding the top of the door and the other hand holding the bottom, remove
the door from the dryer by lifting it UPand OUT.
/
t/
9_
[_] Rotate the door 180°Insert it on the opposite side of the opening by moving
the door/N and DOWN until the top hinge and the bottom hinge are resting
on the top screws inserted in step 1.
[_] Remove the remaining screws from the side of the opening from which the door
was removed. With these screws, secure each hinge at the bottom. Tighten the
two top screws of each hinge. Reinsert the plastic plugs on the side from which
the door was removed.
10
About loading and using the dryer.
Always follow the fabric manufacturer's care label when laundering.
ge.com
Sortingand Loading Hints
As a general rule, if clothes are sorted properly for
the washer, they are sorted properly for the dryer.
Do not overload. This wastes energy and causes
wrinkling.
Do not add fabric softener sheets once the load
has become warm. They may cause fabric softener
stains. Bounce®Fabric Conditioner Oryer Sheets
have been approved for use in all GEDryers when
used in accordance with the manufacturer's
instructions.
Do not dry the following items: fiberglass items,
woolens, rubber-coated items, plastics, items with
plastic trim and foam-filled items.
The Exterior: Wipe or dust any spills or washing
compounds with a damp cloth. Dryer control
panel and finishes may be damaged by some
laundry pretreatment soil and stain remover
products. Apply these products away from the
dryer. The fabric may then be washed and dried
normally. Damage to your dryer caused by these
products is not covered by your warranty.
Care and Cleaning of the Or_ter
Stainless Steel: To clean stainless steel surfaces,
use a damp cloth with a mild, non-abrasive cleaner
suitable for stainless steel surfaces. Removethe
cleaner residue, and then dry with a clean cloth.
The Lint Filter: Clean the lint filter before each
use. Moisten your fingers and reach into the filter
opening. Run your fingers across the filter. Have a
qualified technician vacuum the lint from the dryer
once a year.
J
The Exhaust Duct: Inspect and clean the exhaust
ducting at least once a gear to prevent clogging.
A partially clogged exhaust can lengthen the
drying time.
Follow these steps:
r_ Turn off electrical supply by disconnecting
the plug from the wall socket.
r_ Disconnect the duct from the dryer.
[_] Vacuum the duct with the hose attachment
and reconnect the duct.
The Exhaust Hood: Checkfrom the outside that
the flaps of the hood move freely when operating.
Hake sure that there is not wildlife (birds, insects,
etc.)nesting inside the duct or hood.
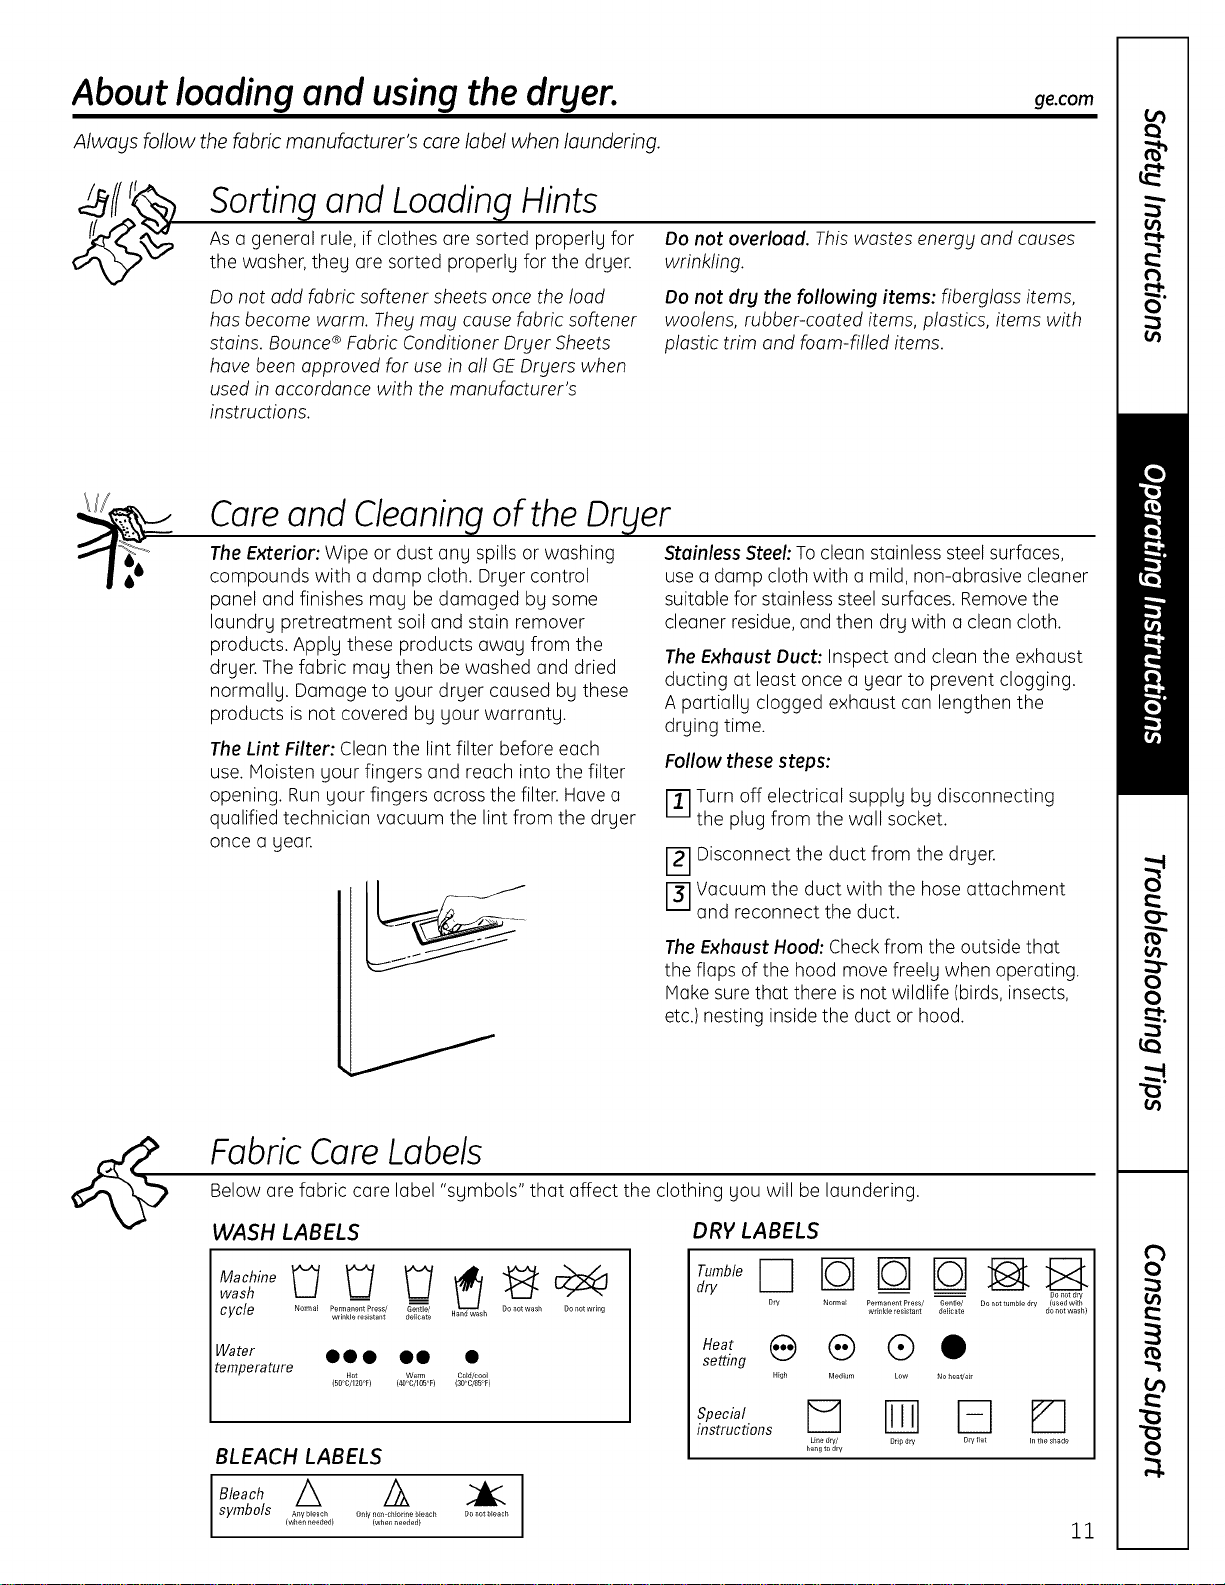
FabricCareLabels
Below are fabric care label "symbols" that affect the clothing you will be laundering.
WASH LABELS
wash __ __
cycle Nolmal Perm ane_/t Piess/ Ge_/tle'_/
wdnkle _esista{}t delicate an wash
Water • • • •• •
temperature
Hot Wam] Co_d/cool
{50 0/120 F} (40<C/105<F} (30<0/85< F}
BLEACH LABELS
81eachA A _1
DRV LABELS
dr_ oo,,at_,y
DW Nornlal Pernla_}e_}t P_ess/ Gentle/ Do not tumble dW {used with
wd_}kle resista_}t delicate do _}ot wash}
.eat e ® ® O
setting
High Medium Low Nohea_ai_
instructions
Line d_y/ Ori_ dry OH flat In the shade
ha_g to dry
11
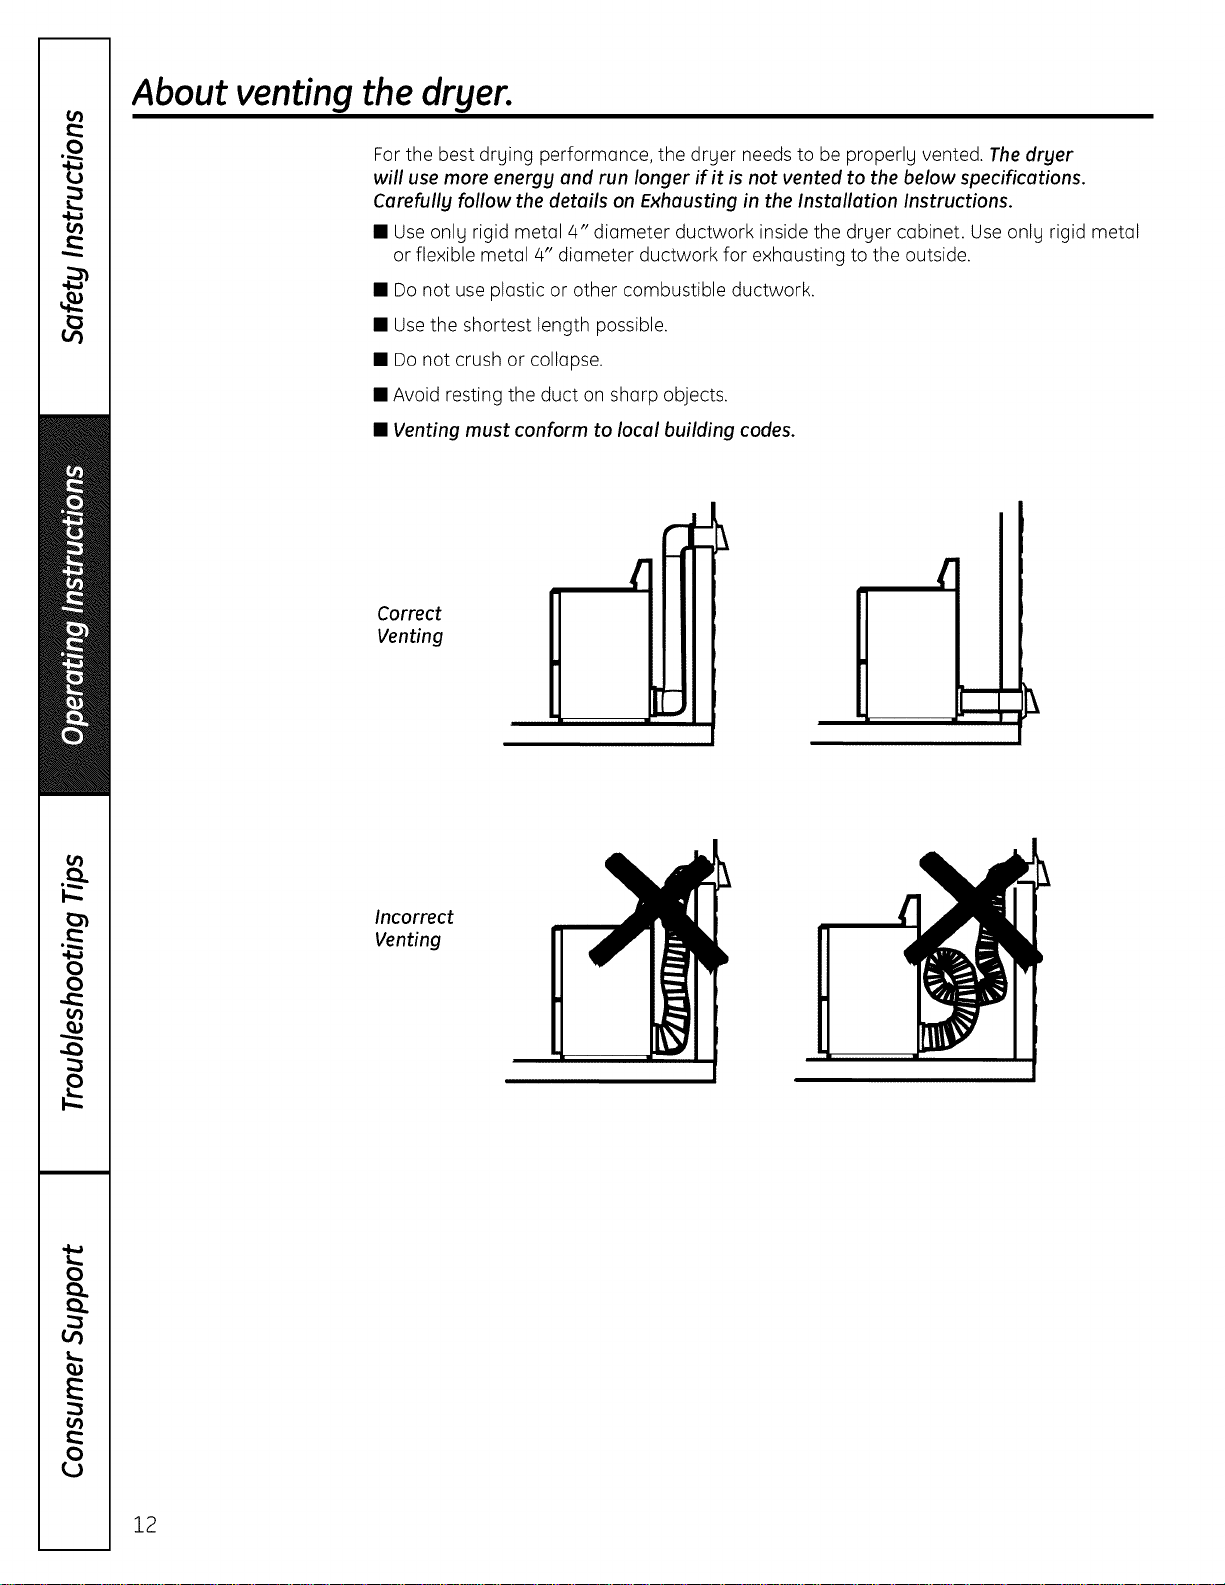
About venting the druer.
Forthe best drying performance, the dryer needs to be properly vented. The druer
will use more energu and run longer if it is not vented to the below specifications.
Carefullu follow the details on Exhausting in the Installation Instructions.
• Useonly rigid metal/4" diameter ductwork inside the dryer cabinet. Use only rigid metal
or flexible metal 4" diGmeter ductwork for exhausting to the outside.
• Do not use plastic or other combustible ductwork.
• Usethe shortest length possible.
• Do not crush or collapse.
• Avoid resting the duct on sharp objects.
• Venting must conform to local building codes.
Correct
Venting
(
m
[-
(
Incorrect
Venting
12
Before you call for service.., go.cam
Troubleshooting Tips
Save time and money! Review the charts on the following pages,
or visit go.com. You ma_l not need to call for service.
Problem Possible Causes What To Do
Oryer doesn't start Orgeris unplugged • Makesure the druer plug ispushedcompletelu into
the outlet.
Fuse isblownlcircuit breaker • Checkthe housefuse/circuit breaker box and replace
is tripped fuse or reset breaker.NOTE:Mostelectric dryers use
two fuses/breakers.
Dryer doesn't heat Fuse is blown/circuit breaker is • Checkthe housefuse/circuit breaker box and replace
tripped; the drger mag tumble both fusesor reset both breakers.Yourdrger mug tumble
but not heat ifonlg one fuse is blown or one breaker istripped.
Gasservice is off • Makesure gas shutoff at drger and main shutoff are
fullg open.
Noheat temperature • Selectanother heat setting.
selected
Dryer shakes or Someshaking/noise is normal. • Movedrger to an evenfloor space,or adjust levelinglegs
makes noise Drger mag be sitting unevenlg as necessarg until even.
Greasy spots on clothes Improper useof fabric softener • Followdirections on fabric softener package.
Drging dirtg items • Usegour dryer to dry only clean items. Dirty items can
with clean ones stain clean items and the dryer.
Clothes were not • Sometimesstains which cannot be seenwhen the clothes
completelg clean are wet appear after drying. Useproperwashing procedures
beforedrying.
Lint on clothes Lint filter isfull • Cleanlint screenbefore each load.
Improper sorting • Sort lint producers(likechenille)from lint collectors
(likecorduroy).
Static electricity can attract lint • Seesuggestions in this section under STATIC
Overloading • Separate largeloads into smallerones.
Paper,tissue, etc., left in pockets • Empty all pockets before laundering clothes.
Static occurs Nofabric softenerwas used • Try a fabric softener.
Bounce®FabricConditioner Dryer Sheetshave been
approved for use in all GEDryerswhen usedin accordance
with the manufacturer's instructions.
Overdrging • Try a fabric softener.
• Adjustsetting to LESSDRVor DAMPDRV.
Sgnthetics, permanent press • Try a fabric softener.
and blends can cause static
Tgpeof heat • Automatic drying times will vary according to the type
of heat used(electric,natural or LPgas),sizeof load,
types of fabrics,wetness of clothes and condition of
exhaust ducts.
Inconsistent
drying times
13

Before gou call for service...
Problem Possible Causes
Clothes take too long Improper sorting
to dry
Large loads of heavg fabrics
Ilike beach towels)
Controls improperlgset •
Lint filter isfull •
Improper or obstructed •
ducting
What To Do
• Separate heavg items from lightweight items(generallg,
a well-sorted washer load isa well-sorted drger load).
• Large,heavg fabrics contain more moisture and take
longer to drg. Separatelarge,heavg fabrics into smaller
loadsto speed drging time.
Hatch control settings to the load gou are drging.
Clean lintfilter before everg load.
Check installation instructions for proper
ducting/venting.
Hake sure ducting isclean, free of kinksand
unobstructed.
• Checkto seeifoutside wall damper operates easilg.
• Checkthe Installation Instructions to make surethe
drger venting iscorrect.
Blown fuses or tripped • Replacefuses orresetcircuit breakers.Sincemost drgers
circuitbreaker use2 fuses/breakers,make sureboth are operating.
Overloading/combining loads • Donot put more than one washer load in the drger at
a time.
Underloading • Ifgouare drging onlg one or two items,add a few items
to ensureproper tumbling.
Clothes are wrinkled Overdrying • Select a shorter drging time.
• Removeitems while theg still hold a slight amount of
moisture. Selecta LESSDRVorDAMPDRYsetting.
Letting items sitin dryer • Removeitems when cgcle ends and fold or hang
after cycle ends immediatelg.
Overloading • Separate large loads into smaller ones.
Clothes shrink Somefabrics will naturally shrink • Toavoid shrinkage,follow garment care labelsexactlg.
when washed. Others can be • Some items mag be pressedback into shape after drging.
safelywashed, but will shrink
in the dryer • Ifgouare concerned about shrinkage in a particular
item,do not machine wash or tumble drg it.
14
GEDryer Warranty.
All warranty support provided by our Factory Service Centers,
or an authorized Customer Care®technician. Toschedule service,
on-line, 24 hours a day, visit us at Be.cam or call 800.GE.CARES
(800.432.2737). Please have serial number and model number
available when calling for service.
Staple your receipt here.
Proof of the original purchase
date is needed to obtain
support under the warranty.
For The Period Of:
One Year
From the dateof the
original purchase
Second Year
From the dateof the
original purchase
Thirdthrough FifthYear
From the dateof the
original purchase
GE Will Replace:
Any part of the drger which fails due to a defect in materials or workmanship. During this
limited one-year warranty, GEwill also provide,free of charge, all labor and related servicecosts
to replacethe defective part.
Any part ofthe dryer which fails due to a defect in materials or workmanship. Duringthis
additional one-year limited warranty, you will be responsiblefor any labor or related servicecosts.
Theextra largeor super capacity dryer drum and main electroniccontrol board if any of these
parts should fail due to a defect in materials or workmanship. Duringthis additional three-year
limitedwarranty, Uouwill be responsiblefor anu labor or related servicecosts.
What GE Will Not Cover:
• Servicetrips to your home to teach you how
to use the product.
• Improper installation, delivery or maintenance.
• Failure of the product if it isabused, misused, or
used for other than the intended purpose or used
commerciallg.
• Replacement of the light bulb.
• Replacement of house fuses or resetting
of circuit breakers.
• Damage to the productcaused bg accident, fire,floods
or acts ofGod.
• Incidental or consequential damage caused bg possible
defectswith this appliance.
• Damage causedafter deliverg.
• Product not accessible to providerequired service.
EXCLUSION OF IMPLIED WARRANTIES--Your sole and exclusive remedy isproduct repair as provided in this Limited
Warranty. Any implied warranties, including the implied warranties of merchantability or fitness for a particular
purpose, are limited to one year or the shortest period allowed by law.
Thiswarranty isextendedto theoriginal purchaserand any succeedingowner for products purchasedfor home usewithin the
USA.If the product islocated in on area whereserviceby a GEAuthorized Servicerisnot available,you may be responsiblefor a
trip charge or you may be requiredto bring theproduct to onAuthorized GEServicelocation forservice.InAlaska,the warrantF
excludesthe costof shipping orservicecallsto your home.
Somestates do not allow the exdusion or limitation of inddental or consequentialdamages.Thiswarranty givesyou specificlegal
rights,and you may alsohaveother rights which vary from state to state.Toknow what your legal rights ore,consultyour local
or state consumeraffairs office or your state'sAttomeF General.
Warrantor: General Electric Company. Louisville, KV 40225
15
Consumer Support.
GEAppliances Website
Have a question or need assistancewith your appliance?Try the GEAppliances Website 24 hours a day,
any day ofthe year! Forgreater convenience and faster service,you can now download Owner's Hanuals,
order parts or evenschedule service on-line.
ge.com
Schedule Service go.cam
Expert GFrepair service isonly one step away from your door.Geton-line and schedule your serviceat your
convenience 24 hours any day of the year! Or call800.GE.CARES(800.432.2737)during normal businesshours.
Real LifeDesign Studio ge.com
GEsupports the UniversalDesignconcept-products, services and environments that can be usedby
people of all ages, sizesand capabilities.We recognizethe need to design for a wide range of physical and
mental abilities and impairments. Fordetails of GE'sUniversalDesignapplications, including kitchen design ideas
for people with disabilities,check out our Website today. Forthe hearing impaired, pleasecall 800.TDD.GEAC
(800.833.4322).
ExtendedWarranties
Purchasea GEextended warranty and learn about special discounts that are available while your warranty
isstill in effect. You can purchase it on-line anytime, or call 800.626.2224during normal businesshours.
GEConsumer Home Serviceswill still be there after your warranty expires.
ge.com
Ports and Accessories
go.cam
Individualsqualified to servicetheir own appliances can have parts or accessoriessent directly to their homes
(VISA,HasterCard and Discovercards are accepted).Orderon-line today, 24 hours every day or by phone
at 800.626.2002during normal businesshours.
Instructions contained in this manual cover procedures to be performed by any user. Other servicing
generally should be referred to qualified service personnel. Caution must be exercised,since improper
servicing may causeunsafe operation.
Contoct Us
If you are not satisfiedwith the service you receivefrom GE,contact uson our Website with all the details
including your phone number,or write to: General Hanager,Customer Relations
GEAppliances,Appliance Park
Louisville,KY40225
ge.com
Register YourAppliance
Register your new epplience on-line--et your convenience! Timely product registration will allow for
enhanced communication and prompt serviceunder the terms of your warranty, should the needarise.
Youmay alsomail inthe pre-printed registration cord included in the packing material.
go.cam
16 Printed in Canada
ge.com
Instrucciones
de seguridad .............. 2-4
Instrucciones de operacidn
Ajustes de control ............. 6, 8
C6mo cambiar el sentido
de apertura de la puerta ........ 10
C6mo cargary usar lasecadora .ii
Funcionesde lasecadora ........9
Panelesde control.............5,7
Ventilaci6nde lasecadora ......12
Consejos para la solucidn
de problemas ........... 13,14
Soporte al consumidor
Garantia ......................15
Soportealconsumidor .........16
DPSE810
DPSR610
Escriba el n6mero de modelo
y de serie aqui:
No. de modelo
No. de serie
EstosnOmeros se encuentran
en una etiqueta en la parte
delantera de la secadora, detr6s
de la puerta.
175D1807P558 49-90290-1 09-06 JR
J
INFORNIACiON DE SEGURIDAD INIPORTANTE.
LEA TODAS LAS INSTRUCCIONES ANTES DE USAR.
iADVERTENCIA!
Por su seguridad, debe seguir las indicaciones de este manual para minimizar el riesgo
de incendio o explosiSn,descarga el_ctrica, o para evitar dafios a la propiedad, lesiones
personales, o muerte.
No almacene ni use gasolina u otros
vapores y liquidos inflamablesenlas
proximidades deeste o cualquier otro
electrodomgstico.
• La instalaci6n g el servicio Io deben
Ilevar a cabo un instalador calificado,
la agencia de servicio o el proveedor
de gas.
QUE HACER SI USTED HUELE GAS:
F_ No intente encender un f6sforo,
o un cigarrillo, o encender cualquier
electrodom#.stico el_ctrico o de gas.
F2-]No toque ning6n interruptor elgctrico,
usening_n tel_.fonoenel edificio.
F3-]Desocupeel habitaci6n, edificio o 6rea
afectada.
_] Llame inmediatamente a su proveedor
de gas usando el tel_.fono de algCJn
vecino. Siga las instrucciones del
proveedor de gas cuidadosamente.
Siusted no puede ponerse en contacto
con su proveedor de gas, Ilame al
departamento de bomberos.
%
Decreto para hacer cumplir las leges sobm t6xicos g agua potable de California
Estedecreto requiere que el Gobernador de California publique una lista de lassustanciasque el estado sabe
que causan c6ncer,defectos de nacimiento g otros dafios reproductivos g requiere que loscomerciantes le
adviertan a sus consumidores sobreel potencial de exposici6na tales sustancias.
Loselectrodom@sticosde gas pueden causar la exposici6na cuatro de estas sustancias,concretamente
benceno, mon6xido de carbono, formaldehfdo g hollfn,principalmente causados por la combusti6n incompleta
del gas natural o de combustibles LR
Cuando lassecadoras est6n ajustadas apropiadamente, se minimiza la combusti6n incompleta. Laexposici6n
a estassustancias puede minimizarse aOnm6s ventilando apropiadamente la secadora hacia el exterior.
INSTALACIONAPROPIADA
Antes de usarse, la secadora se debe instalar apropiadamente de acuerdo con los Instrucciones
de instalaci6n. Si no recibi6 una Hoja de instrucciones de instalaci6n, puede obtener una
visitando ge.com o Ilamando a1800.GE.CARES (800.432.2737).
• Conecte lasecadora a tierra de manera apropiada
que cumpla con todos losc6digos g ordenanzas
reguladoras. Sigacon cuidado las Instrucciones
de instalaci6n.
• Inst61elao almac@neladonde no est6 expuesta
a temperaturas por debajo del punto de
congelaci6n o expuesta a la intemperie.
• Conectea untomacorriente del tamafio g del calibre
apropiados para evitar una sobrecarga el@ctrica.
• Remuevatodos losobjetos de empaquetado
g desh6gase apropiadamente de todos los
materiales de envfo.
Escape/Ductos:
I-_--1Todas secadorasDEBENtener un escape hacia
el exterior.
P7
Solamente use ductos de metal rfgido de 4" de
di6metro dentro de la secadora. Solamente use
ductos de metal rfgido o flexible de 4" de di6metro
para escape hacia el exterior. EL USO DE DUCTOS
PLASTICOS U OTROSDUCTOS DE MATERIALES
COMBUSTIBLES PODRIA CAUSAR UN INCENDIO.
LOS DUCTOS PERFORADOS PODRIAN CAUSAR
UN INCENDIO SI COLAPSAN 0 SI OCURRE
ALGUNA OBSTRUCCION DURANTE EL USO 0
DURANTE LA INSTALACION.
Para losdetalles completos, sigalas Instrucciones
2 de instalaci6n.
ge.com
SUAREADESECADO
Mantenga el 6rea debajo y alrededor de sus
electrodom@sticoslibrede materiales combustibles
(pelusas,papel,trapos, etc.),gasolina, productos
qufmicos g otros Ifquidosg vapores inflamables.
Mantengael pisoalrededorde suselectrodom@sticos
Iimpios g secospara reducir la posibilidad de
un accidente.
Supervisea losninosen caso de que eliasusen
la secadora ojueguen cerca de ella durante su
operaci6n. Nopermita que losni_osjueguen con
la secadora,en su interior,sabre ella o ning0n
otro electrodom_stico.
Mantenga todos los artfculos de limpieza (tales
coma detergentes g blanqueadores) fuera del
alcance de los ni_os, preferiblemente encerrados
en un gabinete. Ponga atenci6n a las advertencias
en las etiquetas de los envases para evitar
accidentes.
Nunca trepe ni se ponga de pie sabre la parte
superior de la secadora.
iADVERTENCIA!
CUANDO USESU SECADORA
• Nuncaintroduzca susmanos en el interior de •
la secadora mientras el tambor giratorio est_
movi_ndose.Antes de agregar g sacar ropa,espere
hasta que el tambor giratorio sehaga detenido.
• Limpieel filtro de pelusaantes de cada cargo •
para evitar la acumulaci6n de pelusa en el interior
de la secadora o en la habitaci6n. NOOPERELA
SECADORASINELFILTRODEPELUSAENSULUGAR.
Nolaveni sequeart[culos que sehayan limpiado,
lavado, remojado o salpicado con sustancias
combustibles o explosivas(talescoma cera, aceite,
pintura, gasolina,desengrasadores,solventes de
tintoreria, kerosene).Estassustancias producen
vapores que podrian incendiarse o explotar.No
agregue estassustancias al agua de lavado. No
use ni coloque estassustancias alrededor de la
lavadora o secadora durante su usa.
Nocoloque art[culos expuestos a aceite de cocinar
en la secadora.Losartfculos contaminados con
aceites de cocinar podrfan contribuir a formar una
reacci6n qufmica que podrfa causar que una carga
de ropasse incendie.
Cualquierartfculo sabre el cual usted us6un
solvente de limpieza o que contenga materiales
inflamables (talescoma panosde limpieza,
trapeadores,toallas usadas en salonesde belleza,
restaurantes o barber[as)no sedeben colocar en
el interior o en las proximidadesde la secadora.
Existenmuchos artfculos inflamables en el hogar
tales coma laacetona, el alcohol,la gasolina,
el kerosene,algunos limpiadores,algunos
quitamanchas, aguarr6s, trementina, ceras,
removedores de cera g productos que contengan
derivados del petr61eo.
Elproceso de lavado puede reducir la habilidad
de retardar la flamabilidad de algunas telas.
Paraevitar tal resultado,siga lasinstrucciones
del fabricante de lastelas con mucho cuidado.
Nosequeartfculos que contengan goma, pl6stico,
espuma o materiales similarestales coma
sostenes (brasieres)con relleno,zapatos deportivos,
ganchos de goma, alfombras de baBo,baberos
de nino,pantalones de niBo,balsas plcisticasg
almohadas que sepuedan derretir o quemar.
Algunos materiales gomosos, cuando secalientan,
bajo ciertas circunstancias podrfan incendiarse par
combusti6n espontcinea.
Durante su operaci6n, no almacene encima
de la secadora pkisticos,papel o ropa que se
puedan quemar o derretir.
Lasprendas de vestir etiquetadas 'Orblaway from
heat"/Secar alejadasdelcolor)o"Donot tumble
dry" (Nosecarpar giro)--tales coma chaquetas
salvavidas que contienen capoc-no sedeben
colocar en su secadora.
Nosequeartfculosde fibra de vidrioen susecadora.
Estopodrfaocasionar irritaci6n en la piel debido a
las partfculas restantes que sepodrfan adherir a la
ropa durante usossubsecuentes de la secadora.
Paraminimizar la posibilidadde una descarga
el6ctrica, desconecte @steelectrodom@sticode su
tomacorriente o desconecte la secadora del panel
de distribuci6n el@ctricadeledificioremoviendo el
fusible o desconectando el circuito antes de dar
cualquier tipo de mantenimiento o limpieza (con
la excepci6n de remover g limpiar el filtro de la
pelusa).NOTA:Girar la perilla selectorade ciclos
a la posici6n OFF(apagado)o presionar PAUSENO
desconectael electrodom@sticodeltomacorriente. ]
INFORMACION DESEGURIDADIMPORTANTE.
LEA TODAS LAS INSTRUCCIONES ANTES DE USAR.
iADVERTENCIA!
CUANDO USESU SECADORA (cont.)
• Nuncaintente operar _ste electrodom_stico •
siestd danado,si no funciona bien,si est(i
parcialmente desarmado, o si lefaltan partes o
_stasest(in rotas, inclugendodaflos al cable
el_ctrico.
Elinterior de la m6quina g laconexi6n del tubo
de escape en el interior de la secadora sedeben
limpiar por Io menos una vezal aflo por parte de
un t_cnico calificado.Ver la secci6n COmocorgor
g usar la secadora.
Sisusecadora esde gas,6sta est@equipada con
un encendido el6ctricoautom(itico g no necesita
una luzpiloto. NOINTENTEENCENDERLACONUN
FOSFORO.Podrfanresultar quemaduras por tener
su mano en lascercan[as del quemador cuando el
encendido el6ctrico autom6tico comience.
Esposibleque usted deseesuavizarsu ropa
o reducir la electricidad est6tica en ella usando
una toalla suavizante para secadora o un
acondicionador antiest6tico. Recomendamos
que usted useun suavizante de telas en el ciclo
de lavado, de acuerdo con las instrucciones
delfabricante para estosproductos, o trate un
producto en el que elfabricante le proporcione
una garant[a escrita en el paquete especificando
que esseguro para usar en lassecadoras. Los
problemas de servicioo de rendimiento causados
por estos productos son responsabilidad de
losfabricantes de estos productos g no est(_n
cubiertos por la garantfa de 6ste electrodom6stico.
CUANDO NO SEENCUENTREUSANDO SUSECADORA
Cuando desconecte 6ste electrodom6stico, agarre
el enchufe firmemente para evitar daflos al cable
el6ctrico mientras Iohale.Coloqueel cableel6ctrico
en un lugar alejado de las6reasde tr(ifico para
que nadie Iopise,tropiece o Iopueda daflar.
Nointente hacer reparaciones o reemplazar
ninguna parte de 6ste electrodom6stico ni intente
Ilevar a cabo ning0n tipo de servicioa no ser que
Iorecomiende el Manual del propietario o
instrucciones publicadas que usted entienda
g tenga la habilidad de Ilevara cabo.
• Antes de desechar una secadora o de removerla
para darle servicio,remueva la puerta de la
secadora para evitar que alg0n niflo se esconda
en su interior.
• Nointente alterar loscontroles.
LEAYSIGAESTAINFORMACION
DESEGURIDADCUIDADOSAMENTE.
CONSERVE ESTASINSTRUCCIONES
4
Panel de control-para modelo DPSE810. ge.com
• Limpie el filtro
de pelusa
• Agregue ropa
Paso 2 Paso 3
• Seleccione elciclo
de secado
Paso 4
• Cierre la puerta
• Presione START
NOTA: AI hacer una selecci6n con cualquier perilla, simplemente apOntela a cualquier sitio dentro del drea
sombreodo poro eso selecci6n.
Modelo DPSE810
OPTIONS TEMPERATURE DRYNESS
START/PAUSE
0
Ajustes de control.
Serial de fin del ciclo
Esta sepalsonar6justo antesdelafinalizaci6ndelciclopararecordarleretirar la ropa.
Si elige la opci6n EXTENDEDTUMBLE(GIROPROLONGADOLla seBal sonar6 al final del plazo de secado g
sonar6 varias veces durante el ciclo EXTENDEDTUMBLE.La sepal le recordar6 que es momento de retirar
la ropa.
NOTA:
• Retiretodas las prendas inmediatamente al sonido de la seBal. Coloque la ropa en colgadores de modo que
no se produzcan arrugas.
• Utilice END OFCYCLESIGNAL (SEF,IAL DE FINALIZACION DECICLO)especialmente cuando seque telas de
poli6ster g de planchado permanente. Se deber6n retirar las prendas fabricadas con este tipo de telas para
evitar las arrugas.
Giro prolongado
Use esta opci6n para minimizar las arrugas en la ropa. Proporciona aproximadamente 1 hora de giro sin calor
despu6s la ropa est6 seca.
Si est6 utilizando CYCLESIGNAL(SEfilALDE CICLOIg selecciona la opci6n EXTENDEDTUMBLE,sonar6 una
sepal al final del plazo de secado g varias veces durante el ciclo EXTENDEDTUMBLE.Este le recordar6 que
es rnomento de retirar la ropa.

Ajustes de control.
!t
ra
!t
!i
6
Temperatura
HIGH(ALTA) Paraalgodonesnormalesa pesados.
MEDIUM(MEDIA) Paratelassint@icas,combinadas,delicadasy articulosetiquetados coma permanent press(planchadopermanente).
LOW(BAJA) Paratelas delicadas, sint@icasg articulos etiquetados coma tumble drLjlow (secadocon giro lento).
EXTRALOW Paratelas delicadas, sint@icasUarticulos etiquetados coma tumble drLjlow (secadocon giro lento).
(EXTRABAJA)
NOHEAT(SINCALOR) Paraesponjararticulossin calor.ParautilizarOnicamentecon losciclos TIMEDDRY(SECADOCRONOMETRADO).
Sequedad-Esta opci6n seutiliza Onicamentepara ciclo deSENSOR.Loscicloscronometrados funcionan par el plaza
seleccionadoalas temperaturas seleccionadas.
MOREDRY(MASSECO)
DRY(SECO)
LESSDRY(MENOSSECO)
DAMP(HOMEDO)
Usaren telaspesadas.
Usar para obtener un nivelde sequedad adecuado para lamagoria de lascargas.Estees elciclode preferencia
para ahorrode energia.
Usaren telasm6s finas.
Para dejar los articulos parcialmente hOmedos.
Indicador de tiempo restante estimado
• Muestra el tiempo restante apro×imado hasta el fin del ciclo.
• Sieltiempo restante estimado es60 minutos o m6s,"IH" destellar6 en el indicador,seguido de los minutos restantes
estimados.Cuando el tiempo restante es<60 minutos, el cron6metro iniciar6 la cuenta regresiva.
Ciclos de secado--Los ciclos de sensor determinan autom@icamente la sequedad de las telas. Losciclos
cronometrados funcionan par el plaza seleccionado.
COTTONS(ALGODONES)Paraprendasde algod6nglamagoriade laropablanca.
EASYCARE(CUIDADOFACI!.)Par(:]articulos"libresdearrugas",planchadopermanenteg articulosdelicados,g tejidos.
DELICATES(DELICADAS)Paraarticulosdelicados,telasde"cuidadoespecial"g tejidas.
MIXEDLOAD(CARGAMIXTA)Par(:]cargosque consistendealgodonesg mezclasvariadas.
TIMEDDRY(SECADO AjusteelSelectordecicloenelplazade secadodeseado.
CRONOMETRADO)
DAMPDRY Par(:]dejarlosarticulosparcialmentehOmedos.
(SECADOHUMEDO)
DEWRINKLE(ELIMINAClONParaeliminar las arrugas de prendas que est6n limpias y secaso que est6n casisecas.
DEARRUGAS)
QUICKFLUFF Pararefrescaro esponjarlasprendasga secas,telas,ropasblancasy almohadas.Use conNO HEAT.
(ESPONJADORAPIDO) Proporciona 10 minutos de girosin calor.
DRYEL Disehado para usarcon el sistema de cuidado de telas tipo "solo lavado en seco" DRYEL®.Veael embalaje
del producto para obtener magores instrucciones. Encaso de tener preguntas o cuestiones relacionadas
al usa y desempeflo de DRYEL,Ilameal 1.800.21/4.8913,o visiteel sitio Web de DRYELen www.drgel.com.
ANTI-BACTERIAL
Norma P154de NSF, IRendirnientode desinfecd6n I
de secodoros de ropo
" para usa resJdencia
Estaopci6n reduce el 99,9%de ciertos tipos de bacterias, inclugendo: Staphgtococcusaureus,
Pseudomonasaeruginosa y Ktebsieltapneumonioe.* Elproceso anti-bacterial ocurre cuando
seusa calor elevado durante una porci6n del ciclo de secado.
NOTA;No use esteciclo en telas delicadas.
*Elcicloanti-bacterialha sidocertificadopar NSFInternational(antiguamenteNationalSanitationFoundation)
de acuerdocon laNorma P154,rendimientodedesinfecci6nde lassecadorasde ropapara usaresidencial.
KNITS(TEJIDOS) Paratejidos que muestran la etiqueta que indica "Machine Dry" ("Sequeam6quina").
TOWELS(TOALLAS) Paralamayoriade lastoallasy ropablanca.
START (ENCENDIDO)--Cierre la puerta de la secadora. PresioneSTART.Abrir la puerto durante el
funcionamiento detendr6 la secadora. Para reiniciarla, cierre la puerta g presione STARTpara completar el ciclo.
Sila secadora se encuentra funcionando, presione una vez para pausar el ciclo g vuelva a presionar para
continuar con el mismo. Si se pausa la secadora par mcisde 2/4horas, se cancelar(i el ciclo. Para detener el ciclo,
presione el bot6n par 3 segundos.
NOTA;Lostiempos de secado depender(_n del tipo de calor utilizado (el@ctrico,gas natural o LP),volumen de la
cargo, tipos de telas, humedad de la ropa y la condici6n de los conductos de escape.
Panel de control-para modelo DPSR6]O. ge.com
• Limpie el filtro
de pelusa
• Agregue ropa
Paso 2 Paso 3 Paso 4
• Seleccione elciclo
de secado
• Cierre la puerta
• Presione START
NOTA: AI hacer una selecci6n con cualquier perilla, simplemente apOntela a cualquier sitio dentro del drea
sombreodo poro eso selecci6n.
Modelo DPSR6]O
SIGNAL TEMPERATURE WRINKLE CARE
START
0
Ajustes de control.
SeFlalde fin del ciclo
Esta seflal sonar6 justo antes de la finalizaci6n del cicIo para recordarle retirar la ropa.
NOTA:
• Retire todas las prendas inmediatamente al sonido de la seflal. Coloque la ropa en colgadores de modo que
no se produzcan arrugas.
• Utilice END OF CYCLESIGNAL (SERIALDEFINALIZACI(.)NDE CICLO)especialmente cuando seque telas de
poli_ster y de planchado permanente. Se debercin retirar las prendas fabricadas con este tipo de telas para
evitar las arrugas.

Ajustes de control.
IMPORTANTE: Limpie el filtro de pelusa antes de cada usa de la secadora.
Temperaturo
HIGHHEAT(CALORALTO) Poro olgodones normoles o pesodos.
MEDIUMHEAT Para telas sint6ticas, combinadas, delicadas g articulos etiquetados como permanent press (planchado permanente).
(CALORMEDIO)
NOHEAT(SINCALOR) Para esponjar articulos sin color. Para utilizar Onicamente con los ciclos TIMED DRY (SECADO CRONOMETRADOJ.
LOWHEAT(CALORBAJO} Para telas delicadas, sint6ticas g articulos etiquetados como tumble dry low (secado con giro lento).
e
m
m
Wrinkle Cure (Cuidodo poro minimizor orrugos)
Useesta opci6n para minimizar los arrugas en la ropa. Proporcionaaproximadamente 15 minutos de giro sincolor
despu_s que la ropa est6 seca.
Sepuede utilizar esta opci6n con losciclos COTTONS(ALGODONES),EASYCARE(CUIDADOFACIL)g DELICATES
(DELICADAS).Siest6 utilizando CYCLESIGNAL(SEfilALDECICLO)g selecciona la opci6n WRINKLECARE(CUIDADO
PARAMINIMIZARARRUGASI,sonar_ una sehal al final del ciclo de secado g varias vecesdurante el cicIo WRINKLE
CARE.Estole recordar6 que esmomenta de retirar la ropa.
Sila opci6n WRINKLECAREno est6 ENCENDIDA,la secadora se detendrd una vez que el cron6metro Ileguea la marca
WRINKLECAREen eldial de ciclos.
Ciclos de secodo--Los ciclos autom6ticos determinan automciticamente la sequedad de las telas. Seleccione
LESSDRY(MEMOSSECO)si desea que sus prendas se encuentren levemente hOmedas al final del ciclo de secado.
Seleccione MOREDRY(M,_SSECO)si desea que se sientan m6s secas. Los ciclos cronometrados funcionar6n por
el tiempo seleccionado.
COTTONS(ALGODONES)Para prendas de algod6n L!la magoria de la ropa blanca. Para la magoria de las cargas, seleccione
OPTIMUM DRY (SECO OPTIMO).
EASYCARE(CUlDADOFACI!.)Poroorticulos'libresdeorrugos",plonchodopermonenteg orticulosdelicodos,g tejidos.
DELICATES(DELICADAS)Poroorticulosdelicodos,telosde"cuidodoespecial"gtejidos.
TIMEDDRY(SECADO Ajuste elSelectordecicloenelplozo desecododeseodo.
CRONOMETRADO}
DAMPDRY Para dejar los articulos parcialmente hOmedos.
(SECADOHUMEDO)
DBVRINKLE(ELIMINACI6NPara eliminar las arrugas de prendas que esthn limpias g secas o que esthn casi secas.
DEARRUGAS)
OUICKFLUFF Pora refrescoro esponjar los prendos go secos,telos, ropos bloncos golmohodos. Use con NO HEAT.
(ESPONJADORAPIDO) Proporciono 10 minutos de girosin color.
START (ENCENDIDO)--Cierre la puerto de la secadora. PresioneSTART.Abrir la puerto durante el
funcionamiento detendr(i la secadora. Para reiniciarlo, cierre Io puerto g presione STARTpora completar el ciclo.
NOTA:Lostiempos de secado dependeran del tipo de color utilizado (el@ctrico,gas natural o LP),volumen de la
carga, tipos de telas, humedad de la ropa g la condici6n de los conductos de escape.
8
Funcionesdela secadora, ge.com
Ciclo de sensor
de sequedad
Ciclo de sensor de sequedad [enalgunos mode!os)
Esta caracter[stica se activa 0nicamente
en los ciclos COTTONS(ALGODONESI,EASY
CARE(CUIDADOFACIL)g DELICATES
(DELICADAS).
ElSensor de sequedad brinda magor
exactitud de secado que las unidades
convencionales, permitiendo menores
plazos de secado g mejor mantenimiento
de las prendas. Mientras giran las prendas,
entran en contacto con un sensor de
humedad. Elsensor detendr6 el ciclo de
calentamiento tan pronto como se hagan
alcanzado la sequedad seleccionada.
La bombilla del tambor giratorio
Antes de reemplazar la bombilla, asegLirese
de desconectar la secadora del tomacorriente
o de desconectar la secadora del panel de
distribuci6n de su casa removiendo el fusible
o interrumpiendo el circuito el_ctrico.
Alcance por encima de la abertura de la
puerta de la secadora dentro del tambor.
Quite la bombilla g reemplace con una
bombilla del mismo tama_o.
La rejilla de secado tenalgunos modelos)
La rejilla de secado se puede usar
para secar artfculos delicados tales
como su_teres lavables.
Enganche la rejilla sobre el filtro de la pelusa
de forma tal que la rejilla se extienda en
el tambor giratorio de la secadora.
NOTA:
• Lo rejilla de secodo se debe usar con
el CICLODESECADOCRONOMETRADO.
• No use esta rejilla cuando est_ secando
otra ropa en la secadora.
El tambor giratorio de acero inoxidable (enalgunos modelos)
Elacero inoxidable usado para construir eltarnbor no se oxidar6 ni se corroer6.
el tambor giratorio de la secadora proporciona Estas marcas en la superficie no afectar(in
la alta confiabilidad en una secadora GE.Si el funcionamiento o la durabilidad del
el tambor giratorio de la secadora Ilegara a tarnbor giratorio.
ragarse o a abollarse durante el uso normal,
C6mo cambiar elsentido de apertura de la puerta.
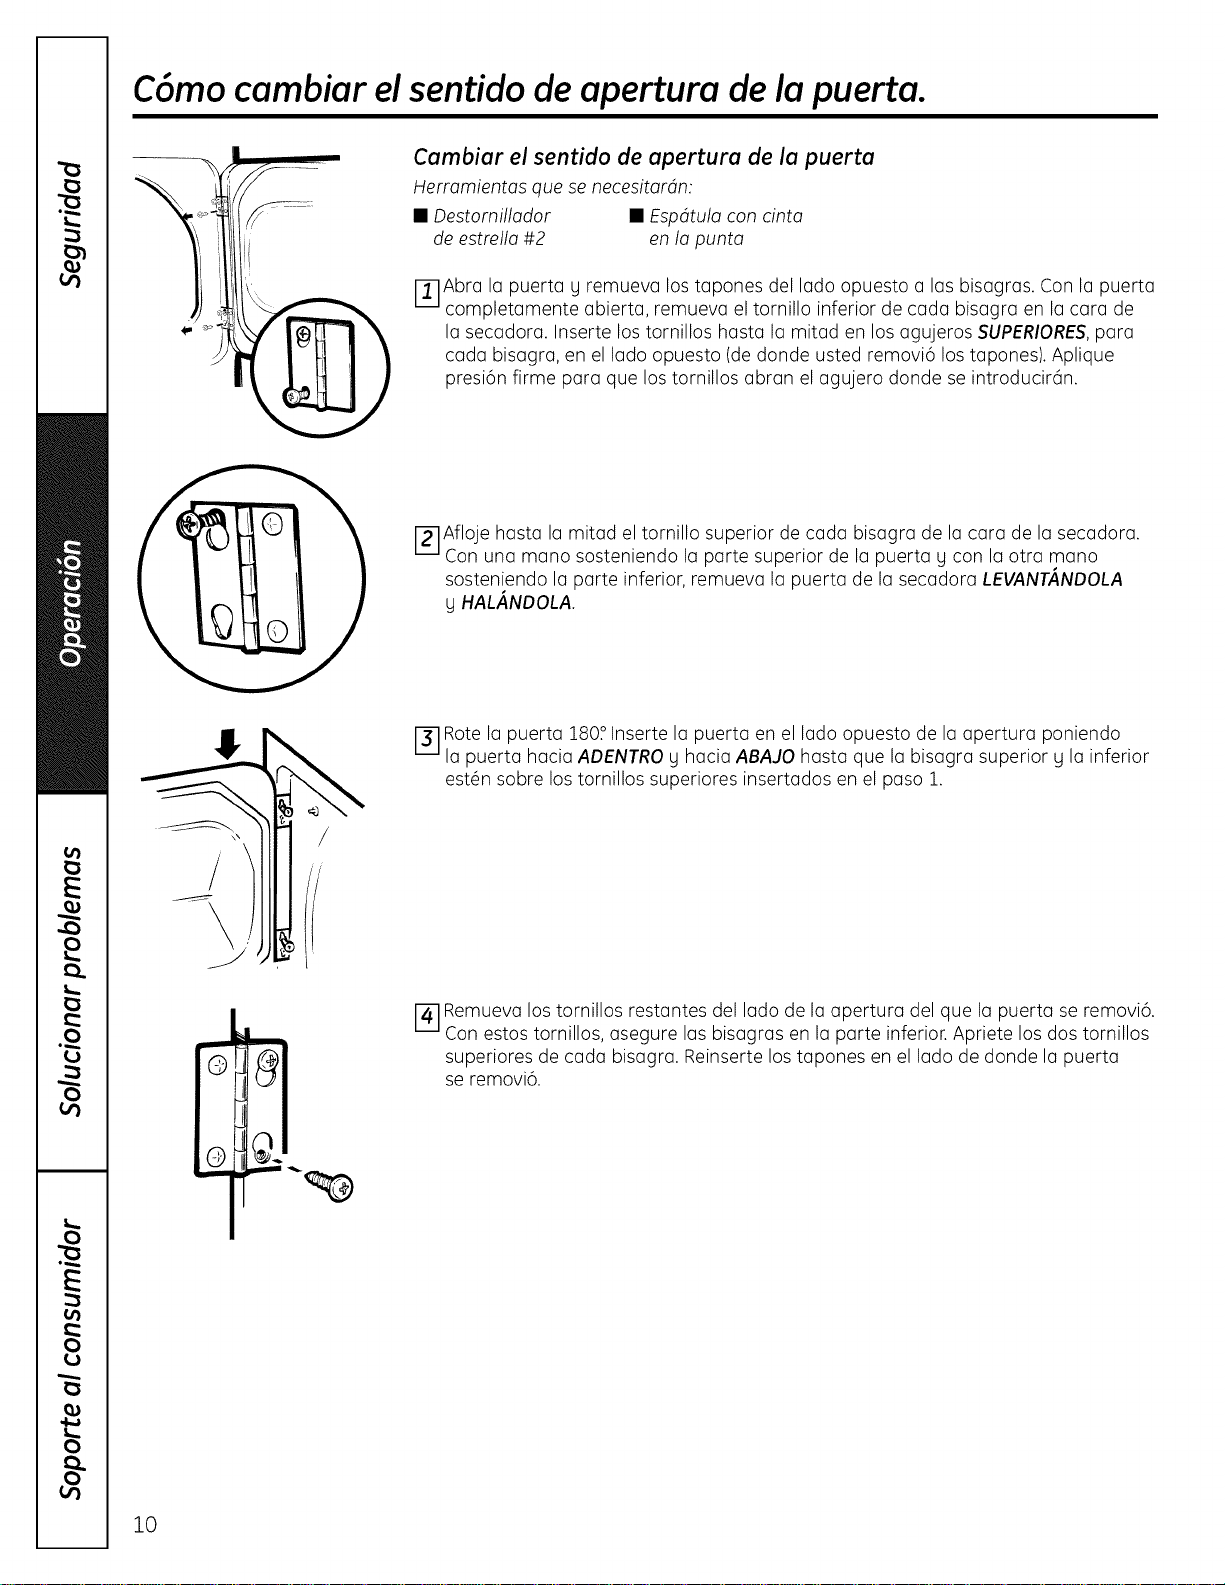
Cambiar el sentido de apertura de la puerta
Herramientas que se necesitardn:
• Destornillador • Espdtula con cinta
de estre!la #2 en la punta
F_-lAbra la puerta g remueva los tapones del lado opuesto alas bisagras. Con la puerta
completamente abierta, remueva el tornillo inferior de cada bisagra en la cara de
la secadora. Inserte los tornillos hasta la mitad en los agujeros SUPERIORES,para
cada bisagra, en el lado opuesto (de donde usted removi6 los tapones). Aplique
presi6n firme para que los tornillos abran el agujero donde se introducir6n.
[_lAfloje hasta la mitad el tornillo superior de cada bisagra de la cara de la secadora.
Con una mano sosteniendo la parte superior de la puerta _dcon la otra mano
sosteniendo la parte inferior, remueva la puerta de la secadora LEVANT,4,NOOLA
y I-tALANDOLA.
/
t/
r_lRote la puerta 180°Inserte la puerta en el lado opuesto de la apertura poniendo
la puerta hacia ADENTRO g hacia ABAJO hasta que la bisagra superior g la inferior
est_n sobre los tornillos superiores insertados en el paso 1.
r_-lRemueva lostornillos restantes del lado de la apertura del que la puerta se removi6.
Con estos tornillos, asegure las bisagras en la parte inferior. Apriete los dos tornillos
superiores de cada bisagra. Reinserte los tapones en el lado de donde la puerta
se removi6.
10
C6mocargar y usar la secadora.
Siempre siga las instrucciones del fabricante de la rope cuando lave.
ge.com
Ideaspara la clasificaci6ng cargadela ropa
Como regla general, si la ropa es clasificada
apropiadamente para la lavadora, estar6
clasificada apropiadamente para la secadora.
No agregue toallitas suavizantes una vez la rope
se haga calentado. Esto podrfa causer que la rope
semanche. Lostoallitas suavizantesacondicionadoras
Bounce®se hen aprobado pare usarse con todas
los secadoras GEde acuerdo con los instrucciones
del fabricante.
No sobrecargue. Esto desperdicia energia g cause
arrugas.
No seque los siguientes articulos: articulos
de fibre de vidrio, prendas de lane que no seen
lavables, articulos con recubrimientos de goma,
pl4sticos, articulos con bordes pl4sticos o rellenos
de espuma.
Cuidadog limpieza de la secadora
El exterior: P6seleun trapo g elimine el polvo
o cualquier derrame de productos de lavanderfa
con un trapo hOmedo. Losproductos de
tratamiento para quitar mugre g manchas
podrfan daSar el panel de control de la secadora
g afectar su apariencia. Aplique estos productos
a cierta distancia de la secadora. Luego las telas
podr6n lavarse g secarse normalmente. Los daSos
causados ala secadora per estos productos no
est6n cubiertos bajo su garantfa.
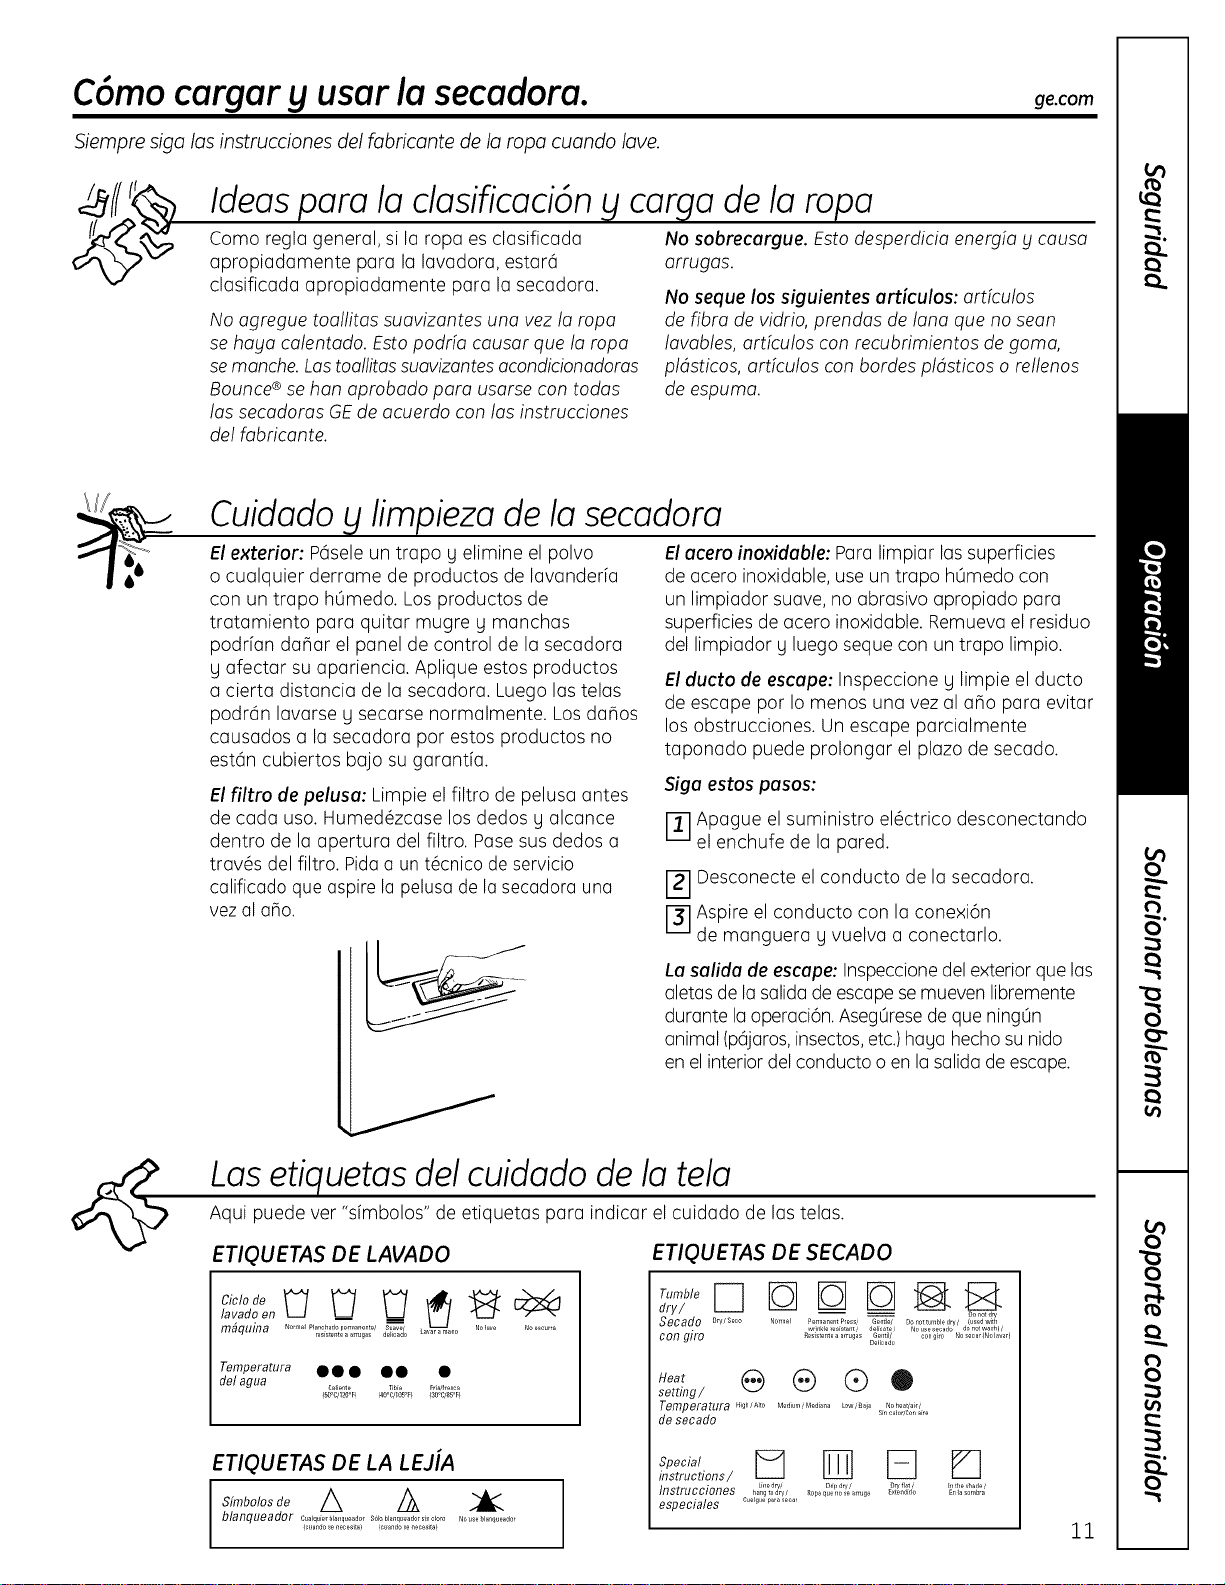
El filtro de pelusa: Limpie el filtro de pelusa antes
de cada use. Humed6zcase los dedos g alcance
dentro de la apertura del filtro. Pasesus dedos a
trav6s del filtro. Pida a un t6cnico de servicio
calificado que aspire la pelusa de la secadora una
vez al ano.
El acero inoxidable: Para limpiar las superficies
de acero inoxidable, use un trapo hQmedo con
un limpiador suave, no abrasive apropiado para
superficies de acero inoxidable. Remueva el residue
del limpiador g luego seque con un trapo limpio.
El ducto de escape: Inspeccione g limpie el ducto
de escape per Io menos una vez al a_o para evitar
los obstrucciones. Un escape parcialmente
taponado puede prolongar el plazo de secado.
Siga estos pasos:
[-_ Apague el suministro el6ctrico desconectando
el enchufe de la pared.
E_] Desconecte el conducto de la secadora.
I-_ Aspire el conducto con la conexi6n
de manguera g vuelva a conectarlo.
La salida de escape:Inspeccionedel exterior que las
aletas de la salidade escape semueven libremente
durante la operaci6n. Aseg0resede que ning0n
animal (p6jaros,insectos,etc.)haga hecho su nido
en el interior del conducto o en la salida de escape.
/
Lasetiquetasdel cuidado dela tela
Aqui puede ver "sfmbolos" de etiquetas para indicar el cuidado de las telas.
ETIQUETAS DE LAVADO
lavade en __ __
mbquina Norn]a] PlarenChs_do[p_t,narun;n_e/dSelUaJa_'_ L.......... No]ave N........
Temperatura • • • • • •
del agua
C_fiente Tbia Friaflre_ca
(5o_c/120oF} _4eoc/_05oF}f30oc!_oFt
ETIOUETAS DE LA LEJIA
blanqueader Cua,q_io,_,o,_qooo_o_StiFeblBnqueadorsi,lcloroNouseblanqueador
fc[Fando_e nec es]ta_ fc[Fando_e neces]ta_
ETIOUETAS DE SECADO
:"n'_'er-1 Ib-Ilb-1Ib-1_ _
dry/ Oono,a_
Secado D,v_sooo No,no, Penrlanent Press' G entle"'_ Do not tumble dry (used wilh
wrinkle _esistanH delicate/ No usHecado o not was I/
congiro Res[stente a amJgas Gellt[I/ con gito No secar (No laver)
De_icado
,e_t @ ® ®®
setting /
fempeFatUya mgh/A],o Medium _ Medialla Low f Ba]a No heatTa[_ /
Sin tabor/Con aire
de secede
instructions/
Lhle d_y! Or[l_ dry / En la sombre
Instrucciones hon_od,v, Ropaq ............. ga _ _ ,t]l_itd'o In the shade/
especiales Cuelgue para secar
11
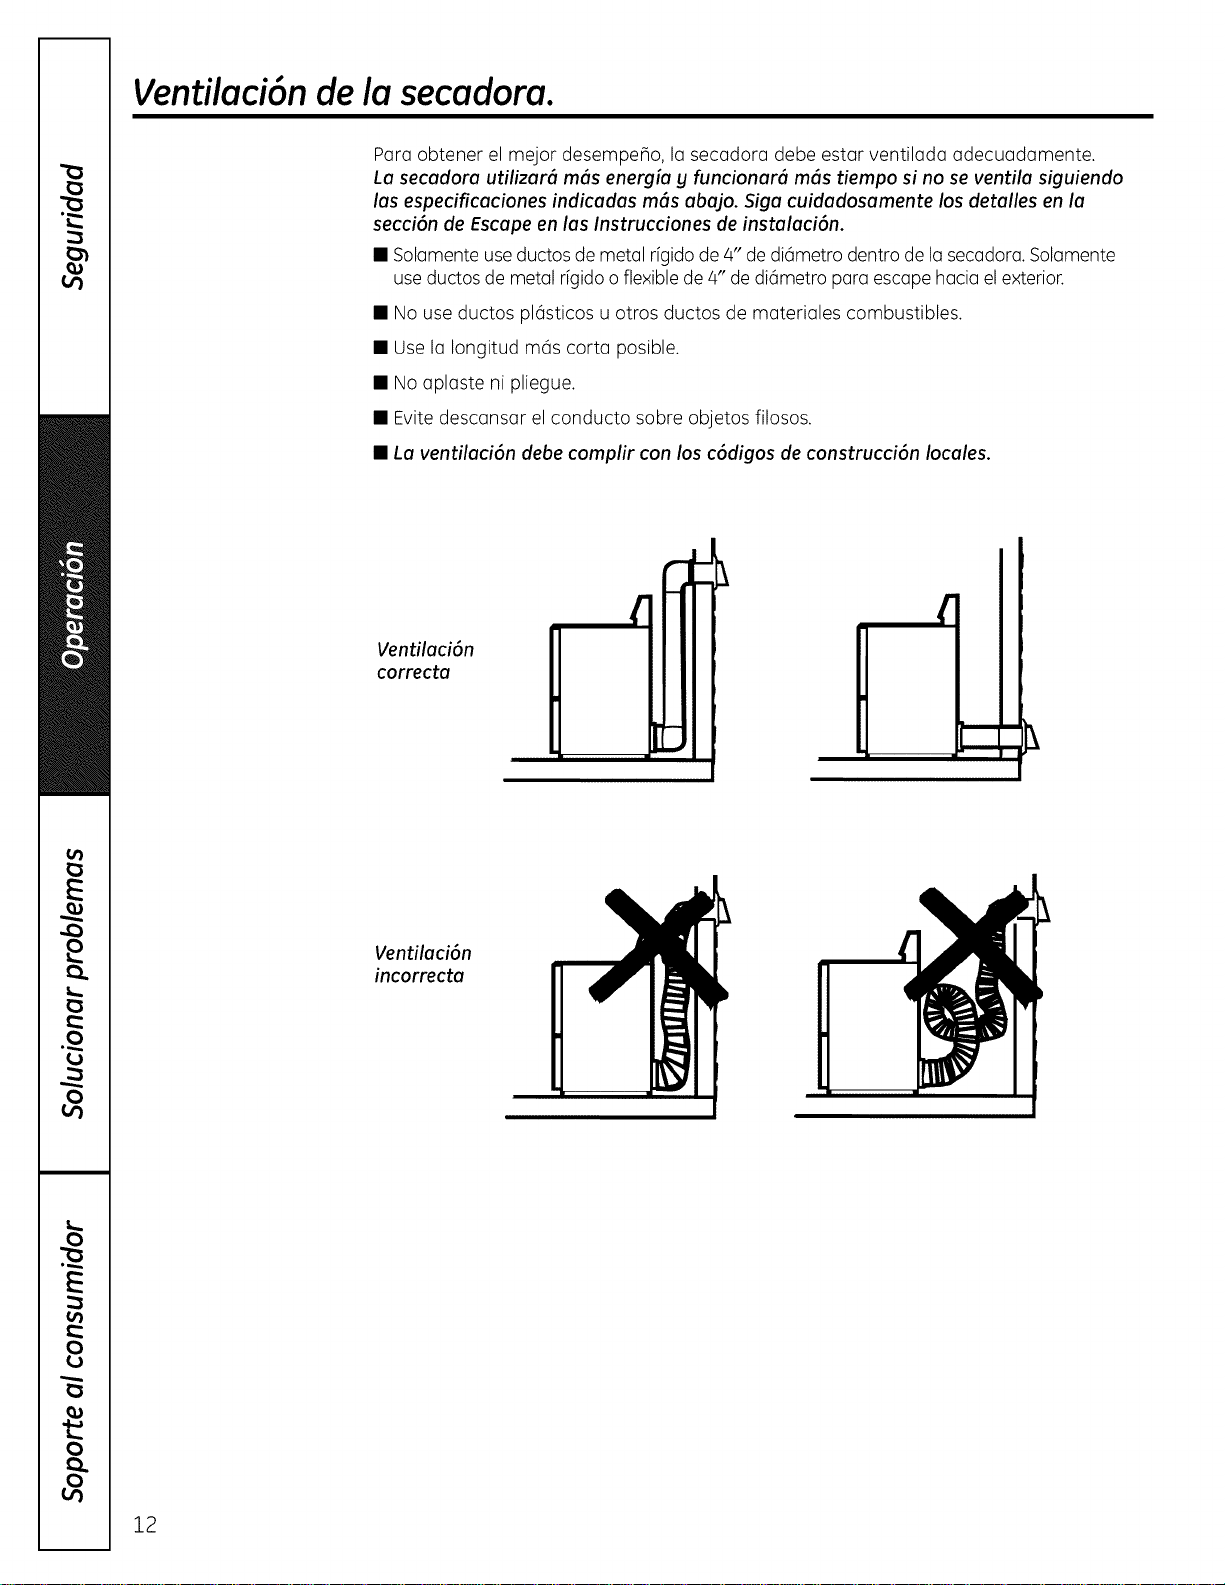
Ventilaci6ndela secadora.
Paraobtenerelmejordesempe_o,lasecadoradebeestarventiladaadecuadamente,
La secadora utilizar_ m_s energia y funcionar_ m_s tiempo si no se ventila siguiendo
las especificaciones indicadas m6s abajo. Siga cuidadosamente los detalles en la
secci6n de Escape en las Instrucciones de instalaci6n.
• Solamente use ductos de metal rigido de 4" de di6metro dentro de la secadora. Solamente
useductos de metal rfgidoo flexible de 4" de di6metro para escape hacia el exterior.
• No use ductos pl6sticos u otros ductos de materiales combustibles.
• Usela Iongitud m6s corta posible.
• No aplaste ni pliegue.
• Evitedescansar el conducto sabre objetos filosos.
• La ventilaci6n debe complir con los c6digos de construcci6n locales.
Ventilaci6n
correcta
C
)
m
[-
Ventilaci6n
incorrecta
12
Antes de Ilamar para solicitar servicio.., ge.com
Consejos para la soluci6n de problemas
iAhorre tiempo _Idinero! Consulte primero los tobias de los pdginas
siguientes o visite ge.com g quizds no necesite Ilamar al servicio.
Problema Posible causa Ou_ hacer
La secadora no funciona La secodoro • Aseg0resedequeel enchufeest_completamente colocado
est(_desenchufado en eltomacorriente.
Fusible quemodo/ • Revisela caja de fusibles/di%untores Ureemplace
disguntor desconectado el fusible o reconecte eldi%untor. NOTA:La magor[a
de lossecadoras el6ctricas usan dosfusibles/di%untores.
Lo secodoro no coliento Fusible quemodo/disguntor • Revisela caja de fusibles/di%untores g reemplace ambos
desconectado; es posible que fusibles g reconecte ambos di%untores. Esposibleque la
Io secodora gire sin colentar secadora gire si0nicamente un fusible seha quemado
o un solo disguntor ha saltado.
Seha cortado el suministro • AsegOreseque la vdlvula de cierre en la secadora g
de gas la v61vulamaestra est6 completamente abierta.
Nose ha seleccionodo • Seleccioneotro nivelde calor.
Io temperoturo
Lo secodoro tiemblo o Un poco de temblor/ruido • Coloque la secadora en un lugar con piso nivelado,o ajuste
produce ruido es normal. La secadoro podria laspatas niveladoras segOnseanecesario hasta que
estor disnivelodo est_ nivelada.
Monchos de groso Usa inopropiodode suovizodor • Siga lasdireccionesen elenvase del suavizador de telas.
en la ropa de telos
Secodode orticulos sucios • Utilicesusecadora para secar 0nicamenteartfculos limpios.
con limpios Losartfculos sucios pueden manchar losartfculos limpios
g la secadora.
Los prendos no est(_n • Algunasmanchas quenosepuedenvercuando losprendas
completomente limpios est6n mojadas oporecendespu_sdel secado.Utilice
procedimientos apropiados de lavado antes del secado.
Pelusaen los prendas Elfiltro de peluso est_ Ileno • Limpieel filtro antes de coda cargo.
Closificoci6n incorrecto • Clasifiquelasprendas que producen pelusa (comafelpilla)
de losprendas quejuntan pelusa (coma la pana).
Lo electricidod est_tico puede • Consulte lossugerenciasenesta secci6nbajo ESTATICA.
otroer peluso
Sobrecorgo • Separeloscargas m6s grandes en menor tomato.
Popel,servilletos,etc.,quedon • Vacietodos losbolsillosantes de lavar la ropa.
dentro de los bolsillos de Io ropo
Ocurre est_tico Nose utiliz6ning_n tipo • Intente utilizar un suavizador de telas.
de suovizodor de telos
Bounce®FabricConditioner DrgerSheetsha sido aprobado
para ser usado con todas losSecadorasGEg cuando
se usende acuerdo con los instruccionesdel fabricante.
Sobresecado • Intente utilizar un suavizador de telas.
• Programe el ojuste a LESSDRV (MENOS SECO)o DAMP
DRV (SECADO HUMEDO).
Articulos sint_ticos, plonchodo
permonente g combinociones
pueden cousor est(_tico
• Intente utilizar un suavizador de telas.
Plazasde secado
inconsistentes
Tipo de color • Losplazas de secado autom6tico pueden variar segOn
el tipo de calor utilizado (el_ctrico,gas natural o LP),
tama5o de la cargo, tipos de telas, humedad de
laropa g lacondici6nde losconductosde escape.
1B
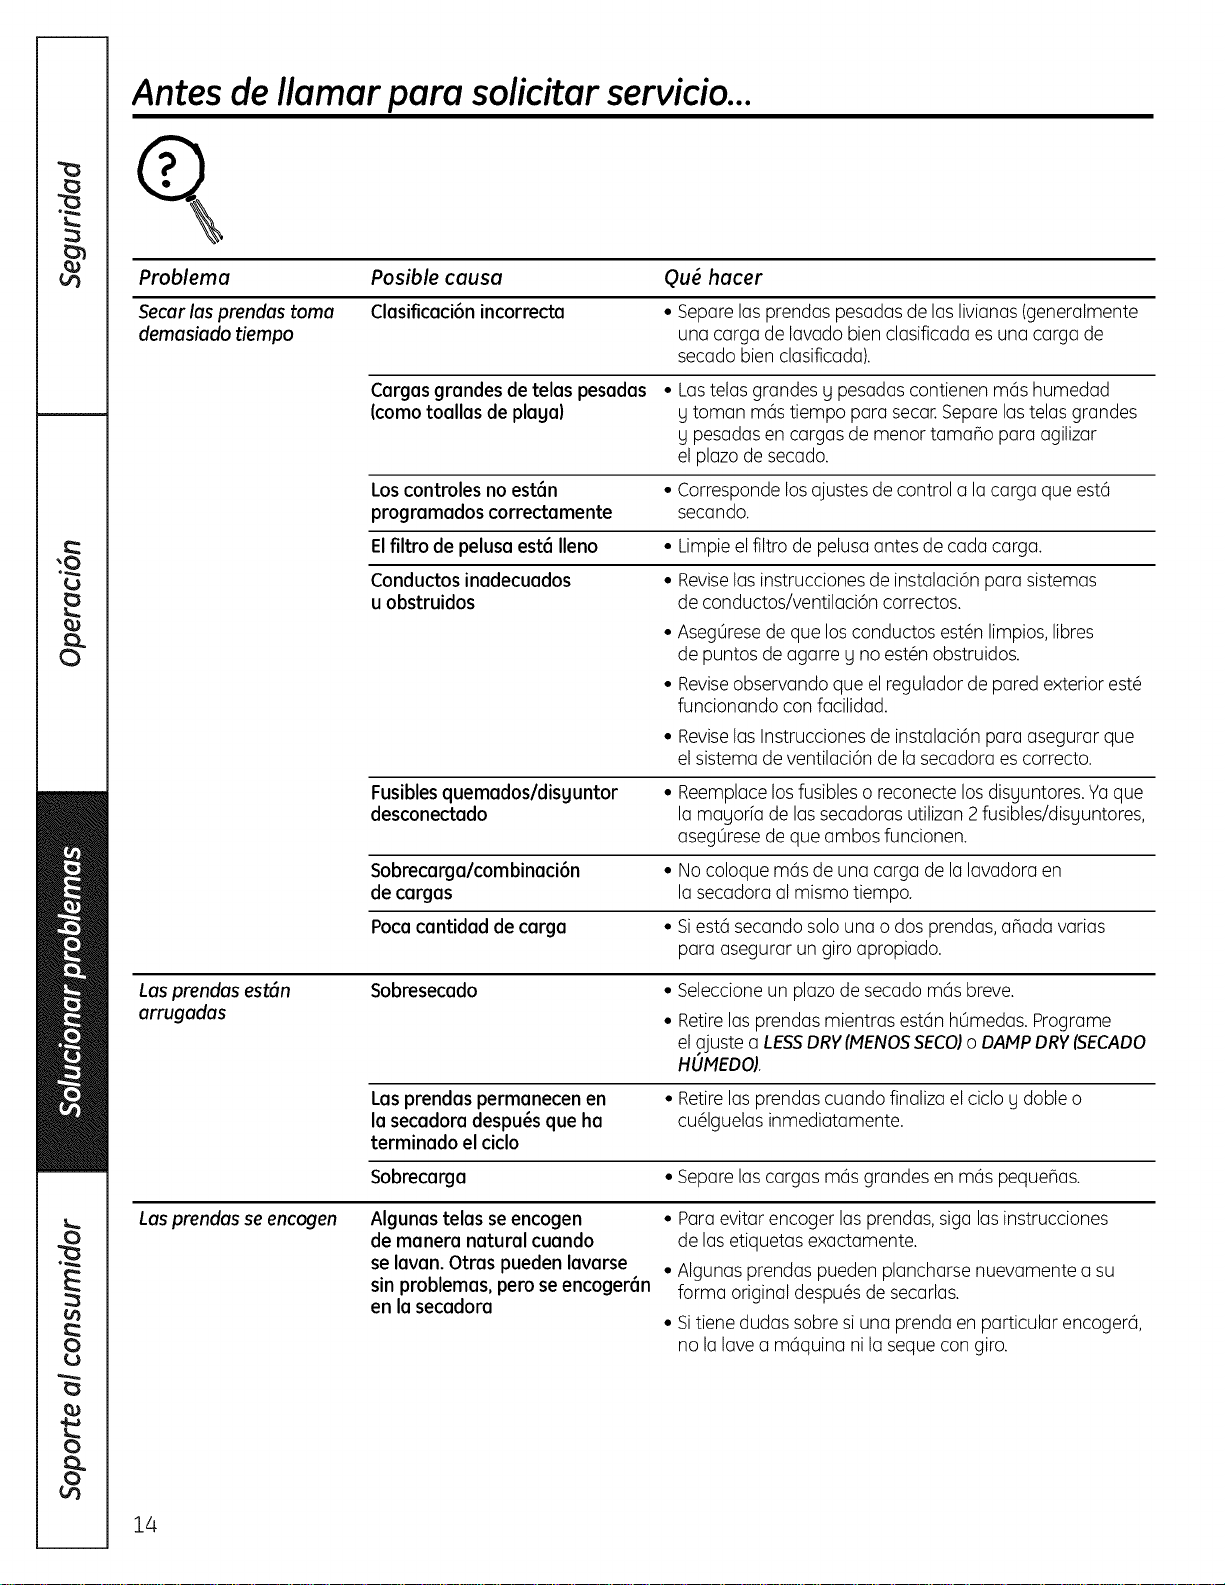
Antes de Ilamar para solicitar servicio...
Problema Posible causa Ou_ hacer
Secarlas prendas toma Clasificacibn incorrecta • Separe lasprendas pesadas de las livianas(generalmente
demasiado tiempo una carga de lavado bien clasificada esuna carga de
secado bien clasiflcada).
Cargas grandes detelas pesadas • Lastelas grandes g pesadas contienen m6s humedad
(coma toallas de plaga) g toman m6s tiempo para secar.Separe lastelas grandes
g pesadas en cargas de menor tamaBo para agilizar
el plazode secado.
Loscontrolesno est6n • Corresponde losajustes de control a la carga que est6
programados correctamente secando.
Elfiltro de pelusa est_ Ileno • Limpieelflltro de pelusaantes de cada carga.
Conductos inadecuados • Reviselas instruccionesde instalaci6n para sistemas
uobstruidos de conductos/ventilaci6n correctos,
• AsegOresede que losconductos est_n limpios,libres
de puntos de agarre g no est_n obstruidos.
• Reviseobservando que el regulador de pared exterior est_
funcionando con facilidad.
• Reviselas Instrucciones de instalaci6n para asegurar que
el sistema de ventilaci6n de la secadora escorrecto.
Fusibles quemados/disguntor • Reemplacelosfusibles o reconecte losdisguntores. Yaque
desconectado la magorfa de lassecadoras utilizan 2fusibles/disguntores,
asegOresede que ambos funcionen.
Sobrecarga/combinaci6n • Nocoloque m6s de una carga de la lavadora en
de cargas la secadora al mismo tiempo.
Pocacantidad de carga • Siest6 secando solo una o dos prendas,aBada varias
para asegurar un giro apropiado.
Sobresecado • Seleccioneun plazade secado m6s breve.Lasprendas est6n
arrugadas
Retire las prendas mientras est6n hOmedas, Programe
el ajuste a LESSDRY (MENOS SECO)o DAMP DRY (SECADO
HUMEDO).
Las prendas permanecen en • Retirelasprendas cuando finaliza el ciclo g doble o
la secadoradespu_s que ha cu6lguelas inmediatamente.
terminado el ciclo
Sobrecarga • Separe lascargas m6s grandes en m6s pequeBas.
Lasprendas seencogen Algunas telas seencogen • Paraevitar encoger las prendas,siga lasinstrucciones
de manera natural cuando de lasetiquetas exactamente.
se lavan. Otras pueden lavarse • Algunas prendas pueden plancharse nuevamente a su
sin problemas, pero seencoger6n forma original despu6s de secarlas.
en la secadora
Sitiene dudas sabre siuna prenda en particular encoger6,
no la lave a m6quina ni la sequecon giro.
14
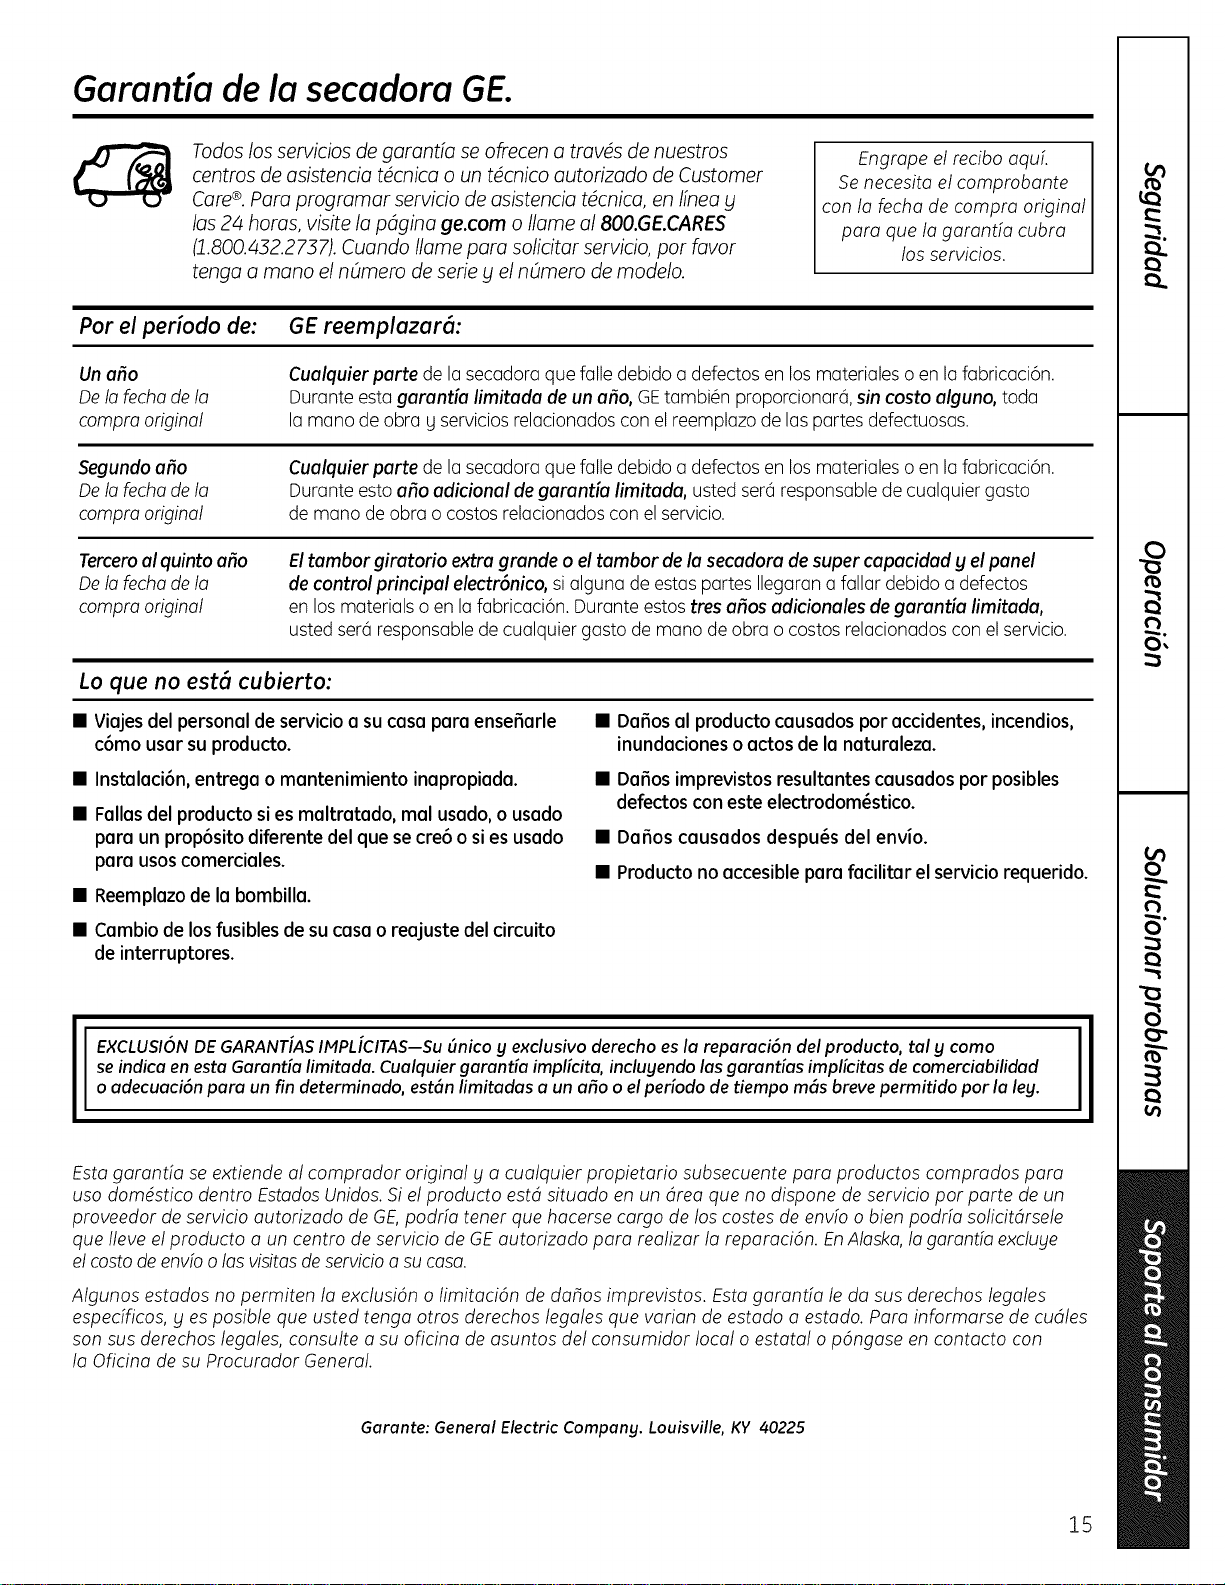
GaranUadela secadora 6E.
Todos los servicios de garantia se ofrecen a trov6s de nuestros
centros de asistencia t6cnica o un t6cnico autorizado de Customer
Care®.Paro progromar servicio de asistencia t6cnica, en linea bl
los 24 horos, visite la pdgina Be.cam o flame a1800.GE.CARES
(1.800.432.2737). Cuando flame paro solicitor servicio, par favor
tenga a mona el nOmero de serie bl el nOmero de modelo.
Engrape el recibo aquL
Senecesita el comprobante
con la fecha de compra original
para que la garantfa cubra
los servicios.
Par el periodo de: GE reemplazarG:
Un aro
Dela fecha de la
compro original
Cualquierparte de la secadora que falle debido a defectos en los materialeso en la fabricaci6n.
Durante esta garanUa limitada de un aria, GEtambi_n proporcionar6, sin costa alguno, toda
la mano de obra g servicios relacionados con el reemplazo de las partes defectuosas.
Segundo aria
Dela fecha de la
compro origina!
Cualquierparte de la secadora que falle debido a defectos en los materialeso en la fabricaci6n.
Durante esto aro adicional de garantia limitada, usted ser6 responsablede cualquier gasto
de mano de obra o costos relacionados con el servicio.
Terceroal quinto aria
Delo fecha de la
compro original
El tambor giratorio extra grande o el tambor de la secadora de super capacidad Uel panel
de control principal electrGnico, si olguna de estas partes Ilegoran a fallar debido o defectos
en los materials o en la fabricaci6n. Durante estos tres aros adicionales de garantia limitada,
usted ser6 responsable de cualquier gasto de mona de obra o costos relacionados con el servicio.
Lo que no est_ cubierto:
• Viajesdel personal de servicio a su casa para ensefiarle
cGmo usar su producto.
• Dafios al producto causados par accidentes, incendios,
inundaciones o actos de la naturaleza.
• Instalaci6n, entrega o mantenimiento inapropiada.
• Fallasdel producto si es maltratado, real usado, o usado
para un propGsito diferente del que secre6 o si es usado
para usos comerciales.
• Reemplazo de la bombilla.
• Dafios imprevistos resultantes causados par posibles
defectos con este electrodom_stico.
• Dafios causados despu_s del envio.
• Producto no accesible para facilitar el serviciorequerido.
• Cambio de los fusibles de su casao reajuste del circuito
de interruptores.
EXCLUSIONDEGARANT[ASIMPLICITAS--Su_nico Uexclusivo derecho esla reparaci6n del producto, tal Ucoma
seindica enesta Garantialimitada.Cualquiergarantia implicita, incluuendolasgarantias implicitas de comerciabilidad
oadecuaci6n para un fin determinado, estSnlimitadasa un aria oelperiodo de tiempo mSsbrevepermitido par laleu.
Esta garantia se extiende al comprador original bla cualquier propietario subsecuente para productos comprados para
usa dom6stico dentro EstadosUnidos.Si el producto est4 situado en un 4rea que no dispone de servicio par porte de un
proveedor de servicio autorizado de GE,podrio tenet que hacerse cargo de loscastes de envio o bien podrfo solicitdrsele
que lleve el producto a un centro de servicio de GE autorizado para realizar la reparaci6n. EnAlaska,lagaranda excluble
el costade envioo losvisitasde servicioa su casa.
Algunos estados no permiten !a exclusi6n o limitaci6n de dafios imprevistos. Esta garanda le do sus derechos legales
espedficos, bles posible que usted tenga arras derechos legales que varian de estado a estado. Para informarse de cudles
son sus derechos legales, consulte a su oficina de asuntos del consumidor local o estatal o p6ngase en contacto con
la Oficina de su Procurador General.
Garante: General Electric Companu. Louisville, KY 40225
15
Soporteal consumidor.
Pdgina Webde GEAppliances
ge.com
_LTienealguna pregunta sabre suelectrodom@stico?iPruebela p6gina Web de GEAppliances 2/4horas al dfa,
cualquier dfa del aBo!Para magor conveniencia g servicio m@sr@pido,ga puede descargar los Manuales de los
Propietarios,pedir piezaso incluso hacer una cita en Ifneapara que vengan a realizar una reparaci6n.
Soliciteuna reparaci6n ge.com
Elserviciode expertosGEest6 a tan s61oun paso de su puerta, iEntreen Ifneag solicite sureparaci6n cuando
le venga bien 2/4horas al dfacualquier dfadel aBo!O Ilame a1800.GE.CARES(800.412.2737)durante horas
normales de oficina.
RealLifeDesignStudio(Estudiodedisehoparalavidareal) ge.com
GEapoga el concepto de DiseBoUniversalJproductos, servicios g ambientes que pueden usargente de todas
lasedades,tamaBos g capacidades. Reconocemosla necesidadde diseBarpara una gran gama de habilidades
g dificultades ffsicasg mentales. Param6s detalles cobre las aplicacionesde GEDiseBoUniversal,inclugendo
ideasde diseBopara la cocina para personas con discapacidades,mire nuestra p6gina Web hog mismo. Para
personas con dificultades auditivas,favor de Ilamar a1800.TDD.GEAC(800.83].4322).
Garantias ampliadas ge.com
Compre una garantfa ampliada g obtenga detalles sabre descuentos especialesdisponibles mientras su
garantfa est6 a0n activa. Puedecomprarla en Ifneaen cualquier momenta, o Ilamar al 800.626.222/4durante
horas normales de oficina.GEConsumer Home Servicesestar6 a0n ahf cuando su garantfa termine.
Piezasg accesorios ge.com
Aquellosindividuos con la calificaci6n necesaria para reparar sus propios electrodom@sticospueden pedir que
se lesmanden las piezaso accesorios directamente a sus hogares (aceptamos lastarjetas VISA,MasterCard
g Discover).Haga su pedido en Ifneahog, 2/4horas cada dfa o Ilamar par teldono al 800.626.2002durante
horas normales de oficina.
Lasinstrucciones descritas en este manual cubren los procedimientos a seguir par cualquier usuario.
Cualquier otra reparaci6n deberia, par regla general, referirse a personal calificado autorizado. Debe ejercerse
precauci6n ya que las reparaciones incorrectas pueden causar condiciones de funcionamiento inseguras.
l P6ngase en contacto con nosotros ge.com
Sino est6 satisfechocon el servicioque recibede GE,p6ngase en contacto con nosotros en nuestra p6gina Web
indicando todos losdetalles asf como su n0mero de tel_fono o escr[banosa:
General Manager,Customer Relations
GEAppliances,Appliance Park
Louisville,KY/40225
Registre su electrodom_stico ge.com
iRegistre su nuevo electrodom_stico en linea-cuando usted prefiera! Elregistrar su producto a tiempo le
proporcionar6, sisurgiera la necesidad,una mejor comunicaci6n gun serviciom6s r6pido bajo lost_rminos de
su garant[a.Tambi_n puede enviar sutarjeta de registro pre-impresa que se inclugeen el material de embalaje.
16 lmpreso en Canadd