Loading ...
Loading ...
Loading ...
Page 14
NOTE:
To ensure proper spark ignition, do not change gap between the electrode wire and the burner. The optimum gap
is preset at the factory between 1/8" and 3/16.' Replace 9V igniter batteries at the first sign of spark weakness.
30" grills require one battery, all others require two. See page 3 for battery replacement instructions.
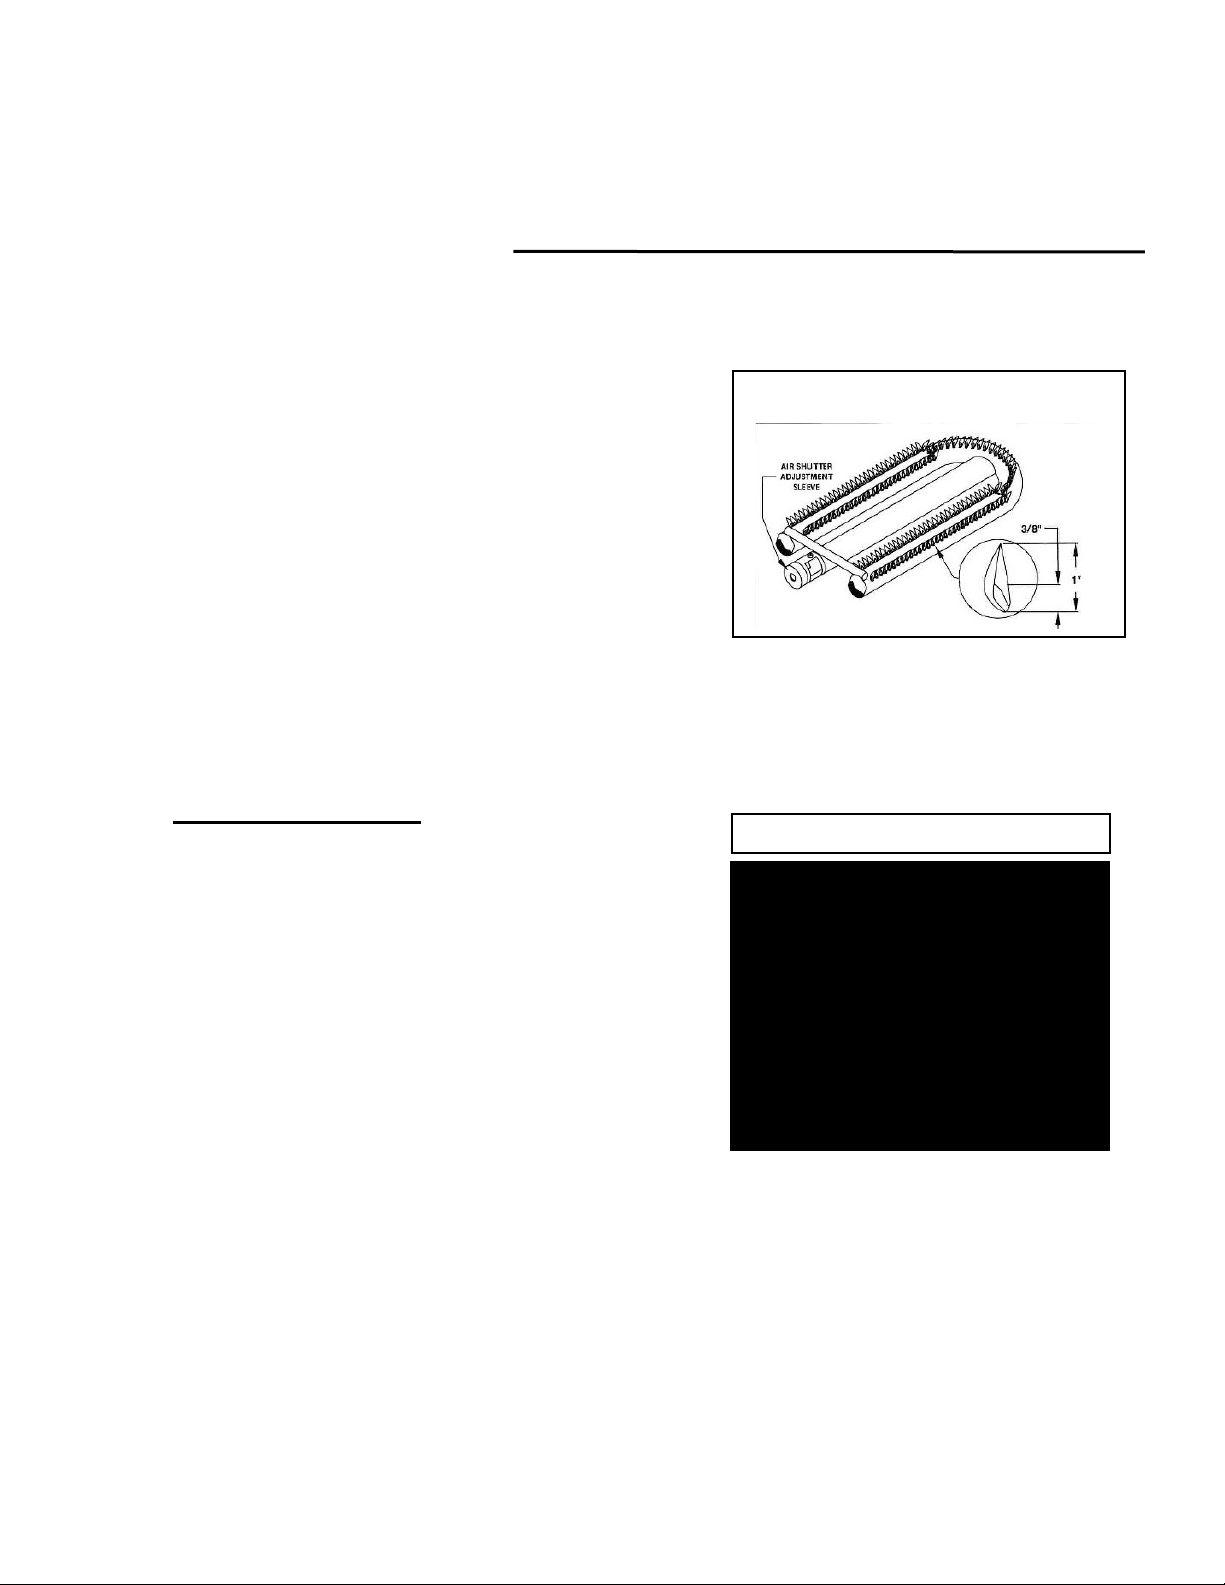
Burner Adjustment
Every grill is thoroughly checked for proper lighting and burner flame pattern. Conditions at the location may necessitate
minor adjustment of the burner air intake, if the flames are not steady/stable as shown in the figure. The flames of the
burners should be visually checked and compared with Figure 4.
The flame should be full length of the burner, blue and stable. The air
intake should be adjusted ONLY if the flame is lifting off of the
ports or has noticeable amounts of yellow in the flame. If any of
these conditions exist, check if dirt, debris, spider webs, etc., block
the air shutter or burner ports. Proceed with air shutter adjustment.
A sheet metal cup at the inlet of the burner called an air shutter
governs the amount of air, which is entrained into a burner. It is
locked in place by a set-screw, which must be loosened prior to
lighting the burner for adjustment.
The air shutter adjustment screws are accessible with a screwdriver by removing the burner. Loosen the lock
screw of the air shutter. Refit the burner. Make certain that the burners are sitting properly on the orifices taking
care not to move or damage the igniter electrode.
Light the burners and adjust according to the following directions
:
U-BURNER ADJUSTMENT
Be careful, as the burner may be and/ or will become very hot.
If the flame is noisy and tends to lift away from the burner,
indicating too much air, turn the air shutter clockwise to reduce the
amount of air to the burner. The screw should be loosened before
turning the air shutter.
If the flame has more yellow than blue, indicating insufficient air, the
air shutter should be turned counter clockwise allowing more air in. This
will stabilize the flame.
Make sure to tighten the screw after adjustments are made.
!!!WARNING!!!
Figure 4- Burner Adjustment
To prevent harm and ensure proper operation
of your grill, it is imperative that the burners
are properly installed with respect to the gas
orifices. Be certain that the orifice is inserted
completely into the burner's inlet and that the
burner rests firmly on its support bracket. The
burner should not rock side to-side nor top-to-
bottom if properly installed. If excessive burner
movement is present, reseat burner or contact
your authorized service provider.
Loading ...
Loading ...
Loading ...