F L ! T F
30" Radiant
Electric Cooktop
Use & Ca_e Guide
Cubierta para Cocinar
Eldctrica Radiante de 30"
Ma_ua_ de_ consu_w_ido_-
Models, Modelos 911.44022; 44023', 44024, 44029, 44424
I-
229C4020P256-2 Sears, Roebuck and Co.,
(SR-10487) Hoffman Estates, IL 60179 U.S.A. www.sears.com
20P2562 ENv01

ELECTRICRADIANTCOOKTOP
TABLEOFCONTENTS
Cooktop Safety ..................... 3_,
Protecting the Cooktop ............. 5
Features of Your Cooktop ......... 6
Removal of Packaging Tape ....6
Cooking Zones ......................... 7
Hot Cooktop Indicator Light .........7
Cooking Utensils and Woks .....7
Checking Your Cookware .........8
Cookware Performance ............ 8
Radiant Coils ............................ 8
Temperature Limiter ................. 8
Control Settings ........................ 8
Dual Cooking Zones ................. 9
Bridge Surface Unit .................. 9
Home Canning Tips .................. 9
Glass-Ceramic Cooktop .... 10-12
Cleaning ............................ 10_11
Potential for
Permanent Damage ............... 11
Precautions ............................. 12
Control Knobs ......................... 12
Before Calling for
Service .............................. 13-14
Warranty .................................. 15
Consumer Service
Numbers ................................. 32
For your convenience and future reference, please write down your model
and serial numbers in the space provided. They are located on a tag
underneath the cooktop.
MODELNUMBER:
SERIALNUMBER:
© Sears, Roebuck and Co.
2
20P2562 ENV01
IMPORTANTSAFETYINSTRUCTIONS
SAVE THESE INSTRUCTIONS
Read all instructions before using this appliance. When using
gas or electrical appliances, basic safety precautions should be
followed, including the following:
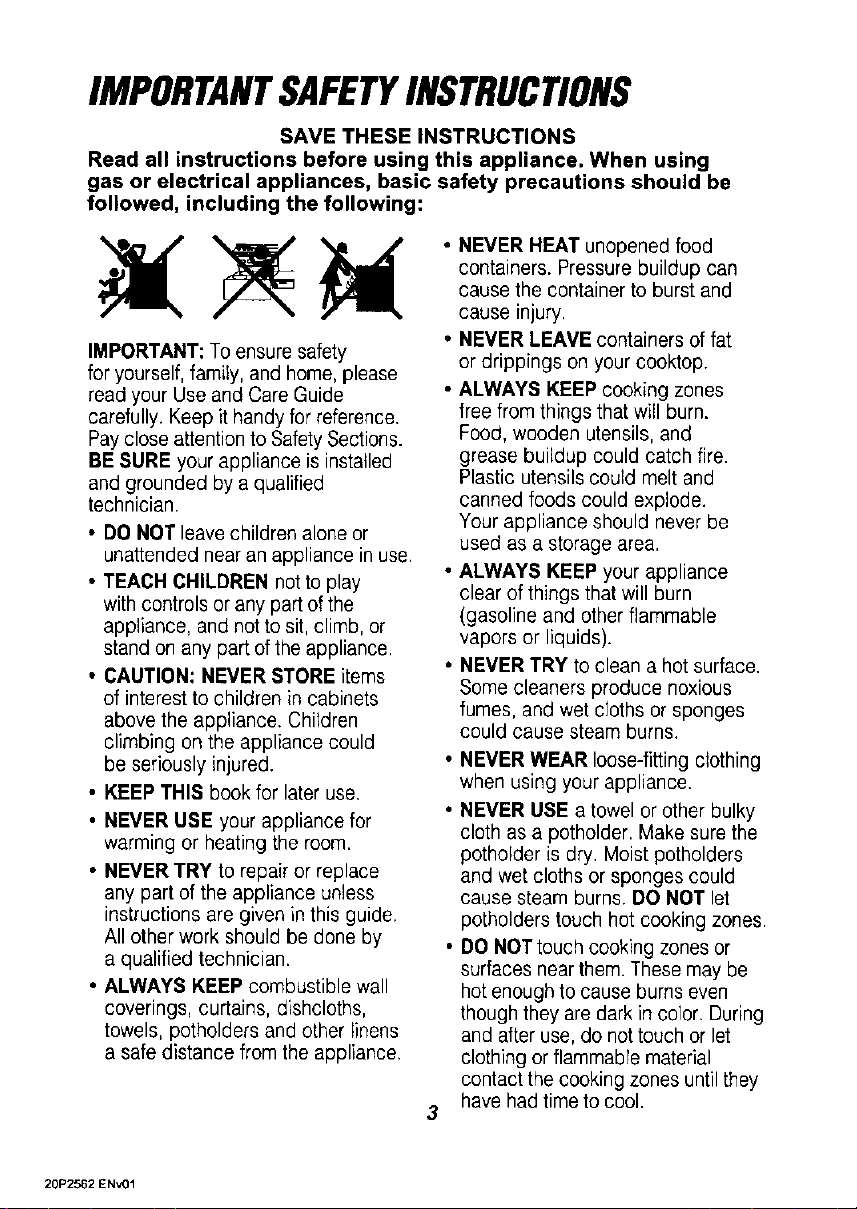
IMPORTANT:To ensuresafety
for yourself,family,and home,please
readyour Useand CareGuide
carefully.Keepit handyforreference.
Paycloseattentionto SafetySections.
BE SUREyour appliance is installed
andgrounded by a qualified
technician.
• DONOTleavechildren aloneor
unattendednearan appliance inuse.
• TEACH CHILDRENnotto play
with controlsorany partof the
appliance,and not to sit, climb, or
stand onany part of the appliance.
• CAUTION:NEVERSTOREitems
of interesttochildren in cabinets
abovethe appliance. Children
climbing onthe appliance could
be seriouslyinjured.
• KEEPTHISbookfor lateruse.
• NEVERUSE yourappliancefor
warmingor heatingthe room.
• NEVERTRY to repairor replace
any part of the appliance unless
instructionsare given inthis guide.
All otherwork should be done by
a qualified technician.
• ALWAYSKEEP combustiblewall
coverings,curtains,dishcloths,
towels,potholdersand other linens
a safe distance fromthe appliance.
• NEVERHEATunopenedfood
containers.Pressurebuildupcan
causethe containerto burst and
cause injury.
• NEVERLEAVEcontainersof fat
or drippings on your cooktop.
• ALWAYSKEEPcookingzones
free from thingsthat will burn.
Food,wooden utensils,and
greasebuildup could catch fire.
Plasticutensilscould meltand
canned foodscould explode.
Yourappliance should never be
used as a storagearea.
• ALWAYSKEEPyour appliance
clear of things thatwill burn
(gasolineand other flammable
vaporsor liquids).
• NEVERTRY to clean a hot surface.
Somecleanersproduce noxious
fumes,and wetcloths or sponges
could cause steamburns.
3
• NEVERWEAR loose-fittingclothing
when using your appliance.
• NEVERUSEa towelor other bulky
cloth as a potholder.Makesure the
potholder is dry. Moistpotholders
and wet cloths or spongescould
causesteam burns.DONOT let
potholderstouch hot cookingzones.
• DONOTtouchcookingzonesor
surfacesnearthem.Thesemay be
hot enoughto causeburns even
thoughthey aredark incolor. During
and afteruse,do nottouch or let
clothingor flammablematerial
contactthe cookingzonesuntilthey
have hadtimeto cool.
20P2562 ENV01
IMPORTANTSAFETY
INSTRUCTIONS
• ONLY certain kinds of glass or
ceramic cookware can be used
for cooktop cooking. Make sure
the cookware you choose to use
is designed for cooktop cooking
without breaking due to the
sudden temperature change.
• ALWAYS USE care when
touching cooking zones.
They will retain heat after the
cooktop has been turned off.
• COOKWARE USED for
cooktop cooking should be flat
on the bottom and large enough
to cover the heating zone being
used. Undersized utensils
expose the heating zone and
may result in direct contact
or ignition of clothing. The
proper-size utensil will also
improve efficiency.
• NEVER LEAVE cooking zones
unattended at high settings.
Boilovers result in smoking
or greasy spills which could
catch fire.
• NEVER cook on a broken
cooktop; cleaning solutions and
spillage could penetrate it and
create the risk of electrical shock
or fire. Contact a qualified
technician for repairs.
• LARGE SCRATCHES OR
IMPACTS to glass cooktops
can lead to broken or shattered
glass.
• ALWAYS TURN utensil handles
inward and away from other
cooking zones to reduce the risk
of burns, ignition, unintended
contact and spillage.
• NEVER use your appliance for
warming or heating the room.
• CLEAN ventilating hoods
frequently. Do not allow grease
to accumulate on the hood or
filter.
• WHEN PREPARING flaming
foods under the hood, turn the
ventilation fan on.
• USE extreme caution when
moving a pan of hot fat. Wait
until the fat is cool.
READ AND UNDERSTAND
THIS INFORMATION NOW!
Be sure everyone in your home
knows what to do in case of fire.
Never use water on a grease
fire; it will only spread the
flames.
COOKTOP GREASE FIRE:
Never pick up a flaming pan...
1. Turn off the surface elements.
2. Smother the flame with a tightly
fitting lid, use baking soda, or
use a dry chemical, foam or
halon-type extinguisher.
4
20P2562 ENv01

OPERATION
ProtectingtheCooktop
• DO NOT slide cookwareacross
your cooktop.
• DO NOT use a dishtowelor sponge
to clean or wipe your cooktop.
• DO NOT use scouringpowdersor
plastic, nylon,or metalcleaning
pads on your cooktop.
• DONOT apply your cooktop
cleaning cremeto the cooktop
surface if the surface is hot.
• READthe instructionlabelon the
cooktop cleaning cremebottle
before attemptingto clean the
surface of your cooktop.
• AFTER cleaning the cooktop
surface,be sure to wipe off any
residuethat may be leftfromthe
cremewith a dry papertowel.
• FORMAJORspills, turn the surface
control knobto OFF.Usea dry
paper towelto wipe up spill,then
use a razor scraper (heldwitha
potholder)at a 45° angleagainst
the surface of the cooktop to
scrape remainingspill from the
hot cooking zone.
• DONOT cook directlyon the
surface of the glass.
• DO NOTusethecooktopasa
cutting board.
_ AUTION: When
the surface controls
are turned off, the
Hot Surface Indicator light
will remain lit until the
cooktop surface has cooled
to approximately 150°F.
The glass ceramic surface
will retain heat after the
indicator light goes out.
Use caution until the cooktop
surface has had time to cool.
J
Sugarspills (suchas jellies,fudge,
candy syrups) or meltedplastic can
cause pitting of the cooktop surface
unlessthe spill is removedwhile it is
still hot.Special care should be taken
when removinghot substances.
Followtheseinstructionscarefully and
removesoil while spill is hot.
1. Turnoff all surface units. Remove
hot pans.
2. Wearingan oven mitt:
a. Usethe razorscraper to move
the spill to a cool area onthe
cooktop.
b, Removethe spill withpaper
towels.
3. Any remaining spillover should be
left until the surface of the cooktop
has cooled.
4. Don't usethe surface unitsagain
until all of the residuehas been
completelyremoved.
NOTE: Ifpitting or indentationinthe
glass surface has already occurred,
the cooktop glasswill haveto be
replaced. In this case, servicewill be
necessary.
5
20P2562 ENv01

OPERATION
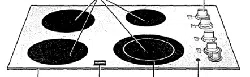
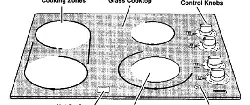
FEATURESOF YOURCOOKTOP
Cooking Zones Glass Cooktop
4 Removable
Cooktop
Control Knobs
Hot Surface Dual Unit On
Indicator Light Cooking Zone Indicator Light
To remove the adhesive residue left from packaging tape and labels, use
household dishwashing liquid, mineral oil, or cooking oil. With a soft cloth, rub
into the area and allow to soak. Rinse and dry well. Repeat procedure using an
appliance polish to ensure no damage is done to the cooktop. This should be
done before the cooktop is turned on for the first time, The adhesive
cannot be removed once the cooktop has heated.
20P2562 ENV01
OPERATION
RadiantCooktopCooking
Before using your new radiant
cooktop, clean itwith the Cooktop
Cleaning Cremee. This will leave a
protective coating.
NOTE: On models with white
glass-ceramic, it is normat for the
surface to appear discolored when
cooking zones are hot. This is
temporary and will disappear as
the glass cools.
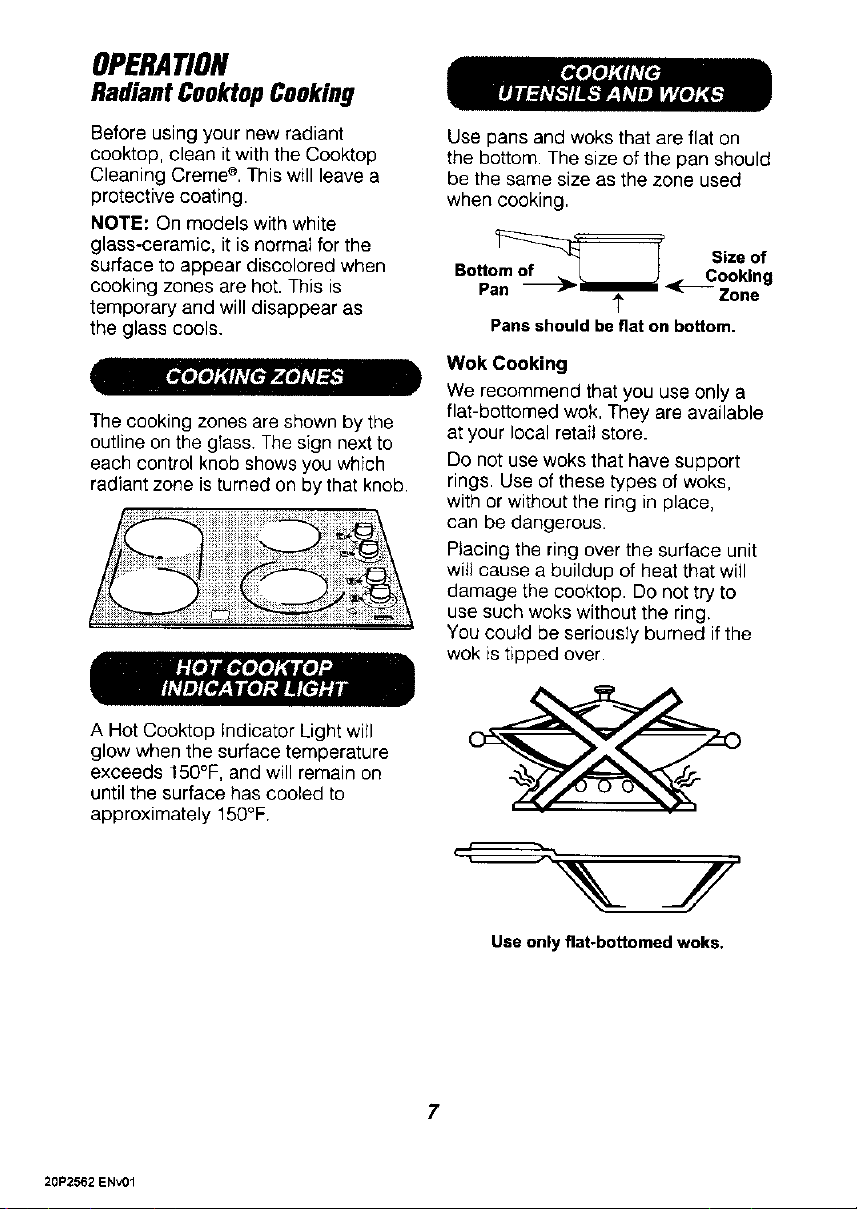
The cooking zones are shown by the
outline on the glass. The sign next to
each control knob shows you which
radiant zone is turned on by that knob.
A Hot Cooktop Indicator Light will
glow when the surface temperature
exceeds 150°F, and will remain on
until the surface has cooled to
approximately 150°F.
Use pans and woks that are flat on
the bottom. The size of the pan should
be the same size as the zone used
when cooking.
Pan _-
"r, Zone
Pansshouldbe fiat onbottom.
Wok Cooking
We recommend that you use only a
flat-bottomed wok. They are available
at your local retail store.
Do not use woks that have support
rings. Use of these types of woks,
with or without the ring in place,
can be dangerous.
Ptacing the ring over the surface unit
witl cause a buildup of heat that will
damage the cooktop. Do not try to
use such woks without the ring.
You couFd be seriously burned if the
wok is tipped over.
Use only flat.bottomed woks.
20P2562 ENv01

OPERATION
RadiantCooktopCooking(cont.)
If you don't
know if your
cookware is
flat on the
bottom, try this test. Turn your pan
upside down on the countertop, and
place the edge of a ruler flat against
the surface of the pan. Rotate the
ruler in a full circle, checking as you
turn for any space between the two
surfaces. The bottom of the pan and
the edge of the ruler should fit flush
against each other all the way across,
Stainless Steel: Highly
recommended for use with your new
cooktop. Especially good with a clad
bottom.
r__[e] -e
Aluminum: Heavyweight aluminum
cookware recommended.
Cast Iron: Cast-iron cookware that
is completely covered with porcelain
enamel is recommended. Cast iron that
is not covered withporcelain enamel
may scratch the glass- ceramic surface
of the cooktop.
Copper Bottom: Has good
performance, but itcan leave a
residue on the cooktop surface if
allowed to boil dry.
Glass-Ceramic or Stoneware:
Usable. Check for rough edges or
burrs, which may scratch the cooktop
surface.
When the knobs are turned on, coils
beneath the glass radiate heat
through the glass to the cooking
utensil. It wiIFtake a few moments for
the coils to heat; as they do, a red
glow can be seen below the surface
of the cooktop.
Every radiant surface unit has a
temperature limiter.
The temperature limiter protects the
glass cooktop from getting too hot.
The temperature limiter may cycle
the units off for a time if:
• The pan boils dry.
• The pan bottom is not flat.
• The pan is off center.
• There is no pen on the unit.
8
HI For quick starts, such as
bringing water to a boil.
MED For slow boil and sauteing.
LO For steaming foods or keeping
cooked foods at serving
temperature.
1. Push down to turn ('/. I
the knob,
2. Set on or between f]
numbers for
%
desired heat.
The Unit On Indicator Light will glow
when any cooking zone is activated.
20P2562 ENV01
OPERATION
RadiantCooktopCooking(cont.)
• *. e_ #A
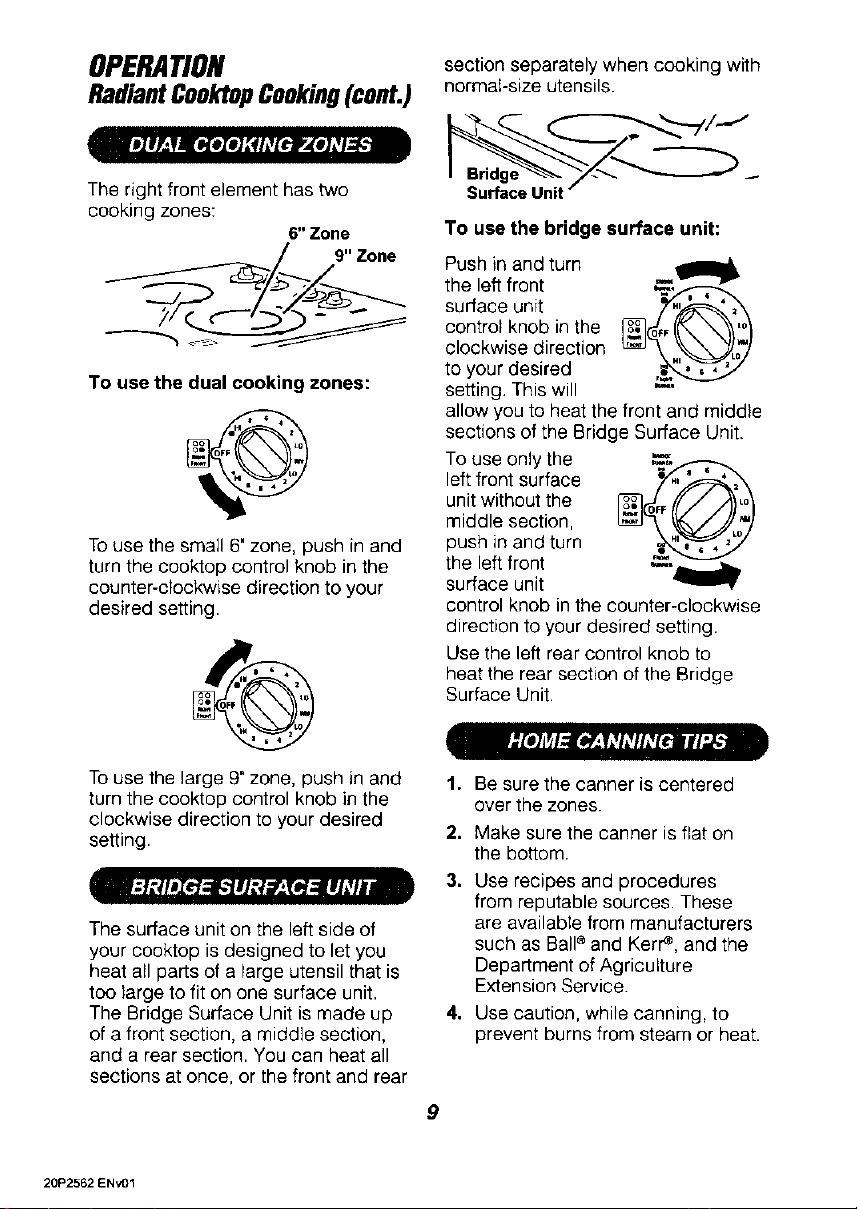
The right front element has two
cooking zones:
6"Zone
To use the dual cooking zones:
To use the small 6' zone, push in and
turn the cooktop control knob in the
counter-c_ockwise direction to your
desired setting.
To use the large 9" zone, push in and
turn the cooktop control knob in the
clockwise direction to your desired
setting.
The surface unit on the left side of
your cooktop is designed to let you
heat all parts of a large utensil that is
too large to fit on one surface unit.
The Bridge Surface Unit is made up
of a front section, a middle section,
and a rear section. You can heat all
sections at once, or the front and rear
section separately when cooking with
normaI-size utensils.
To use the bridge surface unit:
Push in and turn
the left front
surface unit
control knob in the
clockwise direction
to your desired
setting. This will
allow you to heat the front and middle
sections of the Bridge Surface Unit.
To use only the []_-._
left front surface
unit without the
middle section,
push in and turn
the left front
surface unit
control knob in the counter-clockwise
direction to your desired setting.
Use the left rear control knob to
heat the rear section of the Bridge
Surface Unit.
1. Be sure the canner is centered
over the zones.
2. Make sure the canner is flat on
the bottom.
3. Use recipes and procedures
from reputable sources. These
are available from manufacturers
such as Ball®and Kerre, and the
Department of Agriculture
Extension Service.
4. Use caution, while canning, to
prevent burns from steam or heat.
9
20P2562 ENv01

CARE AND CLEANING
Glass-CeramicCooldop
Cleaning
On models with white glass-ceramic,
it is normal for the surface to appear
discoIored when cocking zones are
hot. This is temporary and will
disappear as the glass cools. Cleaning
a glass-ceramic cooktop is different
from cleaning a standard porcelain
cocktop. To maintain and protect
your glass-ceramic cooktop, follow
these basic steps,
Use only Cooktop Cleaning Creme ®
on glass-ceramic.
Normal daily use cleaning:
To maintain and protect your glass-
ceramic cooktop follow these basic
steps.
1. Before using the cooktop for the
first time, clean it with the Cocktop
Cleaning Creme®. This helps
protect the top and makes clean-up
easie[
2. Daily use of the cooktop cleaning
creme will help keep the cooktop
looking new.
3. Shake the cleaning creme well.
Apply a few drops of the creme
directly to the cooktop.
4. Use a paper towel or sponge to
clean the entire cooktop surface.
NOTE: It is very important that you
DO NOT heat the cooktop until it has
been cleaned thoroughly.
Clean your cocktop after each spill.
Burned on residue:
WARNING: DAMAGE to your glass
surface may occur if you use scrub
pads other than BLUE Soctch-Brite ®
Multi-Purpose No Scratch scrub
sponges by 3M.
I. Allow the eooktop to cool.
2. Spread a few drops of Cocktep
Cleaning Creme ®to the entire
burned residue area.
3.Using the scrub sponge, rub the
residue area, applying pressure
as needed.
4. If any residue remains, repeat the
steps listed above as needed.
5.For additional protection, after all
residue has been removed, polish
the entire surface with Cooktop
Cleaning Creme®and a paper towel.
Heavy, burned on residue:
I. Allow the cocktop to cool.
2.Spread a few drops of Cooktop
Cleaning Creme e to the entire
burned residue area.
3. Hold the razor scraper at
approximately a 45° angle against
the glass surface and scrape the
soil. It will be necessary to apply
pressure to the razor scraper in
order to remove the residue,
4. Keep a small amount of creme on
the residue as you scrape.
10
_P2_2EN_I
CAREAND CLEANING
Glass-CeramicCook'top
Cleaning
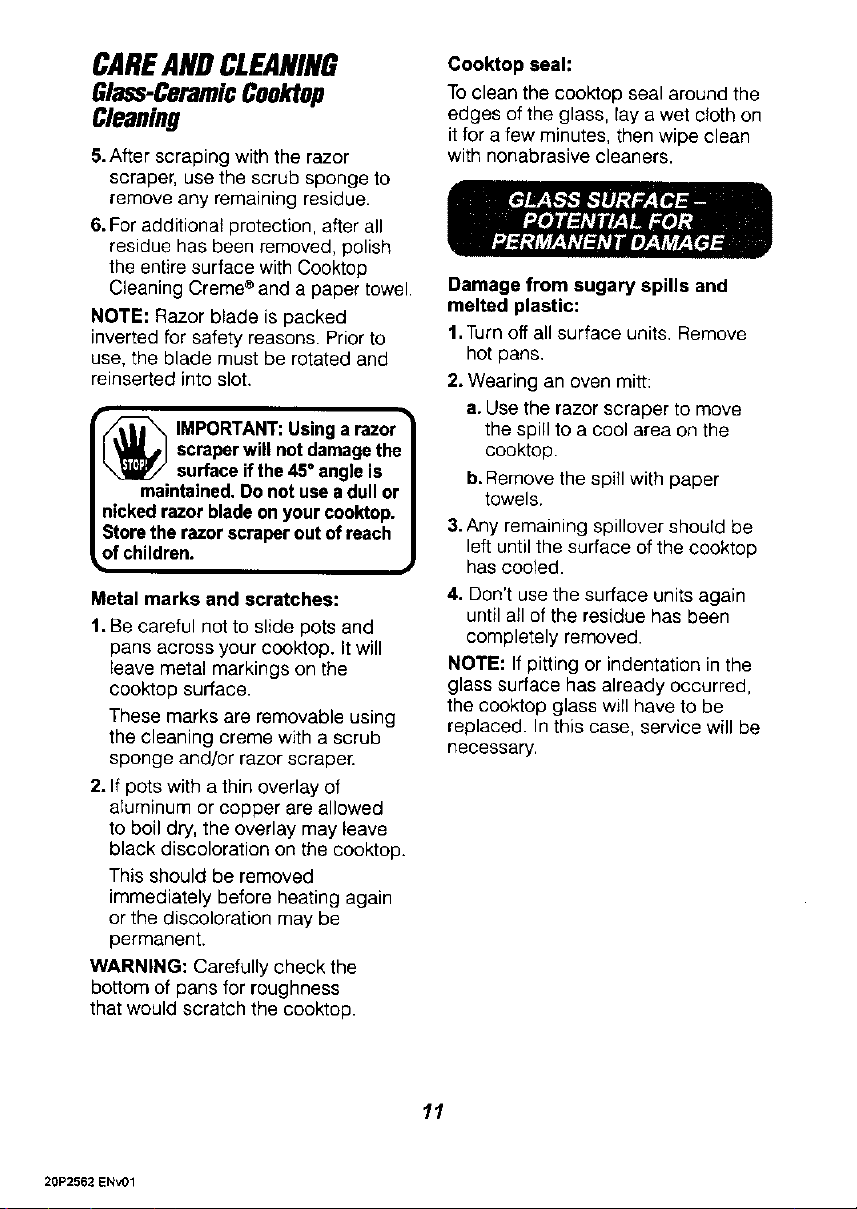
5.After scraping with the razor
scraper, use the scrub sponge to
remove any remaining residue.
6. For additional protection, after all
residue has been removed, polish
the entire surface with Cooktop
Cleaning Creme®and a paper towel.
NOTE: Razor blade is packed
inverted for safety reasons. Prior to
use, the blade must be rotated and
reinserted into slot.
IMPORTANT:Usinga razor
! _/I scraperwill not damagethe
surface ifthe 45° angle is
maintained,Do not usea dull or
nickedrazor bladeon your cooktop.
Storethe razor scraperout of reach
of children.
Metal marks and scratches:
1. Be careful not to slide pots and
pans across your cooktop. It will
leave metal markings on the
cooktop surface.
These marks are removable using
the cleaning creme with a scrub
sponge and/or razor scraper.
2. If pots with a thin overlay of
aluminum or copper are allowed
to boil dry, the overlay may leave
black discoloration on the cooktop.
This should be removed
immediately before heating again
or the discoloration may be
permanent.
WARNING: Carefully check the
bottom of pans for roughness
that would scratch the cooktop.
Cooktop seal:
To clean the cooktop seal around the
edges of the glass, lay a wet cloth on
it for a few minutes, then wipe clean
with nonabrasive cleaners.
Damage from sugary spills and
melted plastic:
1.Turn off all surface units, Remove
hot pans,
2. Wearing an oven mitt:
a. Use the razor scraper to move
the spill to a cool area on the
cooktop.
b. Remove the spill with paper
towels.
3. Any remaining spillover should be
left until the surface of the oooktop
has cooled.
4. Don't use the surface units again
until all of the residue has been
completely removed.
NOTE: If pitting or indentation in the
glass surface has already occurred,
the cooktop glass will have to be
replaced. In this case, service will be
necessary.
11
20P2562 ENV01

CAREAND CLEANING
Cleaning
• Most cleaners contain ammonia,
chemicals, and abrasives that
damage the surface of your
cooktop. Use only the Cooktop
Cleaning Creme ®for proper
cleaning and protection of your
glass-ceramic surface.
• If you slide aluminum or copper
bottom cookware across the surface
of the cooktop, they may leave
metal markings which appear as
scratches. Use the razor scraper
and cooktop creme to remove these
marks. Failure to remove this
residue immediately may leave
permanent marks.
• If pots with a thin overlay of
aluminum, copper, or enamel boi!
dry, bonding with the glass-ceramic
surface of the cook'top may occur.
This black discoloration should be
removed immediately or it could
become permanent.
• Use of glass cleaner may leave
an iridescent film on the cooktop.
Cleaning Creme will remove this film.
• Water stains (mineral deposits)
are removable using the creme or
full-strength white vinegar.
• Do not use a dull or nicked razor
blade on your cooktop.
• Do not use abrasive cleaners or
abrasive scouring pads on your
cooktop.
• Plastic mesh pads, such as Dobie ®,
may be used.
To order additional Cooktop Cleaning
Creme ®,call your nearest Sears
Service Center or Retail Store and
ask for Stock No. 40079.
CLEANING MATERIALS
• Dishwashing detergent
• Warm water
• Soft cloth
Molded Rib Clear Groove
Spring Clip
TO REMOVE
1. Be sure the control knob is in the
off position.
2. Pull straight off the stem.
Using a piece of string can make
removing the knob easier. Slip the
string under and around the knob,
then pull straight out.
TO CLEAN
Wash the knob thoroughly with soapy
water. Dry completely with a soft
cloth. DO NOT let the knob soak.
TO REPLACE
1. Check the back of the knob. The
molded rib of the knob is designed
to fit perfectly onto the knob stem.
2. Align the molded rib to the clear
groove in the knob stem.
3. Push the knob back as far as it
will go.
/2
20P2562 ENv01
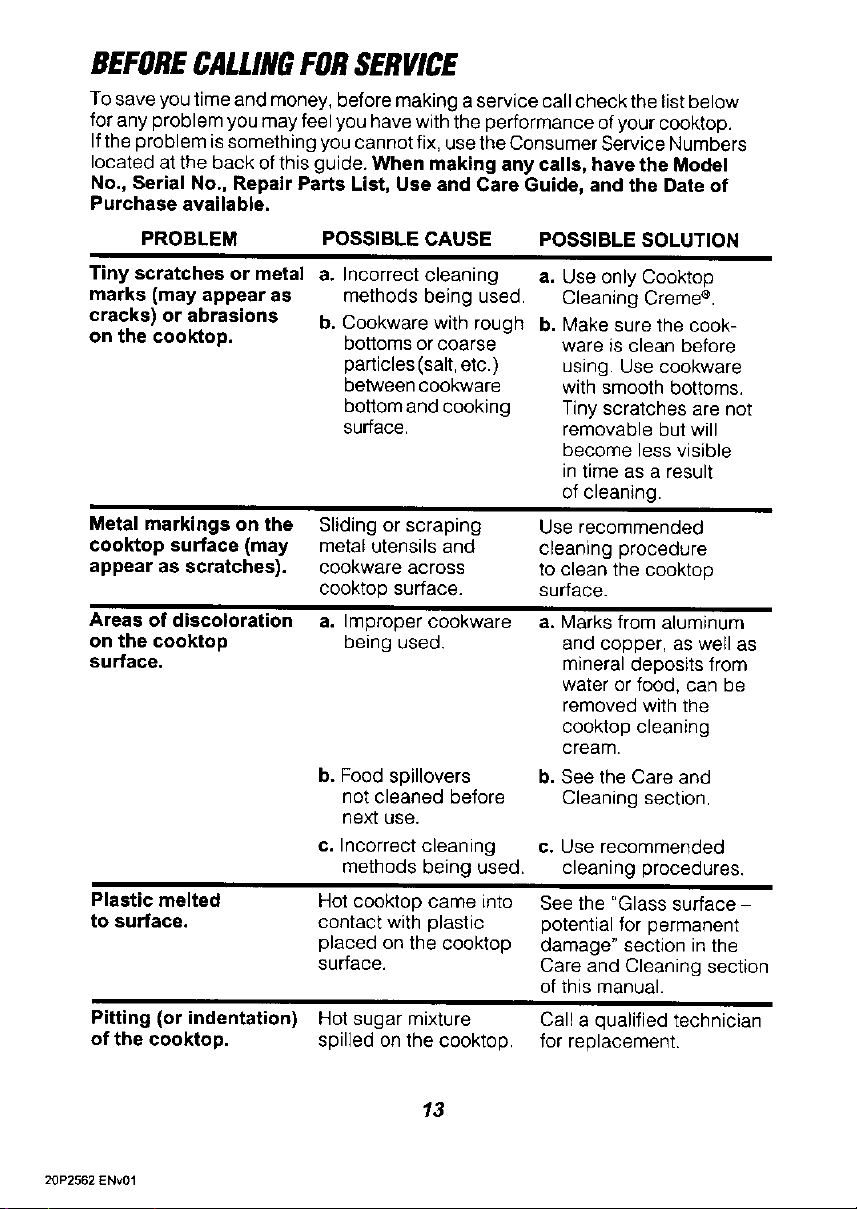
BEFORECALLINGFORSERVICE
To save you time and money, before making a service call check the list below
for any problem you may feel you have with the performance of your cooktop.
If the problem is something you cannot fix, use the Consumer Service Numbers
located at the back of this guide. When making any calls, have the Model
No., Serial No., Repair Parts List, Use and Care Guide, and the Date of
Purchase available.
PROBLEM POSSIBLE CAUSE POSSIBLE SOLUTION
Tiny scratches or metal a. Incorrect cleaning
marks (may appear as
cracks) or abrasions
on the cooktop.
Metal markings on the
cooktop surface (may
appear as scratches).
Areas of discoloration
on the cooktop
surface.
a. Use only Cooktop
methods being used.
b. Cookware with rough b.
bottoms or coarse
particles (salt, etc.)
between cookware
bottom and cooking
surface.
Cleaning Creme ®.
Make sure the cook-
ware is clean before
using. Use cookware
with smooth bottoms.
Tiny scratches are not
removable but will
become less visible
in time as a result
of cleaning.
Plastic melted
to surface.
Sliding or scraping
metal utensils and
cookware across
cooktop surface.
Use recommended
cleaning procedure
to clean the cooktop
surface.
Pitting (or indentation)
of the cooktop.
a. Improper cookware
being used.
a. Marks from aluminum
and copper, as well as
mineral deposits from
water or food, can be
removed with the
cooktop cleaning
cream.
b. Food spillovers b. See the Care and
not cleaned before Cleaning section.
next use.
c. Incorrect cleaning c. Use recommended
methods being used. cleaning procedures,
Hot cooktop came into
contact with plastic
placed on the cooktop
surface.
See the "Glass surface
potential for permanent
damage" section in the
Care and Cleaning section
of this manual.
Hot sugar mixture Call a qualified technician
spilled on the cooktop, for replacement.
13
20P2562 ENV01

BEFORECALLINGFORSERVICE
PROBLEM POSSIBLE CAUSE POSSIBLE SOLUTION
Dark streaks and a. Encrusted boilovers a. Use razor scraper and
specks on the cooktop or grease splatters, fellow the directions in
surface, the cfeaning section of
this manual.
b. Incorrect cleaning b. Use only the Coektop
materials. Cleaning Cremee on
the cooktop sudace.
Cooking zone will You have not used the Be sure the knob is
not work. control correctly, pushed in while turning.
Cooktop will not work. No power to cooktop. Check the circuit breaker
or fuse.
Cooking zones do You may not notice the The cooking zone is
not glow red. cooking zones glowing heating even though it
unless you are using a does not always glow.
higher heat setting. You can, however,
increase the heat setting
if needed.
Food cooks slowly. Improper cookware Use pans which are flat
being used. and match the diameter
of the cooking zone
selected.
14
20P2562 ENv01
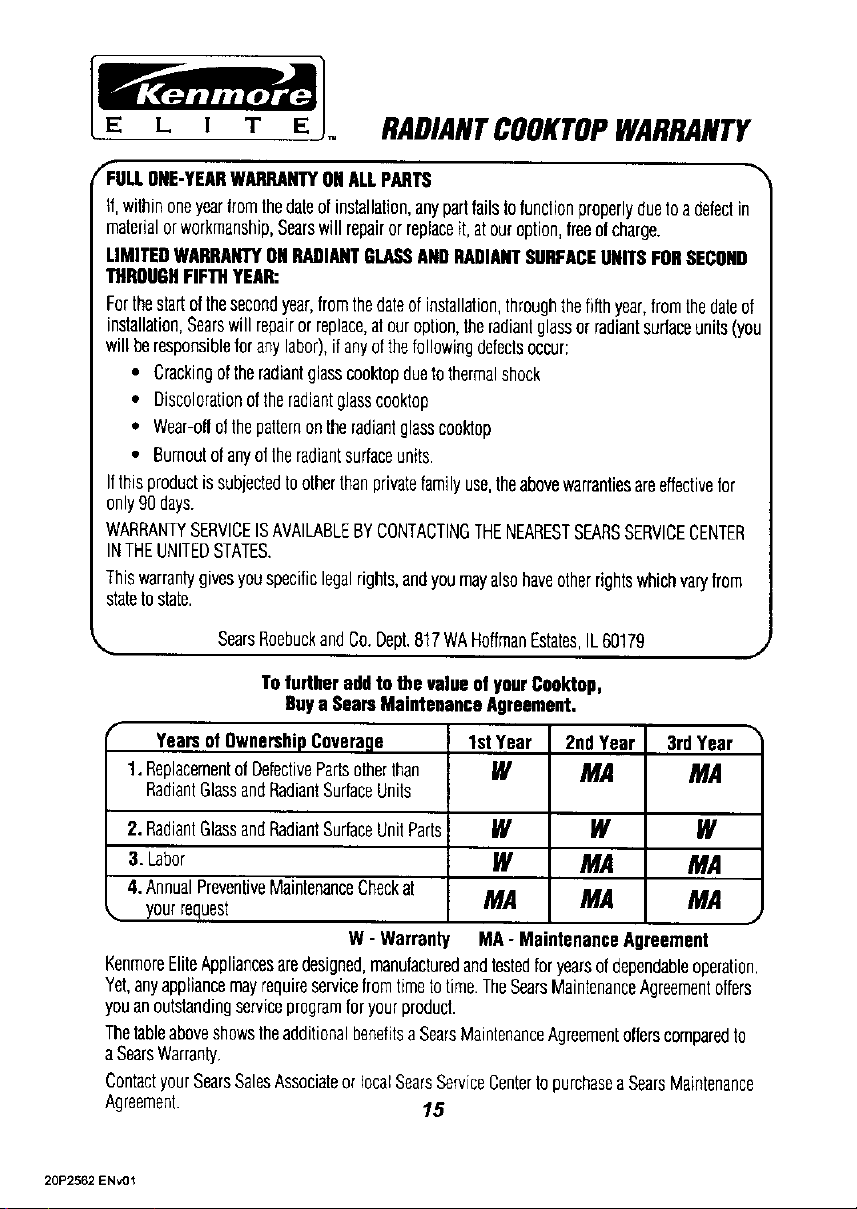
E L I T E RADIANTCOOKTOPWARRANTY
_U ii ONE-YEARWARRANTYONALLPARTS
if,withinoneyearfromthedateof installation,anypartfailstofunctionproperlyduoto adefectin
materialorworkmanship,Searswill repairorreplaceit,atouroption,Ireeel charge.
LIMITEDWARRANTYONRADIANTGLASSANDRADIANTSURFACEUNITSFORSECOND
THROUGHFIFTHYEAR:
Forthestartofthesecondyear,fromthedateofinstallation,throughthefifthyear,fromthedateof
installation,Searswillrepairorreplace,alouroption,theradiantglassorradiantsurfaceunits(you
will beresponsibleforanylabor),if anyofthefollowingdefeclsoccur:
• Crackingof theradiantglasscooktopduetothermalshock
• DiscolorationoftheradiantgJasscooktop
• Wear-offelthepatternontheradiantglasscooldop
• Burnoutofanyof theradiantsurtaceunfte.
Ifthisproductis subjectedtootherthanprivatefamilyuse,theabovewarrantiesareeffectivefor
only90days.
WARRANTYSERVICEISAVAILABLEBYCONTACTINGTHENEARESTSEARSSERVICECENTER
INTHEUNITEDSTATES.
Thiswarrantygivesyouspecificlegalrights,andyoumayalsohaveotherrightswhichvaryfrom
stateto state.
SearsRoebuckandCo.Deph817WAHoffmanEstates,IL 60179
Tofurtheraddto the valueof yourCooktop,
Buya SearsMaintenanceAgreement.
Yearsof OwnershipCoverage
1. Replacementof DefectivePartsotherthan
RadiantGlassandRadiantSurfaceUnits
2. RadiantGlassandRadiantSurfaceUnitParts
3. Labor
4.AnnualPreventiveMaintenanceCheckat
yourrequest
W - Warranl
1stYear 2ndYear
W MA
W W
W MA
MA MA
MA - MaintenanceAt
J
%
3rdYear
MA
W
MA
MA
J
reement
KenmoreEliteAppliancesaredesigned,manufacturedandtestedforyearsofdependableoperation,
Yet,anyappliancemayrequireservicefromtimetotime.TheSearsMaintenanceAgreementoffers
youanoutstandingserviceprogramforyourproduct.
Thetableaboveshowstheadditionalbenefitsa SearsMaintenanceAgreementofferscomparedto
aSearsWarranty.
ContactyourSearsSalesAssociateorlocalSearsServiceCentertopurchasea SearsMaintenance
Agreement. 15
20P2562 ENV0_