Loading ...
Loading ...
Loading ...

6
PREPARATION
PREPARATION
1. BEFORE YOU START
**DO NOT INSTALL IF DAMAGED**
**RETURN OR EXCHANGE WILL BE DENIED IF INSTALLED**
a. Be sure you have all the content of your purchase and required tools for
this installation.
b. Installation may take at least 1 to 2 hours from start to finish.
c. Plan to use as few elbows or turns as possible for more efficient air flow.
d. Collar size may need to be increased if utilizing a long duct run.
e. At least 12” of vertical duct is required before any turn.
f. Do not try to install this unit by yourself, SERIOUS INJURY MAY OCCUR.
g. At least two people are needed for installation.
h. Hiring a certified installer and electrician is recommended.
i. Cold weather installation will require make-up air or a CFM reducer.
Check with your local building codes for more detail.
2. LOCATION
a. Determine the exact location you want to install the range hood.
b. Depending on the height of your ceiling, distance between cooktop and
range hood should be between 27”-33”.
c. Range hood should be mounted at stated measurements to ensure
performance and lifespan of electrical components.
d. Correctly measure the dimension needed to install the unit.
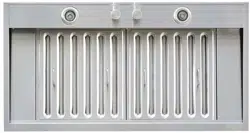
3. HOOD LINER
a. Inspect for any sign of defect or damage. (i.e. scratches, dents, loose
seams, etc.)
b. Power up the unit to make sure it is working properly.
c. Remove the baffle filters and unscrew the fillers.
d. Remove the protective file on the baffle filters and fillers.
Use Fig. 1a and 1b on page 5 for measurements
Loading ...
Loading ...
Loading ...