Loading ...
Loading ...
Loading ...
5
--9
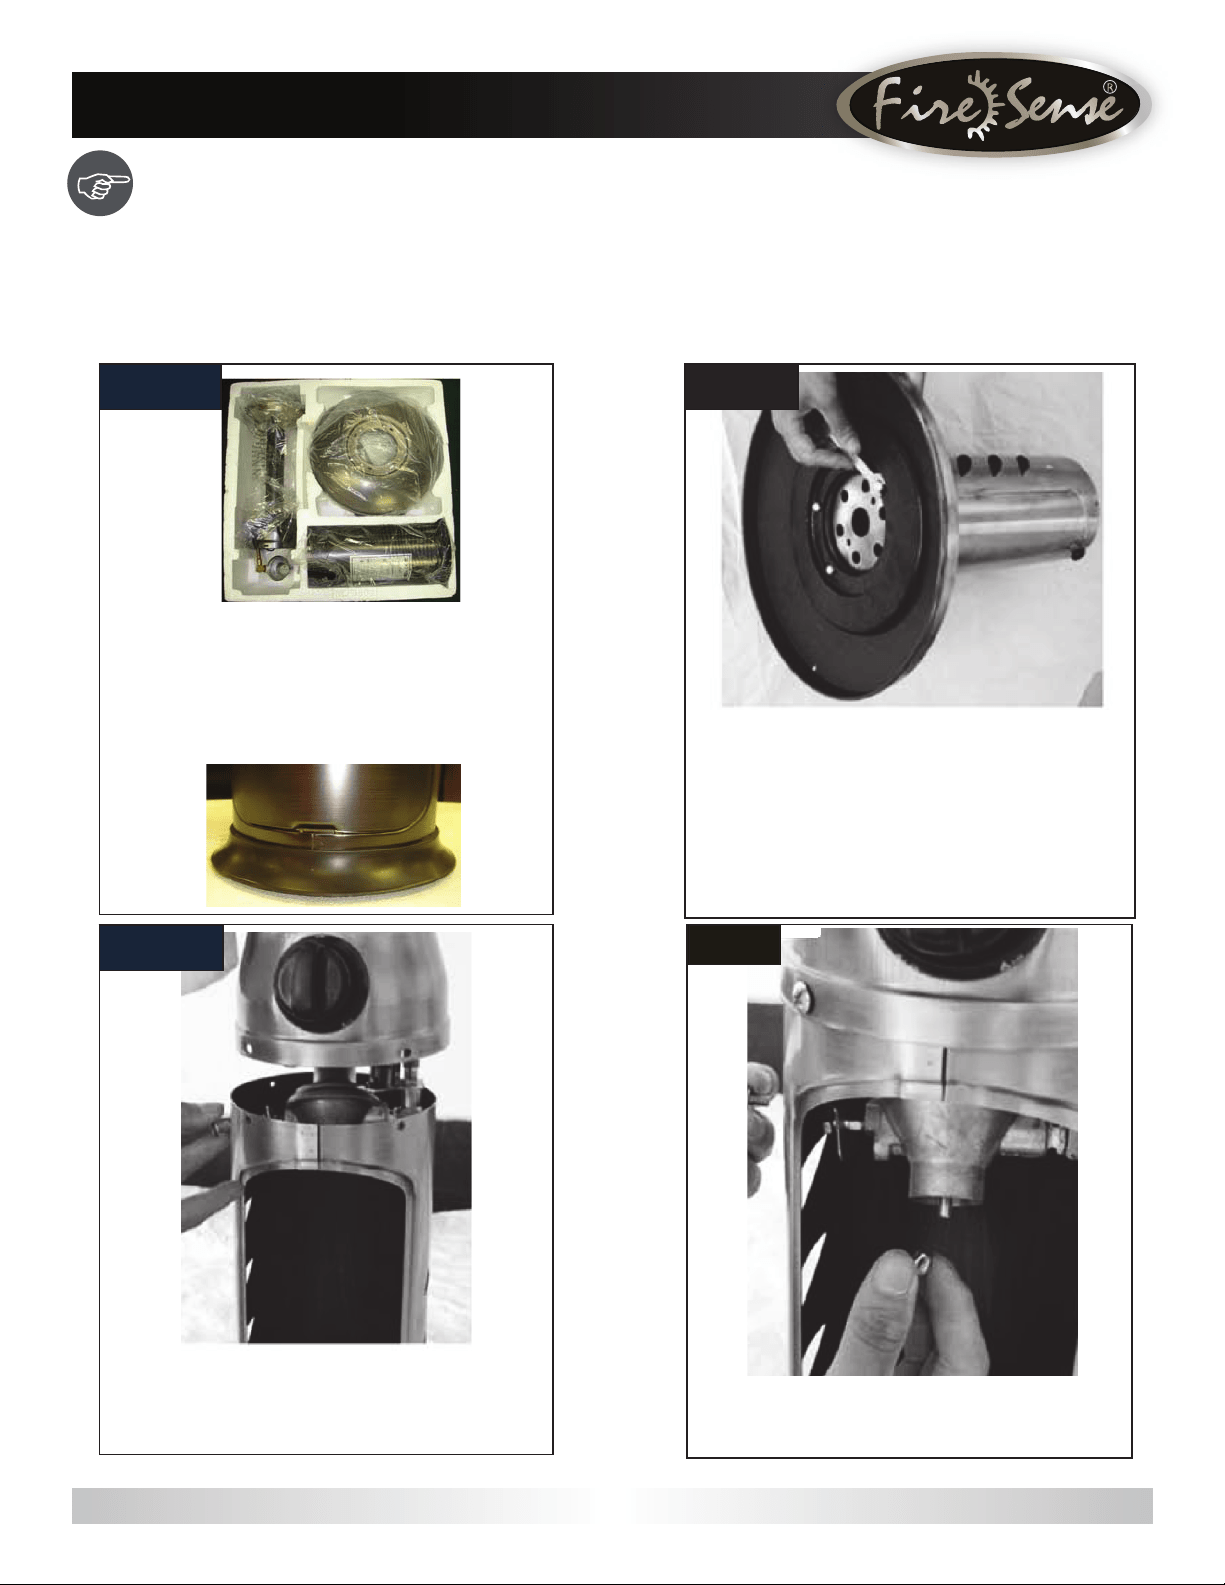
Before beginning assembly of this appliance, make sure all parts are present.
Compare all parts with package contents list and hardware contents as listed on the previous page. If any part is
missing or damaged, do not attempt to assemble this product. Contact customer service for replacement parts.
-//½--9½ /[ 30 minutes
/¶½,g¨Å³g_½t³½¶¶gLϽ¢ "/½UÅ_g_£[
• Phillips screwdriver w/medium blade • Slip joint/adjustable pliers
• Adjustable wrench (2)
Remove all parts of the heater from the
packaging. ( "/: Plastic ring on tank
housing should already be in place but if not,
slide the plastic ring over the bottom of tank
housing.)
67(3
67(3 67(3
67(3
Contact us for assistance: (866) 985-7877 | www.balkenehome.com
Place the Burner on the Tank Housing,
then join them using 4 M5x8 Bolts.
Fix the Regulator to the Tank Housing
using a M5x12mm Bolt and M5 Nut.
Use 4 M5x25 Bolts to fix the tank housing
to the base and cast iron weight( Note:
weight is preassembled to base),then
fasten with 4 M5 nuts from the inside of
the tank housing.
Use Wrench to tighten the bolts and nuts
as shown above.
Loading ...
Loading ...
Loading ...