211015
Please read and understand this entire manual before attempting to assemble, operate or install the product.
WARNING
● Turn off electricity at main fuse box (or circuit breaker box) before beginning installation by removing fuse (or
switching off circuit breaker).
● Be careful not to damage or cut the wire insulation (covering) during fixture installation. Do not permit wires to contact
any surface having a sharp edge. To do so may damage or cut the wire insulation, which could cause serious injury
or death from electric shock.
CAUTION
● All electrical connections must be in agreement with local codes, ordinances or the national electric code (NEC).
Contact your municipal building department to learn about your local codes, permits and/or inspections.
● Risk of fire – most dwellings built before 1985 have supply wire rated for 140°F/60ºC. Consult a qualified electrician
before installation.
SAFETY INFORMATION
Questions, problems, missing parts?
Before returning to your retailer, call our customer service at 1-800-887-6326
Monday – Friday 9:00 a.m. – 5:00 p.m. CST
SKU Number: 346-0861
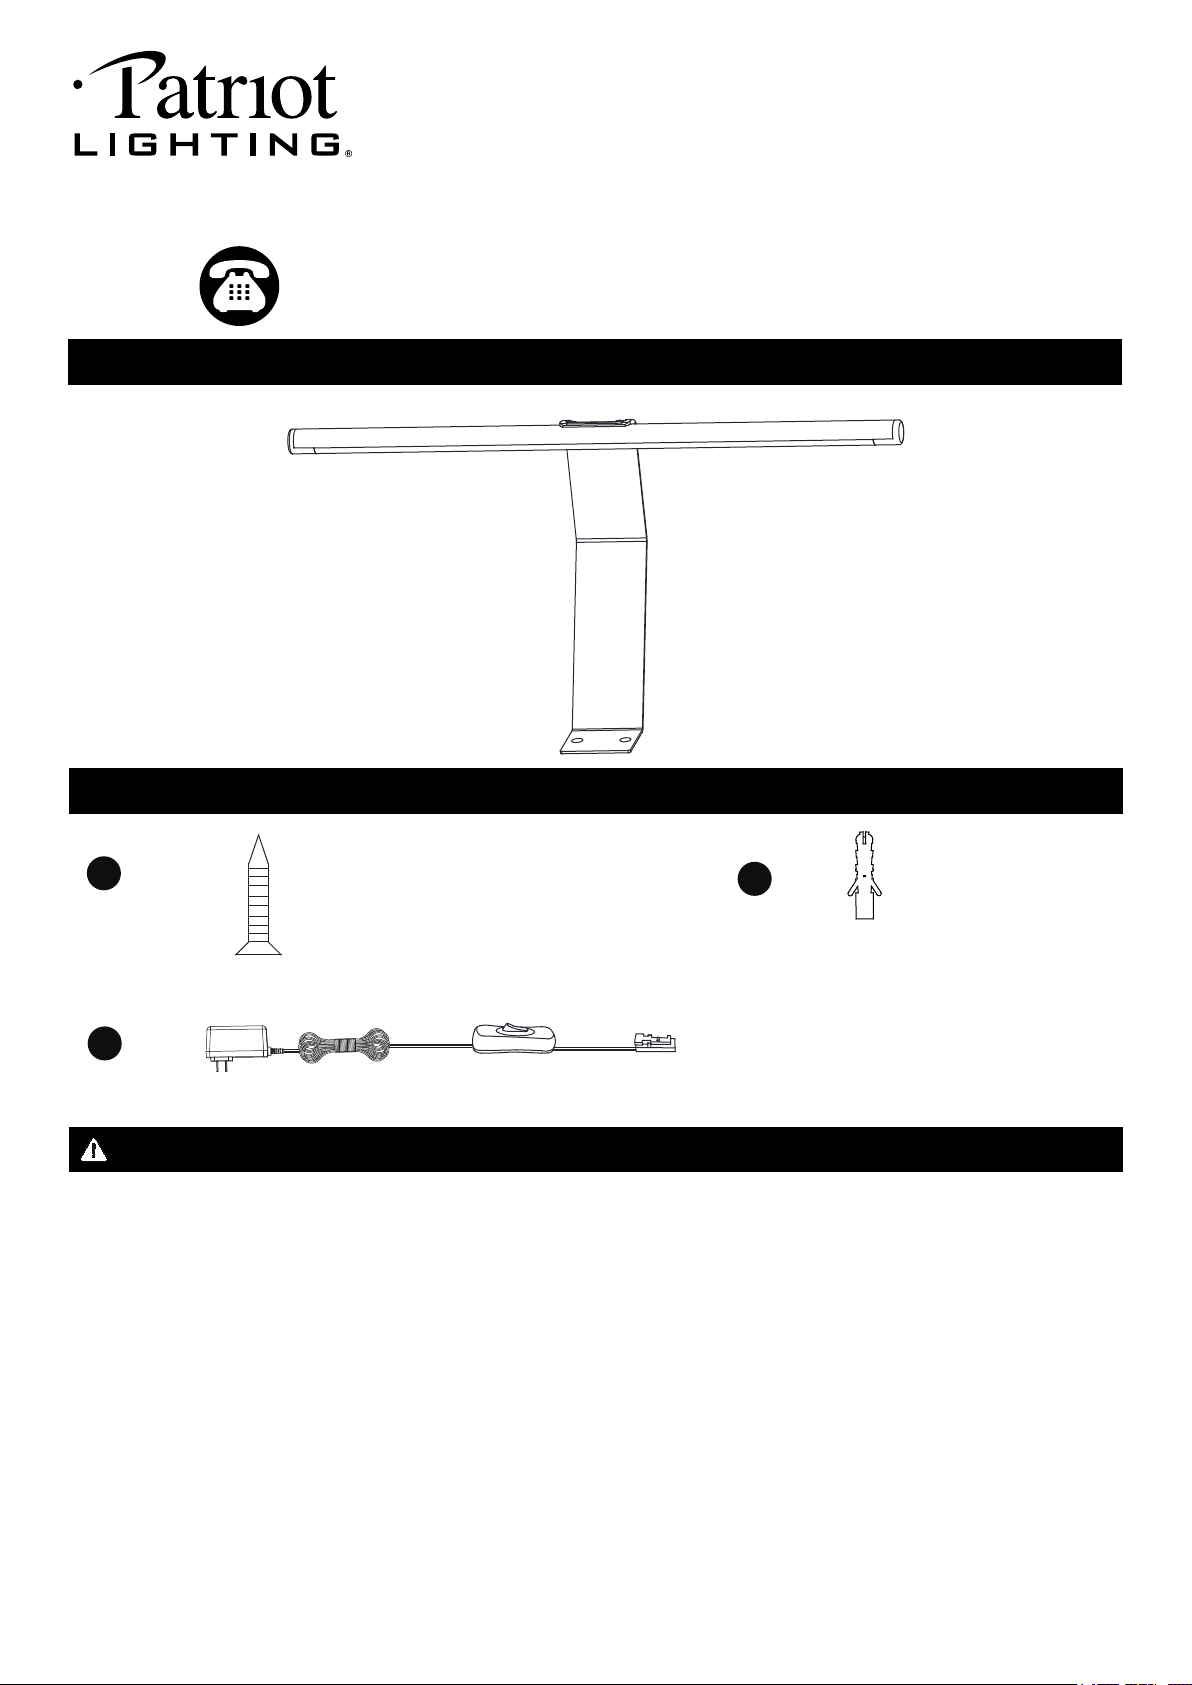
LED PICTURE LIGHT
Model Number:
U5809
PACKAGE CONTENTS
HARDWARE CONTENTS Note: Hardware not shown actual size.
Dry Wall Screw
X2
AA
CC
BB
Anchor
X2
Adaptor
X1
PREPARATION
Before beginning assembly, installation or operation of product, make sure all parts are present. Compare parts with
package contents list and diagram on previous page. If any part is missing or damaged, do not attempt to assemble,
install or operate the product.
Tools Required for Assembly (not included): Phillips Screwdriver, Safety Glasses, Ladder.
● To clean, turn off and wipe with a damp, non-abrasive cloth.
1) The light does not work:
a) Make sure the wall switch and circuit breaker are on.
b) Make sure the power adaptor is correct plug in.
CARE AND MAINTENANCE
TROUBLESHOOTING
If unable to fix any of the above issues, please consult a certified electrician.
Page 2 of 2
ASSEMBLY INSTRUCTIONS
Turn off the power at fuse or circuit box.
FIVE-YEAR LIMITED WARRANTY: If, during normal use, this PATRIOT LIGHTING lighting fixture breaks or fails
due to a defect in material workmanship within five (5) years from the date of original purchase, simply bring this
lighting fixture with the original sales receipt back to your nearest MENARDS retail store. At its discretion, PATRIOT
LIGHTING agrees to have the product or any defective part(s) repaired or replaced with the same or similar PATRIOT
LIGHTING product or part free of charge, within the stated warranty period, when returned by the original purchaser
with original sales receipt. This warranty; (1) excludes expendable parts including but not limited to light bulbs; (2) does
not cover damage that has resulted from abuse or misuse; and (3) does not cover any losses, labor, injuries to
persons/property or costs. This warranty does give you specific legal rights and you may have other rights, which vary
from state to state.
R
R
R
R
Questions, problems, missing parts?
Before returning to your retailer, call our customer service at 1-800-887-6326
Monday – Friday 9:00 a.m. – 5:00 p.m. CST
Spare Parts List:
The following parts are available for re-order if damaged or missing. Call our toll free at 1-800-887-6326.
Assembly Kit
5952MM (1SET)
Dry Wall Screw
X2
AA
BB
Anchor
X2
3
Outlet
CC
Turn on the power at fuse or circuit box.
1
Wood Material
AA
2
Cement Wall Panel
BB
AA
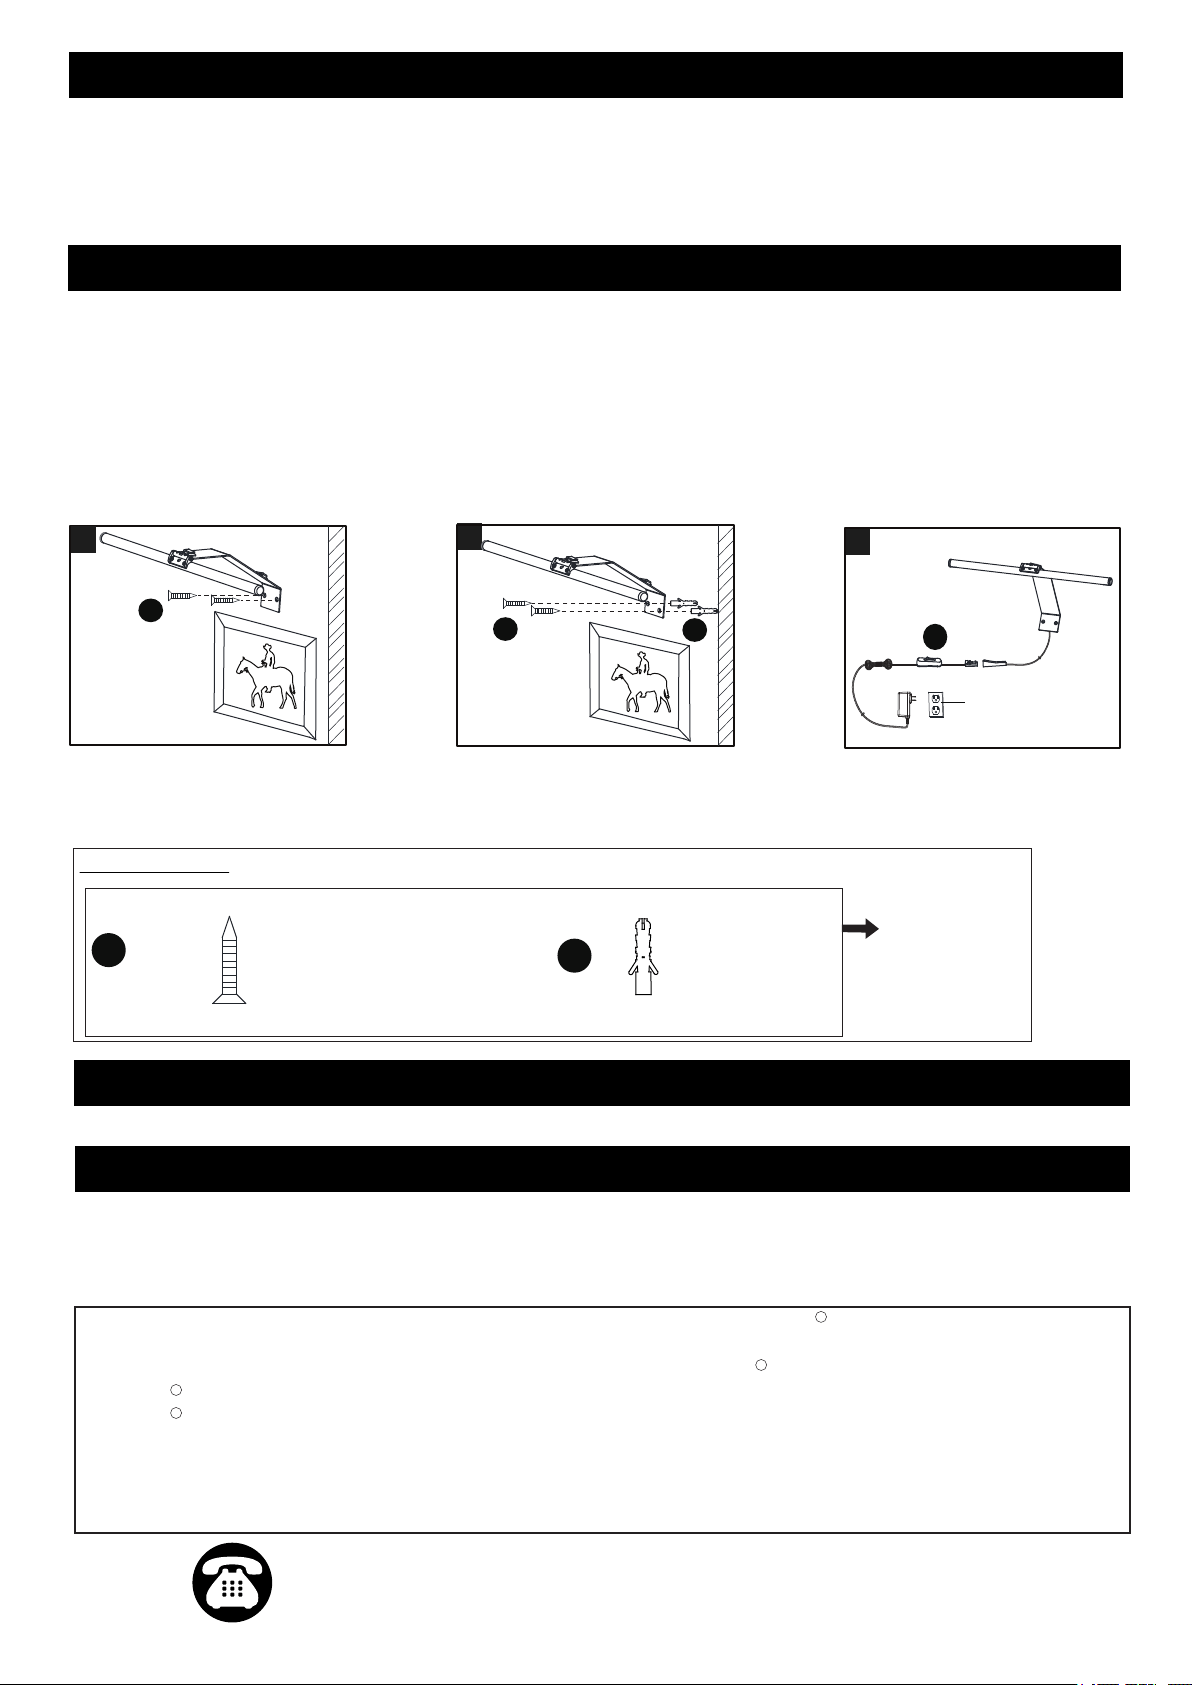
1. Place the light fixture and mark the target on the wall.
2. Attach the fixture to the wall.
a)
For wood material
Secure two dry wall screw (AA) through the set holes on the arm of light fixture (See Fig 1).
b) For cement material
Drill the holes of target for threading the anchors(BB), secure the dry wall screw (AA) through the set holes into the
anchors (BB) (See Fig 2).
3. Connect the male / female connections, then plug the power adaptor (CC) into the outlet (See Fig 3).
211015