Loading ...
Loading ...
Loading ...
8
Fitness Bike
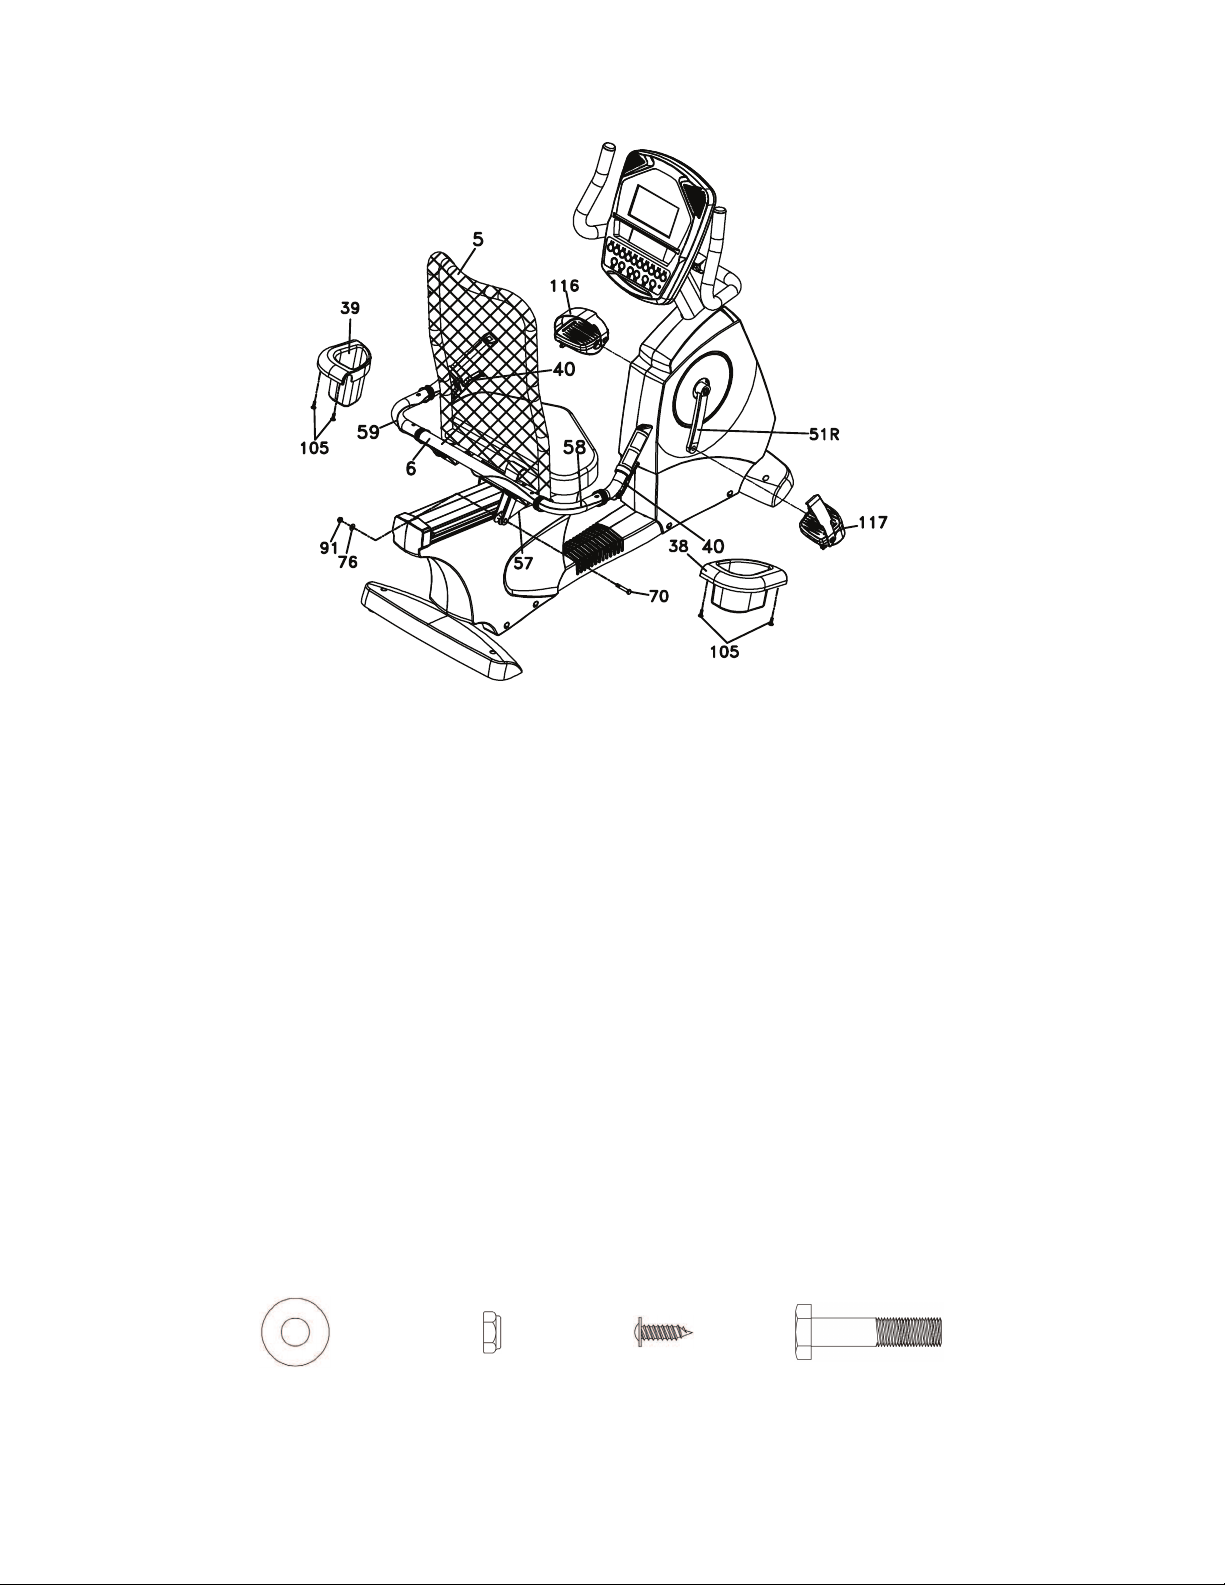
XBR55
1. Put the Seat Recline Release Cable (58) on the U Bracket of the Seat Back Frame (5).
2. Install the Gas Cylinder (57) on the Seat Back Frame (5) with one Hex Head Bolt (70), one Flat Washer (76)
and one Nyloc Nut (91) by using the wrenches provided (112 & 113).
3. Remove the Button Head Socket Screws holding the clamps of the left and right Release Levers (40) by using
the M5 Allen Wrench (115). Install the Release Levers (40) onto the Seat Handle Bars (6) just behind the
Hand pulse sensors on each side. Install them at an angle that allows easy access for use, then reinsert and
tighten the socket screws removed earlier. Don’t over tighten these screws.
4. Secure the Steel Cables (58 & 59) to the Seat Handle Bar (6) with 2pcs of Velcro Tape. Wrap the tape around
the handlebars in places that will be under the beverage holders so they are out of sight.
5. Attach the Pedals (L, R)(116,117) to the Crank Arms (51L, 51R). Tighten with the wrench (113). Remember
that the left pedal has a reverse thread and will be threaded onto the Crank arm in a counterclockwise motion.
There is an “L” stamped in the end of the threaded post of the left pedal and an “R” in the right. Make sure to
tighten the pedals as rmly as you can. It may be necessary to re-tighten the pedals if you feel a thumping while
pedaling the bike. A thumping or clicking noise is usually caused by loose pedals.
6. Attach the Drink Bottle Holders (L39 & R38) to the sides of the Seat Handle Bar (6) with four Sheet Metal
Screws (105). Tighten with the Phillips Head Screw Driver (114).
HARDWARE
STEP 4: Plastic Parts
#76.5/16” x 18 x 1.5T
Flat Washer
(1 pc)
#91.5/16” x 6T
Nyloc Nut
(1 pc)
#105.4 x 16mm
Sheet Metal Screw
(4 pcs)
#70.5/16” x 1-1/4”
Hex Head Bolt
(1 pc)
Loading ...
Loading ...
Loading ...