Loading ...
Loading ...
Loading ...
4
BEFORE USE
Remove the Packaging
■ Remove tape and glue residue from surfaces before turning
on the refrigerator. Rub a small amount of liquid dish soap
over the adhesive with your ngers. Wipe with warm water
and dry.
■ Do not use sharp instruments, rubbing alcohol, ammable
uids, or abrasive cleaners to remove tape or glue. These
products can damage the surface of your refrigerator. For
more information, see “Refrigerator Safety.”
■ Dispose of/recycle all packaging materials.
After you remove all of the packaging materials, clean the inside
of your refrigerator before using it. See the cleaning instructions
in “Refrigerator Care.”
Important information to know about glass shelves
and covers:
Do not clean glass shelves or covers with warm water when
they are cold. Shelves and covers may break if exposed to
sudden temperature changes or impact, such as bumping.
Tempered glass is designed to shatter into many small,
pebble-size pieces. This is normal. Glass shelves and covers
are heavy. Use both hands when removing them to avoid
dropping.
Water Supply Requirements
Read all directions before you begin.
IMPORTANT:
■ When your refrigerator was installed, the water connection
from the water source should have been connected to your
refrigerator. If your refrigerator is not connected to a water
source, see “Connect to Water Line” in the Installation
Instructions. If you have any questions about your water
connection, see “Troubleshooting” or call a licensed, qualied
plumber.
■ If you turn the refrigerator on before the water line is
connected, turn the ice maker Off. See “Ice Maker and
Storage Bin.”
■ All installations must meet local plumbing code requirements.
Clean Before Using
Water Pressure
A cold water supply with water pressure between 30 and 120 psi
(207 and 827 kPa) is required to operate the water dispenser and
ice maker. If you have questions about your water pressure, see
“Troubleshooting” or call a licensed, qualied plumber.
Reverse Osmosis Water Supply
IMPORTANT: The pressure of the water supply coming out of
a reverse osmosis system going to the water inlet valve of the
refrigerator needs to be between 30 and 120 psi (207 and
827 kPa).
If a reverse osmosis water ltration system is connected to your
cold water supply, the water pressure to the reverse osmosis
system needs to be a minimum of 40 psi (276 kPa).
If the water pressure to the reverse osmosis system is less than
40 psi (276 kPa):
■ Check to see whether the sediment lter in the reverse
osmosis system is blocked. Replace the lter if necessary.
■ Allow the storage tank on the reverse osmosis system to rell
after heavy usage.
■ If your refrigerator has a water lter, it may further reduce
the water pressure when used in conjunction with a reverse
osmosis system. Remove the water lter. See “Water Filtration
System.”
If you have questions about your water pressure, call a licensed,
qualied plumber.
Water System Preparation
Please read before using the water system. Follow the directions
specic to your model.
Style 1 (Dispenser Models)
IMPORTANT: After connecting the refrigerator to a water source
or replacing the water lter, follow the steps below to make sure
that the water system is properly cleaned. This will ush air from
the lter and water dispensing system, and prepare the water
lter for use.
Do not use with water that is microbiologically unsafe or of
unknown quality without adequate disinfection before or
after the system.
NOTE: If your model has a base grille lter system, make sure
the base grille lter is properly installed and the cap is in the
horizontal position.
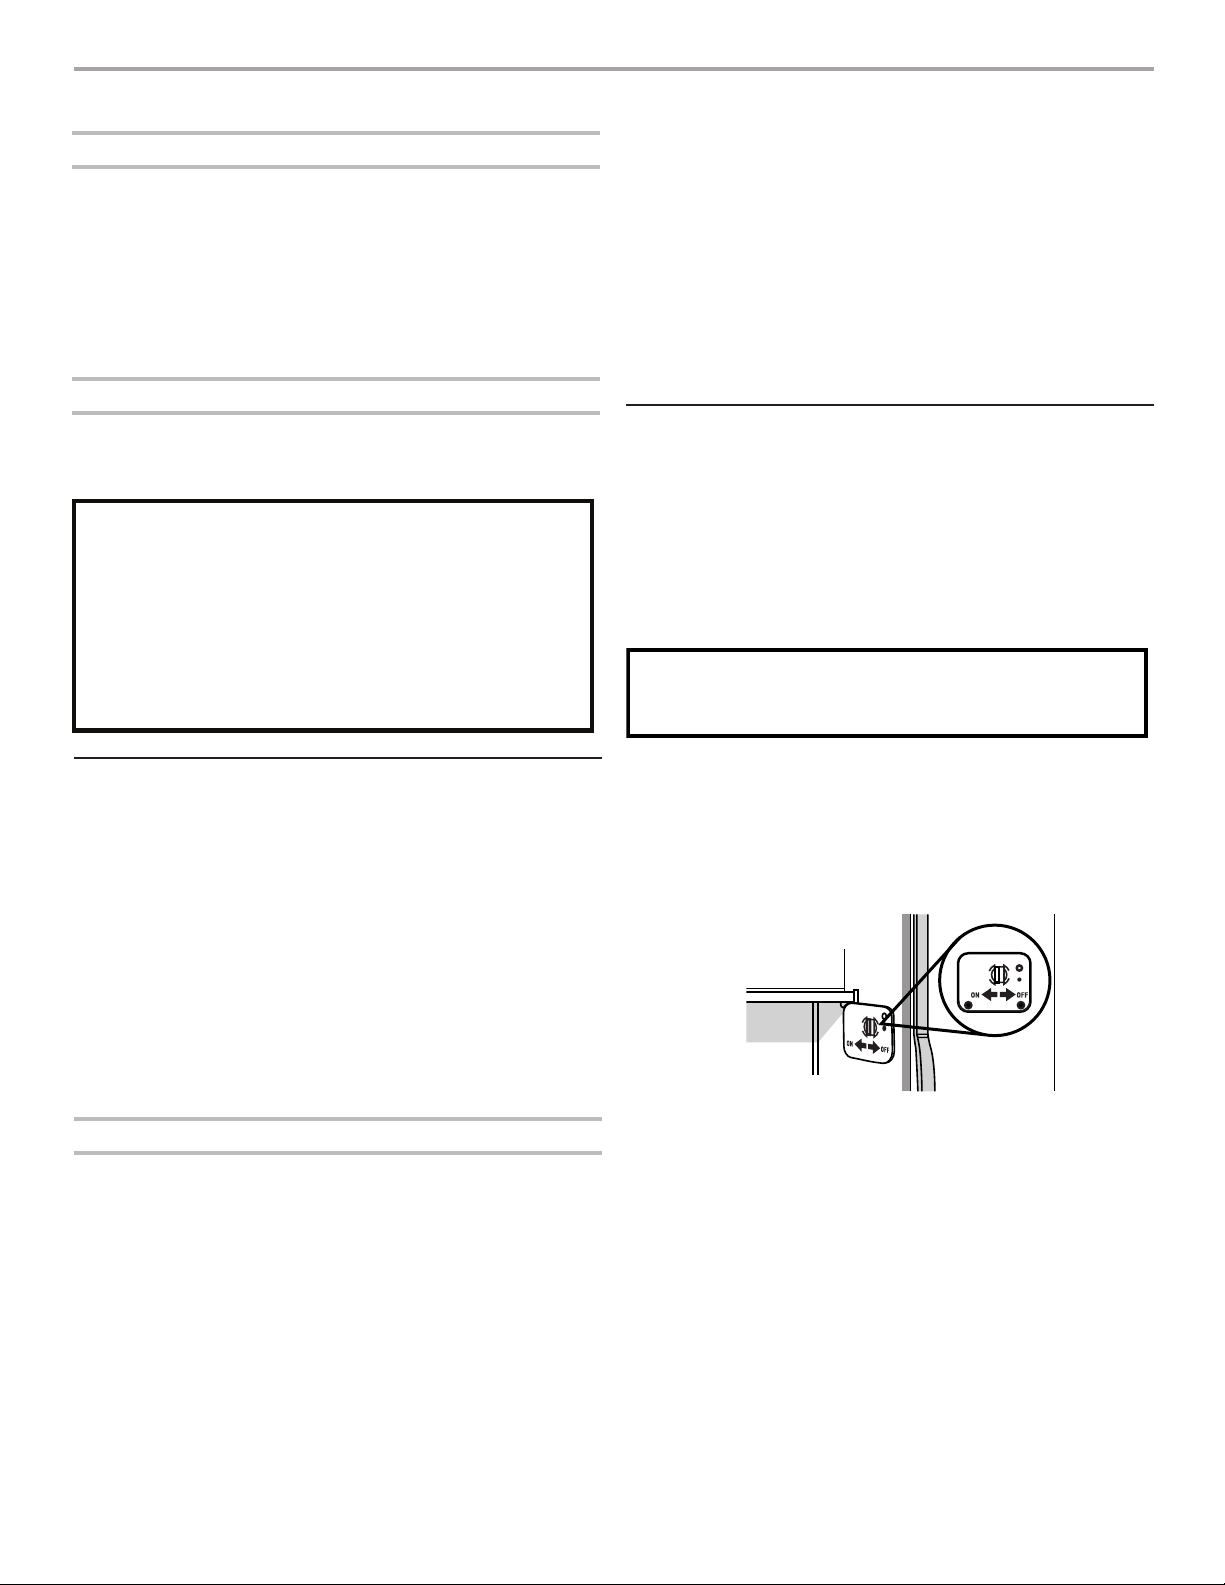
1. Open the freezer door and turn off the ice maker. The On/
Off switch is located on the top right side of the freezer
compartment. Move the switch to the OFF (right) setting as
shown.
2. Use a sturdy container to depress and hold the water
dispenser lever for 5 seconds, and then release it for
5 seconds. Repeat until water begins to ow. Once water
begins to ow, continue depressing and releasing the
dispenser lever (5 seconds on, 5 seconds off) until a total
of 3 gal. (12 L) has been dispensed. This will ush air from
the lter and water dispensing system and prepare the water
lter for use. Additional ushing may be required in some
households.
NOTE: As air is cleared from the system, water may spurt out
of the dispenser.
3. Open the freezer door and turn on the ice maker. Move the
switch to the ON (left) position.
NOTES:
■ Allow 24 hours to produce the rst batch of ice.
■ Discard the rst three batches of ice produced.
■ Allow 3 days to completely ll ice container.
Loading ...
Loading ...
Loading ...