Loading ...
Loading ...
Loading ...
Your pressure washer requires some assembly and is
ready for use only after it has been properly serviced
with the recommended oil and fuel.
if you have any problems with the assembly of
your pressure washer, please caNIthe pressure
washer he_p_ine at 1o800o222o3136.
UNPACK THE PRESSURE WASHER
1. Remove everything from carton except pressure
washer.
2. Open carton completely by cutting each corner
from top to bottom.
3. Remove pressure washer from carton.
CARTON CONTENTS
Check all contents. If any parts are missing or
damaged, call the pressure washer helpline at
1o800o222o3136.
• Main Unit
• Handle
• Accessory Tray
• High Pressure Hose
• Spray Gun
• Nozzle Extension with Quick Connect Fitting
• Oil Pouch
Perfect Mix Concentrate Bottles (2)
Bottle Bracket Wireform (2)
Perfect Mix Siphoning Unit/Hose
Parts Bag (which includes the following):
Operator's Manual
Owner's Registration Card
Bag containing 4 Multi-Colored Quick Connect
Spray Tips
Rubber straps (2)
Handle Fastening Hardware Kit (which includes):
Handle Bolts (2)
Carriage Bolt (2)
Plastic Knobs for Handle (2)
Plastic Knob (2)
Tree Clips (4)
Become familiar with each piece before assembling
the pressure washer. Identify all contents with the
illustration on page 6. If any parts are missing or
damaged, call the pressure washer helpline at
1o800o222o3136.
ASSEMBUNG PRESSURE WASHER
Your Craftsman pressure washer will need assembly
before operation:
1. Fill out and send in registration card.
2. Attach handle and accessory tray.
3. Connect detergent siphon hose to pump.
4. Add oil to engine crankcase.
5. Add fuel to fuel tank.
6. Connect pressure hose to spray gun and pump.
7. Connect water supply to pump.
8. Attach nozzle extension to spray gun.
9. SelectJ'attach quick connect spray tip to nozzle
extension.
Attach Handle and Accessory Tray
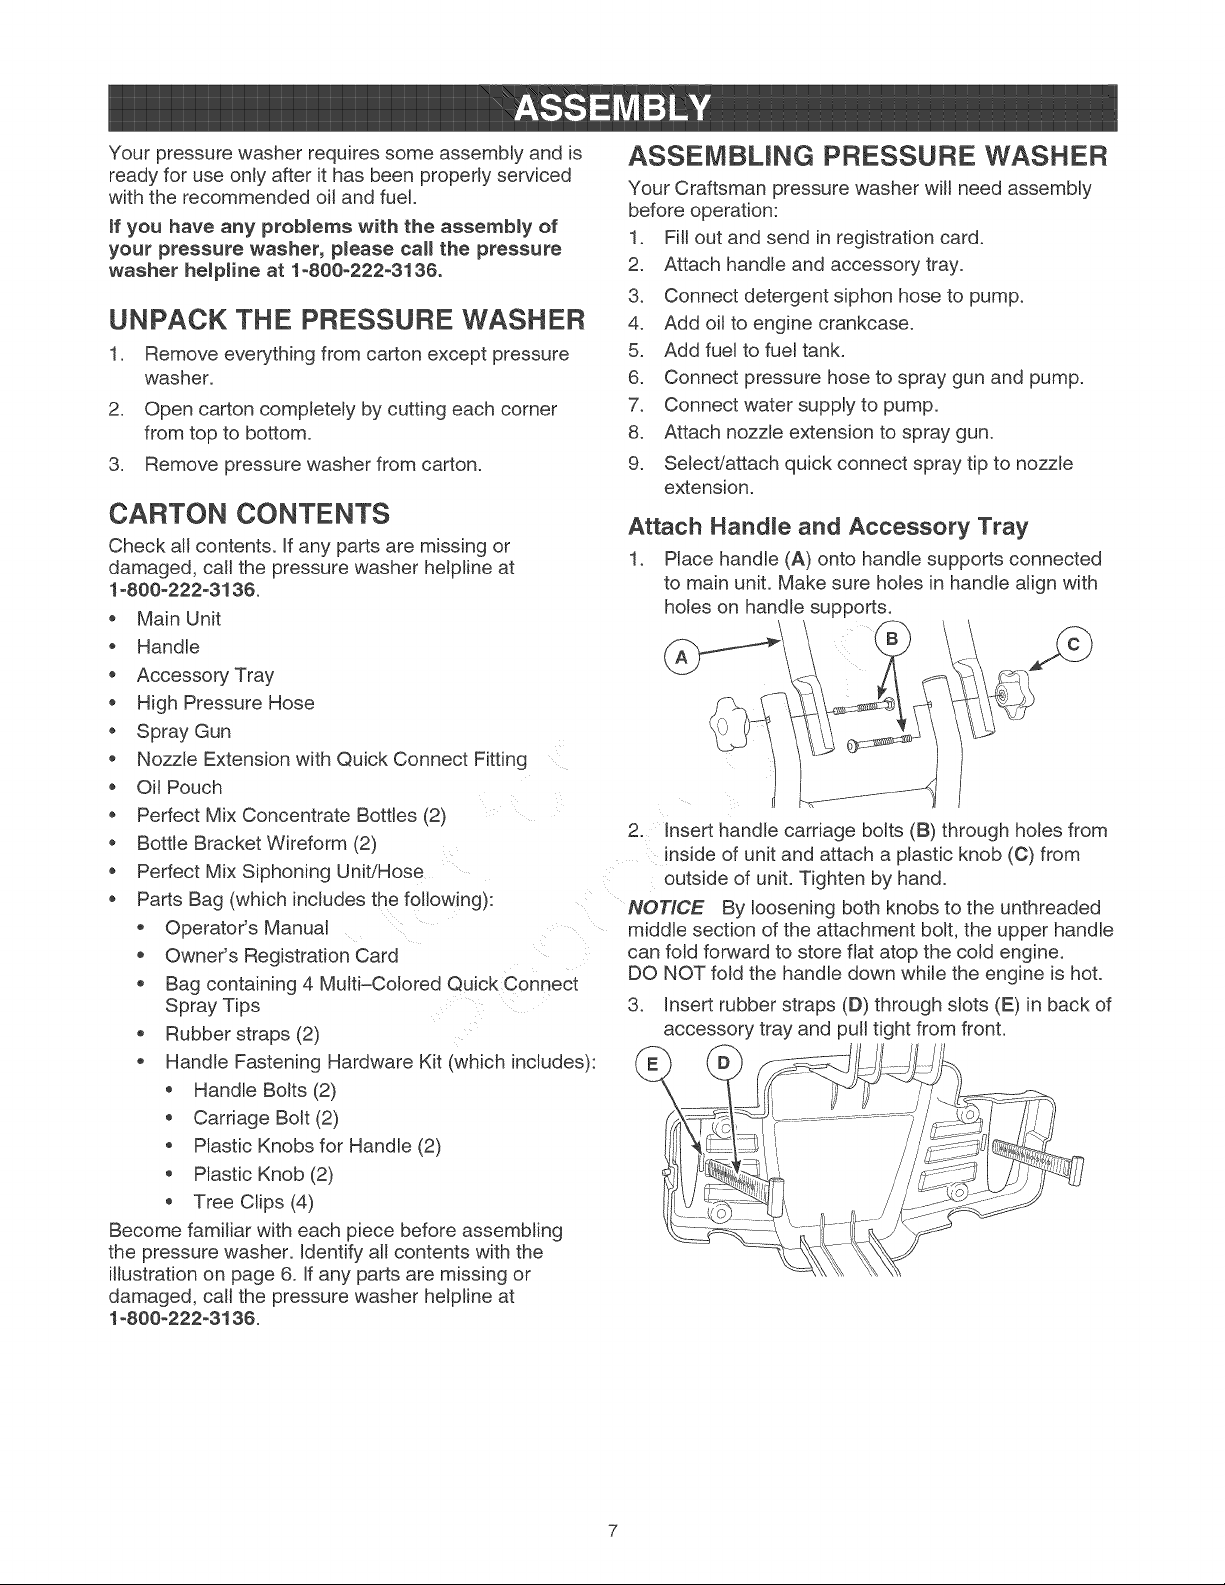
1. Place handle (A) onto handle supports connected
to main unit. Make sure holes in handle align with
holes on handle supports.
2. Insert handle carriage bolts (B) through holes from
inside of unit and attach a plastic knob (C) from
outside of unit. Tighten by hand.
NOTICE By loosening both knobs to the unthreaded
middle section of the attachment bolt, the upper handle
can fold forward to store flat atop the cold engine.
DO NOT fold the handle down while the engine is hot.
3 Insert rubber straps (D) through slots (E) in back of
accessory tray and pull tight from front.
Loading ...
Loading ...
Loading ...