Loading ...
Loading ...
Loading ...
Installation Instructions
Questions?Call 800.GE.CARES(800.432.2737)or visitour _'ebsite at: www.Hotpoint.com
In Canada,call 1.800.361.3400or Visitour _'ebsite at: www.geappliances.ca
BEFORE YOU BEGIN
Read these instructions completely and carefully.
• IMPORTANT - S ,,ethese
instructions for local inspector's use.
• IMPORTANT - Obse,ve;,ll
governing codes and ordinances.
• Note to Installer _ Be sure to leave these
instHlctions with tile Consun/er.
• Note to Consumer _ Kee I) these instructions
tor fllture reference.
• Skill level - Installation of this appliance requires
basic mechanical skills.
• Completion time - Refligerator Installation
15 mintKes
• Proper installation is tile responsibility of installer.
• Product tailure due to improper installation is not
covered under tile Warranty:
REFRIGERATOR LOCATION
• Do not install the refl'igerator where tile temperature
will go below 60°F (l 6°C) because it will not rtm
often enough to maintain proper temperatures.
• Install it on a floor strong enough to sui)i)ort it fiflly
loaded.
ROLLERS
The milers have 3 purposes:
• Rollers a(!iust so tile door ch)ses easily when opened
about hallway.
• Rollers a_!iust so the refrigerator is firefly i)ositioned
on the floor and does not wobble.
• Rollers allow you to move the retiigerator away fl'om
tile wall fin" cleaning.
To adjust the milers, remove tile base grille by pulling it
out at tile bottom.
Turn the roller a({justing screws dockwise to raise the
reliigerato_; comlterclock, vise to lower it. Use an
a(!iustable wrench (3/8" hex head bolt) or pliers.
To replace base grille, line up the clips on back of grille
between tile bar and tile bottom (ff tile cabinet. Push
tin'ward until grille snaps into place.
WATER SUPPLY TO THE ICEMAKER
(on some models)
If tile refrigerator has an icemaker, it will have to be
connected to a cold water line. A GE water SUl)ply kit
is available at extra cost fl'om your dealer, by visiting
our _'ebsite at www.Hotpohlt.com (in Canada, at
www.geappliances.ca), or from Parts and Accessories,
800.626.2002.
CLEARANCES
_Mlow tile following clearances fin" ease of installation,
proper air circulation and I)lumbing, and electrical
connections.
• Sides 1/8" (4ram) * Top 1" (25 ram) * Back 1" (25 ram)
A door clearance of./4 (19 InIn) is needed fi)I" a 90 ° door
opening which proxides better access to tood storage area.
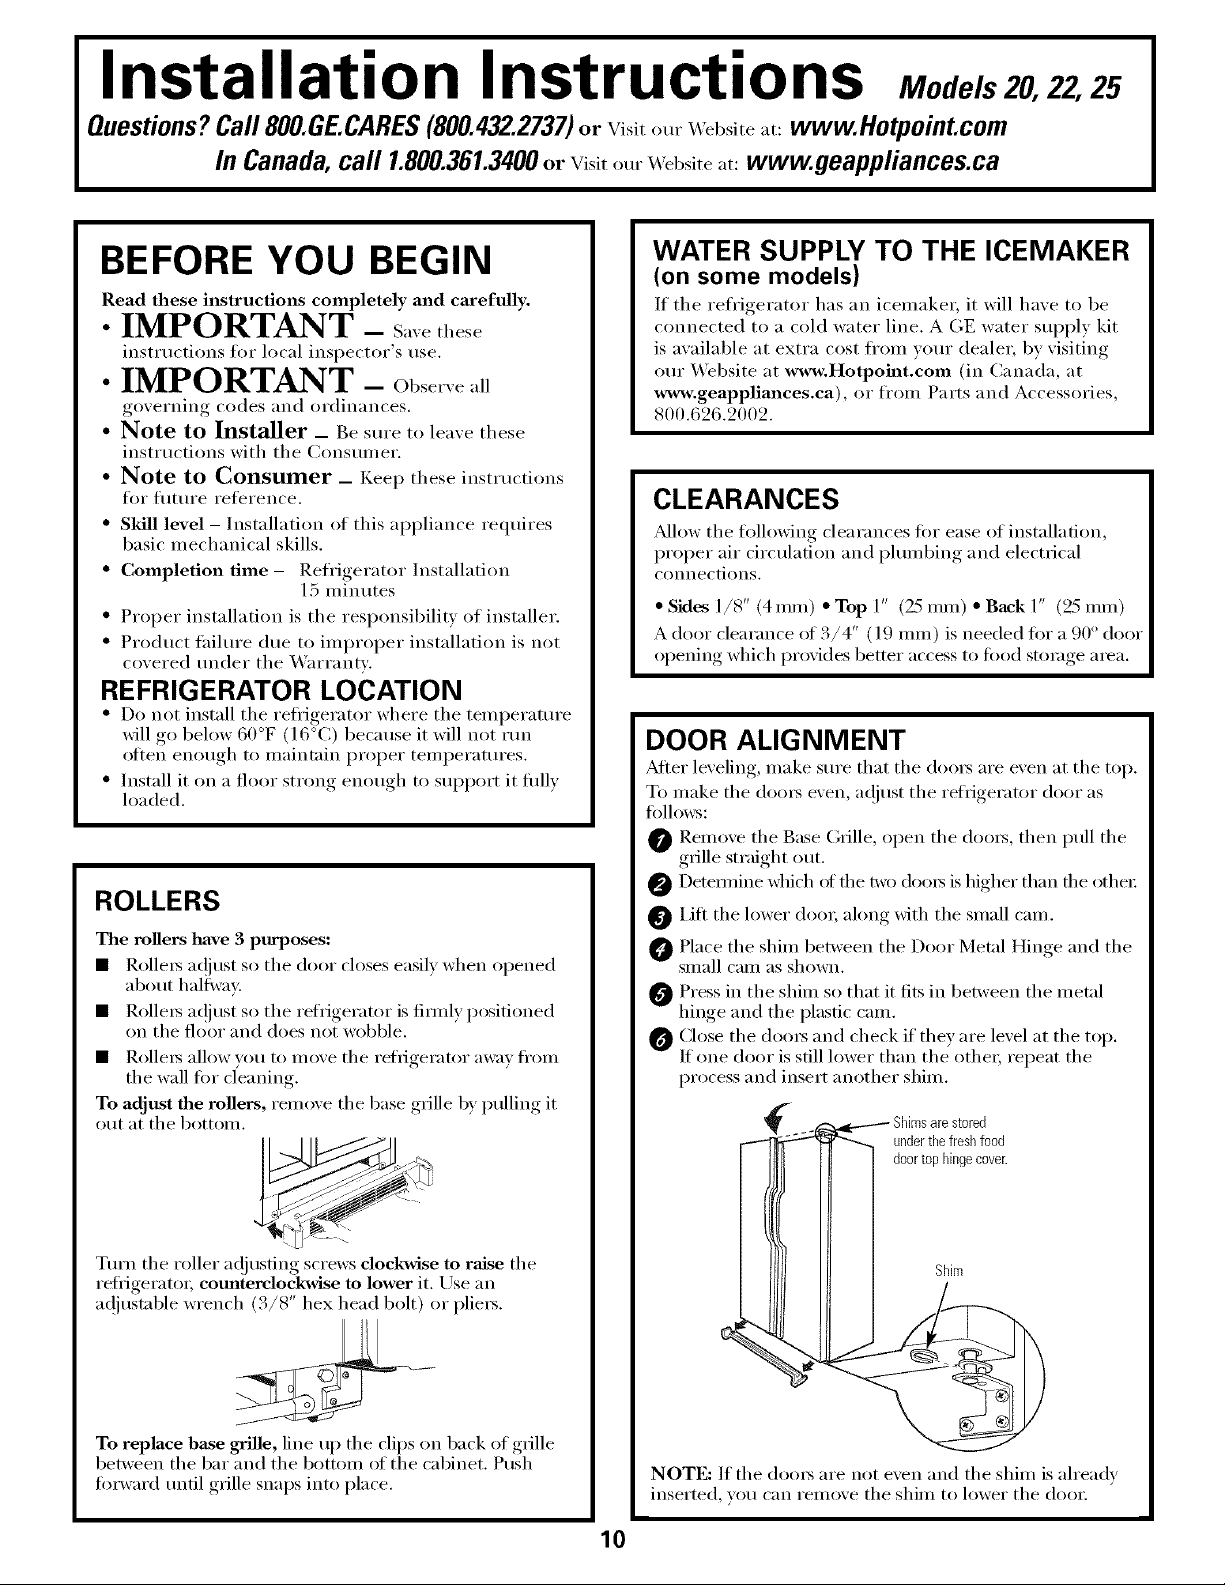
DOOR ALIGNMENT
_Mter lexeling, make sure that tile doo_ are exen at tile top.
To make tile (loo_ exen, a(!just tile refrigerator door as
follows:
O Remoxe tile Base (;rille, open tile doo_s, then pull tile
grille straight out.
Detennine which of tile two doo_s is higher than tile other:
O Lift tile lower (loo_; ahmg with tile small cam.
Place tile shim between tile Door Metal Hinge and tile
small cam as shown.
O Press in tile shim so that it fits in between tile metal
hinge and the plastic cam.
O Close the doo_ and check if they are level at the top.
If one door is still lower than the other; repeat the
process and insert another shim.
underthe freshfood
doortop hingecover.
Shim
NOTE: If tile doo_s are not ex,en and tile shim is ah'eadx
inserted xo/I c},n i'eino_e tile shim to lower tile dooI i
Loading ...
Loading ...
Loading ...