Loading ...
Loading ...
Loading ...
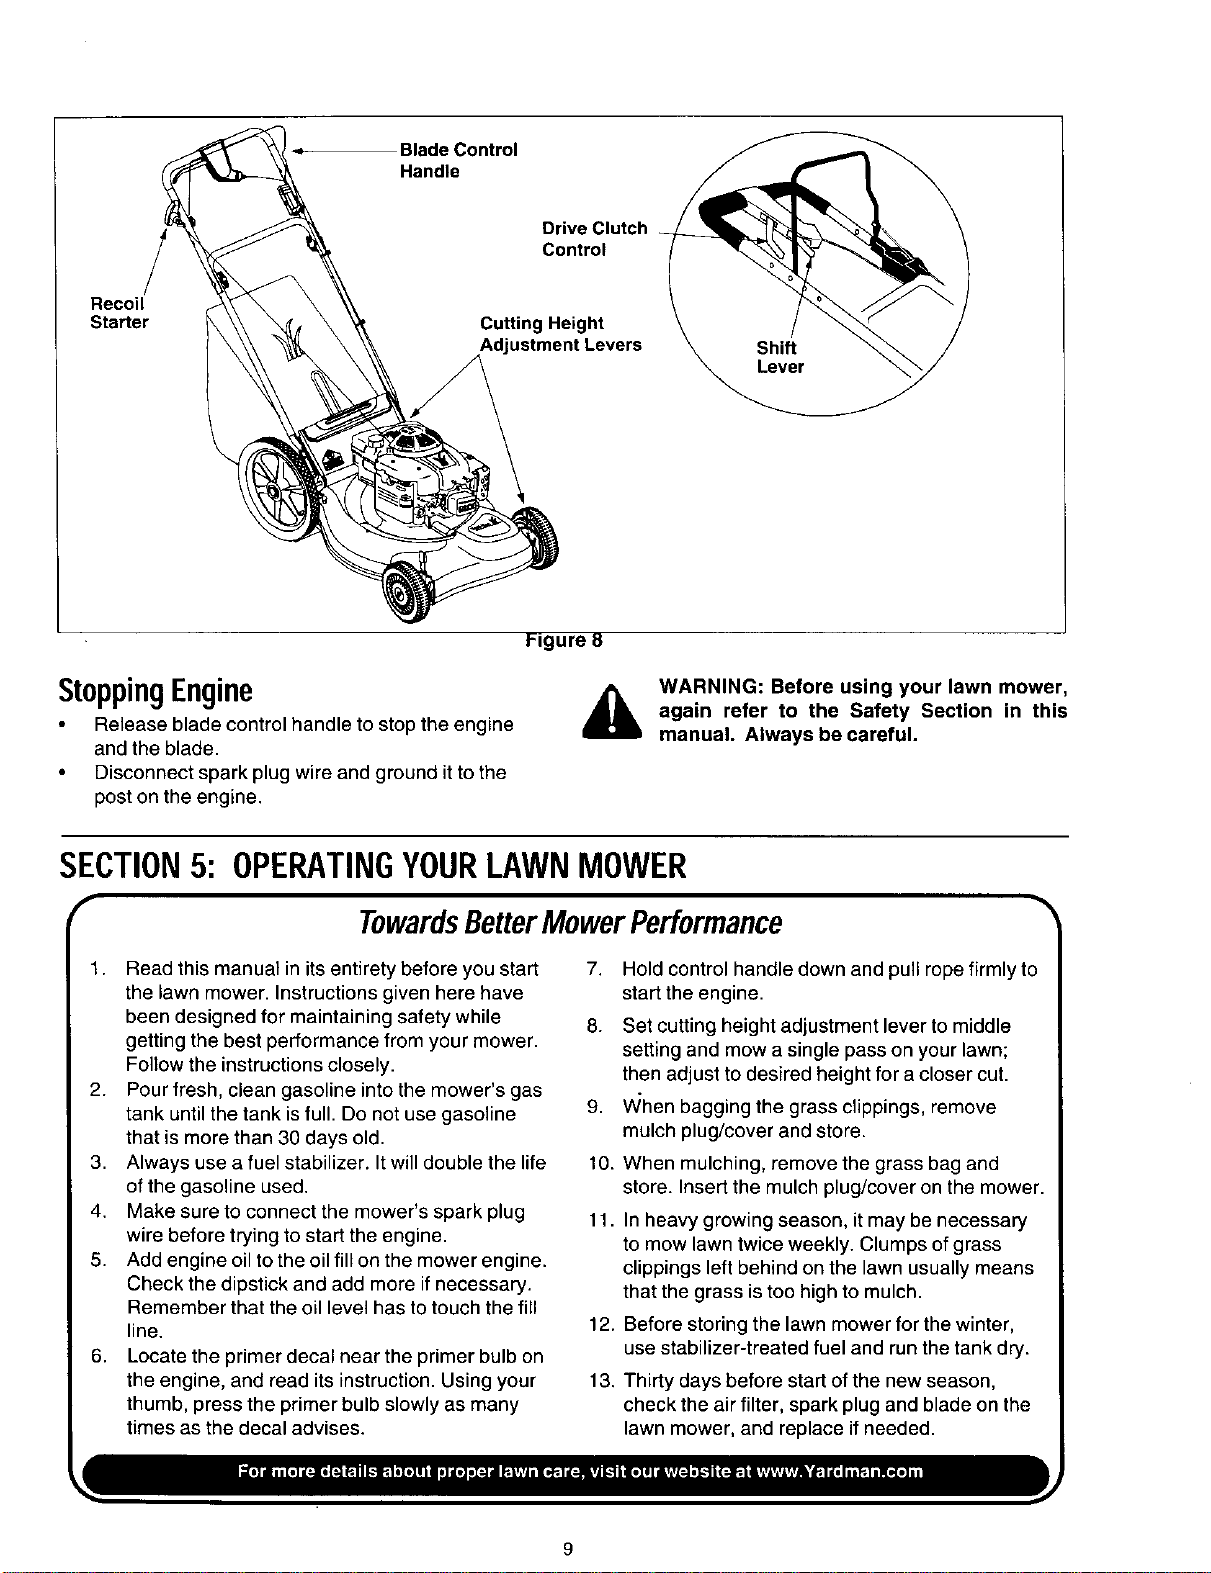
Blade Control
Handle
Drive Clutch
Control
Recoil
Starter
Cutting Height
Jstment Levers
StoppingEngine
Release blade controlhandle to stop the engine
and the blade.
• Disconnect spark plug wire and ground it to the
post on the engine.
WARNING: Before using your lawn mower,
again refer to the Safety Section in this
manual. Always be careful.
SECTION5: OPERATINGYOURLAWNMOWER
TowardsBetterMowerPerformance
1. Read this manual in its entirety before you start
the lawn mower. Instructions given here have
been designed for maintaining safety while
getting the best performance from your mower.
Follow the instructions closely.
2. Pour fresh, clean gasoline into the mower's gas
tank until the tank is full. Do not use gasoline
that is more than 30 days old.
3. Always use a fuel stabilizer. It will double the life
of the gasoline used.
4. Make sure to connect the mower's spark plug
wire before trying to start the engine.
5. Add engine oil to the oil fill on the mower engine.
Check the dipstick and add more if necessary.
Remember that the oil level has to touch the fill
line.
6. Locate the primer decal near the primer bulb on
the engine, and read its instruction. Using your
thumb, press the primer bulb slowly as many
times as the decal advises.
7. Hold control handle down and pull rope firmly to
start the engine.
8. Set cutting height adjustment lever to middle
setting and mow a single pass on your lawn;
then adjust to desired height for a closer cut.
9. VVhen bagging the grass clippings, remove
mulch plug/cover and store.
10. When mulching, remove the grass bag and
store. Insert the mulch plug/cover on the mower.
11. In heavy growing season, it may be necessary
to mow lawn twice weekly. Clumps of grass
clippings left behind on the lawn usually means
that the grass is too high to mulch.
12. Before storing the lawn mower for the winter,
use stabilizer-treated fuel and run the tank dry.
13. Thirty days before start of the new season,
check the air filter, spark plug and blade on the
lawn mower, and replace if needed.
9
Loading ...
Loading ...
Loading ...