Loading ...
Loading ...
Loading ...
Improper installation and use may result
in property damage.
• Fill tank with water before operation.
Never use tn_swater heater unless _t_scompletely full of water
To prevent damage to the tank and heating element, the tank
must be filled with water. Water must flow from the hot water
faucet before turning "ON" power.
14. Check element for water leaks. If leakage occurs, tighten
element or repeat steps 2 and 3, remove element and
reposition gasket. Then repeat steps 10 through 14.
15. Reconnect the two wires to the element and then check to
make sure the thermostat remains firmly against the surface
of the tank.
FIGURE 38.
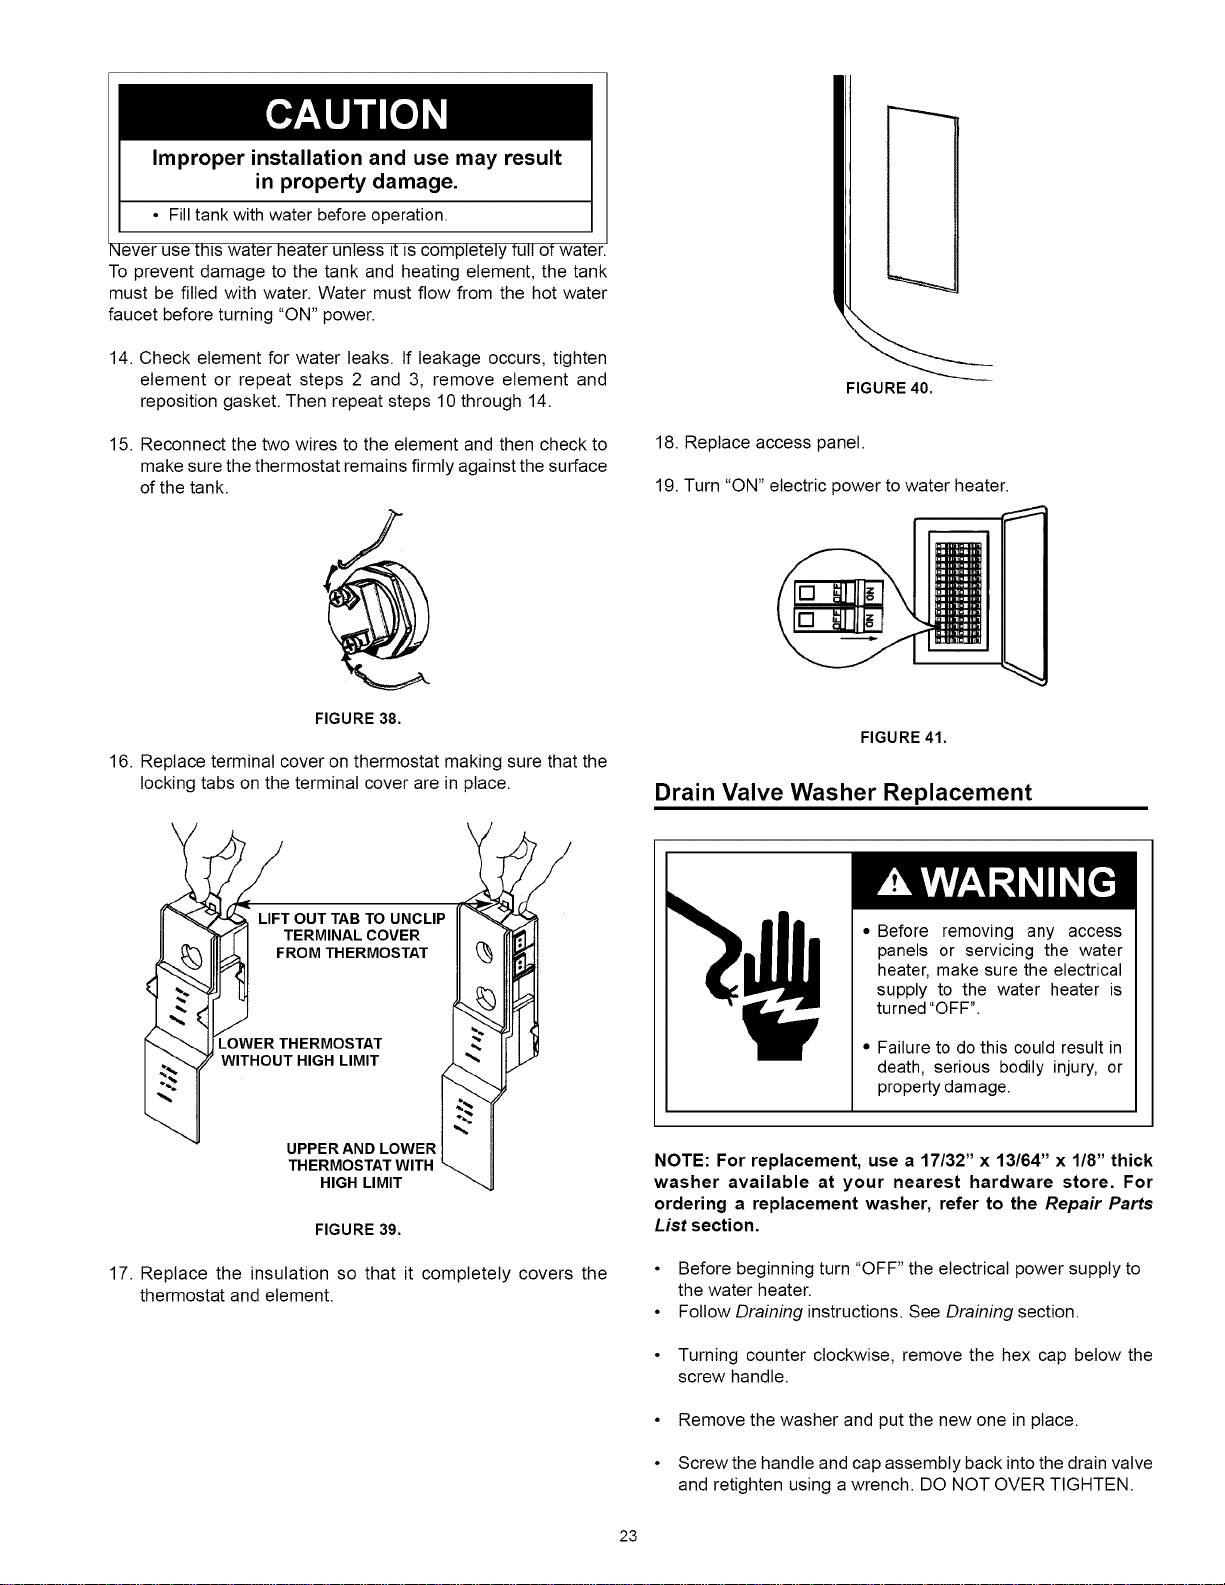
16. Replace terminal cover on thermostat making sure that the
locking tabs on the terminal cover are in place.
OUT TAB TO UNCLIP
ERMINAL COVER
OM THERMOSTAT
HERMOSTAT
HIGH LIMIT
_ W ITHOUuPPERAND LOWER
THERMOSTAT WITH
HIGH LIMIT
FIGURE 39.
17. Replace the insulation so that it completely covers the
thermostat and element.
FIGURE 40.
18. Replace access panel.
19. Turn "ON" electric power to water heater.
FIGURE 41.
Drain Valve Washer Replacement
• Before removing any access
panels or servicing the water
heater, make sure the electrical
supply to the water heater is
turned "OFF".
• Failure to do this could result in
death, serious bodily injury, or
property damage.
NOTE: For replacement, use a 17/32" x 13/64" x 1/8" thick
washer available at your nearest hardware store. For
ordering a replacement washer, refer to the Repair Parts
List section.
• Before beginning turn "OFF" the electrical power supply to
the water heater.
• Follow Draining instructions. See Draining section.
• Turning counter clockwise, remove the hex cap below the
screw handle.
• Remove the washer and put the new one in place.
• Screw the handle and cap assembly back into the drain valve
and retighten using a wrench. DO NOT OVER TIGHTEN.
23
Loading ...
Loading ...
Loading ...