
For questions about features, operation/performance, parts or service,
call: 1-855-344-7367
R
efrigerator Use & Care Guide
Model:
RB17A2CSE
RB17A2CWE
17
21
22
T
able of Contents
Adjustable bottom feet
Roll wheel
Ice bucket ( inside/optional )
1
/
8
-Allen Wrench
5/32
-Allen Wrench
Ice maker ( optional )
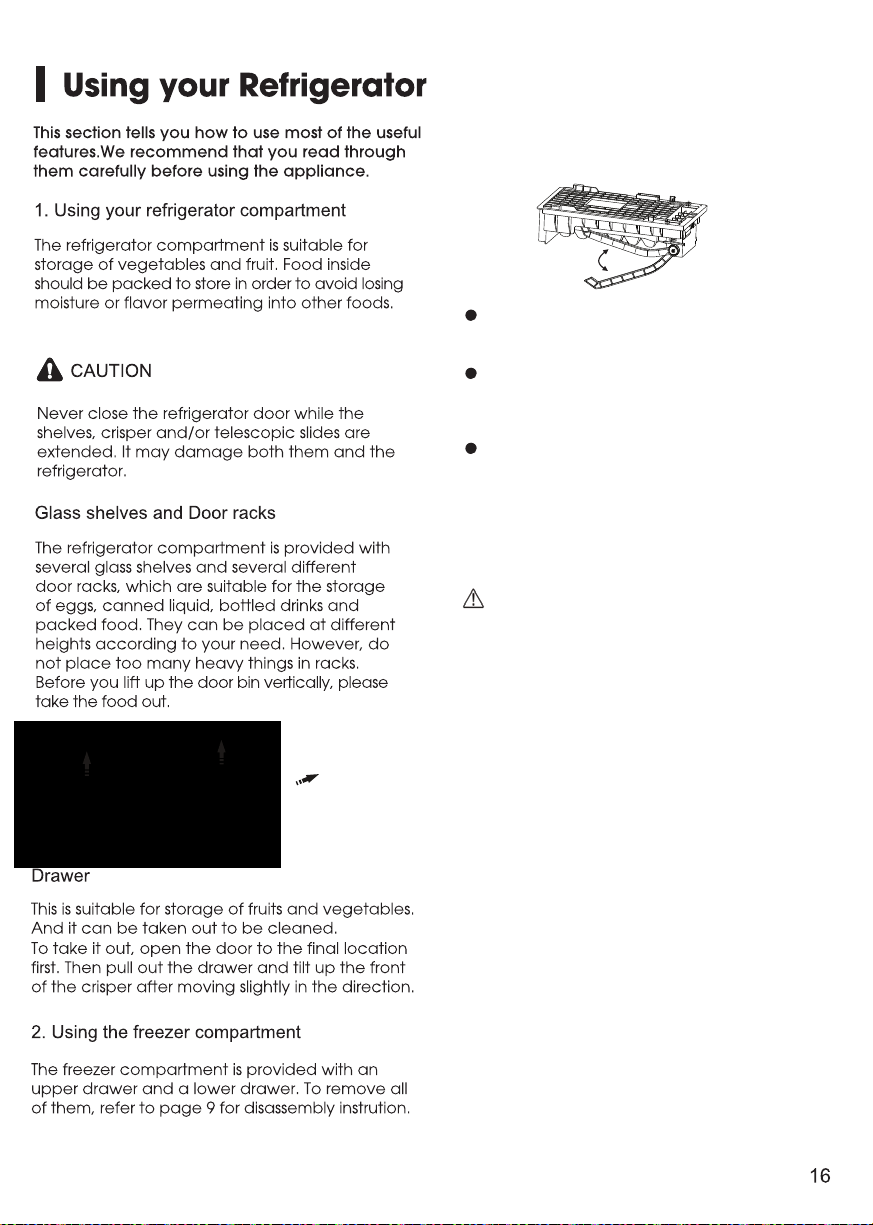
Crisper Drawer
22
Stopper block
21
21
22
"
"
Handle supports (x4)
(x4)
screws
assembled missed
A
A
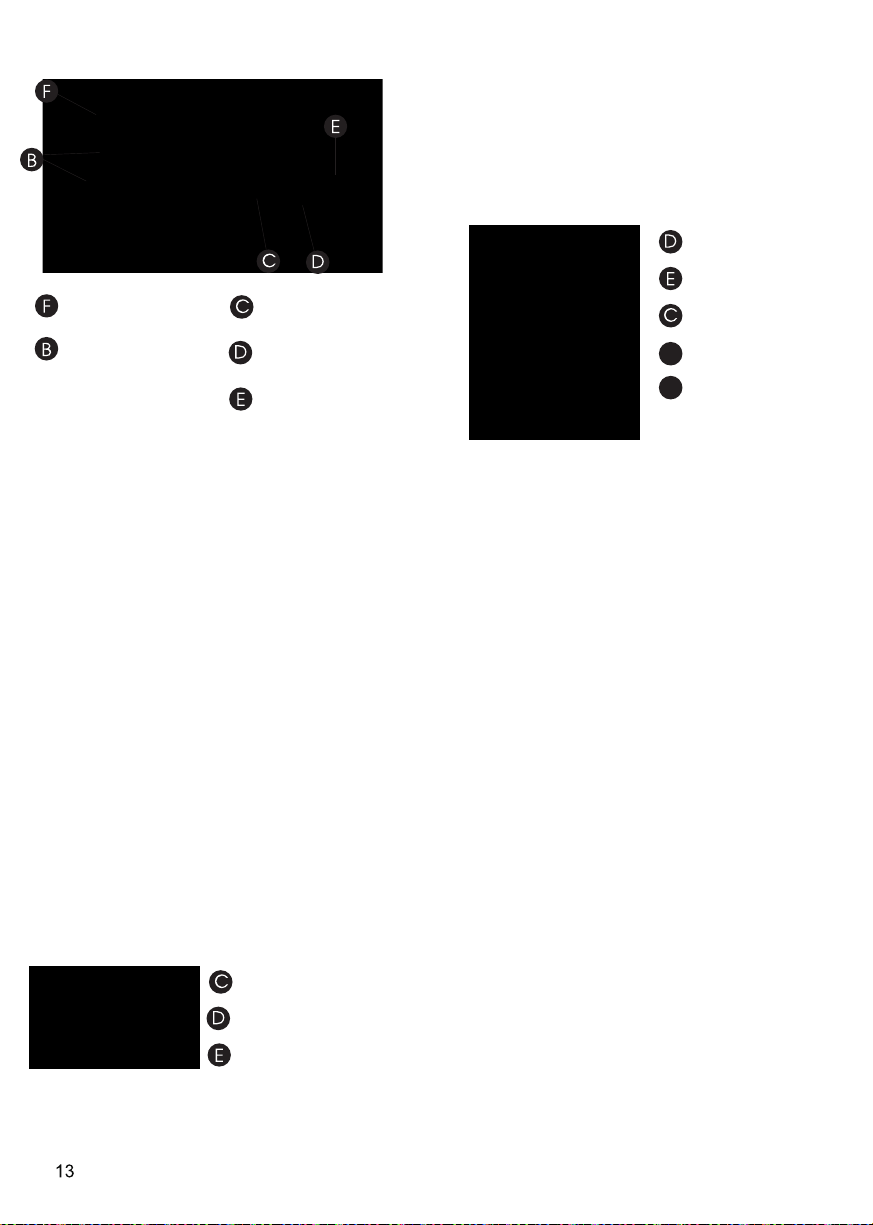
B
C
D
B
C
D
s
-Wrench 7/ 8
"
a
b
c
d
e
f
g
dimension
56.3
"
(1430mm)
43.3 " (1101mm)
29.1 " (740mm)
26.6 (6 mm)
31.1 " (790mm)
34.3 " (870mm)
52 " (1321mm)
a
b
c
d
f
g
e
.
75.5
h
69.1 " (1756 mm)
"
h
3.9
3.9

(5/16 , 8mm)
(5/32 ,4mm )
"
"
Take out the screw hole covers on the
doors, install the handle supports(C).
Place the handle (A) on the door by
fitting the handle over the handle supports (C),
then fasten the screws (B) with 3mm Allen
wrench (provided in plastic bag).
adjusting bottom feet
( 1/8 ,3mm )
"
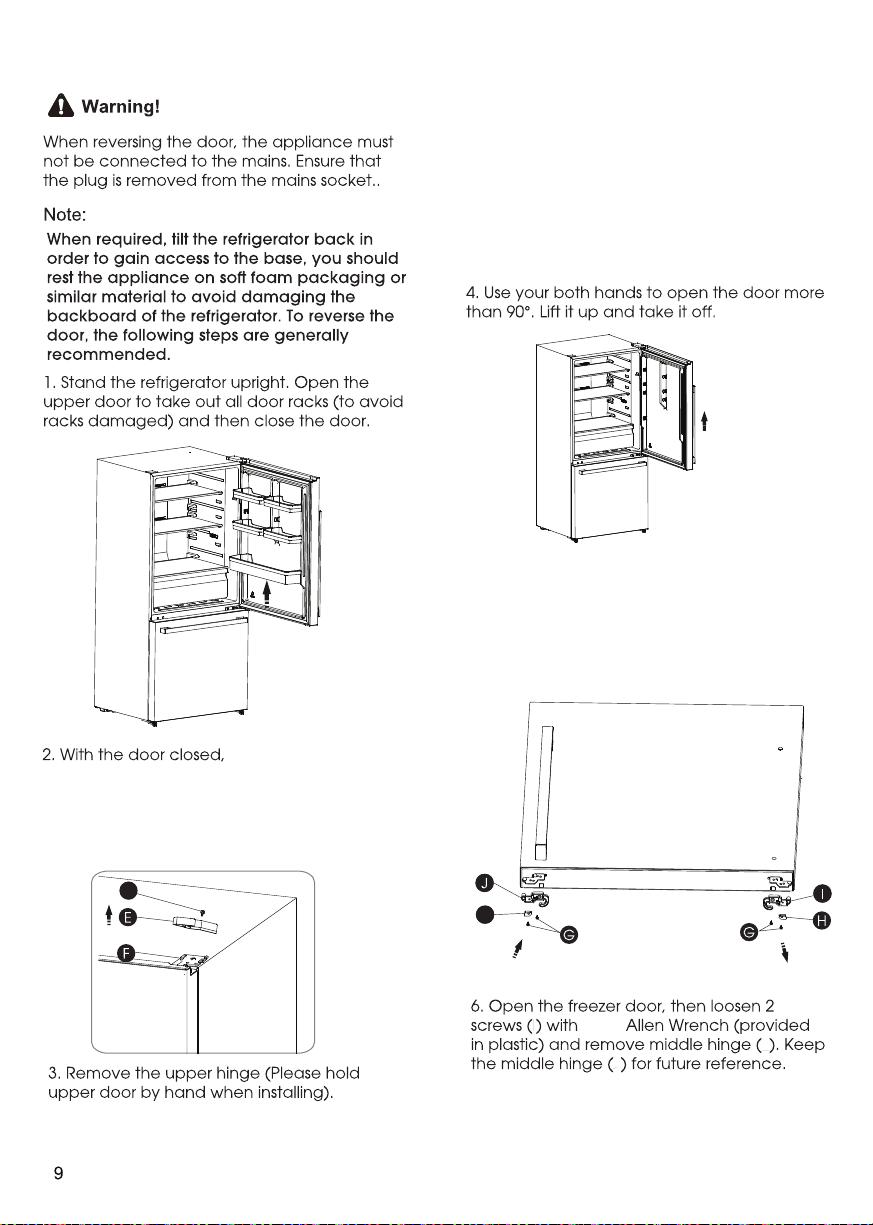
K
5. Loosen the two screws(G) on the right
bottom of the fridge door,then take
out the right stopper block(H) and the
right door stopper(I).Then install the left
stopper block(K) and the left door
stopper(J) (provided in the plastic bag)
K
L
M
M
5/32
"
loosen the screw (O )
and remov e the upper hing e cov er (E ) on the
O
top rig ht side of appliance and remov e 3
special flang e screws (F ) with socket wrench.
K eep the upper hing e cov er for future reference.
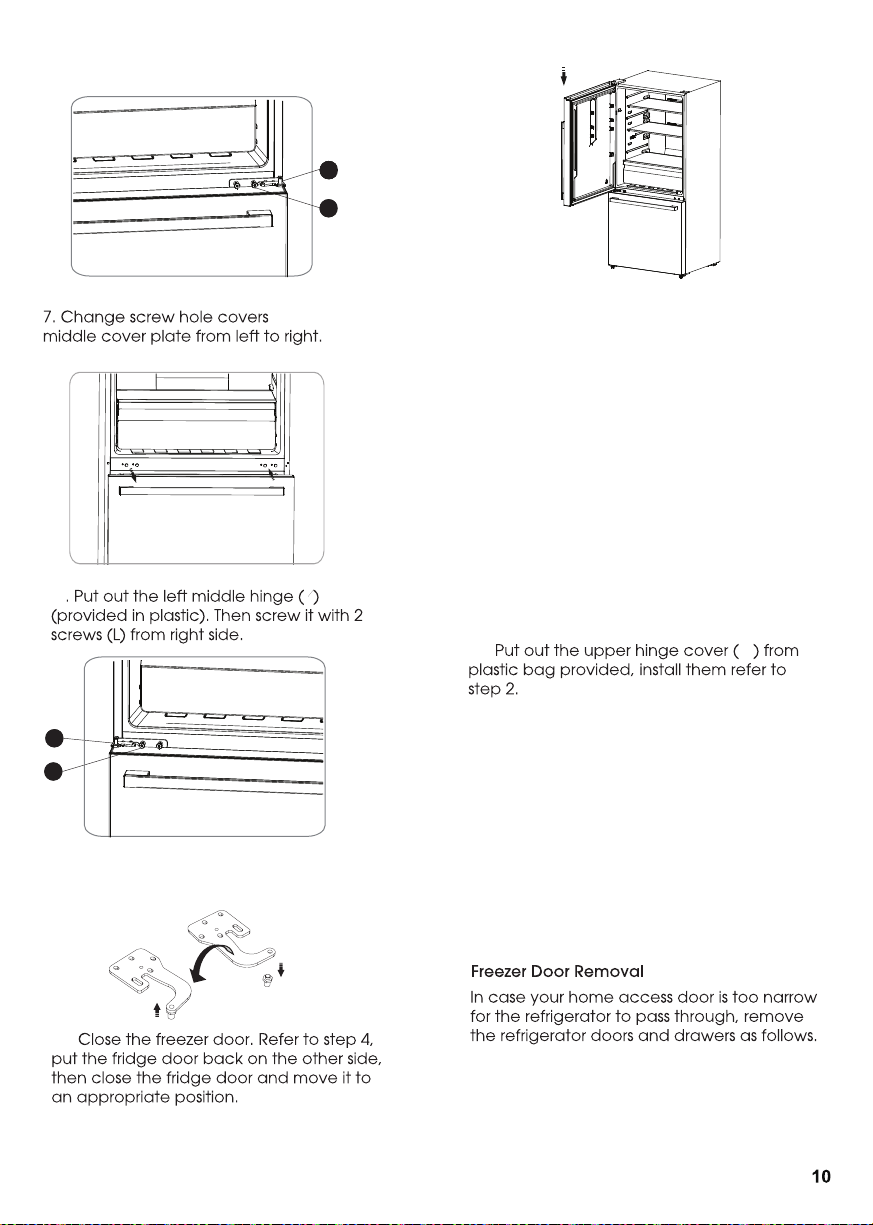
L
LM
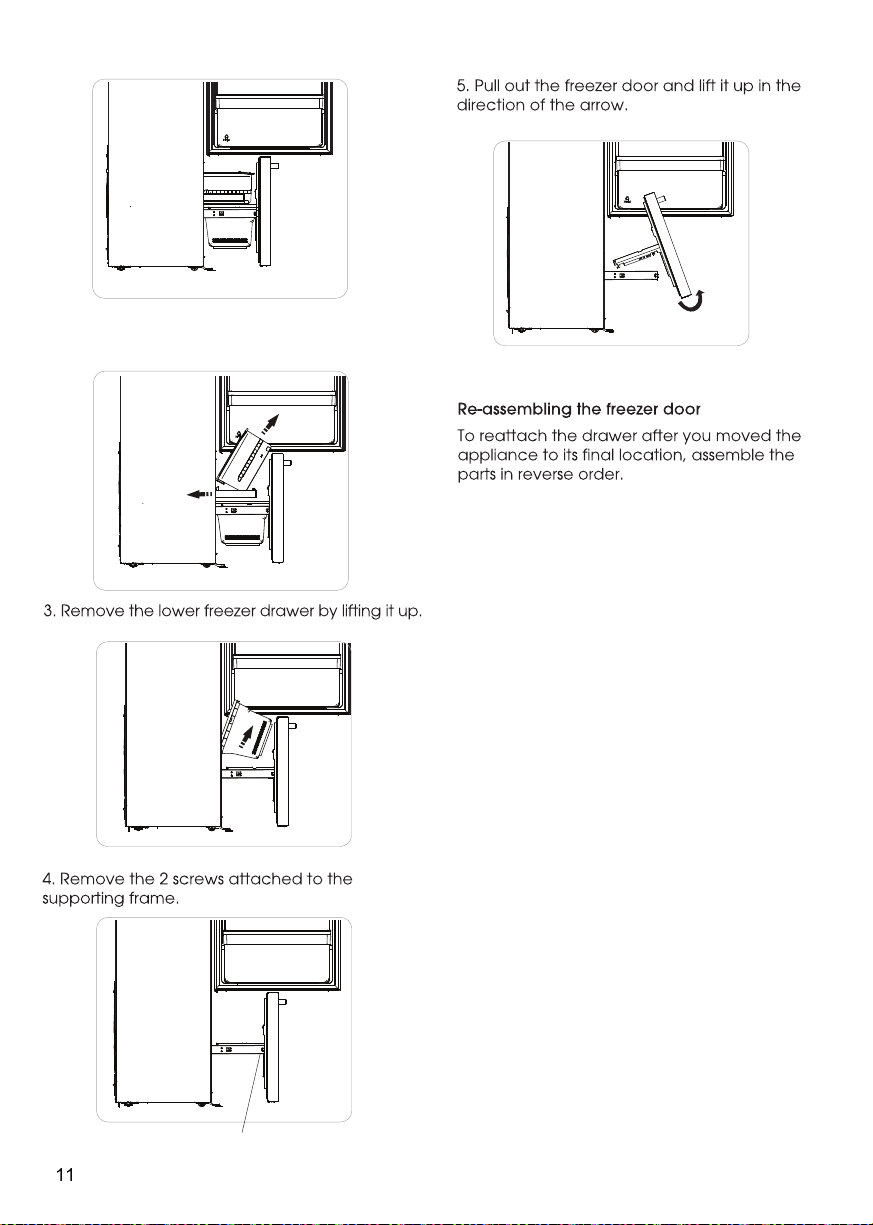
1. Firstly , open the upper door , then pull out the
freezer door and upper freezer drawer to the
final position.
P
12..
11. P ut the upper hing e on the top left side
refer to step 3 .
N
L
N
on
8
9 .. Screw out the upper hing e ax is
turn the upper hing e ov er and fix ax is
on it. T hen place it at side for use.
10 ..
Installing the water lines
In order for the ice maker to operate properly,
a water line is required.
You may need to purchase a water purifying
system to do that.
The water connection must be made by a
qualified plumber.
If the refrigerator is installed in an area with low
water pressure (below 30psi/207KPa), you can
install a booster pump to compensate for the
low pressure.
-the maximum inlet water pressure is
101.5psi/700kPa;
-the minimum inlet water pressure is
30psi/207kPa.
Important:Operation outside the water
pressure range may cause malfunction and
severe,damaging water leaks.
Note:If the water pressure is less than what is
required, ice cubes could be hollow or
irregularly shaped.
screws on the inside
2. Take out the upper freezer drawer
by lifting it up from the rail system,then
push the rail system back.
3. Place the free end of the 1/4" water line into
an empty container or sink.
4. Turn on main water supply and open
quarter-turn shutoff valve to flush the 1/4" water
line of any contaminants. Run water until it is
clear.
Method 2: Shutoff Valve With Saddle clamp
NOTE: Do not use a piercing-type or
3/16" (4.76 mm) saddle valve which reduces
water flow and clogs easier.
Following are two methods of connecting to your
household water supply. Use the instructions
specific to your installation.
IMPORTANT: Turn off main water supply. Turn on
nearest faucet long enough to clear the line of
water.
You will need the following tools(not supplied).
Phillips screwdriver
Flat-blade screwdriver
1/2" or adjustable wrench
Drill and 1/4" drill bit
Quarter-turn shutoff valve
1 PCS
1/4" shutoff valve with
saddle clamp 1 PCS
Ferrule (sleeve) 2 PCS
1/4" compression nut 2 PCS
1/4" water line 1 PCS
(1) Connect Water Line to Household Water
Method 1: Quarter-turn Shutoff Valve
Gather the required tools and parts before
starting installation.
1. Use a quarter-turn shutoff valve or the
equivalent served by a household supply line.
NOTE: To allow sufficient water flow to the
refrigerator, a minimum 1/2" household supply
line is recommended.
2. Using the ferrule (sleeve) and 1/4" compression
nut, connect the 1/4" water line to the quarter-turn
shutoff valve.
NOTE: Do not overtighten.
Quarter-turn
Shutoff Valve
Ferrule (Sleeve)
1/4" compression nut
1/4" Water Line
Household Supply Line
1. Find a 1/2" to 11/4" (12.7 mm to 31.8 mm)
vertical water inlet near the refrigerator.
IMPORTANT:
• Make sure it is a cold household supply line.
• Horizontal pipe will work, but the following
procedure must be followed: Drill on the top
side of the pipe, not the bottom. This will
help keep water away from the drill. This also
keeps normal sediment from collecting in
the valve.
2. Determine the length of 1/4" water line you
need. Measure from the connection on the rear
of the refrigerator to the water pipe. Add 7 ft
(2.1 m)to allow for cleaning. Use 1/4"
(6.35 mm) O.D. (outside diameter) water line.
3. Using a cordless drill, drill a 1/4" hole in the
household supply line you have selected.
4. Fasten the 1/4"shutoff valve to the household
supply line with the saddle clamp.Be sure the
outlet solidly in the end is 1/4" drilled hole in the
household supply line and that the washer is
under the saddle clamp.
Tighten the packing nut. Tighten the saddle
clamp screws slowly and evenly so the washer
makes a watertight seal. Do not overtighten.
Only Applicable to models with Ice Maker
1/4" shutoff valve
with saddle clamp
Ferrule (sleeve)
1/4" compression nut
1/4" water line
Household Supply
Line
5. Slip the ferrule(sleeve) and 1/4" compression
nut on the 1/4" water line as shown. Insert the
end of the tubing into the outlet end squarely
as far as it will go. Screw 1/4" compression nut
onto outlet end with adjustable wrench.
Do not overrighten or you may crush the
1/4" water line.
6. Place the free end of the 1/4" water line into
an empty container or sink.
7. Turn on main water supply and open
shutoff valve to flush the 1/4" water line of any
contaminants. Run water until it is clear.
Connect Water Line to Refrigerator.
(2) Connect Water Line to Refrigerator
IMPORTANT: If you turn the refrigerator on before
the water is connected, turn off the ice maker.
1. Unplug refrigerator or disconnect power.
2. Close shutoff valve.
3. Thread a 1/4" compression nut and ferrule
(sleeve) onto the free end of the 1/4" water line.
Ferrule (sleeve)
1/4" compression nut
1/4" water line
4. Insert the free end of the 1/4" water line into
the brass fitting attached to the water inlet on
the back of the refrigerator.
5. Slide the 1/4" compression nut over the ferrule
(sleeve) and screw the 1/4" compression nut
onto the brass ftting.
1/4" water line
1/4" compression nut
Ferrule (sleeve)
G
H
Brass fitting
Water inlet
6. Confrm 1/4" water line is secure by gently
pulling on it.
7. Turn on water supply and check for leaks.
Correct any leaks.
Only Applicable to models with Ice Maker
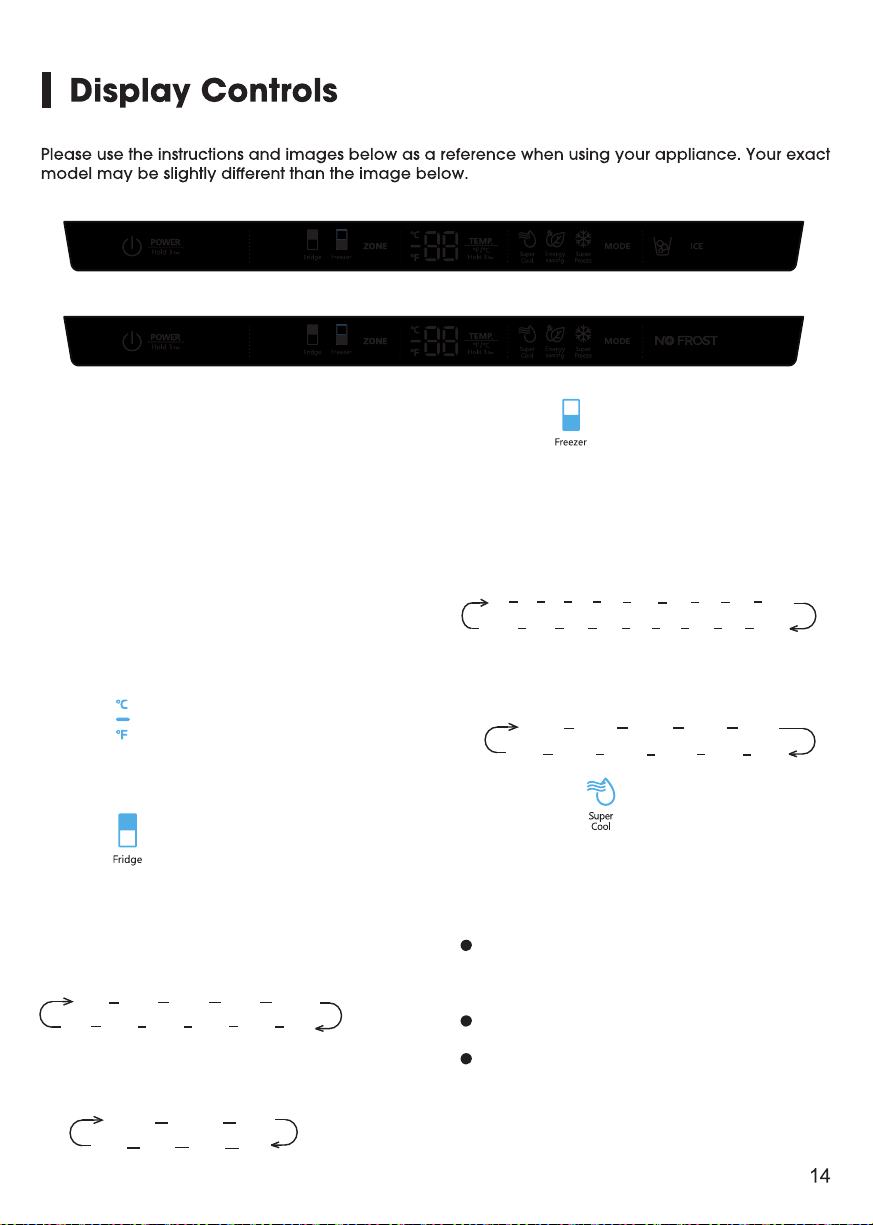
Press the “ZONE” button until the
“Freezer” icon lights up, then press the
“TEMP.” button to select a temperature
setting.
If you have set the temperature type to
Fahrenheit, the temperature settings cycle
from 7°F to -11°F.
Controlling the temperature
We recommend that when you start your
refrigerator for the first time, the
temperature for the refrigerator is set to
39°F(4°C) and the freezer is set to
0°F(-18°C). If you want to change the
temperature, follow the instructions below.
Caution! When you set a temperature, you
set an average temperature for the whole
refrigerator cabinet. Temperatures inside
each compartment may vary from
the temperature displayed on the panel,
depending on how much food you store
and where you place them. Ambient
temperature may also affect the actual
temperature inside the appliance.
To toggle between Celsius and Fahrenheit
on the display, press and hold the “TEMP.”
button for three seconds.
2. Fridge
1. °F /°C
Press the “ZONE” button until the “Fridge”
icon lights up, then press the “TEMP.”
button to select a temperature setting.
If you have set the temperature type to
Fahrenheit, the temperature settings cycle
from 44°F to 34°F.
℉
℉ 4
4
℉
3
℉
42
℉
3
6
℉
3
7
℉
3
8
℉
3
9
℉
4
0
℉
4
1
℉
If you have set the temperature type to
Celsius, the temperature settings cycle
from 7°C t
o 1
°C.
2
℃ 3℃
4
℃
5
℃
℃ 7 ℃
6
℃
3. Freezer
7℉ 6℉ 5℉ 4℉ 3℉ 2℉ 1℉ 0℉ -1℉ - 2℉
-1 1℉ - 10℉ - 9℉ - 8℉ -7℉ -6℉ - 5℉ - 4℉ -3℉
-14°C -1 5 °C -1 6 °C - 17°C - 1 8 °C
-24 °C - 2 3°C -2 2 °C -21 °C - 2 0°C -1 9 °C
If you have set the temperature type to
Celsius, the temperature settings cycle
from -14°C to -24°C.
4. Super Cool
Super Cool can refrigerate the food
quicker and keep food fresh for a longer
period. This is useful to activate before
inserting a large amount of warm/room
temperature food.
Press the “MODE” button to activate
this function. The “Super Cool” icon will be
illuminated and the fridge temperature
indicator will display 34°F (1°C).
Super Cool will automatically turn off
after 3 hours.
When super Cool function is on you
can turn it off by pressing the “MODE” or
setting fridge temperature. To manually
turn off the Super Cool function, the fridge
Models with ice maker
Models without ice maker
1
3
5
4
34
Press and hold the “POWER” button for three
seconds to turn the power function on or off.
When the power function is on, the icon
lights and the display board will show “OF”.
NOTE:
When the power function is on, the refrigerator
is stopped cooling.
temperature setting will revert back to the
previous setting.
8. POWER
5. Energy saving
Press the “MODE” button to turn on the energy
saving function, the “Energy saving” icon will
be illuminated.
When the energy saving function is on, the
temperature of fridge is automatically switched
to 43°F (6°C) and the temperature of freezer is
automatically switched to 1°F(-17°C).
When energy saving function is on you can
switch it off by pressing the “MODE” or “TEMP.”
button and the refrigerator temperature setting
will revert back to the previous setting.
6. Super Freeze
Super Freeze will quickly lower the temperature
within the freezer so food will freeze faster than
usual. This feature also helps to keep vitamins
and nutrition of fresh food fresh for longer period.
Press the “MODE” button to activate this
function. The “Super Freeze” icon will be
illuminated and the temperature for the freezer
is set to -11°F (-24°C).
Super freezer will automatically turn off after
52
hours.
When Super Freeze function is on you can turn
it off by pressing by pressing the “MODE” or
setting freezer temperature. To manually turn
off the Super freezer function, the freezer
temperature setting will revert back to the
previous setting.
NOTE: When you selecting the Super Freeze
function, ensure there are no bottled or canned
drinks (especially carbonated drinks) in the
freezer compartment. Bottles and cans may
explode.
7. ICE(models with ice maker)
The ice maker is located inside the freezer
compartment, near the top of the compartment.
When the ice maker makes ice, the ice is stored
in ice storage box inside the upper freezer drawer.
Press the “ICE” button to turn the ice maker on
or off. When the ice maker is turned on, the icon
lights.
To use ice, open the freezer compartment door,
then pull open the upper freezer drawer and
remove ice from the storage box.
9. Door Alarm
When the door of fridge or freezer is open
over 2 minutes,
the control panel will
show
“dr
”
The door alarm wil turn off
about 8
minutes l
ater
.
To save energy, don’t keep the door open
for a long time when using refrigerator. In case
of door alarm, it can clear door alarm by closing
the doors.
10
. Demo mode
Demo Mode is for store displaying only.
In this mode, the light and the display
operation is normal, but the refrigerator is not
cooling. When the refrigerator is in the Demo
Mode , if consumers open the door or no keys
operation for 30 seconds with the door opened,
the temperature control panel will show as
follow from A to F.
To exit this mode,you could press the
leftmost key and the rightmost key at the same
time for 3 seconds ,then you can see the whole
control panel light up for 1 second.
The Demo Mode stays on even if theNOTE:
refrigerator powers off.If the consumers enter
the mode with unintentional operation ,you
should exit it as soon as possible ,since the
refrigerator will not cool in this mode ,which
will cause the food going bad.
A B C D E F
m
.
Automatic icemaker (Models with Ice Maker)
Note:
When the ice maker dumps ice into the
ice box, any sounds are part of normal
operation.
If ice is not dispensed for a long period
of time, it may clump in the Ice box. If this
occurs, please remove all the ice and
empty the box.
In case of prolonged absence and the
ice maker is not used, close the water
valve to prevent leaks.
It is recommended that the first several ice
charges be discarded to ensure highest
quality of Ice.
Do not store cans or containers that will
burst when frozen.
CAUTION
Do not allow your children to touch the ice
maker. This could cause injury.
3.
Icemaker makes Ice automatically.
20
SOLUTION
POSSIBLE CAUSE(S)
PROBLEM
Straighten the water supply line.
Wait 24 hours after installation for ice
production to begin.
Contact a licensed, qualified plumber.
Ice maker is not turned on
Kink in the water line
New installation
Inadequate water pressure
The ice
maker is not
producing ice,
enough ice,
or cubes are
hollow.
About the ice maker
Press and hold "ICE" key on the panel t o turn
On/Off the ice maker. See “Display C ontrols.”
21

USA:
CANADA:
MEXICO:
Hisense USA Corporation
7310 McGinnis Ferry Road
Suwanee, GA 30024
Hisense Canada Co., Ltd
2283 Argentia Road, Unit 16
Mississauga, ON, Canada
L5N 5Z2
Hisense Mexico S. de R.L. de C.V.
Blvd. Miguel de Cervantes Saavedra No 301
Torre Norte Piso 2, Col. Ampliación Granada
Miguel Hidalgo, Ciudad de México, C.P. 11520
Copyright Statement
© 2018 Hisense Company Ltd. All Rights Reserved.
All material in this User Manual is the property of Hisense Company Ltd. and its subsidiaries, and is
protected under US, CANADA, MEXICO and International copyright and/or other intellectual property
laws. Reproduction or transmission of the materials, in whole or in part, in any manner, electronic, print,
or otherwise, without the prior written consent of Hisense Company Ltd. is a violation of Hisense Company
Ltd. rights under the aforementioned laws.
No part of this publication may be stored, reproduced, transmitted or distributed, in whole or in part,
in any manner, electronic or otherwise, whether or not for a charge or other or no consideration,
without the prior written permission of Hisense Company Ltd.
Requests for permission to store, reproduce, transmit or distribute materials may be made to one of the
following addresses:
Hisense, and any and all other Hisense product names, logo’s, slogans or marks are registered trademarks
of Hisense Company Ltd. and its subsidiaries. All other trademarks are the property of their respective holders.
© 2018. All rights reserved. Hisense and the Hisense logo are registered trademarks of Hisense.
Other
brand and product names are registered trademarks of their respective owners.
Disclaimer:
Images throughout this document are for illustrative purposes only and may differ from the actual product.