
Loading ...
Loading ...
Loading ...
32
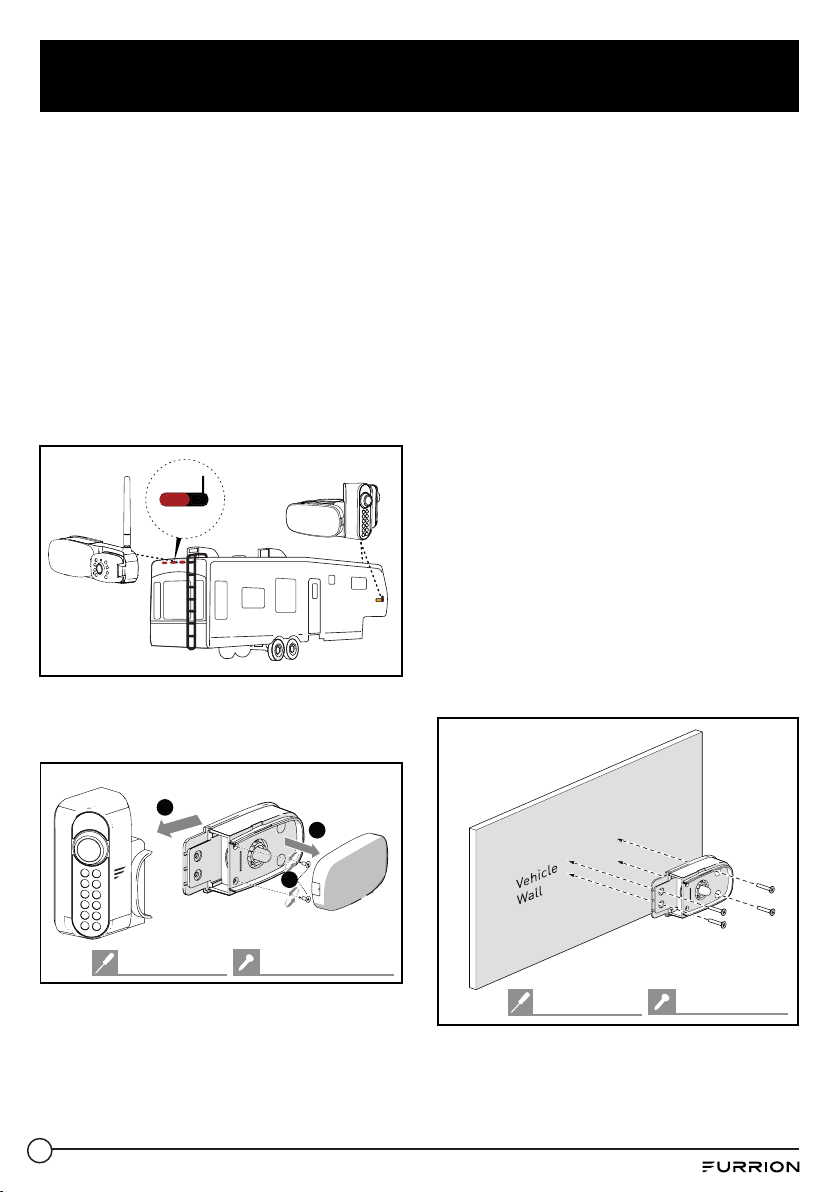
Install Cameras
− For rear camera position: Location
of the original rear marker light at the
top center on the rear of your RV. To
accommodate the camera, ensure that
there is at least 7.5” space between
the central points of the two adjacent
marker lights.
− For side camera position: Location of
the original side marker lights (as front
as possible).
Note: The RV shown here is for reference
only. You can mount Furrion Vision S
products onto various types of RVs such as
trailers and Class A/B/C motorhomes.
Rear camera
position
Side camera
position
2. Remove the lens cover and detach the
camera from the marker light bracket
(right side camera shown).
3
1
2
#4x
1
/
4
" self-tapping
#1 Phillips head
3. Remove the original marker light from the
corresponding location.
4. Connect the bare ends of the power cable
on the back of the bracket to the nearest
12V/24V power supply: red_camera/
brown_marker light: +; black_grounding: -
− For rear camera position: You are
suggested to use the power line for the
original rear marker light directly.
− For left/right side camera position:
You are suggested to use the power
line for the original side marker lights
directly.
Note: Ensure that the fuse on the connected
power line provides additional 1A fusing
current for the camera.
Ensure proper cable isolation for all bare
ends (e.g., by using insulation tape).
5. Secure the gasket and marker light
bracket onto your vehicle using four flat
head #6x3/4”self-drilling screws. If the
mounting surface is uneven, apply sealant
between the gasket and RV surface,
and around the 5/8’’ holes at the screw
locations for better sealing.
#6x
3
/
4
" flat head
#2 Phillips head
Loading ...
Loading ...
Loading ...