Loading ...
Loading ...
Loading ...
8
ENGLISH
(Original instructions)
Use
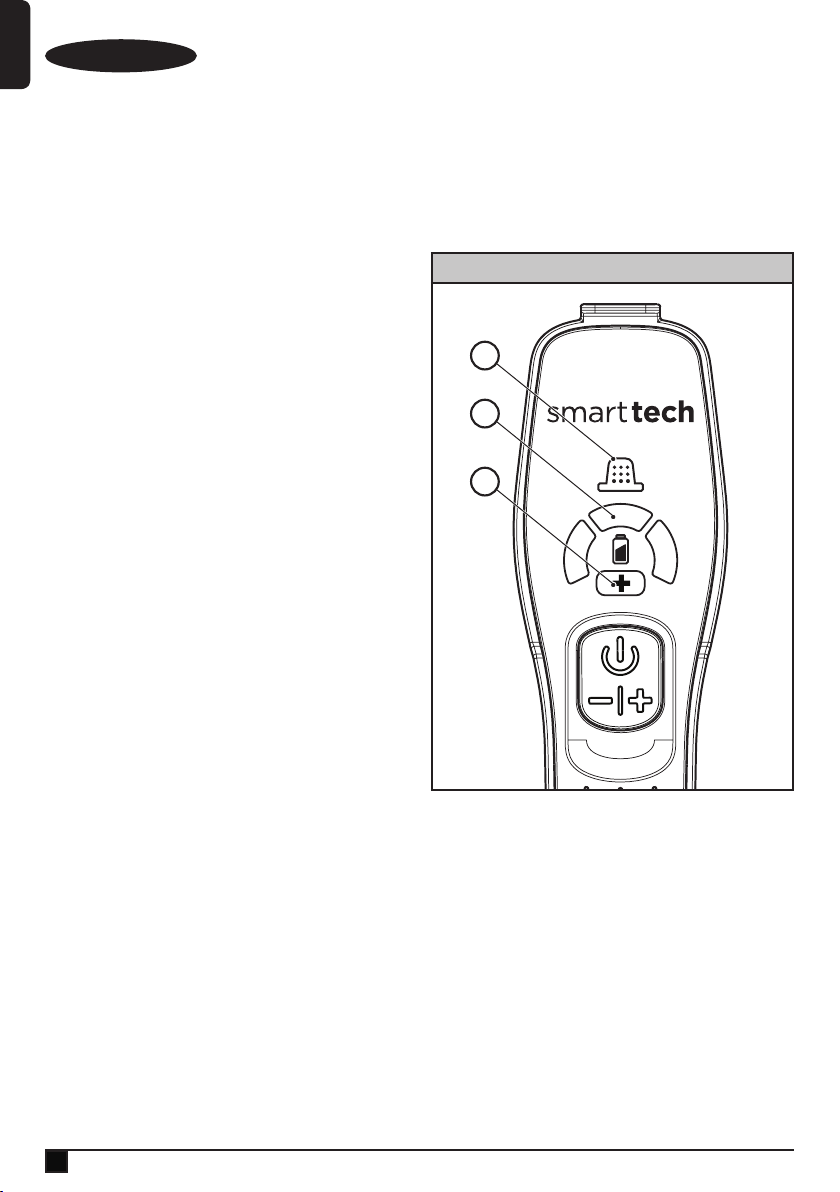
Switching on and off (Fig. A)
u Press the button to turn, on the unit operates in slow
speed, low power mode, conserving the battery life.
u Press the button again, and the unit goes to a BOOST
mode.
u Pressing the button again will turn the product off.
Using the pull out crevice tool (Fig. B,C)
u Extend the crevice tool (4) as shown in gure C, until it
clicks in place. The push in brush (7) can then be tted if
required for dusting and upholstery cleaning.
u To retract the crevice tool (4) press the crevice tool release
button (4a) allowing it to return to its normal position
(Fig. B).
Fitting the oor extension tube (Fig. D)
u Slide the nozzle (3) into the oor extension tube (9) until
you hear an audible ‘click’ as shown in gure D.
u The oor extension tube is supplied with a ip down brush
(11) for cleaning difcult to reach areas (Fig.E).
Fitting the oor head (Fig. F)
u Slide the oor extension tube (9) onto the oor extension
head (12) until you hear an audible ‘click’ as shown in
gure F.
Floor sense feature
The appliance is tted with a unique oor sensing feature.
It senses thick pile carpet and automatically goes from low
speed to BOOST mode for greater cleaning performance.
Removing and clearing hair from the beater
bars
(Fig. G, H)
u Depress the beater bar unit (16) release button (17) as
shown in gure G.
u The beater bar (18) can now be removed. The end pieces
are also removable allowing you to clear any hair or other
debris that may have accumulated during use (Fig. H).
Charging (Fig. I)
The appliance can be charged either as a single unit or while
attached to the oor extension.
Wall Mounting
The wall mount (13) can be attached to a wall to provide a
convenient storage for the appliance.
Warning! When xing to a wall, make sure that the xing
method is suitable for the wall type and is appropriate to the
weight of the appliance.
u Mark the location of the screw holes (within reach of an
electrical outlet for charging the vac while it is on the wall
bracket).
u Place the charger (14) into the charging port (15) and plug
into the electrical outlet.
u Switch the electrical outlet on. The LED charging indicator
(B) will Illuminate.
Multi LED Display
A. Filter sensor
Whenever a lter is blocked and needs cleaning, the red
lter LED (A) in the handle will illuminate.
Clean ne dust from lter (See section on ‘cleaning lters’
in this manual).
B. LED Charging display
Battery icon will illuminate when appliance requires
charging. LED display indicates state of charge (See LED
pattern chart in this manual).
C. BOOST mode
Illuminates when the appliance is in BOOST mode
allowing you to operate at higher power.
A
B
C
Loading ...
Loading ...
Loading ...