Loading ...
Loading ...
Loading ...
10
4. Press the Temp/Time “up” or “down” arrow keypad to enter
a cook time length.
5. Press DELAY. The Delay indicator light will light up.
6. Press the Temp/Time “up” or “down” arrow keypad to enter
a start time.
7. Press START.
8. Press and hold TIMER SET/OFF keypad for 5 seconds.
“SAb” will flash in the display.
9. Press START while “SAb” is flashing to enter Sabbath mode;
otherwise, the entire cycle cancels out. “SAb” will stop flashing
and remain on in the display. The oven is now in Sabbath
mode and is Sabbath compliant. The On and Delay indicator
lights will be displayed.
When the start time is reached, the Bake, On, and Cook Time
indicator lights will automatically turn on. When the set cook time
ends, the oven will shut off automatically and the indicator lights
will turn off, indicating the end of the cycle.
Pressing CANCEL at any time returns the oven to the normal
cooking mode (not Sabbath mode compliant).
NOTE: If “SAb” does not appear in your display, the Sabbath
mode is not active. After Sabbath mode is deactivated, you must
activate Sabbath mode by completing steps 1 through 5.
Keep Warm
NOTE: The convection fan will shut off when the oven door is
opened. If the oven door remains open for too long, the heating
elements will shut off until the oven door is closed. All timers,
including any active Cook Time or Timed Cook functions, will
continue to count down.
IMPORTANT: Food must be at serving temperature before placing
it in the warmed oven. Food may be held up to 1 hour; however,
breads and casseroles may become too dry if left in the oven
during the Keep Warm function. For best results, cover food.
The Keep Warm feature allows hot cooked foods to stay at serving
temperature.
To Use:
1. Press KEEP WARM.
2. Press Temp/Time “up” or “down” arrow keypad until desired
temperature is reached. A tone will sound if the minimum
or maximum temperature is reached.
3. Press START.
4. Place food in the oven.
5. Press CANCEL when finished.
NOTE: The temperature may be changed at any time by pressing
the Temp/Time “up” or “down” arrow keypad to the desired
temperature and then START.
Aluminum Foil
IMPORTANT: To avoid permanent damage to the oven bottom
finish, do not line the oven bottom with any type of foil or liner.
For best cooking results, do not cover entire oven rack with foil
because air must be able to move freely.
WARNING
Food Poisoning Hazard
Do not let food sit in oven more than one hour before
or after cooking.
Doing so can result in food poisoning or sickness.
Positioning Racks and Bakeware
IMPORTANT: To avoid permanent damage to the porcelain finish,
do not place food or bakeware directly on the oven door or bottom.
Bakeware
To cook food evenly, hot air must be able to circulate. Allow 2"
(5 cm) of space around bakeware and oven walls. Make sure
that no bakeware piece is directly over another.
Racks
■ Position racks before turning on the oven.
■ Do not move racks with bakeware on them.
■ Make sure racks are level.
To move a rack, pull it out to the stop position, raise the front edge,
and then lift out. Use the following illustration as a guide.
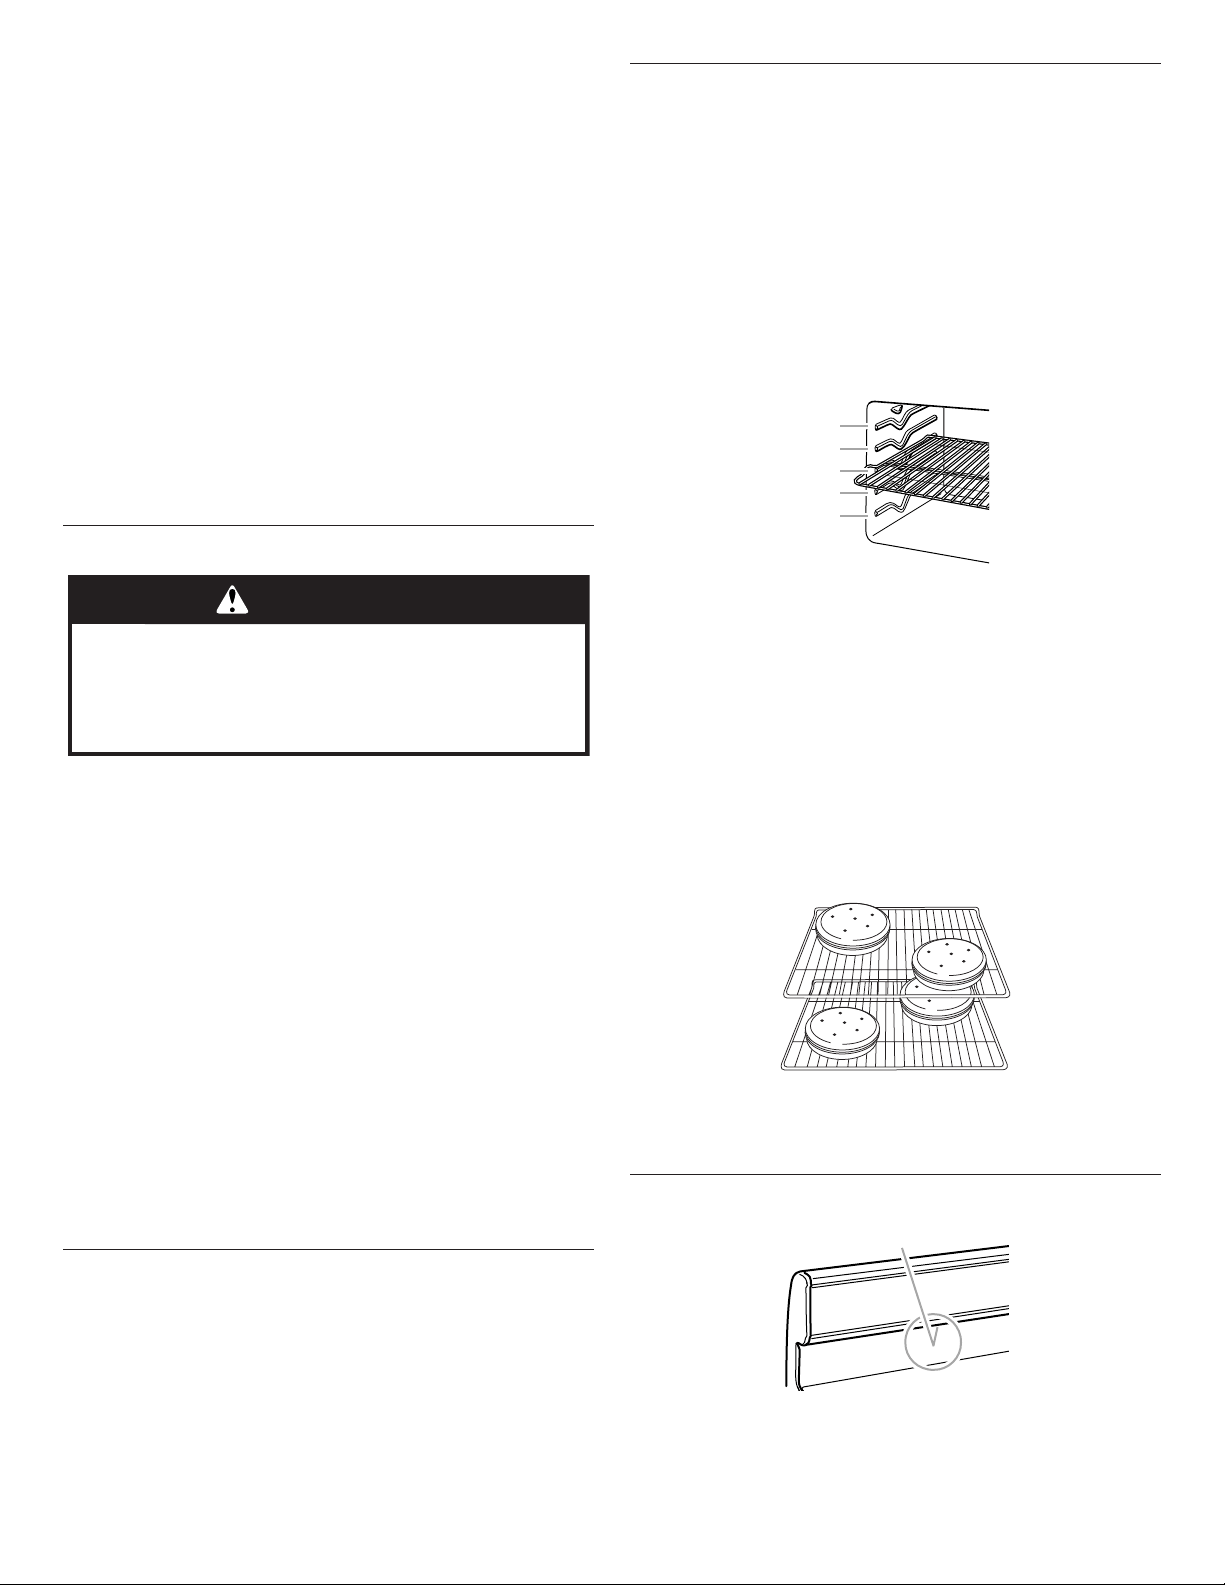
Rack Positions
Rack 5: 2-rack baking
Rack 4: Broiling and toasting
Rack 3: Most baked goods on a cookie sheet, jellyroll pan,
or muffin pan; casseroles; frozen convenience foods
Rack 2: Roasting small cuts of meat and poultry, pies, bundt and
angel food cakes, yeast bread, quick breads, and 2-rack baking
Rack 1: Roasting large cuts of meat and poultry
Multiple Rack Cooking
2-rack: Rack positions 2 and 5 for regular and convection bake
Baking Layer Cakes on 2 Racks
For best results when baking cakes on 2 racks, use racks 2 and
5 with regular Bake. Place the cakes on the racks as shown.
Baking Cookies on 2 Racks
For best results when baking cookies on 2 racks, use racks 2 and
5 with Convect Bake.
Oven Vent
The oven vent releases hot air and moisture from the oven and
should not be blocked or covered. Blocking or covering the oven
vent will cause poor air circulation, affecting cooking and cleaning
results. Do not set plastics, paper, or other items that could melt or
burn near the oven vent.
1
2
3
4
5
A
A. Oven vent
Loading ...
Loading ...
Loading ...