Loading ...
Loading ...
Loading ...
IMPORTANT:This unitis shippedwith theenginefullof oil. After
assembly,see page 10for fuel andoildetails.
Removing From Carton
1. Cut the cornersof thecartonand lay the sidesflaton the ground.
Removeall packinginserts.
2. Movethe snowthrowerout of thecarton.
3. Makecertainthe carton has beencompletelyemptiedbefore
discardingit.
DO NOTlift the snowthrower bythechute handle.
Before Assembly
NOTE: Referenceto right,left, frontor rearof the unit isfromthe
operatingpositionunlessotherwisestated.
Setting Up The Handle
NOTE: Be awareof the three looselyfitted cabletiesattachedto the
lowerhandlethat will be utilizedlaterto securethe cables.
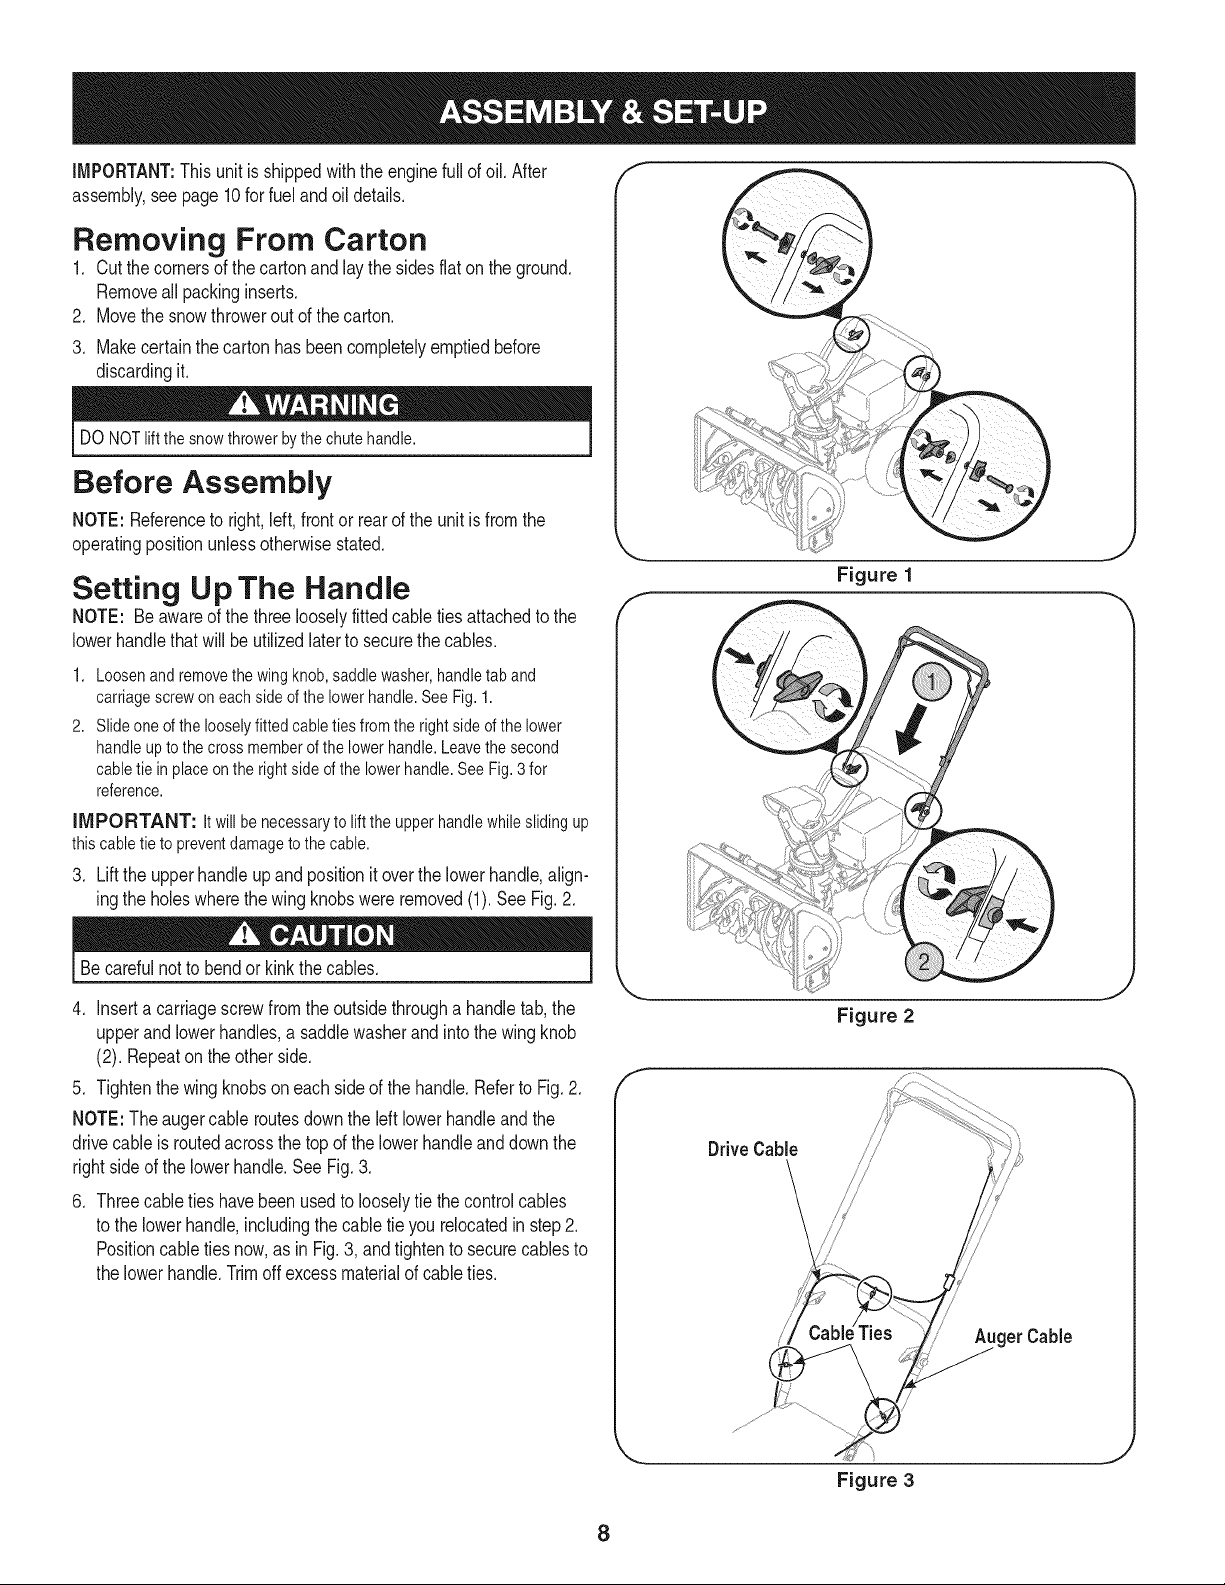
1. Loosenand removethe wing knob,saddlewasher,handletab and
carriagescrew on eachside of the lowerhandle.See Fig.1.
2. Slideone of the looselyfitted cabletiesfromthe right side of the lower
handleup to the cross memberof the lowerhandle.Leavethe second
cabletie in placeon the rightside of the lowerhandle.See Fig.3 for
reference.
iMPORTANT: Itwillbenecessaryto lifttheupperhandlewhileslidingup
thiscabletieto preventdamagetothecable.
3. Lift the upper handleupandpositionit overthelowerhandle,align-
ingthe holeswherethewing knobswereremoved(1).SeeFig.2.
Becarefulnot to bendor kinkthe cables.
4. Inserta carriagescrewfromthe outsidethrougha handletab, the
upperand lowerhandles,a saddlewasherandintothe wing knob
(2). Repeatonthe otherside.
5. Tightenthewing knobson each sideof the handle.Referto Fig. 2.
NOTE:The augercable routesdownthe left lowerhandleand the
drivecableis routedacrossthe top of the lowerhandleanddownthe
rightside of the lowerhandle.See Fig. 3.
.
Threecabletieshavebeenusedto looselytie the controlcables
to the lowerhandle,includingthe cabletie you relocatedinstep 2.
Positioncable tiesnow,as in Fig. 3, and tightento securecablesto
the lowerhandle.Trimoffexcessmaterialof cableties.
f
Figure 1
Figure 2
DriveCable
get Cable
Figure 3
8
Loading ...
Loading ...
Loading ...