Loading ...
Loading ...
Loading ...
8. Using2people,liftrangehoodintofinalposition,feeding
electricalwirethroughwiringopening.Positiontherange
hoodsothatthelargeendofthekeyholeslotsareoverthe
screws.Thenpushthehoodtowardthewallsothatthe
screwsareintheneckoftheslots.Tightenmountingscrews
tocabinet,makingsuremountingscrewsareinnarrowneck
ofslots.
9. Checkthatthedamper,ifused,rotatesupanddownfreely.
10. For vented model installations only:
Connect ventwork to hood. Seal joints with clamps to make
secure and airtight.
Install 75-watt (max.) incandescent light bulb.
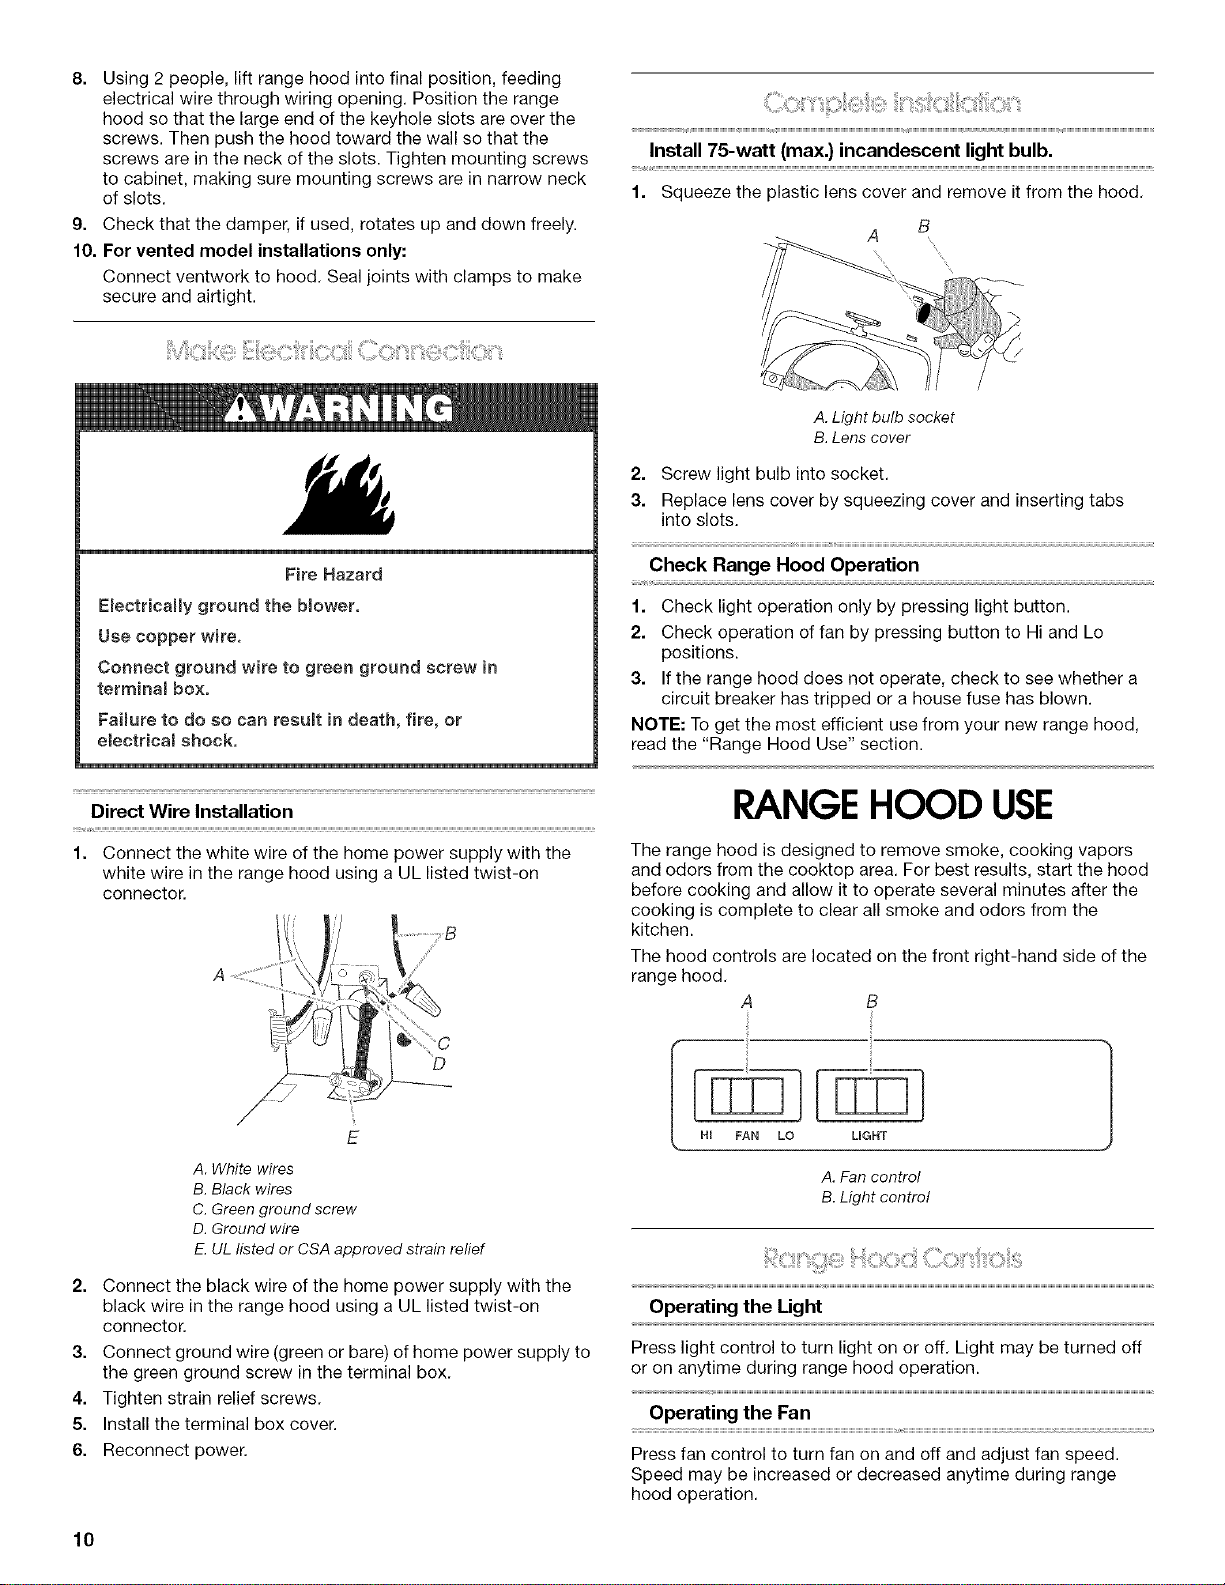
1. Squeeze the plastic lens cover and remove it from the hood.
B
Fire Hazard
EmectricaHy ground the blower.
Use copper wire.
Connect ground wire to green ground screw in
terminam box.
FaiBure to do so can resumt in death, fire, or
eiectricam shock,
Direct Wire Installation
1. Connect the white wire of the home power supply with the
white wire in the range hood using a UL listed twist-on
connector.
g
A. Light bulb socket
B. Lens cover
2. Screw light bulb into socket.
3. Replace lens cover by squeezing cover and inserting tabs
into slots.
Check Range Hood Operation
1. Check light operation only by pressing light button.
2. Check operation of fan by pressing button to Hi and Lo
positions.
3. If the range hood does not operate, check to see whether a
circuit breaker has tripped or a house fuse has blown.
NOTE: To get the most efficient use from your new range hood,
read the "Range Hood Use" section.
RANGE HOOD USE
The range hood is designed to remove smoke, cooking vapors
and odors from the cooktop area. For best results, start the hood
before cooking and allow it to operate several minutes after the
cooking is complete to clear all smoke and odors from the
kitchen.
The hood controls are located on the front right-hand side of the
range hood.
A B
D
E
A.White wires
B.Black wires
C.Green ground screw
D.Ground wire
E.UL listed or CSA approved strainrelief
2. Connect the black wire of the home power supply with the
black wire in the range hood using a UL listed twist-on
connector.
3. Connect ground wire (green or bare) of home power supply to
the green ground screw in the terminal box.
4. Tighten strain relief screws.
5. Install the terminal box cover.
6. Reconnect power.
HI FAN LO UGHT
A. Fan control
B. Light control
Operating the Light
Press light control to turn light on or off. Light may be turned off
or on anytime during range hood operation.
Operating the Fan
Press fan control to turn fan on and off and adjust fan speed.
Speed may be increased or decreased anytime during range
hood operation.
10
Loading ...
Loading ...
Loading ...