Loading ...
Loading ...
Loading ...
OPERATRON
CHARGING STAND
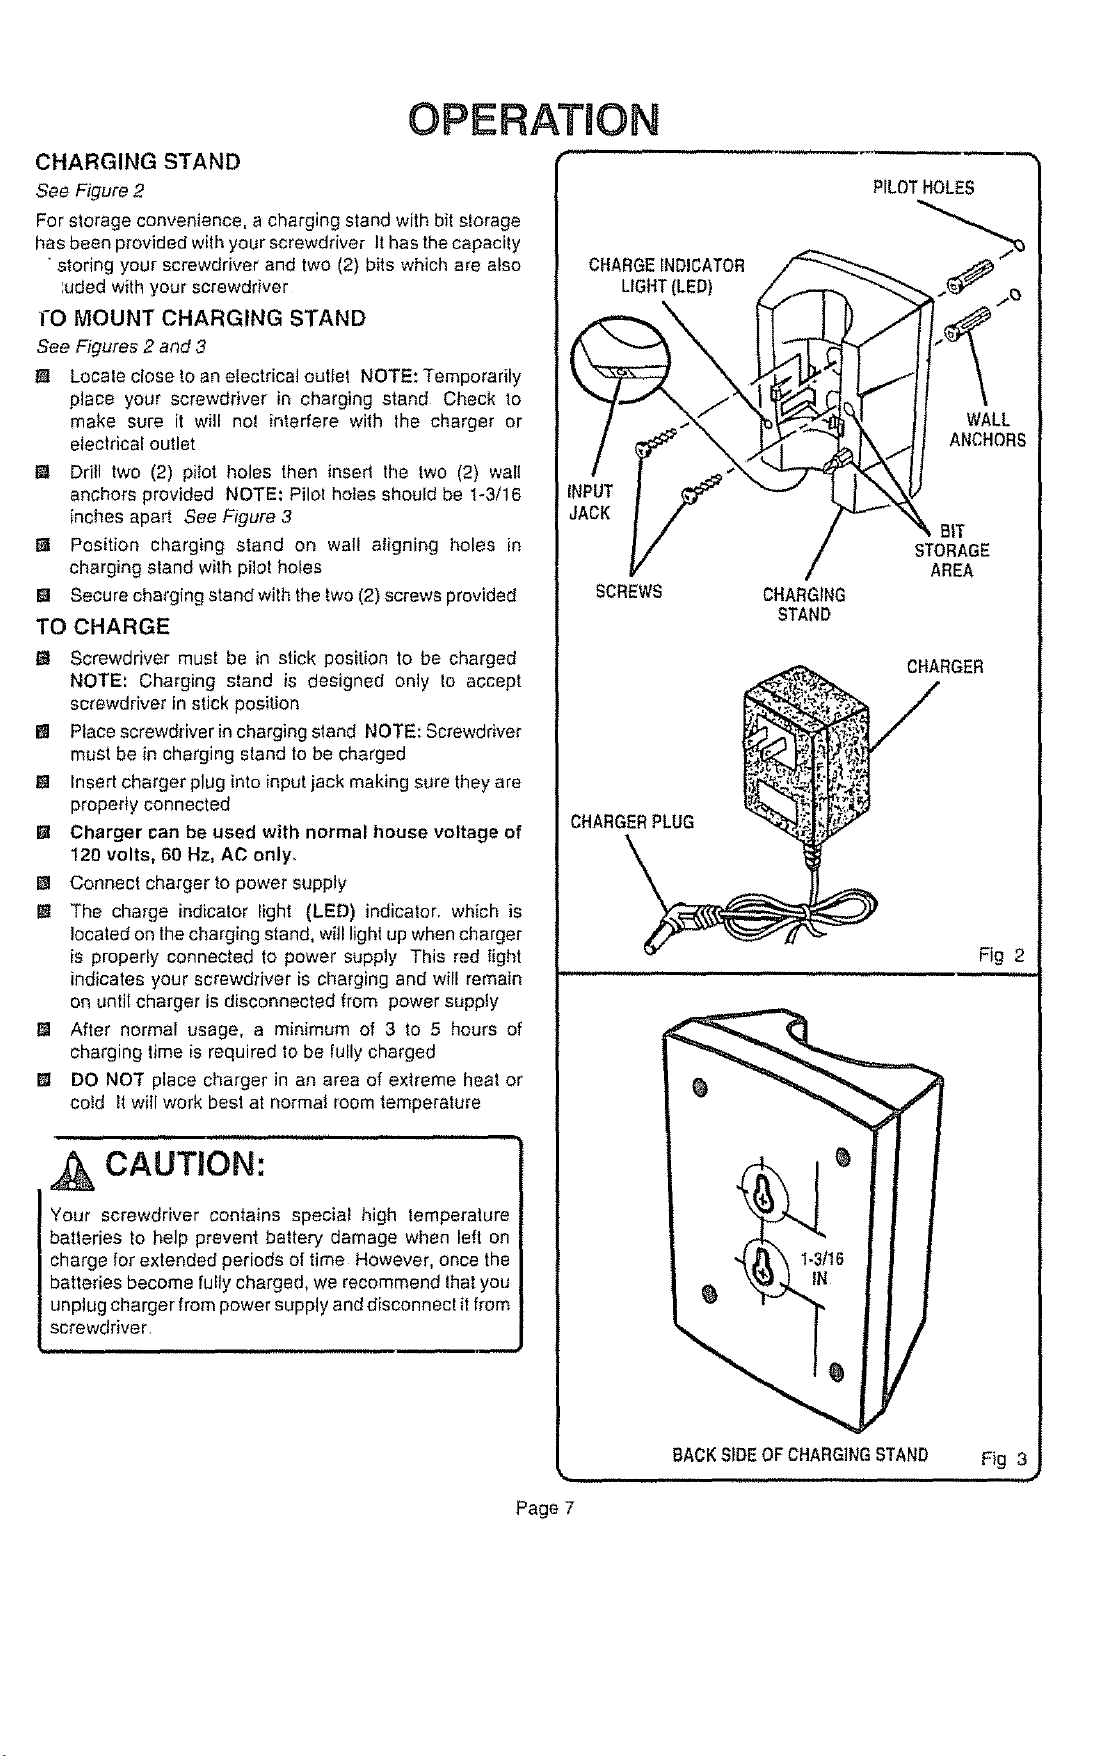
See Figure 2
For storage convenience, a charging stand with bit storage
has been provided with your screwdriver It has the capacity
• storing your screwdriver and two (2) bits which are also
',uded with your screwdriver
I-O MOUNT CHARGING STAND
See Figures 2 and 3
El Locate close to an electrical outfet NOTE: Temporarily
place your screwdriver in charging stand Check to
make sure it will not interfere with the charger or
electrical outlet
_1 Drill two (2) pi{ot holes then insert the lwo (2) wall
anchors provided NOTE: Pilot holes should be t-3/16
inches apart See Figure 3
Position charging stand on wall aligning holes in
charging stand with pilot holes
_i Secure charging stand with the two (2) screws provided
TO CHARGE
_1 Screwdriver must be in stick position to be charged
NOTE: Charging stand is designed only to accept
screwdriver in stick position
I_ Place screwdriver in charging stand NOTE; Screwdriver
must be in charging stand to be charged
B Insert charger plug into input jack making sure they are
properly connected
I_ Charger can be used with normal house voltage of
120 volts, 60 Hz, AC only,
_1 Connect charger to power supply
Im The charge indicator light (LED) indicator, which is
located on the charging stand, will light up when charger
is properly connected to power supply This red light
indicates your screwdriver is charging and will remain
on until charger is disconnected from power supply
t_ After normal usage, a minimum of 3 to 5 hours of
charging time is required to be fully charged
m DO NOT place charger in an area of extreme heat or
coid It will work best at normat room temperature
,,,,,,,,,,,,,,,,,,,,,i,, unii
CAUTION:
Your screwdriver contains special high temperature
batteries to help prevent battery damage when left on
charge for extended periods of time However, once the
batteries become fully charged, we recommend Ihat you
unplug charger from power supply and disconnect it from
screwdriver
i i, H,H
PILOT HOLES
CHAR E INDI ATOR _ _'_ "_/
STORAGE
AREA
SCREWS CHARGING
STAND
CHARGER
CHARGERPLUG
e
BACK SIDE OF CHARGINGSTAND
Fig 2
Fig 3
Page 7
Loading ...
Loading ...
Loading ...