Loading ...
Loading ...
Loading ...
C. SETTING THE DEPTH
a WARNING [
Never attempt to adjust the depth adjusting[
wheel when the motor isrunning. Always stop[
the motor, wait until the blade stops turning,[
and disconnect the unit from the power source[
before making adjustments. [
Your edger is equipped with three cutting positions
which help control the depth of edging and trenching.
Adjust to the following positions to compensate for blade
wear:
Cutting Position 1 - First edging cut or re-cut after sev-
eral wee_.
Cutting Position 2 - Maintain initial cut - compensate
for blade wear - slightly deeper cut than #1.
Cutting Position 3 - Maintain initial cut - compensate
for blade wear - slightly deeper cut than #2.
IMPORTANT: Do not use cutting positions 2 and 3 for
first cuts, or you may overload the motor, shorten-
Lug it's life.
la pllllll i i ii i llllll i
D. OPERATING INSTRUCTIONS
A WARNING
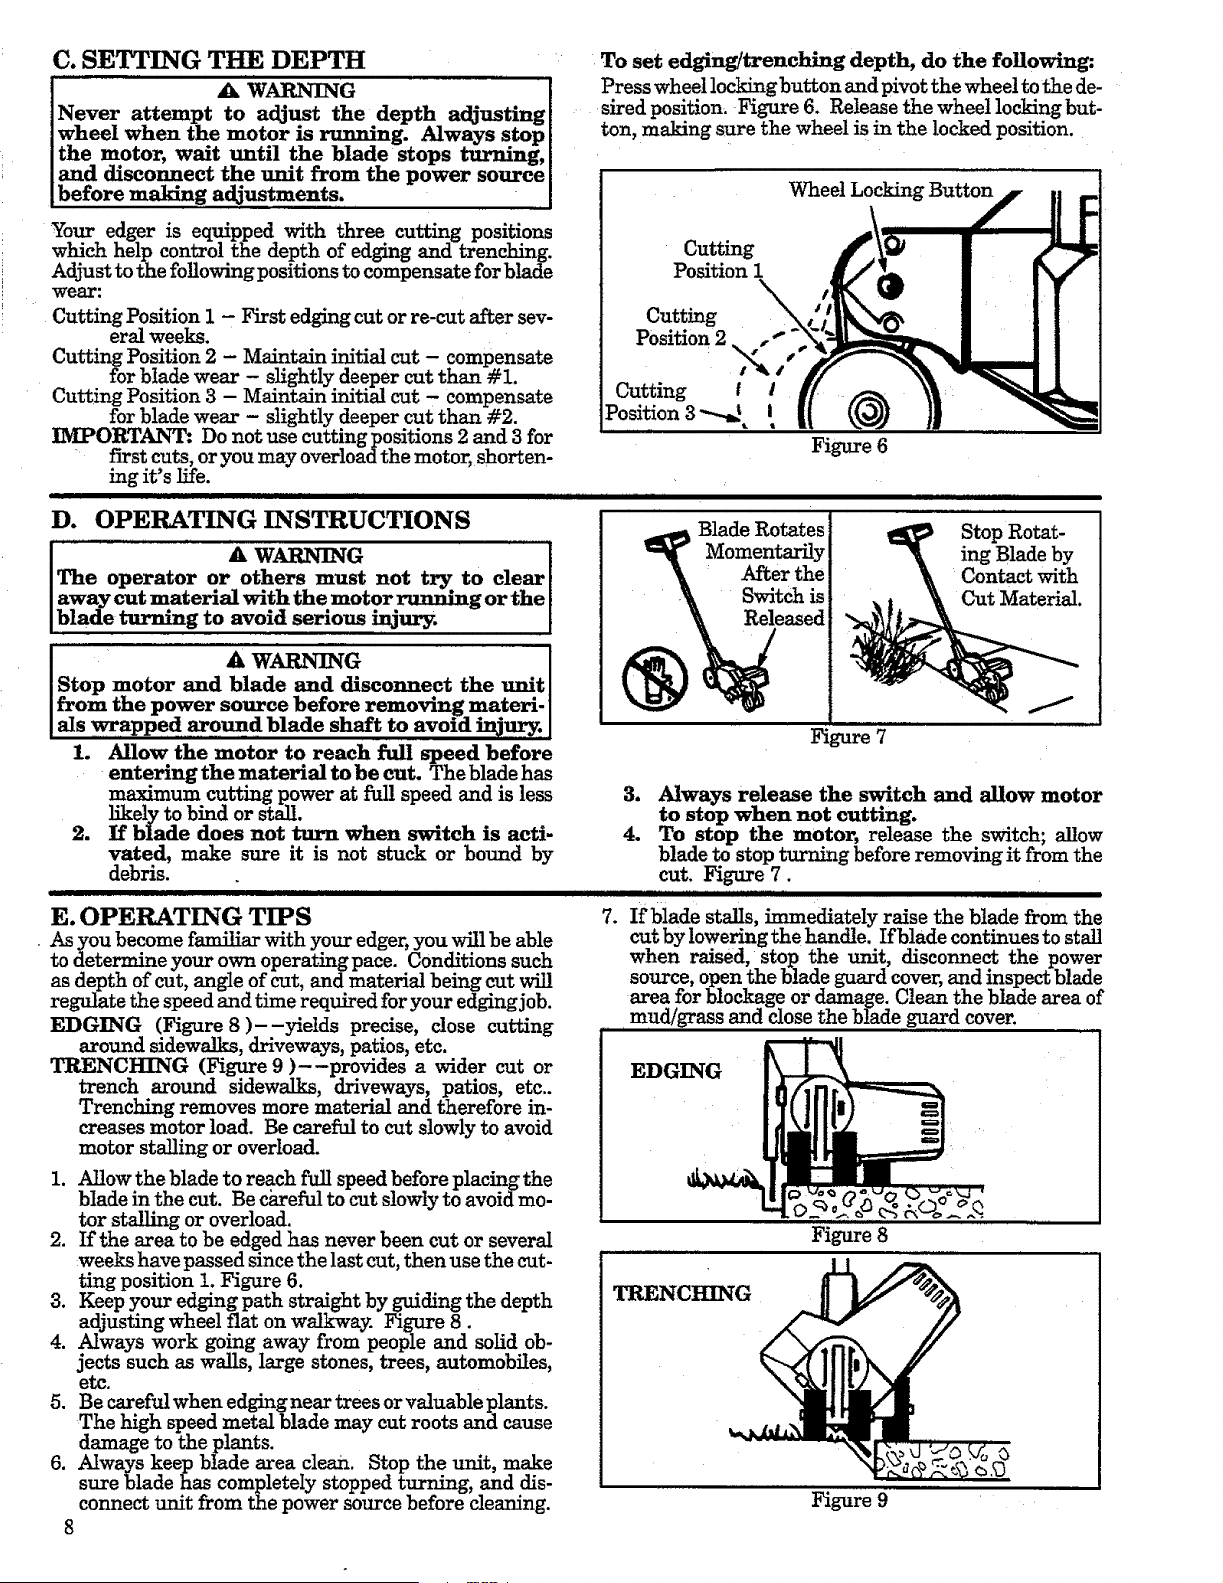
To set edging/trenching depth, do the following:
Press wheel locking button and pivot the wheel to the de-
sired position_ Figure 6. Release the wheel locking but-
ton, making sure the wheel is in the locked position.
Wheel Locking Button
Cutting
Position i
Cutting
Position2 \(. _"
Cutting f !
Position3--.._ I, !
Figure6
®
Blade Rotates
Momentarily
After the
Switch is
Released
Stop Rotat-
ing Blade by
Contact with
1. Allow the motor to reach full speed before
entering the material to be cut. The blade has
maximum cutting power at htl! speed and is less
likely to bind or stall.
2. If blade does not turn when switch is acti-
vated, make sure it is not stuck or bound by
debris.
:.:HI..HmHI I H
E. OPERATING TIPS
• As you become fam_ar with your edger, you will be able
to determine your own operating pace. Conditions such
as depth of cut, angle of cut, and material being cut will
regulate the speed and time requ_ed for your edging job.
EDGING (Figure 8 )--yields precise, close cutting
around sidewalks, driveways, patios, etc.
TRENCHING (Figure 9 )--provides a wider cut or
trench around sidewalks, driveways, patios, etc..
Trenching removes more material and therefore in-
creases motor load. Be careful to cut slowly to avoid
motor stalling or overload.
1. Allow the blade to reach full speed before placing the
blade in the cut. Be careful to cut slowly to avoid mo-
tor stalling or overload.
2. If the area to be edged has never been cut or several
:weeks have passed since the last cut, then use the cut-
ting position 1. Figure 6.
3. Keep your edging path straight by guiding the depth
adjusting wheel fiat on walkway. Figure 8.
4. Always work going away from people and solid ob-
jects such as walls, large stones, trees, automobiles,
etc.
5. Be careful when edging near trees or valuable plants.
The high speed metal blade may cut roots and cause
damage to the plants.
6. Always keep blade area clean. Stop the unit, make
sure blade has completely stopped turning, and dis-
connect unit from the power source before cleaning.
8
Figure 7
3. Always release the switch and allow motor
to stop when not cutting.
4. To stop the motor, release the switch; allow
blade to stop turning before removing it from the
cut. Figure 7.
iHIHI I.I, , H HHllll. lml.I V ,,.....
7. If blade stalls, immediately raise the blade from the
cut by lowering the handle. If blade continues to stall
when raised, stop the unit, disconnect the power
source, open the blade guard cover, and inspect blade
area for blockage or damage. Clean the blade area of
mud/grass and close the blade guard cover.
EDGING
Figure 8
TRENCHING
Figure 9
Loading ...
Loading ...
Loading ...