Loading ...
Loading ...
Loading ...
16
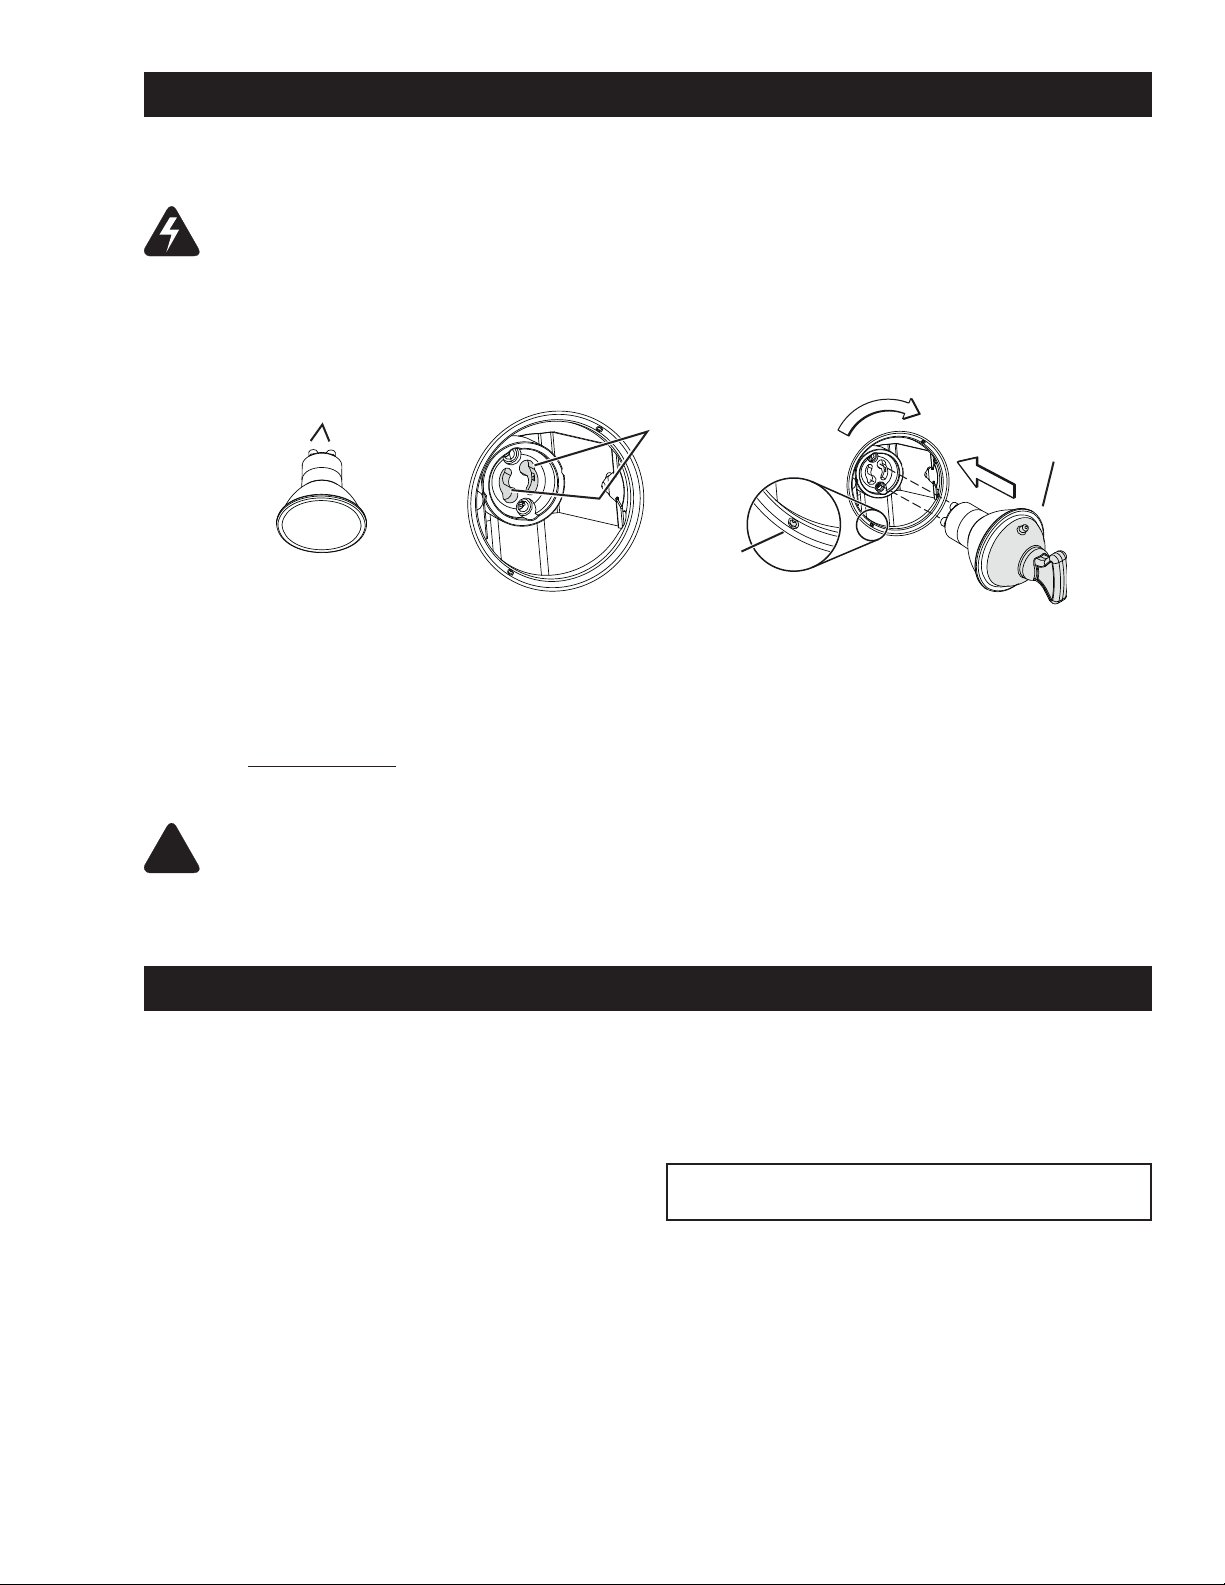
1. Align the bulb leads with the small indentations located
on the border of the lamp location on hood (see inset
above), then install the bulbs by placing the bulb leads
into their grooves in the socket.
!
CAUTION: Most GU10 LED replacement bulbs
commonly found in the market are not designed
for use in a cooking environment and might not
perform as advertised. Their usage with this
product is not recommended.
INSTALL THE LIGHT BULBS
This range hood requires two shielded Halogen Bulbs (120 V, 50 W max., MR16 or PAR16 with GU10 base).
NOTE: The Suction Cup Tool (included with hood) can be used to install and remove light bulbs. Press suction cup
tool on bulb and rotate counterclockwise to remove bulb or clockwise to install bulb.
SUCTION
CUP TOOL
BULB
LEADS
BULB LEAD
GROOVES
(IN SOCKET)
WARNING: Do not touch lamps during or soon
after operation. Burns may occur. In order to
prevent the risk of personal injury, only install
shielded halogen lamps. Also, never install a
cool beam, a dichroic lamp, a lamp not suitable
for use in recessed luminaires or identifi ed for
use in enclosed fi xtures.
Ducted Installation Only:
Re-install grease fi lters removed in step 1 on page 7,
under “Prepare the Hood”.
INSTALL THE FILTERS
“Non-ducted Filters” available by calling Sears at
1-800-4-MY-HOME
®
INDENT
2. Gently push upwards and turn clockwise until secure.
Non-ducted Installation Only:
Purchase two non-ducted fi lters (see part number in
Service parts list). Attach the non-ducted fi lters following
instructions packed with the non-ducted fi lters.
Loading ...
Loading ...
Loading ...